To disconnect your First Alert smoke alarm, first turn off power at the circuit breaker and verify it’s off. For hardwired models, press the locking arms on the wire harness and gently pull the connector away.
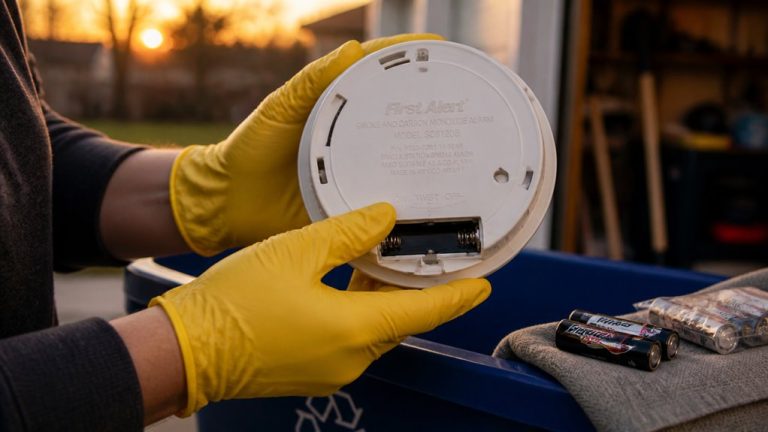
Twist the mounting bracket counterclockwise to release the unit from the ceiling or wall. For battery-operated alarms, remove batteries and deactivate any tabs to fully power down the device.
If the alarm chirps for low battery or end-of-life, prepare for replacement. Keep following to find detailed guidance on safely handling every step.
Key Takeaways
- Turn off power at the circuit breaker and verify power disconnection with a non-contact voltage detector before starting.
- Press the locking arms on the wire harness and gently pull the connector away from the alarm base to disconnect wiring.
- Insert a flathead screwdriver between the mounting bracket pin and bracket, then twist the alarm counterclockwise to release it.
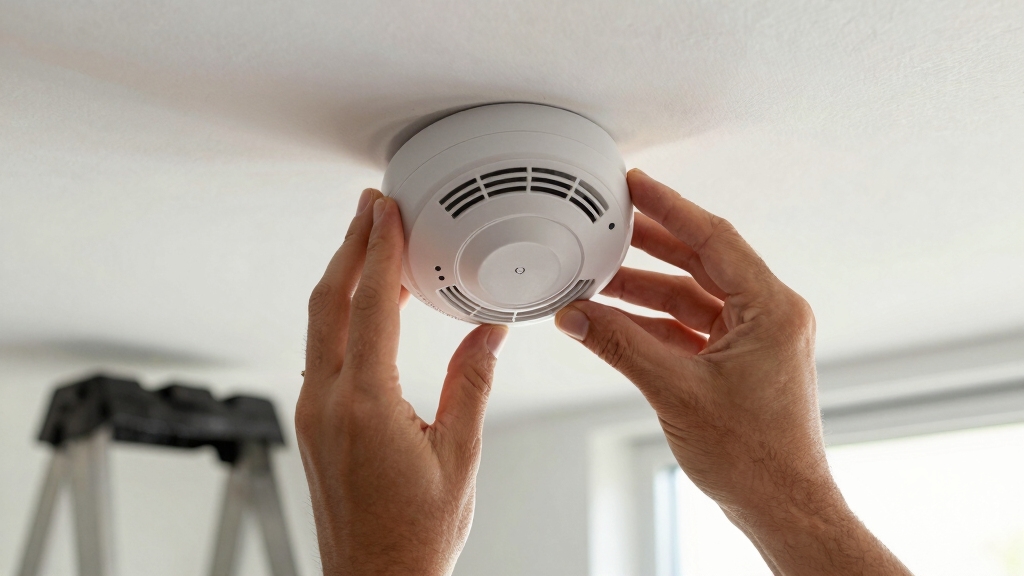
- Hold the mounting bracket and twist it counterclockwise to detach it from the ceiling or wall.
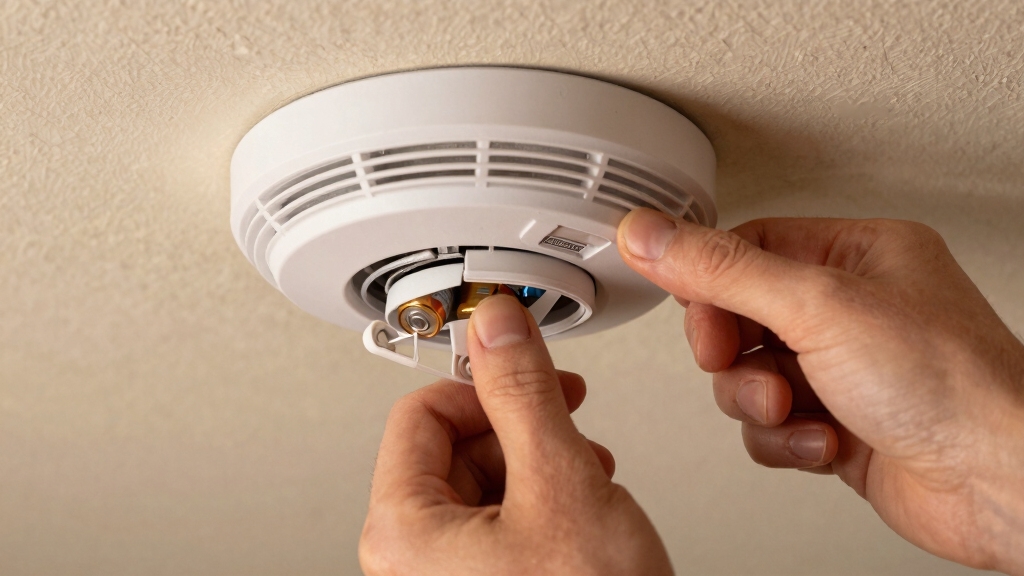
- Remove backup batteries and pry the deactivation tab gently to fully disable the alarm’s powercell before disposal.
How to Unlock and Remove a Battery-Operated First Alert Smoke Alarm?
To unfasten and remove your battery-operated First Alert smoke alarm, start by slipping a flathead screwdriver between the mounting bracket pin and the bracket itself.
Next, turn both the screwdriver and smoke alarm counterclockwise simultaneously. This action releases the alarm unit from the mounting bracket, which remains fixed to the ceiling or wall.
Hold the smoke alarm base firmly while twisting the mounting bracket counterclockwise to detach it from the alarm base. This method guarantees safe removal without damaging the unit or bracket.
Ensure you check for and disengage any tamper-resist features before attempting removal to avoid damage or alarms sounding.
How to Deactivate a First Alert Smoke Alarm Before Removal?
Before you take down your First Alert smoke alarm, you’ll want to make sure it’s deactivated first. Start by breaking the deactivation tab with a tool. It’s a simple step, but it’s really important!
Once that tab is broken, go ahead and slide the activation switch to the off position. This will fully disable the unit. Doing this stops the power cell and helps prevent any annoying false alarms while you’re trying to remove it.
Keep in mind, some models may have a backup battery that also needs to be removed to completely power down the alarm.
Breaking The Deactivation Tab
Start by inserting a tool, like a flathead screwdriver, beneath the edge of the deactivation tab on your First Alert smoke alarm.
Apply gentle pressure to break the tab, which disables the unit’s powercell and prevents it from detecting smoke. This step is vital when your alarm reaches end-of-life or shows low battery warnings.
| Step | Action |
|---|---|
| 1 | Insert screwdriver under tab |
| 2 | Pry gently to snap the tab |
| 3 | Confirm tab is broken |
| 4 | Proceed to slide activation switch |
Breaking the tab guarantees permanent deactivation, so handle the alarm carefully before removal. Remember to install a new alarm promptly for continuous protection. Always check the manufacture date to ensure your smoke alarm is within its effective lifespan before deciding on replacement.
Sliding Activation Switch
Once you’ve broken the deactivation tab, slide the activation switch to the off position to fully disable your First Alert smoke alarm. This step guarantees the unit no longer detects smoke and discharges the powercell, preventing false alarms during removal.
Here’s what you need to do:
- Locate the sliding activation switch near the battery compartment.
- Push the switch carefully to the “off” or “deactivate” position.
- Confirm the alarm stops beeping or flashing.
- Avoid forcing the switch to prevent damage.
- Prepare to install a new unit immediately after deactivation.
Sliding the activation switch completes the deactivation process, making removal safe and effective. Always replace your smoke alarm promptly to maintain fire safety protection. Regular maintenance, including battery replacement, helps prevent false alarms and ensures reliable operation.
How to Silence Alarms During Removal:
If you need to silence those pesky alarms while you’re removing them, just press the Test/Silence button. This will quiet the alarm for a little while—up to 10 minutes, in fact. It’s a handy feature because it lowers the unit’s sensitivity without turning off smoke detection completely.
Just a quick heads-up, though: even in silence mode, if there’s dense smoke, the alarm will still go off. So, keep that in mind while you’re working!
For a complete reset after removal, remember that a factory reset deletes all user data and network settings, returning the device to its original state.
Using Test/Silence Button
When you press the Test/Silence button on your First Alert smoke alarm, you temporarily quiet nuisance alarms for up to 8 to 10 minutes. This feature helps you manage false alarms during removal without disabling smoke detection entirely.
Keep in mind:
The alarm’s sensitivity is temporarily reduced, not turned off. The LED flashes every 10 seconds to show the alarm is silenced. If dense smoke appears, the alarm overrides silence and sounds again.
Use this pause to identify and address the nuisance source safely. After the silence period, the alarm resumes normal operation automatically.
This method guarantees safety while letting you proceed with removal calmly and effectively. Always remain alert to actual fire risks during this process. To reduce the chance of false alarms during removal, ensure the alarm is placed away from high humidity areas and sources of moisture.
Temporary Alarm Quieting
Managing nuisance alarms during removal becomes easier by using the Test/Silence button on your First Alert smoke alarm.
Pressing this button temporarily silences the alarm for 8-10 minutes, allowing you to work without constant noise. The unit remains active but less sensitive. The LED flashes every 10 seconds to indicate silence mode.
Keep in mind, dense smoke will override silence and trigger the alarm again for safety.
Regular cleaning and maintenance can help reduce the frequency of nuisance alarms caused by dust buildup or insects.
| Action | Result |
|---|---|
| Press Test/Silence | Silence alarm for 8-10 minutes |
| LED flashes every 10s | Confirms alarm is silenced |
| Smoke density rises | Alarm reactivates immediately |
Use this feature to identify nuisance sources before fully disconnecting the unit safely.
Smoke Sensitivity During Silence
Although pressing the Test/Silence button temporarily quiets your First Alert smoke alarm, the unit maintains a reduced sensitivity to smoke during this period.
This feature allows you to silence nuisance alarms without disabling smoke detection entirely. Keep in mind the silenced state is temporary and safety remains a priority.
During silence mode, remember:
- The alarm stays less sensitive but continues monitoring smoke.
- The LED flashes every 10 seconds to show silence is active.
- Silence lasts about 8-10 minutes before normal sensitivity resumes.
- Dense smoke overrides silence, triggering an alarm if danger exists.
- Use silence to identify false alarm sources before removal.
Regularly testing your smoke detector by holding the test button ensures it remains fully functional despite long-life battery designs.
How to Safely Disconnect Hardwired First Alert Smoke Alarms?
Because hardwired First Alert smoke alarms connect directly to your home’s electrical system, disconnecting them requires extra care to guarantee safety and prevent damage.
First, turn off the power at your circuit breaker to avoid electrical shock. Next, press the locking arms on the wire harness connector and gently pull it away from the alarm base.
Hold the alarm firmly and twist the mounting bracket counterclockwise to release it from the ceiling or wall. Remember, battery backup may still function after disconnection.
Always verify power is fully disconnected using a non-contact voltage detector before proceeding.
| Step | Action |
|---|---|
| 1 | Turn off power at circuit breaker |
| 2 | Press locking arms on wire harness |
| 3 | Pull connector away gently |
| 4 | Twist mounting bracket counterclockwise |
| 5 | Remove alarm and install replacement |
Responding to Low Battery and End-of-Life Alarms
You’ll often hear chirping sounds from your First Alert smoke alarm signaling low battery or end-of-life conditions. When this happens, you need to act promptly to maintain safety.
First, score the label along the dotted line with a flathead screwdriver to reveal the deactivation tab. Then, pull the tab outward until it snaps into place, fully discharging the powercell.
Score the label with a screwdriver, then pull the tab to fully discharge the powercell and deactivate the alarm.
Remember, once deactivated, the alarm can’t be reactivated and will require replacement. Be aware that mounting resistance increases after deactivation, so handle removal carefully.
- Chirping indicates urgent battery or end-of-life status
- Use a screwdriver to access the deactivation tab
- Pull the tab to discharge the powercell completely
- Alarm can’t be reactivated after deactivation
- Exercise care when removing the alarm post-deactivation
For continuous safety, it’s important to perform monthly tests and replace batteries promptly, as recommended in battery replacement guidelines.
Essential Safety Tips for Disconnecting Your Smoke Alarm
Prioritizing safety when disconnecting your smoke alarm guarantees you protect yourself and your home from potential hazards.
First, never ignore active smoke or fire signals; evacuate immediately and call 911.
If smoke is non-emergency, open windows to clear the area before proceeding.
Use a flathead screwdriver carefully to release mounting brackets or deactivate tabs without damaging components.
Always deactivate the alarm fully and discharge its powercell to prevent accidental reactivation.
When handling hardwired alarms, disconnect the wire harness by squeezing locking arms, but seek professional help if unsure.
Silence nuisance alarms temporarily using the Test/Silence button to avoid panic.
Finally, clean the unit to reduce false alarms and install a replacement promptly after removal to maintain continuous protection for your home.
Frequently Asked Questions
How Often Should I Test My First Alert Smoke Alarm?
You should test your First Alert smoke alarm at least once a month to make certain it’s working properly.
Press the Test/Silence button until you hear the alarm sound. Regular testing helps you catch any malfunctions early, keeping you and your family safe.
Also, replace batteries annually or when the low battery chirp sounds.
Don’t forget to replace the entire unit every 10 years to maintain reliable protection.
Can I Paint My Smoke Alarm to Match the Ceiling?
Painting your smoke alarm is like putting a coat of paint on your car’s engine. It’s not a good idea.
You shouldn’t paint your smoke alarm because paint can block the sensors and vents. This prevents it from detecting smoke properly.
This compromises your safety by delaying or stopping alarms during a fire. Instead, choose a model that blends with your ceiling or use paintable covers made specifically for alarms to maintain safety and appearance.
What Type of Batteries Do First Alert Alarms Use?
First Alert smoke alarms typically use 9-volt batteries or AA alkaline batteries, depending on the model.
Some newer models come with sealed lithium batteries designed to last up to 10 years, so you won’t need to replace them regularly.
Always check your alarm’s user manual to confirm the correct battery type.
Using the right battery guarantees your alarm functions properly and keeps your home safe.
Don’t mix battery types or brands.
How Do I Reset My Smoke Alarm After a False Alarm?
To reset your smoke alarm after a false alarm, press and hold the Test/Silence button for about 15-20 seconds until the alarm stops sounding.
This temporarily silences the unit and resets its sensors.
If the alarm continues, check for dust or debris on the cover and clean it with a soft cloth.
Make sure the battery is fresh, then press the button again to confirm the reset.
Are First Alert Smoke Alarms Compatible With Smart Home Systems?
Wondering if First Alert smoke alarms work with smart home systems? Yes, many First Alert models are compatible with popular smart home platforms, letting you monitor alarms remotely through apps.
You can receive alerts on your phone and integrate alarms with other devices like smart lights or voice assistants. However, not all models support this, so check your specific unit’s features to guarantee seamless smart home integration and enhanced safety control.
Confidence in Every Step, Safety in Every Moment
Disconnecting your First Alert smoke alarm doesn’t have to feel like defusing a ticking time bomb. By following these steps, you’ll safely and confidently remove or silence your alarm without hassle.
Remember, smoke alarms protect your home like a trusty knight guarding a castle. Never leave your safety to chance. Always replace batteries promptly and handle hardwired units with care.
Stay vigilant and keep your home secure for years to come.