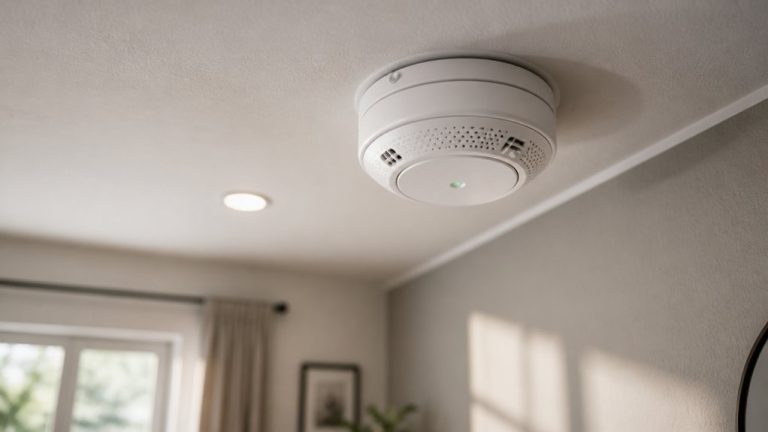
To install your First Alert smoke and carbon monoxide alarm, select locations on every floor and inside bedrooms, avoiding corners and placing ceiling units at least 8 inches from walls.
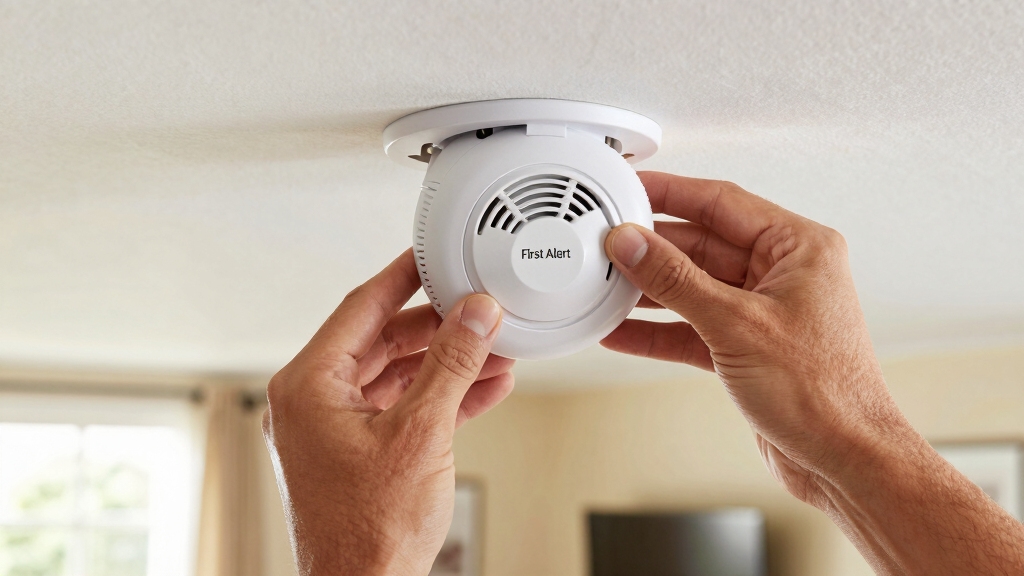
Use a pencil to mark drill points, then secure the mounting bracket with screws and anchors.
Connect batteries or hardwire safely, turning off power first. Attach the alarm, activate it by removing the battery tab, and perform a test using the button.
Proper setup guarantees reliable alerts; further steps cover maintenance and replacement.
Key Takeaways
- Install alarms on every floor and inside each bedroom, placing ceiling units at least 8 inches from walls and wall units 4–12 inches below ceilings.
- Use a drill with a 3/16” bit to make holes, insert anchors for drywall, and securely fasten the mounting bracket with supplied screws.
- For hardwired models, turn off the breaker, strip wires, connect black, white, and interconnect wires, then plug in the power connector before restoring power.
- Insert batteries with correct polarity, remove the yellow activation tab on new units, and twist the alarm clockwise onto the bracket to lock it in place.
- Test the alarm monthly by pressing and holding the test button until full alarm sounds and indicator lights activate, ensuring proper operation.
How to Choose the Best Location for Your First Alert Alarm?
When choosing the best location for your First Alert smoke and carbon monoxide alarm, you’ll want to guarantee peak coverage and functionality.
Install an alarm on every floor, inside each bedroom, and near fuel-burning appliances. For ceiling placement, position the alarm at least 8 inches from walls to avoid dead air spaces.
If mounting on a wall, place the top edge between 4 and 12 inches below the ceiling. Avoid corners and ceiling peaks within 36 inches, as these areas hinder sensor performance.
Place alarms indoors only, avoiding garages or attics. Make certain alarms are installed in rooms where their audible warnings will be clearly heard, especially in remote bedrooms.
Following these precise guidelines maximizes detection efficiency and safety throughout your home. Always ensure your hardwired alarms have a reliable battery backup to maintain protection during power outages.
Tools You’ll Need to Install Your Alarm
Successful installation of your First Alert smoke and carbon monoxide alarm depends on having the right tools ready.
You’ll need a pencil for marking drill points accurately.
A pencil is essential for marking drill points with precision during your alarm installation.
Use a drill equipped with a 3/16” (5mm) bit to create holes for screws and drywall anchors.
A Phillips screwdriver will secure screws firmly, while a hammer helps insert anchors if required.
For hardwired models, wire strippers and a flathead screwdriver are essential for preparing and connecting wires safely.
Make sure you turn off power at the circuit breaker before any wiring work.
Don’t forget the mounting hardware; screws and drywall anchors come with your alarm.
If installing a smart model, download the First Alert App to complete setup and monitoring.
Gathering these tools beforehand guarantees a smooth, efficient installation process.
Additionally, understanding the proper reset procedures after installation can help ensure your alarm functions correctly.
How to Install the Mounting Bracket Securely?
Alright, let’s get started on installing that mounting bracket securely! First off, you’ll want to mark the drill points on your chosen ceiling or wall location. Make sure everything lines up nicely with the holes in the mounting bracket.
Once you’ve got your marks, grab your drill and the right bit size to create those holes. If you’re working with drywall, it’s a good idea to insert some drywall anchors to really secure everything.
Now, it’s time to attach the bracket. Just pop in those screws and tighten them up firmly. You want to make sure the bracket is solid and won’t budge. And there you go! Your bracket should be all set and ready to go! For continuous operation, ensure your smoke detector has a reliable power source to keep it functioning effectively.
Marking Drill Points
Begin by holding the mounting bracket firmly against the chosen ceiling or wall location, ensuring it aligns properly with your selected placement guidelines.
Check that the bracket is positioned at least 8 inches from the ceiling if on the ceiling, or 4 to 12 inches below the ceiling if on a wall, avoiding corners and peaks within 36 inches.
Once aligned, use a pencil to mark the drill points through the bracket’s screw holes. If installing over a junction box for hardwired models, confirm bracket holes line up with the box screws.
Double-check your marks for accuracy before removing the bracket. These marks will guide your drilling, so precise placement is critical for a secure, flush mount and proper alarm function.
Ensure the alarm is powered on by turning the red wheel clockwise or mounting it fully on the base until you hear a musical tone and voice prompt confirming it is ready.
Securing Bracket Firmly
After marking the drill points accurately, drill holes at the marked locations using a 3/16” or 5mm bit.
Insert the provided drywall anchors firmly into each hole to guarantee a secure hold, especially if mounting on drywall.
Position the mounting bracket over the drilled holes, aligning it properly.
For hardwired models, thread the wires through the bracket before positioning it.
Use the supplied screws and a Phillips screwdriver to fasten the bracket tightly into the anchors or directly into the junction box screws.
Make sure the bracket sits flush against the surface with no wobble.
Tighten the screws evenly to maintain bracket stability.
Properly securing the bracket prevents the alarm from loosening and guarantees reliable operation over time.
For hardwired alarms, ensure to disconnect the wire harness safely before installation or seek professional help if unsure.
How to Connect Power for Battery and Hardwired Alarms?
Connect power carefully to make sure your First Alert smoke and carbon monoxide alarm functions correctly. For battery-powered units, insert the provided batteries, ensuring correct polarity.
Connect power carefully to ensure your First Alert smoke and carbon monoxide alarm operates properly.
For sealed 10-year battery models, remove the yellow activation tab to engage power. For hardwired alarms, first turn off power at the circuit breaker.
Strip about ¾ inch of insulation from each wire. Thread the wires through the mounting bracket before securing it.
Connect the black (hot) and white (neutral) wires to the corresponding terminals on the alarm using wire nuts. If your model supports interconnect, connect the interconnect wire as indicated in the manual.
Plug the power connector into the back of the alarm. Double-check all connections are secure before restoring power.
Always verify that the circuit breaker is off and confirm power disconnection by testing for loss of panel display before handling wiring.
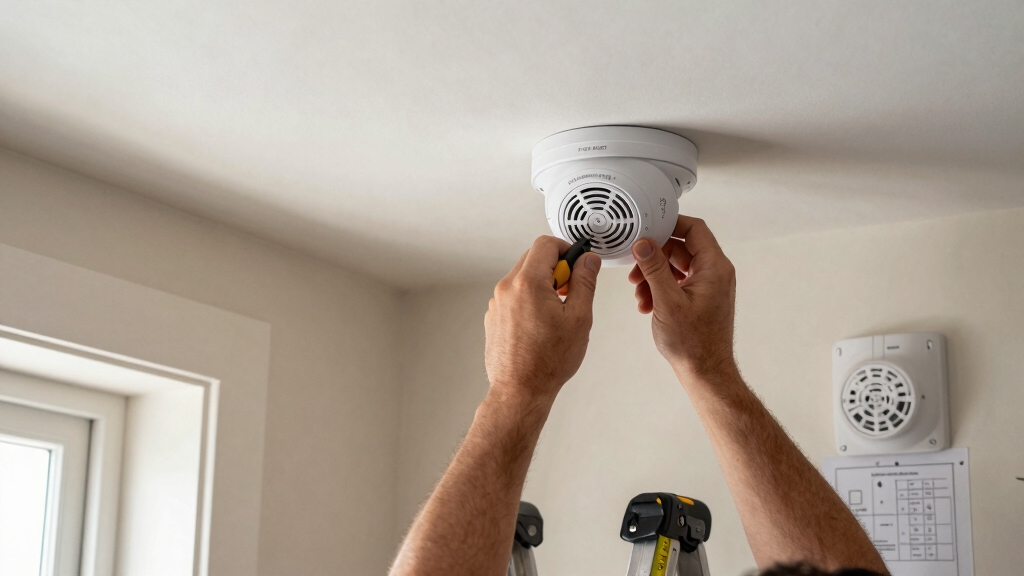
How to Attach and Activate Your First Alert Alarm?
Now that your mounting bracket is nice and secure, it’s time to attach the alarm. Just align the tabs on the alarm with the bracket and give it a twist clockwise to lock it in place.
Next, go ahead and remove the yellow battery tab to activate the unit. If your alarm is hardwired, don’t forget to plug in the power connector as well.
Finally, to make sure everything’s working correctly, press and hold the test button. This will confirm that both the sound and lights are functioning as they should.
Be sure to test your alarm monthly to maintain proper functionality and safety.
Align And Secure Alarm
Remove the yellow battery tab to activate your First Alert alarm before attaching it to the mounting bracket. Align the alarm’s tabs with the corresponding slots on the bracket, guaranteeing a proper fit.
For hardwired models, connect the power plug securely into the alarm’s back before alignment. Once aligned, twist the alarm clockwise until it locks firmly into place, preventing any wobble or looseness.
Confirm the alarm sits flush against the mounting surface, allowing for a wide rotation range without disengagement. Finally, write the installation date on the alarm’s label for future reference.
This precise alignment and secure locking guarantee peak sensor performance and reliable operation, critical for your smoke and carbon monoxide detection system. Regularly cleaning the alarm helps maintain sensor accuracy and prevents false alarms.
Activate And Test Unit
After you securely lock the alarm onto the mounting bracket, activate the unit by removing the yellow battery tab if you haven’t already. For hardwired models, make certain the power connector is plugged in.
Next, press and hold the test button to verify the alarm sounds and indicator lights activate. For smart alarms, confirm functionality via the First Alert App. Test all interconnected units to ensure system-wide alerting.
| Step | Action |
|---|---|
| 1. Remove battery tab | Activates battery power |
| 2. Connect power | For hardwired models only |
| 3. Press test button | Confirms audible and visual alert |
| 4. Verify interconnect | Checks linked alarms respond |
Regular testing ensures reliable operation and safety. Observing the indicator lights during testing helps pinpoint which unit is sounding the alert in interconnected systems.
How to Test Your First Alert Smoke and CO Alarm?
Regularly testing your First Alert Smoke and Carbon Monoxide Alarm guarantees it functions correctly when you need it most.
To test, press and hold the alarm’s test button until you hear the full alarm sound. This confirms the internal battery, speaker, and circuitry are operational.
For hardwired units, verify the test activates all interconnected alarms simultaneously.
Smart models require checking via the First Alert App to confirm signal and LED indicators respond properly.
If the alarm fails to sound or lights don’t activate, replace batteries or troubleshoot wiring immediately.
Testing monthly minimizes risk of malfunction.
Never use actual smoke or CO for testing; rely solely on the built-in test button to prevent damage.
Proper testing confirms your alarm’s reliability and your household’s safety.
Stay proactive with regular maintenance to ensure your detector remains dependable and reduces nuisance alarms.
When and How to Maintain or Replace Your Alarm?
Maintaining your First Alert Smoke and Carbon Monoxide Alarm guarantees it performs reliably over time. Regularly vacuum the vents to remove dust and debris that can impair sensor function.
Test the alarm monthly by pressing the test button until you hear the alert sound and see indicator lights. For hardwired models, check power connections and the app for smart alarms to confirm connectivity.
Replace the entire alarm unit every 10 years; don’t replace batteries alone. When replacement is due, remove the alarm by twisting it counterclockwise from the mounting bracket and disconnect power or batteries.
Install the new unit following the initial installation steps, including activating the yellow battery tab and recording the installation date on the alarm for future reference.
Frequently Asked Questions
Can First Alert Alarms Be Interconnected With Other Brands?
No, you can’t interconnect First Alert alarms with other brands. These alarms use proprietary signaling protocols that only communicate with compatible First Alert units.
To guarantee proper interconnect functionality and safety, you need to use alarms from the same manufacturer. Mixing brands can cause unreliable alerts or failure to activate linked alarms.
Always check compatibility on the packaging or user manual before purchasing additional units for interconnection.
How Do Smart Alarms Notify Me When I’M Away From Home?
When you’re not home, smart alarms gently keep you in the loop by sending alerts directly to your smartphone via the First Alert App.
They use your Wi-Fi connection to notify you instantly of smoke or carbon monoxide detection.
You just need to download the app, connect the alarm to your network, and enable notifications.
This guarantees you’re promptly informed, allowing you to take quick action no matter where you are.
Are These Alarms Suitable for Outdoor or Garage Installation?
No, these alarms aren’t suitable for outdoor or garage installation. You should install them indoors only, as exposure to temperature extremes, humidity, or dust can cause false alarms or damage.
Instead, place them in living spaces, bedrooms, and near fuel-burning appliances. For garages, consider specialized detectors designed for harsh environments.
Proper indoor placement guarantees reliable operation and accurate detection of smoke and carbon monoxide hazards.
What Should I Do if the Alarm Frequently Gives False Alerts?
If your alarm’s false alerts feel like a broken record, start by checking its location. Move it away from kitchens, bathrooms, or heating vents to avoid steam or cooking fumes triggering it.
Clean the vents and sensor gently with a vacuum to remove dust buildup. Make sure the batteries are fresh and properly seated.
If issues persist, reset the unit or consult the manual to recalibrate or replace it, keeping your safety gear reliable.
Can I Replace the Battery Myself in Sealed 10-Year Models?
You can’t replace the battery yourself in sealed 10-year First Alert models.
These units come with a non-replaceable, sealed lithium battery designed to last the full 10-year lifespan.
When the battery depletes, you must replace the entire alarm.
Attempting to open or replace the battery voids the warranty and compromises safety.
Instead, plan to install a new alarm after 10 years for reliable protection.
Protect What Matters Most with Ongoing Care
Now that you’ve installed your First Alert smoke and carbon monoxide alarm correctly, can you imagine the peace of mind it brings knowing your home is safer?
Regularly test your alarm, maintain the batteries, and replace the unit as recommended to guarantee peak performance.
Following these precise steps helps protect your household from harm. Don’t overlook maintenance; it’s as vital as installation for keeping your alarm fully operational and reliable.