To adjust your door closer’s closing speed, first locate the swing (S) and latch (L) valves, usually under the cover. Turn both valves clockwise to fully close them, then open the swing valve 1.5–2 turns counterclockwise to set main speed.
Do the same with the latch valve for the final closing phase. Test repeatedly, making small adjustments for smooth, consistent timing around 7–9 seconds. Proper tuning guarantees controlled closing and avoids slamming.
Keep exploring to handle common issues and maintenance tips.
Key Takeaways
- Locate and remove the door closer cover to access the speed adjustment valves labeled for sweep (main speed) and latch speed.
- Turn all valves clockwise to fully close them before starting adjustments to set a baseline.
- Adjust the sweep speed valve counterclockwise to increase door closing speed or clockwise to slow it down.
- Adjust the latch speed valve to control the final 10–20 degrees of closing for smooth latching without slamming.
- Test the door multiple times, making small valve adjustments until the door closes smoothly within 7 to 9 seconds.
Understanding Door Closer Speed Controls
While adjusting a door closer, you need to understand its speed control zones: main speed, latch speed, backcheck, and delayed action. Each zone governs specific portions of the door’s movement to guarantee smooth, safe, and effective operation.
Main speed controls the door travel from fully open to about 15°–20° before closing. It’s adjusted via the main hydraulic valve to set overall tempo. Latch speed manages the final 10°–15%, ensuring the door overcomes latch resistance without slamming or bouncing.
Main speed sets the door’s overall closing pace; latch speed fine-tunes the final few degrees for smooth latching.
Backcheck activates near full open, providing resistance to prevent damage from forceful swings. Note that backcheck is not designed to serve as an artificial door stop.
Delayed action, if present, slows the initial closing phase to accommodate slower egress. Each zone has independent valves allowing precise tuning.
Adjust valves incrementally, considering hydraulic damping created by fluid flow restrictions to achieve the desired door movement and safety compliance.
Preparing for Adjustment
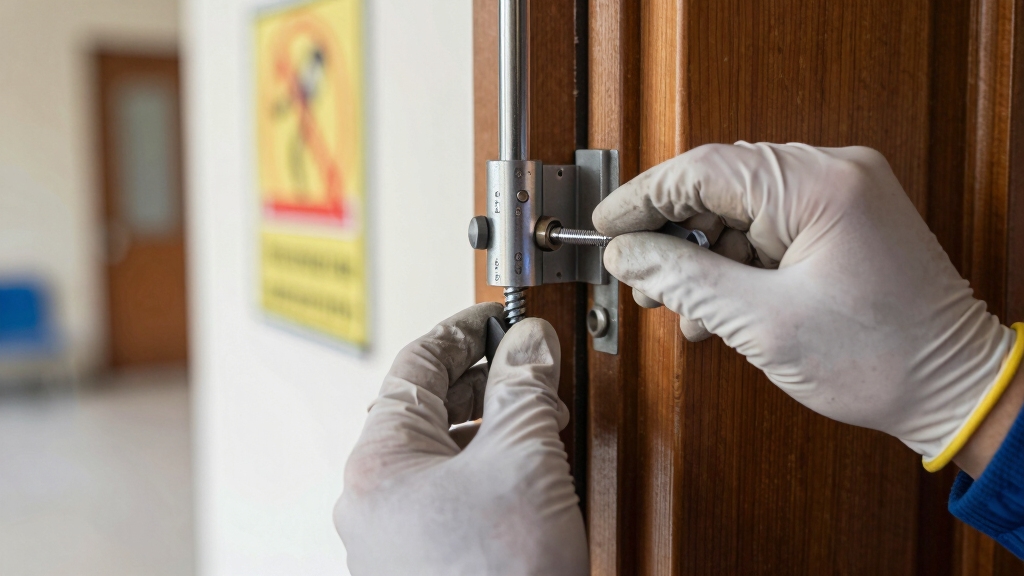
Adjusting the specific speed zones of a door closer requires thorough preparation to guarantee safety and accuracy. Before you start, gather essential tools like screwdrivers, Allen keys, and safety gear including gloves and eye protection.
Inspect the closer for leaks, loose screws, or corrosion. Confirm the door and frame alignment to rule out mechanical causes for improper closing. Check compliance with fire and accessibility standards to avoid regulatory issues. Proper placement and alignment are as critical for door closers as they are for installing a peephole in metal doors.
Key preparation steps include:
Depressurize spring-tension components to prevent injury. Make certain there are no electrical or obstruction hazards in the adjustment area.
Document current valve settings and arm geometry. It is also important to close all valves fully to establish a baseline before making any adjustments.
Set hydraulic valves fully closed as a baseline before adjustments. Following these precautions sets you up for a controlled, safe, and effective speed adjustment process.
Step-by-Step Closing Speed Adjustment
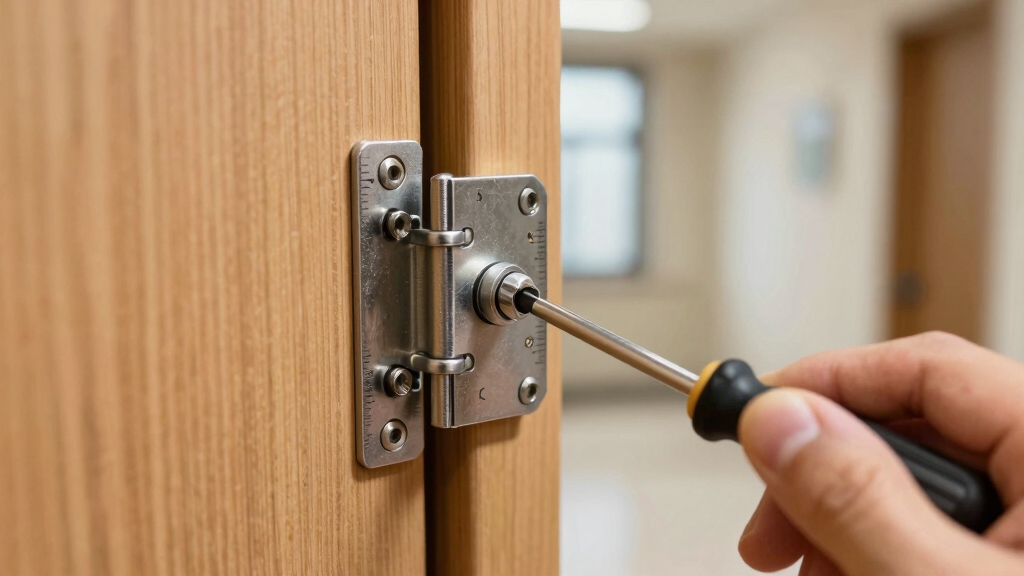
Start by removing the cover on your surface-mounted door closer to expose the adjustment screws labeled S (swing speed) and L (latch speed). This may require a screwdriver or hex key depending on your closer model to loosen any fasteners holding the cover in place. If you are unfamiliar or uncertain, consulting a professional locksmith can ensure proper handling and prevent damage.
Begin by taking off your surface-mounted door closer’s cover to reveal the S and L adjustment screws.
First, turn all valves clockwise until fully closed.
Then, adjust the swing speed by turning screw S counterclockwise 1.5-2 turns to increase closing speed or clockwise to slow it, controlling roughly 75% of the door’s closing range.
Next, adjust the latch speed with screw L, turning it counterclockwise 1.5-2 turns to speed up the last 10-20 degrees or clockwise to slow it for a smooth latch.
After each adjustment, test the door multiple times, making small increments (1/4 or 1/8 turn) to achieve consistent 7-9 second closure while ensuring compliance with applicable codes.
Common Issues and How to Fix Them
If your door closer isn’t working smoothly, several mechanical or environmental factors could be causing the issue.
Common problems include worn seals, incorrect spring tension, and misaligned parts that disrupt hydraulic flow or arm leverage. Environmental factors like drafts or improper mounting also affect closing speed. It is important to make sensitive adjustments because small turns produce significant changes in closing speed.
To troubleshoot, check for loose or bent arms and fasteners causing inconsistent speed or bouncing. Inspect for hydraulic leaks or contamination leading to erratic movement.
Ensure the closer size is correct and that installation is proper to maintain control. Environmental drafts or air pressure changes can also overwhelm settings.
Diagnose by observing the door’s sweep, latch, and backcheck phases, and inspect hardware condition. Address worn parts or leaks promptly. Replacement is often necessary if issues persist despite adjustments.
Best Practices for Safety and Maintenance
Because door closers play a critical role in safety and accessibility, you must follow established standards and maintenance protocols to guarantee reliable performance.
Door closers are essential for safety and accessibility, requiring strict adherence to standards and maintenance protocols.
Make certain your closers comply with EN 1154, ANSI/BHMA A156.4, and fire-rating certifications, using only listed devices for fire and smoke doors.
Regularly inspect and maintain components, focusing on closing speed adjustments that meet ADA requirements.
Closers should close in over five seconds with controlled force under five pounds. This timing guideline is essential to prevent slamming and ensure safe door operation.
Use corrosion-resistant materials like 304/316 stainless steel to enhance durability. Test closers under standard conditions (60-85°F) and verify proper latching to maintain security and compartmentation.
Avoid unauthorized hold-open devices on fire doors. Schedule periodic follow-up inspections and replace worn parts promptly to uphold performance, energy efficiency, and compliance with safety mandates.
Frequently Asked Questions
Can Adjusting Door Closer Speed Affect Fire Rating Compliance?
Yes, adjusting the door closer speed can affect fire rating compliance.
If you set the sweep or latch speed too fast or slow, you risk failing positive latching or creating excessive noise and hardware damage.
You must balance spring tension within ADA force limits while ensuring the door closes fully and latches reliably. Incorrect adjustments may cause a fire door to fail inspections, violating UL10C and NFPA 80 standards.
How Does Temperature Affect Hydraulic Door Closer Performance?
Temperature directly impacts hydraulic door closers by altering fluid viscosity.
When it’s cold, the fluid thickens, slowing the door’s closing speed and potentially requiring seasonal adjustments. Heat thins the fluid, speeding closure and risking slamming.
Advanced fluids like Liquid X maintain consistent viscosity across -30°F to 120°F, minimizing performance shifts.
Some closers use temperature-sensitive valves to compensate, ensuring reliable operation despite temperature fluctuations.
What Tools Are Needed for Precise Door Closer Adjustments?
You’ll need a 5/32-inch Allen key for sweep and latch speed controls and a 3/32-inch hex wrench for the regulation valve. A screwdriver suits Phillips or flat-head adjustment screws.
For more precise tweaks, carry a Falcon PB-30 1/8-inch Allen wrench pack or a green hex wrench pack with dual ends. Use a door pressure gauge to measure force and a timer to verify ADA closing compliance.
Safety gloves protect your hands during adjustments.
Are There Differences in Adjusting Interior Versus Exterior Door Closers?
Yes, you’ll adjust interior and exterior door closers differently.
Exterior closers need stronger spring sizes and finer latch-speed tuning to overcome seals and pressure differentials.
You’ll also set backcheck more aggressively to prevent wind damage.
Interior closers often require lighter spring settings and may include delayed-action for accessibility.
Always test exterior adjustments under real environmental conditions, as lab settings rarely reflect in-field performance accurately.
How Often Should Door Closers Be Professionally Inspected or Replaced?
You should have your door closers professionally inspected every 3-6 months for high-traffic areas like offices and retail stores, monthly for hospitals, and annually for low-traffic zones.
Fire doors require annual inspections by qualified personnel per NFPA 80 standards.
Replace closers when you notice signs like leaking oil, cracks, or failure to close properly.
Regular inspections extend lifespan and guarantee compliance with safety codes.
Stop Accidents Before They Happen With Proper Door Control
Adjusting your door closer’s speed is vital for safety and functionality. Did you know that improperly adjusted closers cause nearly 30% of door-related injuries in commercial buildings?
By following precise speed controls and maintenance steps, you’ll guarantee smooth, controlled closing that prevents damage and accidents.
Regular checks and timely adjustments keep your door operating efficiently, extending its lifespan and enhancing safety. Take action now to avoid costly repairs and potential hazards.