For door buzzer installation, mount the buzzer securely about 48 inches (120 cm) above the floor near your main entrance for optimal reach and visibility.
Use a level to keep it straight and protect it from weather and tampering. Run low-voltage wiring carefully, guaranteeing compatibility with your intercom and electric lock systems.
Use insulated connections to prevent shorts. After securely installing and wiring all components, test communication and door release functions thoroughly.
With the right approach, you’ll secure safe, reliable operation and smooth access control. Explore how to perfect each step next.
Key Takeaways
- Mount the door buzzer near the main entrance at about 48 inches (120 cm) height for optimal visibility and accessibility.
- Use rust-resistant screws and wall anchors on a sturdy, level surface, sealing edges with silicone to prevent moisture damage.
- Ensure wiring compatibility, route low-voltage cables through conduits, and secure connections with proper insulation and labeling.
- Position the buzzer away from noisy appliances or HVAC vents to minimize audio interference and enhance sound quality.
- Test the system thoroughly after installation, verifying power supply, buzzer operation, and electric lock functionality per manufacturer guidelines.
How To Pick The Best Spot For Your Door Buzzer?
When choosing the best spot for your door buzzer, you should prioritize accessibility, visibility, and security to guarantee reliable operation and user convenience.
Mount the buzzer near the main entrance, ideally at a height of 48 inches (120 cm), to accommodate all users comfortably.
Make certain the location offers clear visibility from the exterior but remains protected from direct weather exposure and tampering.
Avoid placing it behind obstacles or in dimly lit areas to prevent misuse or damage.
Select a spot that allows straightforward wiring routes to the intercom and door lock system without excessive bends or length, minimizing signal loss or interference.
Confirm that the mounting surface is sturdy enough to support the unit securely, using appropriate anchors and sealants to prevent moisture intrusion and maintain system integrity.
Additionally, ensure the mounting surface is level and plumb as part of a proper installation process to avoid misalignment or operational issues with the door buzzer level and plumb.
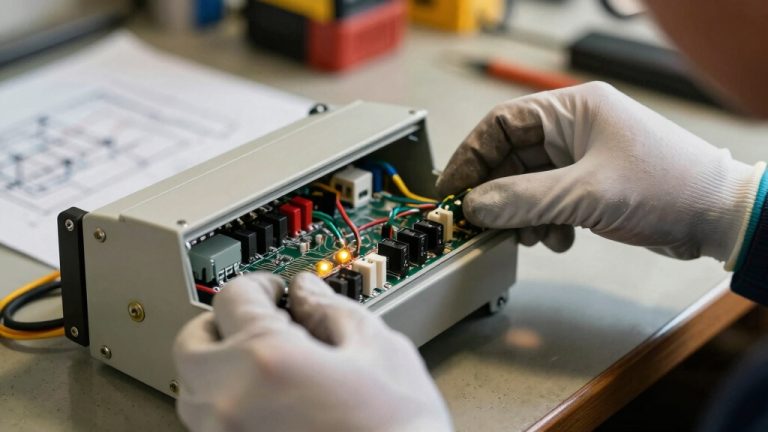
Gather The Essential Tools And Materials You’ll Need
Before you dive into your installation, let’s make sure you’ve got all the necessary tools at your fingertips.
You’ll definitely need an electric drill, wire strippers, and a few screwdrivers.
Having everything ready will help keep your process safe and efficient.
Now, let’s talk about the materials.
You’ll want to gather your buzzer unit, any wiring or wireless components you need, and the mounting hardware.
Just a heads up, make sure everything matches your system type!
Oh, and don’t forget to double-check that the buzzer is compatible with your intercom and door lock.
This little step can save you from any operational hiccups and keeps your system running smoothly.
If you are installing on a metal door, remember to use BI-metal drill bits designed to handle the material effectively.
Necessary Tools Checklist
A complete toolkit is essential to guarantee a smooth and safe door buzzer installation.
You’ll need an electric drill with appropriate drill bits for mounting, wire strippers for precise cable preparation, and a set of insulated screwdrivers to avoid electrical hazards.
Include a voltage tester to verify power status before handling wires, ensuring your safety.
Leveling tools are critical for accurate mounting height and alignment, typically set at 48 inches above ground.
Wire connectors and electrical tape will secure and insulate connections effectively.
A measuring tape helps maintain consistent placement according to manufacturer guidelines.
Have a flashlight or headlamp ready for visibility in dim areas.
Ensuring you have these tools prepared minimizes errors and supports compliance with safety standards throughout the installation process.
Additionally, understanding how to identify and test load wires before connection is crucial to prevent wiring errors and ensure safety.
Required Materials Overview
Why is selecting the right materials critical for your door buzzer installation?
Using appropriate components guarantees system reliability, safety, and compliance with electrical standards.
Start by procuring the exterior buzzer unit, interior receiver, and compatible electric door lock.
Choose low-voltage wiring rated for your specific setup if installing a hardwired system.
For wireless systems, secure reliable battery packs with sufficient capacity.
Include wall anchors and mounting brackets designed for your installation surface to guarantee secure attachment.
Silicone sealant is essential to weatherproof outdoor components and prevent moisture ingress.
Avoid improvising with substandard materials, as this risks system failure or electrical hazards.
Ensuring proper installation with reinforced frames can also enhance the overall security and durability of your door buzzer system.
Compatibility Verification Steps
Selecting the right materials sets the stage, but guaranteeing compatibility between your buzzer, intercom, and door lock components guarantees everything will work seamlessly together.
Before starting installation, you need to verify that all parts operate on the same voltage and communication protocols to avoid malfunctions or damage.
Follow these steps precisely:
- Check manufacturer specifications for voltage requirements of each component.
- Confirm communication compatibility. Wireless or wired systems must match in frequency or wiring standards.
- Verify power supply capacity supports all devices without overloading circuits.
- Inspect connector types and wiring gauges to ensure proper physical and electrical fit.
Adhering to these compatibility checks prevents installation errors and supports safe, reliable operation of your door buzzer system. Proper installation also requires inspecting components for issues such as corrosion or loose connections to ensure reliable operation.
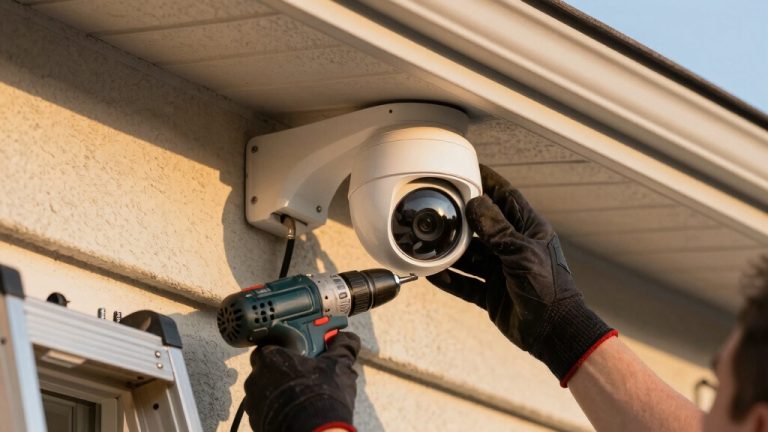
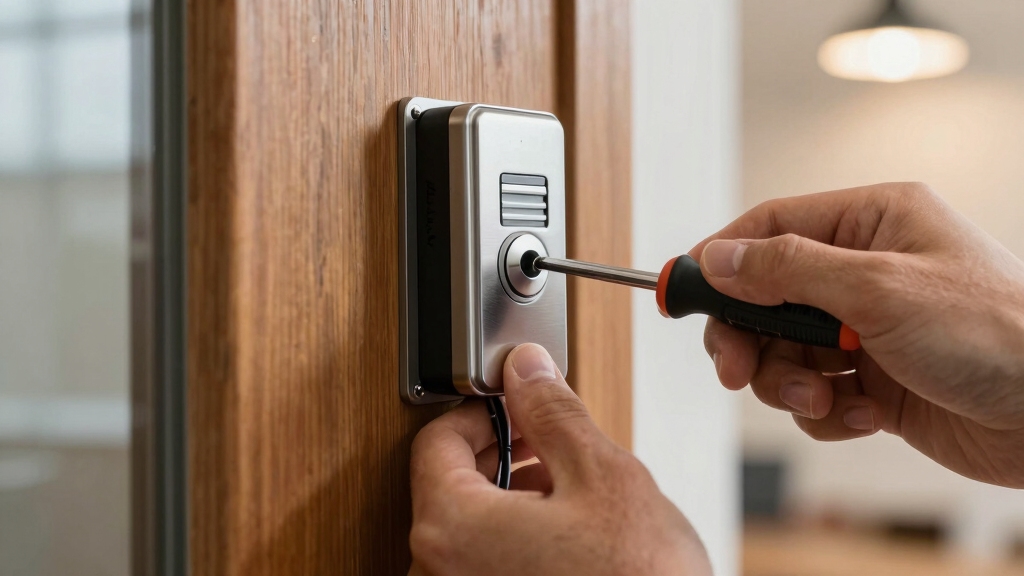
Mount And Secure The Exterior Door Buzzer Unit
When mounting the exterior door buzzer unit, make sure you choose a secure location near the building entrance that balances accessibility with protection against tampering.
Use a level to guarantee the unit is mounted straight, typically at 48 inches (120 cm) above ground. Secure the buzzer with rust-resistant screws and wall anchors suitable for the surface.
Seal around edges with silicone to prevent moisture intrusion. Confirm all wiring connections are insulated and protected within conduits.
Consider reinforcing the mounting surface with tamper-resistant fasteners to improve durability and resist compromise.
| Task | Key Consideration |
|---|---|
| Mounting Height | 48 inches (120 cm) |
| Fastening Method | Rust-resistant screws |
| Weatherproofing | Silicone sealant applied |
Set Up The Interior Intercom For Clear Communication
When setting up your interior intercom, it’s important to find a spot that’s easy to access but also keeps background noise to a minimum. This way, you’ll ensure that communication is clear.
Just remember to follow the manufacturer’s guidelines when choosing the perfect location. Look for a spot that has a good line of sight and steer clear of areas where other electronic devices might cause interference.
Also, don’t forget about audio quality! Proper speaker placement can make a big difference, so take some time to get that right. And make sure to calibrate the volume too—this is key for reliable operation and, of course, user safety.
Additionally, utilizing devices with photocell sensors can improve energy efficiency by automatically managing power based on ambient light conditions.
Optimal Intercom Placement
Where should you position the interior intercom to guarantee clear and reliable communication? You need to prioritize accessibility and minimize interference. Follow these guidelines:
- Mount the intercom near the main entrance or high-traffic area for immediate response.
- Place it at eye level, approximately 48 inches (120 cm) above the floor, to optimize speaker and microphone alignment.
- Avoid locations near noisy appliances or HVAC vents that could cause audio disruption.
- Make certain the unit is within reach of a power source and wiring access for secure, safe connections.
Proper placement ensures you hear visitors clearly and respond quickly, enhancing security.
Always follow manufacturer specs and local electrical codes to prevent hazards and system malfunctions. This setup step is essential before advancing to audio quality enhancements.
Consider integrating the intercom with smart-home hubs to enable seamless automation and remote communication capabilities.
Audio Quality Enhancement
Although proper placement sets the foundation, fine-tuning your interior intercom’s audio settings is essential for clear communication.
Begin by adjusting the volume levels to balance clarity without causing distortion or feedback.
Use the manufacturer’s calibration tools or built-in equalizers to minimize background noise.
Position the intercom microphone away from HVAC vents and other noise sources to reduce interference.
Test the speaker output in different room conditions to guarantee consistent sound quality.
Secure all wiring connections to prevent signal loss or static.
Confirm that the power supply is stable to avoid audio fluctuations.
Prioritize user safety by avoiding excessive volume that could damage hearing.
Finally, conduct multiple communication tests between the exterior buzzer and interior intercom to verify optimal audio performance before finalizing installation.
For optimal performance, regularly inspect and maintain the wiring connections to prevent issues caused by loose or damaged wires.
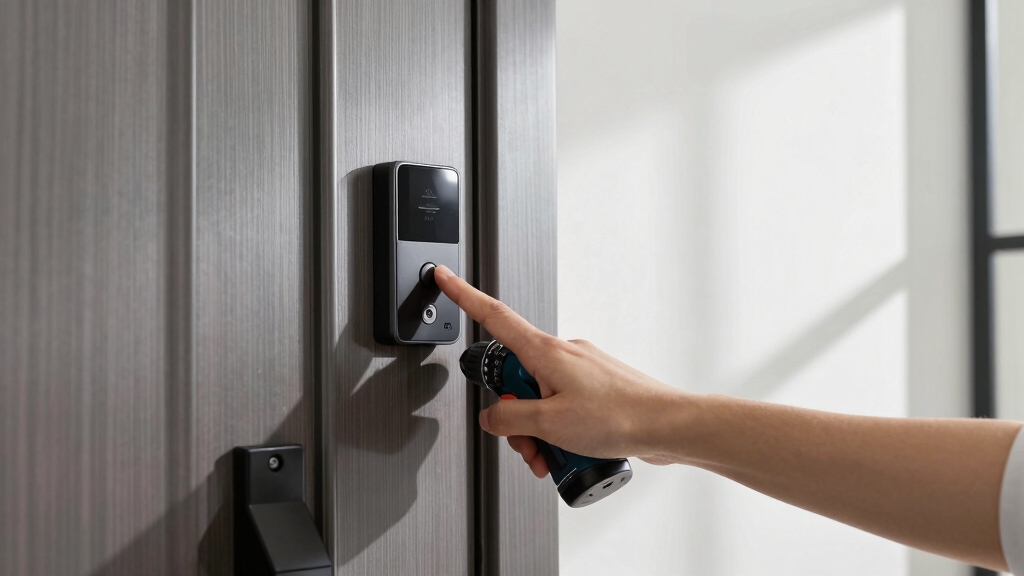
Install The Electric Door Lock And Connect It To The System
Begin by securely installing the electric door lock or electric strike lock on the door frame, following the manufacturer’s detailed instructions to prevent tampering or forced entry.
Assure the lock aligns precisely with the door latch or strike plate for flawless operation.
Next, connect the lock to the intercom system using the specified wiring or wireless connection, assuring secure and insulated connections.
Finally, attach the electric lock to its power source according to safety standards.
- Position and mount the lock firmly to prevent manipulation.
- Verify alignment between lock and door components.
- Establish secure, insulated connections to the intercom system.
- Connect power supply safely, following electrical codes.
Prioritize safety and accuracy to guarantee reliable access control integration. Regular maintenance checks ensure continued replacement readiness and optimal function of your door security components.
Run And Organize Wiring Safely And Effectively
After securing the electric door lock and guaranteeing proper connections, focus on running and organizing the wiring to maintain system integrity and safety.
Once the electric door lock is secured and connections verified, organize wiring carefully to ensure safety and system reliability.
Use low-voltage cables appropriate for your system, routing them through walls or conduits to prevent exposure and mechanical damage.
Keep wires separated to avoid interference, bundling them neatly with cable ties or clips at regular intervals.
Strip insulation carefully to avoid wire damage and use manufacturer-recommended connectors and electrical tape to secure joints.
Guarantee all wiring paths avoid moisture, heat sources, and sharp edges.
Label wires clearly to simplify troubleshooting and future maintenance.
Finally, verify that all cables have sufficient slack to accommodate movement or adjustments, but avoid excess length that could cause clutter or hazards.
Prioritize protection against physical and electrical risks throughout the wiring process.
Test Your Door Buzzer System To Make Sure It Works
When you complete the installation, you’ll need to thoroughly test your door buzzer system to confirm every component functions correctly and safely.
Begin by verifying intercom communication. Ensure clear audio and proper signal transmission between the exterior buzzer and interior unit.
Next, activate the door release mechanism to confirm the electric lock disengages promptly and securely.
Test the manual override to distinguish between electrical and mechanical issues if the door doesn’t respond.
Finally, check all wiring connections for stability, ensuring no exposed wires or loose contacts remain.
- Confirm intercom audio clarity and connection.
- Activate door release, verify electric lock operation.
- Test manual override for troubleshooting.
- Inspect wiring for secure, insulated connections.
This systematic approach guarantees reliable, safe operation.
Frequently Asked Questions
Can I Install a Door Buzzer System Myself Without Professional Help?
Yes, you can install a door buzzer system yourself if you have basic electrical skills and follow safety protocols.
Make sure you identify ideal locations for components and gather all necessary tools.
Carefully study manufacturer wiring diagrams to avoid errors.
Use proper insulation and secure connections to prevent hazards.
Test each component thoroughly before finalizing.
If you feel unsure at any step, consult a professional to maintain safety and functionality.
What Maintenance Is Required to Keep the Door Buzzer System Functional?
You’ll need to regularly inspect wiring for damage or corrosion, tighten loose connections, and clean all components to prevent dust buildup.
Test the buzzer, intercom, and door lock monthly to confirm proper function. Replace batteries in wireless units as needed.
Apply silicone sealant to prevent moisture intrusion, and make certain mounting brackets remain secure.
Always follow the manufacturer’s safety guidelines when performing maintenance to avoid electrical hazards and system failures.
How Do I Troubleshoot a Door Buzzer That Doesn’T Ring?
When the buzzer doesn’t ring, remember: “A stitch in time saves nine.” First, check the power source and wiring connections for loose or damaged wires, ensuring everything’s secure and insulated.
Inspect the buzzer unit and intercom for faults, testing each separately if possible. Verify the door lock’s integration isn’t interfering.
Always turn off power before inspecting electrical components to stay safe. Replace faulty parts as needed to restore functionality.
Are Door Buzzer Systems Compatible With Smart Home Devices?
Yes, many door buzzer systems are compatible with smart home devices, but compatibility depends on the system’s communication protocols and integration capabilities.
You should verify if your buzzer supports Wi-Fi, Zigbee, or Z-Wave standards.
When integrating, guarantee proper voltage and wiring compliance to avoid electrical hazards.
Always follow manufacturer guidelines and use certified components to maintain safety and functionality within your smart home network.
What Is the Average Lifespan of a Door Buzzer System?
You might think door buzzer systems wear out quickly, but with proper installation and maintenance, they typically last 7 to 10 years.
To guarantee safety and longevity, regularly inspect wiring for damage, keep components clean, and avoid exposure to extreme weather.
Using quality materials and following manufacturer guidelines prevents electrical hazards and mechanical failures.
Lock In Reliability at the Doorstep
Now that you’ve installed your door buzzer system, double-check all connections and wiring for safety, just like a meticulous telegraph operator ensuring every line is clear.
Proper placement, secure mounting, and organized wiring are key to reliable operation. Remember, testing the entire system before daily use prevents hazards and malfunctions.
By following these precise steps, you’ll enjoy secure, efficient communication at your door, protecting your home with modern technology and timeless attention to detail.