To disable your Viper alarm system, start by activating valet mode: press the function key twice, then immediately press the release button.
Confirm valet mode by checking that the remote displays “System Valet On” and the lock icon changes from filled to unfilled.
Alternatively, insert your ignition key, turn it on, and press the valet switch near the pedals within 15 seconds to disarm.
For complete shutdown, carefully disconnect the alarm power after safety checks. Detailed procedures and troubleshooting options follow for your situation.
Key Takeaways
- Activate valet mode by pressing the function key twice, then immediately pressing the valet release button to temporarily disable alarm arming.
- Disarm the system using the ignition key: turn to “on” and press the valet switch within 15 seconds to disable the alarm.
- Disconnect the vehicle battery first, then cut the fused positive power wire supplying the alarm control box to physically disable the Viper alarm.
- Replace or recharge remote batteries and maintain close proximity to the vehicle to ensure reliable remote disarming and avoid signal interference.
- For persistent or complex disabling, consult a professional locksmith to safely remove or reprogram integrated alarm and immobilizer components.
How To Activate And Deactivate Viper Valet Mode?
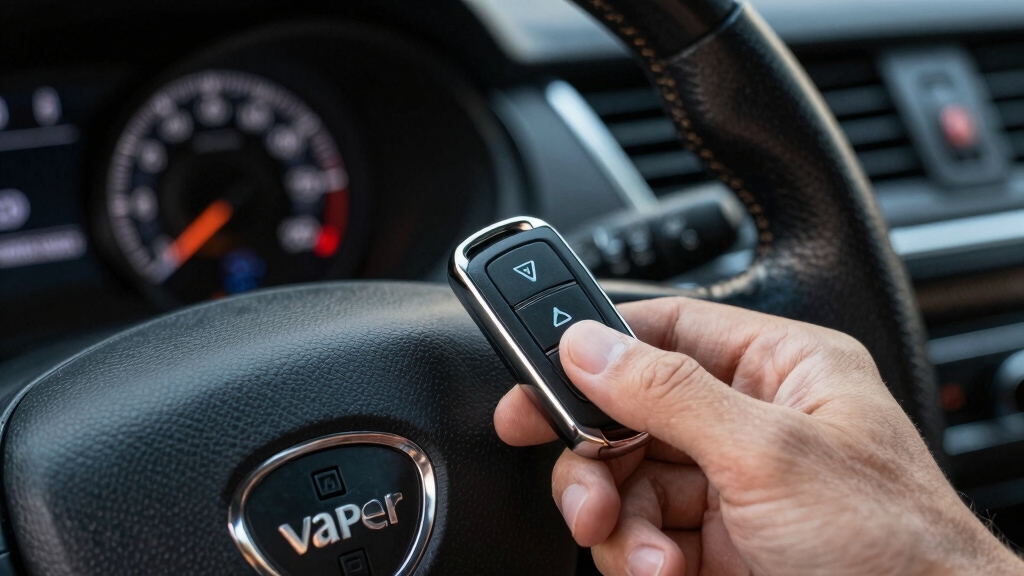
To activate Viper Valet Mode, you’ll press the function key twice followed immediately by the release button on your remote. Once activated, the remote displays “System Valet On,” and the lock icon changes from black (filled) to white (unfilled).
While in Valet Mode, the horn’s beeping is disabled, though the remote still produces sounds for button presses. This mode prevents the alarm from arming automatically or via remote but maintains door lock and trunk release functionality.
To deactivate Valet Mode, repeat the same sequence: function key twice, then release button. The remote will display “System Valet Off,” and the lock icon returns to black. Horn beeps resume upon pressing the lock button, confirming full system reactivation.
Note that bypassing certain alarm functions, like in Valet Mode, can lead to temporary security vulnerabilities similar to bypassing zones in security systems and should be used cautiously.
Using The Ignition Key And Valet Switch To Disarm Your Viper Alarm
Insert your ignition key and turn it to the “on” position to begin disarming your Viper alarm using the ignition key and valet switch method.
Locate the valet switch near the foot panel by the gas and brake pedals. Immediately press and release the valet switch once the ignition is on. The system will disarm roughly 5 seconds later.
This method applies to most Viper models, including the 971 VX.
If your alarm continues to beep, checking the trouble codes can help identify the cause and guide further action.
| Step | Action |
|---|---|
| 1 | Insert ignition key, turn to “on” |
| 2 | Press and release valet switch |
| 3 | Wait approx. 5 seconds for disarm |
Follow these steps precisely to avoid false alarms or system unresponsiveness.
Identifying Valet Mode Status On Your Viper Remote
You can easily tell if Valet mode is on with your Viper remote. Just take a look at the lock icon—it changes from a filled black to an unfilled white when Valet mode is activated.
Plus, your remote screen will clearly show a message saying “System Valet On.” This means automatic arming is disabled, but don’t worry; you still have limited remote functions available.
For enhanced security, many systems like Viper benefit from encrypted sensors that prevent unauthorized access and false alarms.
Valet Mode Activation Indicators
Although the Valet mode alters the alarm’s behavior, your Viper remote clearly indicates its status to prevent confusion.
When activated, Valet mode disables automatic arming and horn chirps. The remote still provides audible feedback.
You can verify activation through specific visual and audio cues on your remote. Look for these Valet mode activation indicators:
- The remote screen displays “System Valet On” confirming mode engagement.
- The lock icon changes from a filled (black) to an unfilled (white) appearance.
- Horn beeping is disabled, although the remote emits confirmation sounds.
Monitoring these indicators allows you to quickly identify Valet mode status.
This ensures proper alarm system control without unintended triggering or confusion during use.
For maintaining your alarm system’s optimal performance, it is important to follow proper battery replacement safety procedures as recommended by the manufacturer.
Lock Icon Appearance
Visual cues on your Viper remote provide immediate feedback about the alarm system’s status. The lock icon serves as a key indicator of Valet mode engagement.
When Valet mode is active, the lock icon changes from a solid black filled shape to an unfilled white outline. This allows you to quickly identify if the system’s security features are temporarily disabled.
This distinction helps you verify activation or deactivation without additional input.
| Lock Icon Appearance | Valet Mode Status |
|---|---|
| Black (filled) | Valet mode deactivated |
| White (unfilled) | Valet mode activated |
| Changes instantly | After button sequence input |
| Provides visual confirmation | Prevents false assumptions |
For enhanced system security, it is important to ensure your remote uses rolling code technology to prevent unauthorized access and signal interception.
Remote Screen Messages
Remote screens on Viper remotes clearly display system status messages, allowing you to identify Valet mode engagement at a glance. When Valet mode is activated, the remote shows “System Valet On” and the lock icon changes from black (filled) to white (unfilled).
This visual confirmation helps you verify the alarm’s temporary disarm state without ambiguity.
Key indicators on the remote include:
- Display of “System Valet On” or “System Valet Off” messages confirming mode status changes.
- Lock icon color shift reflecting Valet mode activation or deactivation.
- Audible feedback modifications, such as horn silence during Valet mode alongside remote beeps.
For enhanced security, consider integrating your Viper system with professional monitoring services to receive instant alerts and emergency response notifications.
How Valet Mode Affects Door Locks And Alarm Sounds?
When you engage Valet Mode on your Viper alarm system, the door locks and alarm sounds behave differently to prioritize convenience and security balance.
In Valet Mode, the system disables the horn beep typically triggered by locking or liberating, preventing audible disturbance. The remote still emits confirmation sounds.
Valet Mode silences horn beeps during locking or unlocking while the remote continues confirming actions audibly.
Door lock and trunk release functions remain fully operational, allowing you to manually secure or access the vehicle without triggering the alarm.
The remote’s lock icon shifts from a filled to an unfilled (white) appearance, visually confirming Valet Mode activation.
Importantly, the system won’t arm automatically or via remote commands, ensuring the alarm stays disarmed during valet parking or maintenance.
This controlled state maintains essential access while suppressing alarm audibility until Valet Mode is deactivated.
How The Viper Security System Bypass Works?
Valet Mode suspends automatic arming and audible alarms to offer controlled access. The Viper system incorporates advanced bypass features to handle false alarms.
Specifically, the system’s bypass function activates after detecting three triggers from the same sensor within a 60-minute period. This temporarily disables security monitoring to prevent repeated nuisance alerts.
Meanwhile, convenience features such as door locks and trunk release remain operational, ensuring usability.
Key aspects of the bypass function include:
- Automatic bypass triggers after multiple identical sensor activations within one hour.
- Continued operation of convenience features during bypass.
- Optional silent mode to suppress arm/disarm confirmation chirps without affecting system function.
This design balances security with user convenience by minimizing false alarms while maintaining essential controls. For complex systems or full decommissioning, it is recommended to seek professional help to prevent false alarms and ensure safety.
Common Viper Alarm Disarming Limitations And Troubleshooting
You might run into some challenges when trying to activate Valet mode, and that’s usually due to timing or button sequence errors. Just remember to keep an eye on that 15-second window after you turn the ignition key on. It’s crucial when using the valet switch!
Also, don’t forget about the remote control. Sometimes, weak batteries or interference can mess with the signal, which can prevent you from disarming the system properly. So, if you’re having trouble, it might be worth checking those batteries first!
In case of persistent issues, consulting a professional locksmith who specializes in advanced smart locks can provide swift and skillful assistance.
Valet Mode Activation Challenges
Although activating Valet mode on a Viper alarm system typically follows a straightforward button sequence, several challenges can complicate the process. You may find the remote unresponsive or fail to see the confirmation indicators. This hinders successful activation.
Timing and sequence precision are critical, and any deviation can cause the system not to enter Valet mode. Additionally, physical factors like weak remote batteries or interference may obstruct communication between the remote and the vehicle.
Consider these common obstacles:
The function key and release button sequence may require multiple attempts within a limited time frame. Remote battery depletion or signal interference can prevent proper mode toggling. The system mightn’t display “System Valet On” if previous disarming attempts were incomplete.
Understanding these nuances guarantees efficient Valet mode engagement without unnecessary frustration. It is also important to ensure power is properly managed during troubleshooting, as power disconnection can reset the system and resolve some issues.
Ignition Key Timing Issues
When working with the ignition key to disarm a Viper alarm system, timing plays a pivotal role in successful operation.
You must insert and turn the ignition key to the “on” position, then immediately press and release the valet switch within a 15-second window.
Delays or mistiming can prevent disarming or cause the alarm to trigger. The system typically disarms about 5 seconds after valet switch release.
If it doesn’t respond, retry the sequence promptly. Understanding this timing guarantees effective alarm bypass without remote use.
For enhanced security, consider integrating motion sensors and obstacle detection to trigger alerts during unauthorized access attempts.
| Step | Action | Timing Detail |
|---|---|---|
| 1 | Insert ignition key | Turn to “on” position |
| 2 | Press valet switch | Within 15 seconds after step 1 |
| 3 | Release valet switch | Immediate after press |
| 4 | Wait for disarm | Approx. 5 seconds |
| 5 | Retry if no response | Act quickly |
Remote Control Signal Problems
- Replace or recharge remote batteries regularly.
- Avoid signal interference from nearby electronic devices.
- Maintain line-of-sight or close proximity to the vehicle during disarming attempts.
Following these steps will improve remote control reliability and reduce disarming difficulties.
How To Physically Disconnect Viper Alarm Power?
To physically disconnect the Viper alarm power, start by locating the power wire connected to the alarm control box. This is typically found near the vehicle’s fuse box.
First, disconnect the vehicle battery to guarantee safety. Then, identify the positive power wire supplying the alarm control box. This is usually a red wire fused near the fuse box or within the wiring harness.
Use a multimeter to confirm voltage presence before proceeding. Once identified, carefully disconnect or cut the power wire, ensuring no exposed wires remain to avoid shorts.
Avoid disturbing ignition wiring or immobilizer connections integrated with the alarm. After disconnection, reconnect the vehicle battery and verify that the alarm system no longer activates.
This process completely disables power to the Viper alarm system, preventing false alarms and battery drain.
Consulting A Professional For Viper Alarm Removal
After physically disconnecting the power to your Viper alarm system, you might still face complexities requiring expert attention.
Complete removal involves spliced ignition wiring, multiple relay boxes, and immobilizer integration. This can impact vehicle safety and functionality if mishandled.
Consulting a professional guarantees proper disassembly without compromising your vehicle’s electrical systems.
Consider the following when seeking expert help:
- Thorough diagnostics to identify all connected components and wiring paths.
- Safe disconnection and removal minimizing risk to ignition and immobilizer circuits.
- Reprogramming or resetting vehicle systems if integrated with the alarm.
Relying on a trained installer minimizes error and prevents unintended system failures. It also ensures compliance with manufacturer specifications during permanent Viper alarm removal.
Frequently Asked Questions
Can I Reset My Viper Alarm System Without the Remote or Valet Switch?
You can’t fully reset your Viper alarm system without the remote or valet switch.
However, you could try disconnecting the power wire at the vehicle fuse box to cut power to the control box temporarily.
Keep in mind, this method disables the system but doesn’t reset it.
For a proper reset or removal, professional dealer assistance is recommended to avoid damaging integrated immobilizer or relay components.
How Do I Replace the Battery in My Viper Alarm Remote?
To replace the battery in your Viper alarm remote, first locate the seam on the remote casing.
Use a small flathead screwdriver to gently pry it open.
Remove the old battery, noting its orientation.
Replace it with a new CR2032 battery, positive side facing up.
Snap the casing back together securely.
Test the remote to guarantee proper function.
Dispose of the old battery safely, following local regulations.
Is It Possible to Program Additional Remotes for My Viper Alarm?
Yes, you can program additional remotes for your Viper alarm.
Typically, start by turning the ignition to the ON position. Then press and hold the valet switch near the foot panel until the LED indicator flashes.
Press a button on each new remote within 10 seconds to sync it. Release the valet switch to exit programming mode.
Consult your specific model’s manual for exact timing and button sequences to guarantee proper remote addition.
What Should I Do if My Viper Alarm Triggers Randomly Without Reason?
Picture your Viper alarm blaring unexpectedly in the quiet night. To fix this, first check for false triggers. It might be dust or vibrations setting it off.
Use the NPC feature to detect sensor faults and enable temporary bypass. Inspect door and trunk sensors for damage or misalignment.
If issues persist, try toggling Valet mode on and off to reset the system. For ongoing problems, consult your dealer for professional diagnostics and repair.
Are There Any Smartphone Apps Compatible With Viper Alarm System Control?
Yes, you can control some Viper alarm systems via smartphone apps like Viper SmartStart.
These apps let you arm, disarm, and track your vehicle remotely using cellular connectivity. To use it, you’ll need to install the SmartStart module and sync your remote with the app.
Make sure your model supports SmartStart compatibility, as not all Viper alarms do. Always follow the manufacturer’s setup instructions for secure operation.
Stay Protected While Avoiding Unwanted Alarms
Disabling your Viper alarm system requires precision and understanding of its modes. Did you know that over 60% of false alarms result from improper disarming? This highlights the importance of correctly using valet mode or the ignition key method to avoid unnecessary triggers.
If troubleshooting fails, physically disconnecting the power or consulting a professional guarantees safe removal. By following these steps methodically, you’ll maintain security while preventing accidental alarm activations effectively.