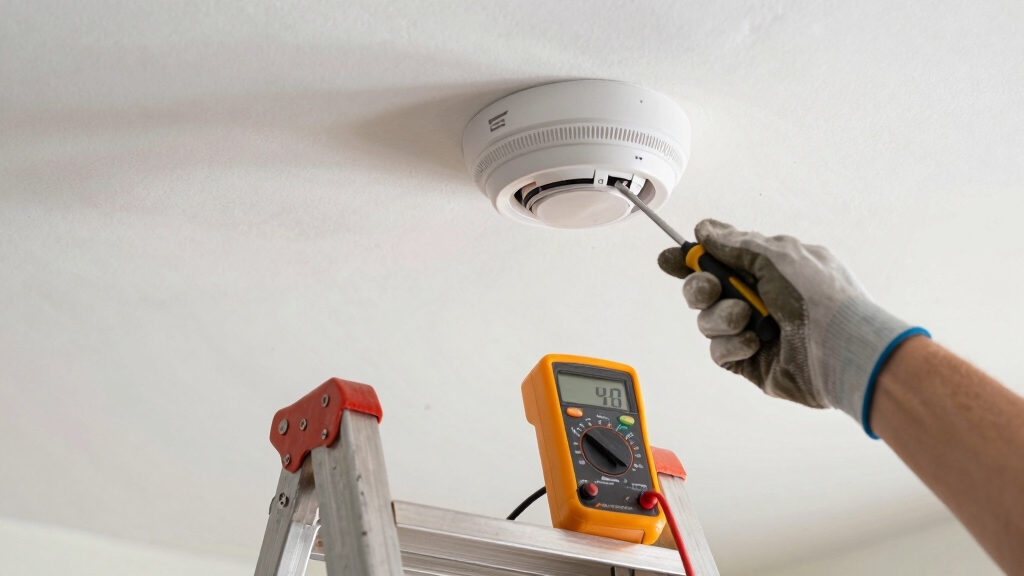
First, turn off power at the circuit breaker. Then verify with a non-contact voltage detector.
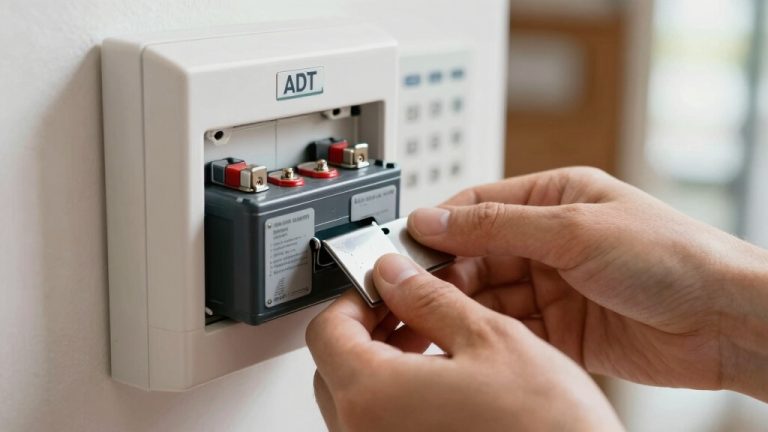
Remove the backup battery to prevent residual current. Choose a compatible alarm, either hard-wired or battery-powered, matching brands for interconnected systems.
Unscrew and twist off the old unit, disconnect wiring, and attach the new mounting plate. Connect wires securely, insert the backup battery, and lock the alarm in place.
Restore power, test the alarm button, and confirm it sounds. For detailed steps and maintenance tips, keep exploring.
Key Takeaways
- Turn off power at the circuit breaker and verify with a non-contact voltage detector before removing the old fire alarm.
- Twist the old alarm counterclockwise to remove it, then disconnect wiring and remove the mounting bracket.
- Choose a replacement alarm compatible with your home wiring and existing interconnected system brand.
- Securely attach the new mounting plate, connect wires using wire nuts, and twist the alarm clockwise to lock in place.
- Restore power, test the alarm by holding the test button for 5–10 seconds, and maintain monthly testing and battery replacement.
Safely Turning Off Power Before Replacement
Begin by turning off the power at the circuit breaker that controls the smoke alarm’s electrical circuit.
Start by switching off the circuit breaker powering the smoke alarm’s electrical circuit.
Locate the correct breaker by labeling or testing switches to avoid cutting power to unrelated areas.
After switching off, use a non-contact voltage detector near the smoke alarm wires to confirm power is fully disconnected. This step prevents electrical shock during replacement.
Never trust the breaker alone; always verify with the voltage detector. Once confirmed, carefully disconnect the wiring harness or wire nuts from the old alarm.
Handle wires gently to avoid damage or shorts. If your alarm has a backup battery, remove it before proceeding.
These safety steps ensure you work on a de-energized circuit, reducing electrical hazards and protecting yourself throughout the replacement process.
Always remember that hardwired smoke alarms require a battery backup to ensure continuous operation during power outages.
Picking the Right Fire Alarm for Your Home
Choose a smoke alarm that matches your home’s electrical setup and safety needs to guarantee reliable fire detection.
If your home has hard-wired wiring, select a hard-wired alarm compatible with your circuit. For battery-only homes, opt for a battery-powered or 10-year sealed lithium battery alarm.
Consider alarms with rechargeable battery backup for uninterrupted power during outages. If your system is interconnected, make sure the replacement alarm matches the existing brand to maintain synchronization.
Check for compliance with local fire codes and manufacturer specifications. Prioritize alarms with clear visual and audible indicators.
Selecting the correct type prevents installation issues and assures peak performance. Avoid mixing alarm types within interconnected systems to prevent false alarms or communication failures.
Proper choice enhances safety and simplifies installation. Regular maintenance, including monthly testing and annual battery replacement, is essential to ensure reliable operation during emergencies.
Removing Your Old Fire Alarm Step-by-Step
Start by turning off the power at the circuit breaker. Verify it’s off with a non-contact voltage detector to prevent electrical shock.
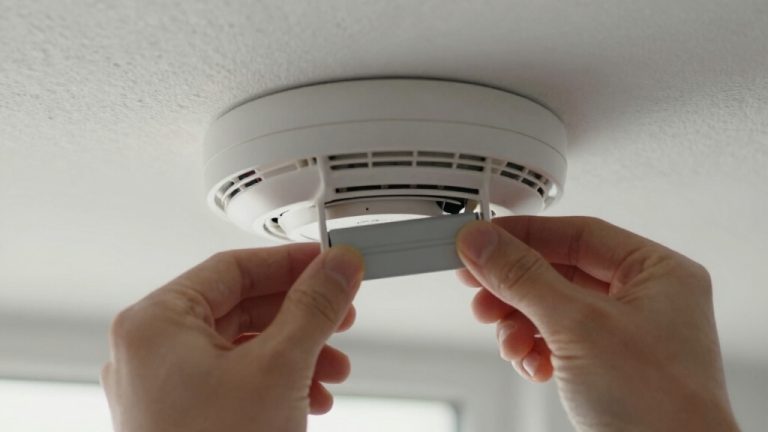
Next, gently twist the old fire alarm counterclockwise to detach it from the mounting plate. If it resists, avoid forcing it to prevent damage.
After removal, locate and unscrew the mounting bracket from the ceiling or wall junction box using your screwdriver or drill.
Before disconnecting the wiring, remove any backup battery present to eliminate power sources.
Carefully disconnect the wiring harness or unscrew the wire nuts securing the wires. Inspect the unit for yellowing or damage, which may indicate it’s over 10 years old and due for replacement.
Keep all screws and parts organized for proper disposal or recycling. To reduce false alarms caused by moisture, it’s important to understand the effects of humidity on smoke alarms when replacing your unit.
Installing Your New Fire Alarm Correctly
Once you’ve confirmed the power is off, attach the new mounting plate securely to the junction box using the appropriate screws.
Next, connect the wiring harness from your home to the back of the new fire alarm. If your alarm uses separate wires, twist matching wires together and secure them with wire nuts or lever nuts, guaranteeing tight, stable connections.
Align the notches on your fire alarm with the mounting plate, then twist the alarm clockwise until it locks firmly in place. Insert the backup battery, confirming correct polarity.
Avoid forcing components to prevent damage. Make sure all connections are snug and the unit sits flush against the ceiling or wall.
This precise installation assures proper function and compliance with manufacturer specifications for optimal fire safety.
Regularly testing your alarm monthly is essential to ensure sensor and battery function and maintain reliability.
Testing Your New Fire Alarm
After securing your new fire alarm and verifying all connections are tight, restore power at the circuit breaker to activate the unit.
Confirm the power indicator light illuminates, signaling correct electrical supply.
Press and hold the test button for 5 to 10 seconds; the alarm should emit a loud, continuous sound confirming operational status.
If the alarm fails to sound, recheck wiring connections and power source. Test interconnected alarms simultaneously to guarantee system-wide functionality.
Avoid using smoke or open flames for testing, as they risk damage and safety hazards. Document the test date for your records.
Only proceed once you verify the alarm functions correctly, assuring reliable detection and prompt alerts in case of fire emergencies.
Proper testing completes a safe and effective fire alarm replacement.
Remember that single-station alarms do not automatically notify the fire department, so occupants must still make a manual 911 call in case of fire.
Maintaining Your Fire Alarm for Long-Term Safety
Regularly maintaining your fire alarm guarantees it functions reliably when you need it most.
Start by pressing the test button monthly to verify proper operation. Replace batteries annually or immediately when the alarm chirps, indicating low power.
Use a vacuum with a soft brush attachment to remove dust and debris from vents, following manufacturer guidelines.
Make certain all interconnected alarms are replaced simultaneously to maintain system integrity. Inspect your alarm for yellowing or damage, which signals it’s time for a full replacement.
For hard-wired alarms, confirm wiring connections remain secure and free from corrosion. Always restore power at the circuit breaker after maintenance and verify the power light illuminates.
Consistent upkeep extends your alarm’s lifespan and optimizes your home’s fire safety. Proper placement and regular maintenance together ensure your alarms provide early warnings that can save lives.
Frequently Asked Questions
How Often Should I Replace My Fire Alarm Entirely?
You should replace your fire alarm entirely every 10 years. After a decade, sensors can degrade, reducing effectiveness.
Look for yellowing or the manufacturer date on the unit to confirm its age. For 10-year sealed lithium battery alarms, replacement is mandatory since you can’t change batteries.
Regularly test alarms monthly and replace batteries yearly. Remember, full unit replacement guarantees peak safety and compliance with standards.
Can I Install Fire Alarms Myself or Hire a Professional?
You can definitely install fire alarms yourself if you follow safety protocols like turning off the power and using a voltage detector. Think of it as defusing a live wire with care.
Use the right tools, connect wires securely, and align mounting plates precisely.
That said, if you’re unsure or dealing with interconnected systems, hiring a professional guarantees compliance and peace of mind. Your safety system deserves nothing less than expert hands or your cautious vigilance.
What Is the Best Location to Install Fire Alarms in a Home?
You should install fire alarms inside each bedroom, outside sleeping areas, and on every level of your home, including the basement.
Mount them on ceilings or high on walls, at least 4 inches from corners. Avoid placing alarms near windows, doors, or ducts where drafts might interfere.
Keep them away from kitchens or bathrooms to reduce false alarms. This placement guarantees early detection and maximizes safety throughout your home.
Are There Specific Fire Alarms for People With Hearing Impairments?
You won’t find fire alarms that whisper, but yes, specific alarms for hearing impairments exist.
You’ll want devices with bright strobe lights or vibrating pads that activate during emergencies.
These specialized alarms integrate visual and tactile alerts to make certain you don’t miss a warning.
When choosing one, verify compatibility with your home system and follow installation instructions precisely to guarantee effective and timely alerts that match your needs perfectly.
How Do Interconnected Alarms Communicate With Each Other?
Interconnected alarms communicate through a dedicated wiring system that links each unit electrically, allowing signals to pass instantly.
When one alarm detects smoke or fire, it sends an electrical signal to activate all connected alarms simultaneously.
This guarantees you’re alerted throughout your home regardless of where the fire starts.
Make sure you use alarms from the same brand and compatible models to maintain proper communication and system integrity.
From Setup to Safety: Don’t Skip the Final Check
Now that you’ve replaced your fire alarm, don’t rush to relax just yet. The real test comes next: ensuring it functions perfectly every time danger strikes.
Follow each step carefully, from powering off to testing. Remember, a small oversight can cost dearly.
Keep your alarm maintained to guarantee long-term safety. Your vigilance today could be the difference between safety and disaster tomorrow.
Are you ready to trust your new alarm fully?