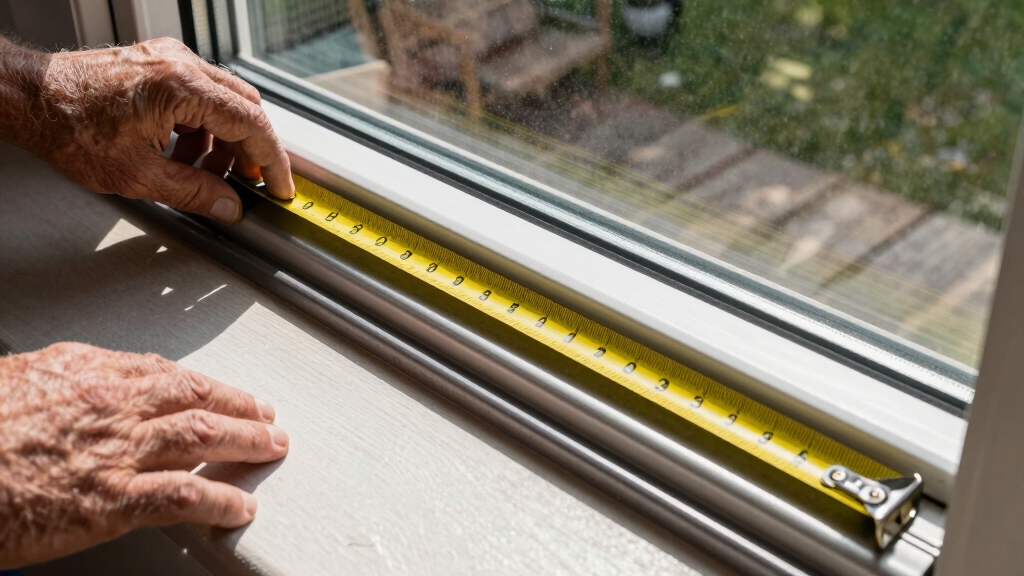
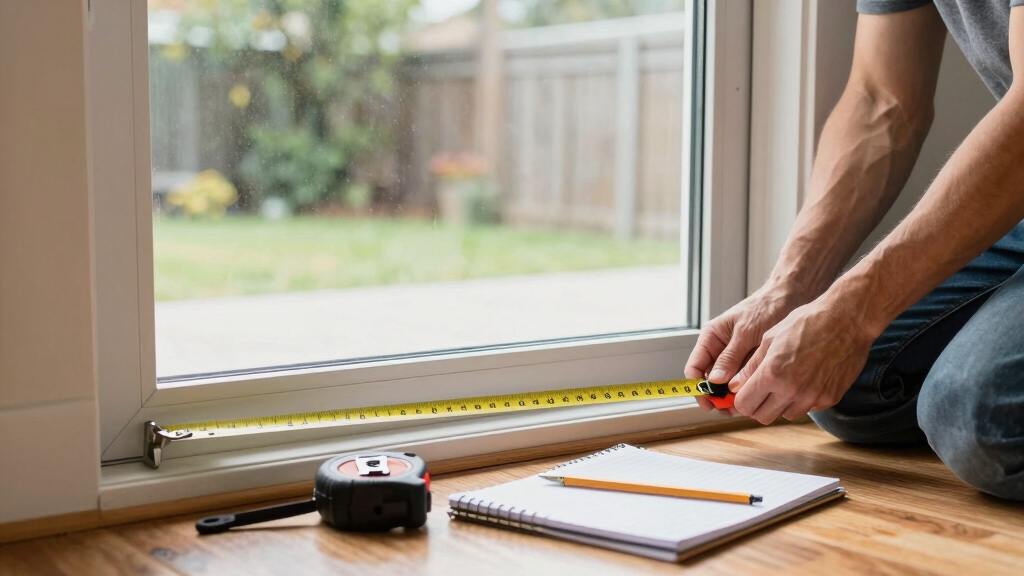
To measure your sliding glass door for replacement, first gather a steel tape, a level, and a pencil. Check if the frame is level, plumb, and square by measuring the width at the top, middle, and bottom. Use the smallest width.
Then measure height at left, center, and right, again taking the smallest. Finally, measure the frame depth from the interior to the exterior wall surfaces. Record all dimensions precisely to 1/16 inch for a secure fit.
Continue exploring for tips on avoiding common errors and when to call a pro.
Key Takeaways
- Measure the width at top, middle, and bottom of the door frame; use the smallest measurement for ordering the replacement door.
- Measure the height from the top of the frame or header down to the sill or threshold at left, center, and right; select the smallest height.
- Check that the door frame is level, plumb, and square by using a spirit or laser level and measuring diagonal distances to identify irregularities.
- Inspect the sill and surrounding surfaces for warping or unevenness to ensure proper door operation and fit.
- Record all measurements precisely to the nearest 1/16 inch and add clearance for flashing, shimming, and sealing during installation.
Gather Your Tools for Measuring Sliding Glass Doors
Before you plunge into measuring your sliding glass door, make sure you’ve gathered the right tools to get accurate results.
Gather the right tools first to ensure accurate measurements for your sliding glass door project.
Start with a 25–30 ft locking tape measure for frame and rough opening dimensions. Use a rigid folding rule or story pole to transfer repeated measurements accurately.
A specialty sliding-door gauge, like the Accu-Rule, helps you measure track-to-track distances quickly. Bring a small tape for hardware and threshold details. Precise measurements are as critical as the placement considerations used in peephole installation for metal doors.
For marking, grab a carpenter’s pencil or fine-tip marker; avoid marking glass directly. Keep a measurement worksheet or notepad handy to record every dimension. It is crucial to record measurements for later comparison to ensure the new door fits properly.
Use your smartphone to photograph any frame issues. Don’t forget safety gear: cut-resistant gloves, safety glasses, and closed-toe shoes protect you while working. Finally, pack a flashlight and pry tool to inspect hidden frame parts before you begin.
Check for Level and Plumb Before Measuring
Before you dive into measuring your sliding glass door, it’s a good idea to grab a level. Trust me on this one!
You’ll want to check the frame’s verticality first. Just place the level along the side jambs and sill to see if there are any uneven surfaces or deviations from being plumb and level. Ensuring the frame is properly aligned is critical because misalignment can affect the door’s structural integrity and security performance.
It’s important to check both the left and right walls for plumbness by measuring at the bottom and top of the opening to ensure accurate measurements for your replacement door wall plumbness.
Using A Level
How do you make certain accurate measurements for your sliding glass door replacement? Start by using a reliable level to check the head jamb and sill for evenness. This prevents future problems like binding or uneven gaps.
Here’s what to do:
- Place a 4–6 ft spirit or laser level along the head jamb’s interior face, noting any slopes or high spots.
- Check the sill’s interior and exterior edges for level, identifying twists or crowns.
- Use a laser level on a tripod to create a consistent reference line across the opening.
- Record the lowest points on the head and sill; these guide your height measurements to avoid installation issues.
- Additionally, verify that the side jambs are plumb by placing a 6-ft level flat against both the inside and outside edges of each jamb to ensure proper vertical alignment.
Proper alignment and level are crucial because hydraulic damping in door closers depends on smooth and consistent door movement without binding. Following these steps guarantees the new door fits perfectly and operates smoothly.
Assessing Frame Verticality
Start by thoroughly evaluating the verticality of your sliding glass door frame to ensure accurate measurements and proper installation. First, sight along each jamb to detect bowing or twisting.
Use a long straightedge to find any mid-span deviations and mark high or low spots. Next, measure diagonals across the rough opening; a difference over 1/8 inch indicates out-of-square framing.
Note which corner is pulled to plan shimming. Also, check head and sill heights at left, center, and right to ensure parallelism within tolerance. It is important to recognize that house settling can cause frame misalignment, which may affect these measurements and require adjustment before replacement.
| Checkpoint | Method | Tolerance |
|---|---|---|
| Jamb verticality | Sightline + straightedge | ≤ 1/8 inch over 6 feet |
| Diagonal measurement | Top-left to bottom-right, and vice versa | ≤ 1/8–1/4 inch difference |
| Head and sill height | Measure left, center, right | ≤ 1/8 inch variation |
| Frame parallelism | Visual inspection | No crown, dip, or twist |
Identifying Uneven Surfaces
Since a level sill is essential for correct door operation and water drainage, you need to verify the sill’s levelness before taking any measurements.
Use a 6-foot level to check the sill and floor surface; the bubble must sit perfectly between the indicator lines.
Also, measure diagonally across the frame to confirm squareness. Uneven surfaces cause door panels to misalign, hinder water drainage, and lead to operational issues.
Here’s how to identify uneven surfaces:
- Check if the bubble on the level is off-center.
- Measure diagonal distances to detect out-of-square frames.
- Look for warped or twisted rough opening walls.
- Confirm the sill plate is continuously level.
Address any unevenness before proceeding to assure a smooth installation. Reinforcing the frame and jamb with steel jamb armor can help maintain proper alignment over time. Remember, doors should be hung plumb and level to function properly and avoid alignment problems.
How to Measure Sliding Door Width Accurately?
To measure the width of your sliding door accurately, start by taking some horizontal measurements. You’ll want to check at the top, in the middle, and at the bottom of the exterior frame edges.
It’s a good idea to use the smallest width you find among these measurements. This way, you can ensure that your replacement door will fit snugly, even if there are a few irregularities in the frame.
Make sure you grab a metal tape measure for this task, as it provides the most precise readings. Since standard sliding glass door widths typically range from 60 to 72 inches, knowing your exact measurement helps you find a suitable replacement.
Also, consider consulting a professional to ensure your measurements align with standard door sizes for easier replacement. And don’t forget to write down each measurement clearly!
Having everything noted will help you keep track of what you need when you’re ready to make your purchase.
Measure Multiple Width Points
When measuring the width of a sliding glass door opening, you’ll want to take three separate measurements at the top, middle, and bottom of the frame. This helps you spot any irregularities like bowing or out-of-square framing that could affect your door fit.
Use a steel tape measure, keep it straight and taut, and record each width to the nearest 1/16 inch for precision. Then, rely on the smallest width as your ordering size to avoid installation issues. Remember that proper measurement techniques help ensure accurate fitting and prevent future security concerns.
- Measure at top, middle, and bottom for framing consistency.
- Use the narrowest width as your key dimension.
- Detect out-of-square frames early to prevent problems.
- Consult manufacturer specs before adding clearance.
- Use steel measuring tape (minimum 25 feet) to ensure precise and accurate measurements that cover the entire door opening.
Use Exterior Frame Edges
Measuring the width of your sliding glass door from the exterior frame edges gives you the most accurate sense of the full opening size.
Start by positioning a steel tape measure at the center of the exterior frame, stretching it horizontally from one outer edge, such as brick, siding, or stucco, to the other. It is important to call 811 to have underground utilities marked before any major renovation or digging.
Hold the tape straight and taut, ensuring no slack or bending. Measure at multiple heights to capture any frame variations caused by wall thickness differences. It is important to verify width measurements at least twice for consistency to avoid costly adjustments later.
This method accounts for the full rough opening, essential for a proper replacement fit.
| Measurement Point | Description |
|---|---|
| Top | Horizontal width at frame’s top |
| Middle | Center width at frame midpoint |
| Bottom | Width near the frame’s base |
Record Smallest Width
After you’ve measured the sliding glass door‘s width at the exterior frame edges, you’ll need to record the width inside the opening at three horizontal points: top, middle, and bottom.
Use consistent reference points like jamb-to-jamb, keep your tape level, and note each measurement separately. Applying precise measurement techniques ensures the most accurate data for ordering replacement doors.
Then compare these widths carefully.
- Select the smallest width as your key measurement; it guarantees the replacement fits without binding. To ensure accurate fitting, it’s important to measure finished door opening after all surrounding finishes are complete.
- Treat any variation over ¼ inch as a sign of an out-of-square opening needing attention.
- Document the smallest width clearly as “net opening width – use for ordering” to avoid errors.
- Remember, installers often reduce this smallest value slightly to allow for shimming and squaring.
This precise approach prevents ordering oversized units and helps you manage potential structural issues.
How to Measure Sliding Door Height Accurately?
Although it might seem straightforward, getting the sliding door height right requires careful attention to your vertical reference points.
Measure from the top of the existing frame or header down to the top surface of the sill or threshold, not to the floor. It is advisable to clean around measurement areas using routine care to ensure dust or debris do not affect accuracy.
Take three vertical measurements: left, center, and right. Use the smallest reading as your height to make certain the new door fits without binding. It is important to measure height outside the home, such as from brick to brick or stucco to stucco, to ensure accuracy.
Note if the sill is sloped or stepped and select a consistent bottom reference.
Check for any transoms above and measure only the active door height.
Record measurements accurately to 1/16 inch and re-measure to confirm.
How to Measure Door Frame Depth or Jamb Thickness?
To measure the depth of your door frame, which is also known as jamb thickness, you’ll want to find the distance from the finished wall surface on the inside to the finished wall surface on the outside at your door opening. It’s pretty straightforward!
Knowing precise measurements helps avoid issues similar to the reverse parallax effect seen in optical devices, where small errors can cause misalignment.
Just grab a tape measure and start checking the thickness in several spots. Make sure to measure on both sides and also at the top of the frame. This way, you can account for any irregularities in your walls.
For pocket sliding doors, keep in mind that the wall thickness is commonly designed for 24 (3.5 finished) or 26 (5.5 finished) framing, which affects the jamb depth needed.
Once you’ve got those measurements, matching them to your wall construction is key. This will help ensure that your new door fits perfectly without any gaps or the need for extra trim. Simple, right? Just take your time, and you’ll be set for a smooth installation!
Definition Of Jamb Depth
When you measure jamb depth, you’re determining the distance from the interior wall surface to the exterior wall surface where the door frame sits. This measurement guarantees the frame fits flush within the wall cavity, preventing gaps or misalignment during installation.
Typical jamb depths range between 3 3/8 inches and 6 5/8 inches, varying by wall thickness and door manufacturer. For example, Hirschmann Architectural Windows & Doors offers a standard jamb depth of 6 5/8″ (168 mm), which can also be milled to project dimensions.
Keep in mind, jamb depth differs from jamb thickness; the latter is the width of the door frame material itself. To get this right, remember:
- Measure perpendicular to the wall from interior to exterior surface.
- Check multiple points (top, middle, bottom) for consistency.
- Consider the wall’s framing size (2×4 or 2×6).
- Consult manufacturer specs for precise jamb depth requirements.
Measuring Jamb Thickness
Since jamb thickness determines how the door frame fits within your wall assembly, you’ll want to measure it carefully from the interior finished surface all the way to the exterior finished surface.
Place your tape measure tight against the interior drywall or casing and extend it straight to the exterior siding, brick, or stucco at the door frame edge.
Take measurements at both jambs and mid-height to spot any irregularities from bowed studs or uneven walls. Record the smallest consistent value to avoid ordering a jamb that’s too deep.
Be sure to exclude decorative trim or brickmould from your measurement, focusing on the true jamb face.
This guarantees your replacement frame matches your current finished wall thickness accurately for a snug fit. Also, confirming wall thickness is essential to match door/frame for a tight, secure fit.
Matching Wall Construction
Although measuring jamb thickness is essential, matching your sliding door frame to the wall construction guarantees a seamless fit and peak performance.
You need to assess the frame material—aluminum, timber, or uPVC—since each affects durability, energy efficiency, and maintenance. Aluminum frames, for example, offer sleek profiles and strong support for various glass thicknesses.
Barn sliders, which feature a top-hung, surface-mounted track, provide smooth gliding without the need for recessed floor tracks, making them an excellent choice for conserving space.
Also, consider the mounting system, top-hung or bottom-rolling, to make certain compatibility with your wall’s structure. Finally, trim and casing must integrate smoothly with your interior and exterior finishes.
- Choose frame material that complements wall durability and insulation.
- Verify mounting system aligns with wall and ceiling support.
- Measure wall cavity depth for pocket or stacking doors.
- Confirm trim style matches existing wall finishes for aesthetic harmony.
Identify Your Sliding Glass Door Panel Type
To identify your sliding glass door panel type, start by examining how many panels the door has and how they operate within the frame. A 2-panel door features one fixed panel and one sliding panel overlapping on a single track, common in standard patio doors.
If you see three panels, note whether one or two slide, often stacking to one side, typical for wider openings. Four-panel doors usually have two sliding center panels and two fixed outer panels, with the sliding panels meeting in the middle.
For multi-slide or telescoping doors, look for three or more narrow panels on multiple tracks that stack or pocket into walls, allowing very wide openings.
Most 4-panel sliding glass doors provide a wide, center-opening configuration that creates expansive access and ventilation. Observing these details ensures you correctly identify your door type before measuring or ordering replacements.
Record and Use Your Measurements for Ordering Sliding Doors
When ordering a replacement sliding glass door, accurately recording your measurements is essential to guarantee a proper fit.
Measure the smallest width and height from multiple points on the existing frame, noting each dimension to two decimal places or 1/16 inch.
Measure the smallest width and height at several points, recording dimensions precisely to two decimals or 1/16 inch.
Record width first, then height (W × H), and list frame opening width, height, and jamb depth separately. Remember to measure the width at the top, center, and bottom and circle the smallest measurement as the official width size width measurement procedure.
Use these practical steps:
- Write down each measurement clearly, avoiding mixing figures.
- Note obstructions or uneven openings to inform the supplier.
- Compare your numbers with manufacturer size charts, choosing the closest standard or custom size.
- Confirm jamb depth matches your wall thickness for a flush fit.
When Should You Hire a Professional to Measure?
If your sliding glass door opening shows signs of structural issues like sagging, bowing, or water damage, you should hire a professional to measure.
Also, call in an expert if your door involves complex configurations, custom sizes, or must meet strict building codes. Professionals guarantee precise measurements, avoiding costly mistakes.
Because there is no single standard size for sliding glass doors, professional measurement ensures the right fit for your specific opening.
| When to Hire a Pro | Why It Matters | Examples |
|---|---|---|
| Structural Concerns | Accurate sizing, safe installation | Sagging frame, water damage |
| Complex or Custom Doors | Proper fit, smooth operation | Multi-panel, pocketed systems |
| Code & Warranty Requirements | Compliance, warranty validity | Egress codes, impact zones |
Hiring a pro protects your investment and guarantees your new sliding door fits perfectly and functions safely.
Common Mistakes to Avoid When Measuring Sliding Doors
Although measuring a sliding glass door might seem straightforward, overlooking key details can lead to costly errors and poor fitting replacements. To avoid frustration and wasted money, watch out for these common mistakes:
- Measuring only the glass portion without including the frame, track, and threshold, which affects overall fit.
- Using external measurements instead of internal ones, ignoring wall thickness and installation space.
- Failing to measure width and height at multiple points, missing irregularities or variations. It is important to measure width and height at top, middle, and bottom to ensure accuracy.
- Neglecting to subtract clearance allowances for smooth door operation and proper framing.
Tips for Ensuring a Perfect Fit With Replacement Doors
Since precise measurements form the foundation of a well-fitting sliding glass door, you need to measure height and width at multiple points to capture any structural shifts or irregularities.
Take height at the left, center, and right sides; width at top, middle, and bottom. Add ¾ inch extra clearance to accommodate flashing, material thickness, and tape. This additional clearance provides necessary space for shimming, foam, and air sealing around the product.
Always verify frame straightness with a level, especially near the lock area, to avoid bowing. Check door tracks and rollers for smooth operation.
Consider ceiling height, ensuring the door won’t block fixtures or clash with moldings. Match door style and material with existing windows for architectural harmony.
If unsure, consult a professional to confirm measurements and door height to guarantee a perfect fit and seamless integration.
Frequently Asked Questions
Can I Reuse My Existing Sliding Door Hardware With the New Door?
You can reuse your existing sliding door hardware, but it hinges on several factors.
First, confirm brand, profile, and screw-hole spacing match the new door.
If your hardware shows wear, corrosion, or doesn’t meet current security standards, it’s best to replace it.
Measure carefully and check compatibility with the new door’s prep.
Pairing old parts with new wear components can be a smart move, but don’t cut corners on safety and function.
How Do Weather Conditions Affect Sliding Door Measurements?
Weather conditions can cause your sliding door frame and glass to expand or contract, slightly altering measurements.
Temperature fluctuations affect materials like aluminum, so you should measure during moderate weather to get accurate dimensions.
Also, in coastal or high-wind areas, reinforced frames might be thicker, impacting size.
Don’t forget to account for potential settling or shifting over time by leaving extra space in your rough opening measurements.
What Insulation Options Work Best With Replacement Sliding Doors?
You’ll want to choose vinyl or fiberglass frames for top insulation. They resist moisture and have high R-values.
Opt for triple-pane glass with Low-E coatings and argon gas fill to maximize thermal efficiency. Don’t forget high-quality weatherstripping and multi-point locks to seal gaps tightly.
Adding interior cellular shades or thermal curtains can boost insulation further. Properly sealing installation gaps with low-expansion foam prevents drafts. This ensures your sliding door stays energy-efficient year-round.
Are There Specific Codes for Sliding Door Egress Requirements?
Yes, you should know that sliding doors are generally restricted for egress unless occupant load is 10 or fewer.
Codes require at least 3 feet wide by 6 feet 8 inches high for egress doors, and they usually must swing outward, not slide.
If sliding doors are allowed, their locks must release easily without keys or tools, and the force to slide open can’t exceed 50 pounds.
Always check local code specifics.
How Do I Measure Sliding Doors in Older or Uneven Walls?
When measuring sliding doors in older or uneven walls, take multiple width and height measurements at bottom, middle, and top points, using the smallest dimensions for ordering.
Check plumb and level with a long level to spot any leaning or slope. Measure diagonals to detect racking. Account for wall thickness and floor conditions, noting any settling or uneven surfaces.
These steps help you plan for shimming and avoid installation issues.
Take the Guesswork Out of Sliding Glass Door Installation
Measuring your sliding glass door carefully can save you from costly mistakes. Did you know that 70% of replacement doors are returned due to incorrect measurements? By double-checking width, height, and frame depth, you’ll avoid delays and extra expenses.
If you’re unsure, don’t hesitate to hire a professional. Taking these steps guarantees your new door fits perfectly, looks great, and functions smoothly, giving you peace of mind and lasting value.