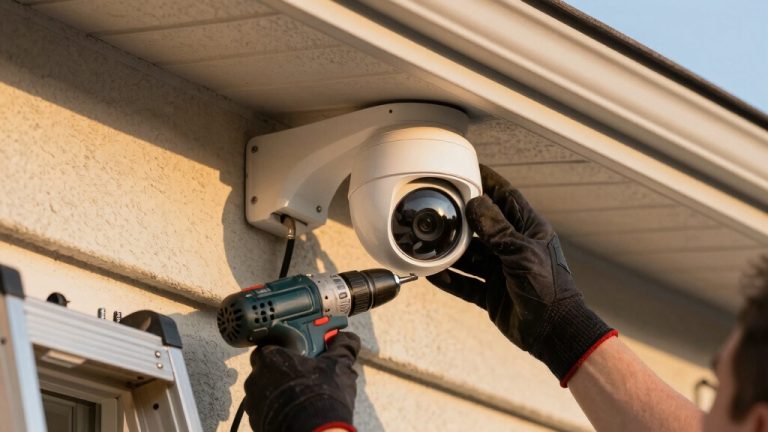
When your garage door opener acts slow, beeps, or the remote stops responding, it’s time to change the battery.
Start by unplugging the opener. Then remove the old battery, usually a CR2032 coin cell or a 12V backup battery, checking polarity and connections carefully.
Install the new battery, secure the compartment, and test the door’s operation from different distances.
Proper installation and testing keep your system reliable. Explore more tips to guarantee your opener’s battery lasts longer and works smoothly.
Key Takeaways
- Unplug the garage door opener before replacing the motor-unit backup battery for safety.
- Open the remote or motor unit battery compartment carefully, noting battery type and polarity.
- Replace old batteries with matching types, usually CR2032 for remotes or 12V alkaline for openers.
- Reconnect wires correctly, secure the compartment cover, and test the opener for proper functionality.
- Regularly inspect batteries every 6-12 months and replace promptly if beeping or LED indicators show faults.
How to Recognize When Your Garage Door Opener Battery Needs Replacing?
Although your garage door opener usually works silently in the background, you’ll know when its battery needs replacing because certain signs will become hard to miss.
Listen for beeping sounds coming from the motor unit or watch for a red LED indicator light flashing on the device.
Pay attention to beeping sounds or a flashing red LED on your garage door motor unit.
If your garage door fails to open or close properly, or if the remote control suddenly becomes unresponsive, these are strong indicators the battery is dying.
Additionally, if the battery can’t hold a charge during power outages, it’s time to act.
Staying alert to these signals helps you avoid inconvenience and guarantees your garage door operates smoothly without unexpected interruptions.
Replacing the battery promptly maintains reliable function and keeps your entryway secure.
Always remember to disconnect power by unplugging the opener before performing any battery replacement or maintenance to ensure electrical safety.
Types of Batteries Used in Garage Door Openers
Understanding the types of batteries used in garage door openers helps you choose the right replacement and maintain smooth operation. Garage door openers rely on different battery types depending on their design, especially between remotes and motor units. Knowing these types guarantees you pick the right battery and keep your system reliable.
Here are common battery types you’ll encounter:
- 3V lithium coin cells, often in remote controls
- CR2032 coin cells, the most popular remote battery type
- 12V alkaline batteries, used in some opener models
- Rechargeable backup batteries, built into motor units for power outages
Each type has unique characteristics like lifespan and voltage. Matching your opener’s requirements is essential for consistent performance. For example, the CR2032 battery provides a steady 3V output and long shelf life, making it ideal for remote controls with stable voltage requirements.
How Often to Replace Garage Door Opener Batteries by Type?
You should typically replace your garage door opener batteries every one to two years, but the exact timing depends on the battery type you’re using.
For remote controls with CR2032 lithium coin cells, expect to change batteries roughly every 12 to 18 months, as these last longer than alkaline types.
If your opener uses 12V alkaline batteries, plan replacements closer to the one-year mark since they drain faster.
Rechargeable backup batteries inside the motor unit need more frequent checks and may require replacement every 1 to 1.5 years, depending on usage and charging performance.
Lithium backup batteries generally outlast alkalines, so you might extend replacement to nearly two years.
Keep an eye on signs like dim LEDs or unresponsive remotes to time your battery changes effectively.
To ensure reliable operation and avoid premature failures, always use high-quality alkaline batteries recommended for your device.
Essential Tips for Proper Battery Installation in Garage Door Openers
When installing new batteries in your garage door opener, paying close attention to proper placement and polarity guarantees smooth operation and prevents damage. Always check the battery compartment for polarity markings before inserting new batteries.
Using the correct battery type, such as lithium or alkaline, assures compatibility and longevity. Avoid mixing old and new batteries to prevent leakage or power issues. Secure the battery compartment cover tightly to protect against dirt and moisture.
Align batteries according to positive (+) and negative (–) terminals shown inside the compartment. Use fresh batteries recommended by the manufacturer for your specific opener model.
Handle batteries with clean, dry hands to avoid corrosion or short circuits. Test the opener after installation to confirm functionality before closing the compartment fully. For best performance, consider how device current draw impacts battery life to ensure you choose the proper battery for your opener’s power needs.
How to Replace Remote Control Batteries?
Replacing the battery in your remote control is pretty simple!
First, you’ll want to find the battery compartment. This usually means sliding or unscrewing the cover—easy peasy, right?
Once you have it open, take out the old battery. Just be careful with it!
Pay attention to its size and type because you’ll need that info for picking up the right replacement.
Now, when you’re ready to pop in the new battery, make sure you look at the polarity markings. They’re super important for making sure everything lines up correctly.
After that, just close up the compartment and you’re good to go!
For wireless systems, it’s important to replace batteries regularly to ensure consistent operation and avoid power interruptions.
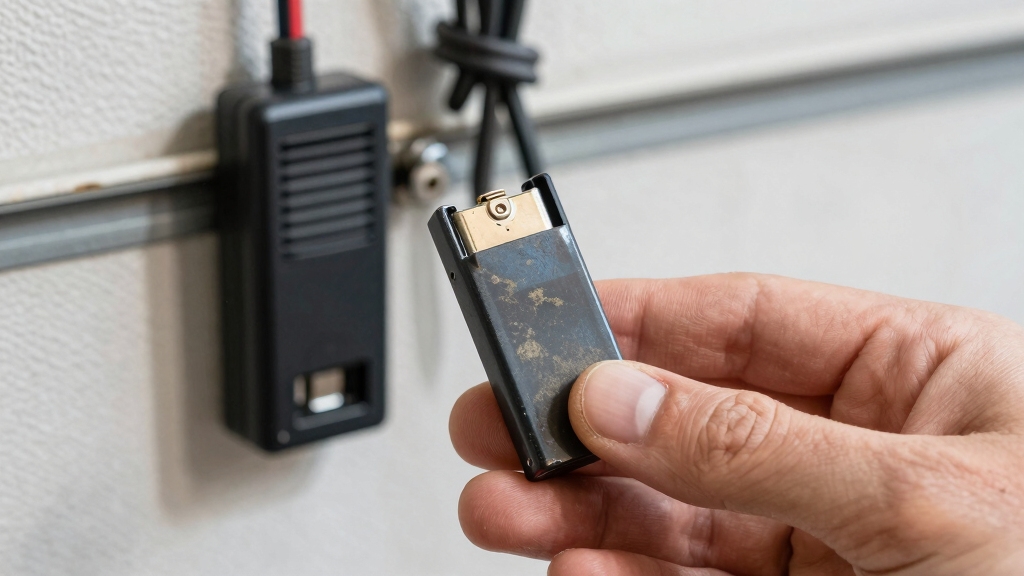
Battery Compartment Access
Start by locating the battery compartment on your garage door remote. It’s usually accessible by sliding or unscrewing a small cover on the back or side. You might need a small screwdriver or just your fingernail to open it.
Once open, you’ll see the battery inside, often a round coin cell. Handle the remote carefully to avoid damaging any internal parts.
Here’s what to expect when accessing the compartment:
- A sliding cover that moves easily with gentle pressure.
- A small screw securing the cover, requiring a precision screwdriver.
- A snug battery held in place by a clip or spring contact.
- A compact space just large enough for the battery size and type.
This step sets you up perfectly for replacing the battery. For optimal performance, ensure the remote’s rolling code technology compatibility when replacing batteries to maintain secure and reliable operation.
Correct Battery Installation
Carefully remove the old battery from the remote control, paying close attention to its orientation and type to ensure you install the new one correctly. Most remotes use CR2032 lithium coin cells, which have the positive (+) side facing up.
Align the new battery accordingly, matching polarity to avoid malfunction. After placing the battery, snap the compartment cover back securely.
Here’s a quick reference to help:
| Battery Type | Polarity Side Up | Common Use |
|---|---|---|
| CR2032 | Positive (+) | Remote Controls |
| 12V Alkaline | Positive (+) | Some Openers |
| Rechargeable | Follow Markings | Backup Batteries |
Double-check the fit and test the remote to ensure your garage door responds properly.
If your system experiences power interruptions, it may enter a compressor protection delay mode that can affect remote responsiveness temporarily.
How to Replace the Backup Battery in Your Garage Door Opener?
Begin by unplugging your garage door opener from its electrical power source to guarantee safety during the replacement process.
Next, locate and open the battery compartment, usually found behind a panel on the motor unit.
Carefully disconnect the red and black wires from the old battery terminals, noting their color correspondence.
Remove the old battery, replace it with a new one matching the original type, and reconnect the wires correctly.
Finally, secure the battery compartment cover.
Here’s a quick rundown:
- Unplug the opener for safety
- Open the battery compartment panel
- Disconnect wires and remove old battery
- Connect new battery wires and close compartment
This makes certain your backup battery is replaced safely and properly without risking damage or injury. To prevent power surges from damaging your opener’s circuitry, consider using surge protection devices during the replacement process.
How to Test Your Garage Door Opener After Battery Replacement?
After replacing the battery, you’ll want to verify that your garage door opener functions correctly by conducting a series of tests.
First, plug in the opener if you disconnected it during replacement. Press the remote control button to guarantee the garage door opens and closes smoothly.
Start by plugging in the opener and using the remote to ensure the door operates smoothly.
Observe the motor unit’s LED indicators; a solid orange light confirms it’s running on battery power, while a flashing green light signals charging.
Next, unplug the opener to test battery operation alone. The door should still respond without issues.
If the LED flashes orange, your battery might be low, but that’s for troubleshooting later.
Finally, repeat the remote control test from different distances to confirm consistent signal strength, guaranteeing your opener is fully operational after the battery swap.
For safety, always ensure the garage door sensors are functioning properly before regular use to avoid potential hazards related to sensor bypassing.
Troubleshooting Common Garage Door Opener Battery Issues
When your garage door opener shows signs of battery trouble, such as unresponsiveness or unusual beeping, you’ll want to troubleshoot the issue promptly to avoid inconvenience.
Start by checking the battery’s charge level and replacing it if it’s old or dead. Inspect the remote control’s battery compartment for corrosion or loose connections.
Also, verify the opener’s backup battery status, especially if it fails during power outages. Finally, confirm the LED indicators on the motor unit don’t signal low battery or faults.
- Remote doesn’t respond despite fresh batteries
- Opener emits beeping sounds or flashing LED lights
- Door fails to operate during power loss
- Battery compartment shows signs of damage or corrosion
Regular maintenance and timely replacement are essential to prevent reduced efficiency and ensure safe, reliable operation of your garage door opener.
How to Maintain and Extend the Life of Your Garage Door Opener Battery?
Regularly maintaining your garage door opener battery can markedly extend its lifespan and guarantee reliable performance.
Start by checking the battery compartment every six months for corrosion or dirt. Clean contacts gently with a dry cloth.
Check your battery compartment biannually for corrosion or dirt and gently clean contacts with a dry cloth.
Replace batteries promptly when you notice beeping sounds, dim LED indicators, or slow door response.
Use high-quality lithium batteries when possible, as they last longer than alkaline types.
If your opener has a rechargeable backup, confirm it charges fully by unplugging the unit occasionally to test battery operation.
Avoid exposing the battery to extreme temperatures, which can reduce efficiency.
Finally, keep remote controls’ coin cell batteries fresh by replacing them annually.
Following these steps helps you avoid unexpected failures and keeps your garage door opener working smoothly for years.
Frequently Asked Questions
Can I Use Rechargeable Batteries in My Garage Door Remote?
Yes, you can use rechargeable batteries in your garage door remote, but you need to choose the right type, usually rechargeable lithium-ion or NiMH batteries that match the remote’s voltage.
Make sure they fit properly and provide consistent power.
Keep in mind, rechargeable batteries might require more frequent charging than alkaline ones and may not last as long per charge.
Always test the remote after replacement to make certain it works smoothly.
What Should I Do if the Battery Compartment Is Stuck or Hard to Open?
When the battery compartment is stuck, don’t force it like a stubborn lock; instead, gently wiggle the cover while applying steady pressure.
Use a flathead screwdriver or a coin to carefully pry open any tight edges without damaging the remote.
If it remains resistant, warm the area slightly with a hairdryer to loosen adhesive or grime.
Always work patiently to avoid breaking the compartment or internal parts during the process.
Are There Specific Brands Recommended for Garage Door Opener Batteries?
You should go for reputable brands like Energizer, Duracell, and Panasonic when choosing garage door opener batteries.
These brands offer reliable lithium or alkaline batteries that last longer and provide consistent power.
For backup batteries, consider sealed lead-acid or lithium-ion types from trusted manufacturers like Mighty Max or ExpertPower.
Using quality batteries guarantees your garage door operates smoothly and reduces the chance of frequent replacements or malfunctions.
How Do Extreme Temperatures Affect Garage Door Opener Battery Performance?
Extreme temperatures can really impact your garage door opener battery’s performance.
Cold weather slows chemical reactions inside the battery, reducing its capacity and making it drain faster.
Heat can cause the battery to degrade quicker, shortening its lifespan.
To keep your battery reliable, avoid exposing it to severe temperature swings.
If you live in extreme climates, check and replace your battery more frequently to maintain consistent operation.
Can a Weak Battery Cause My Garage Door Opener to Lose Its Programming?
Yes, a weak battery can cause your garage door opener to lose its programming. When the battery’s low, it may not supply consistent power to the unit, leading to memory loss or malfunction.
This often happens during power outages when the backup battery fails. To prevent this, replace weak batteries promptly and test your opener regularly to ensure it holds settings correctly and responds well to remote commands.
Smooth Operation Starts with Simple Maintenance
Changing your garage door opener battery is as simple as swapping out a worn shoe for a new, comfortable pair.
By recognizing when your battery’s weak, choosing the right type, and installing it properly, you’ll keep your door operating smoothly.
Don’t forget to test it afterward and troubleshoot any issues promptly.
With regular maintenance, you’ll extend your battery’s life and avoid unexpected hassles, ensuring your garage opener stays reliable day after day.