To change your ADT alarm system battery, first disarm the system via the base or app to avoid alarms.
Use a Phillips screwdriver to remove the bottom panel, matching alignment marks to prevent damage.
Disconnect the old battery plug gently, lift the battery out, then install the official replacement ensuring correct polarity and secure connector fit.
Close the compartment firmly, then plug the base in to recharge.
If you want to confidently manage testing and troubleshooting, more detailed steps await.
Key Takeaways
- Disarm the ADT system completely via the base unit or ADT app to avoid accidental alarms before starting battery replacement.
- Flip the base unit upside down, then remove the battery compartment cover by twisting or unscrewing it according to your model.
- Carefully disconnect the old battery plug without twisting, then lift out the battery and inspect connector pins for damage or debris.
- Insert the new ADT-approved battery, align the plug properly, and ensure a flush, snug fit without forcing the connection.
- Reattach the cover, secure screws or twist-lock, plug in the base unit, and allow 48 hours for the backup battery to fully recharge.
Disarm and Prepare Your ADT System for Battery Replacement
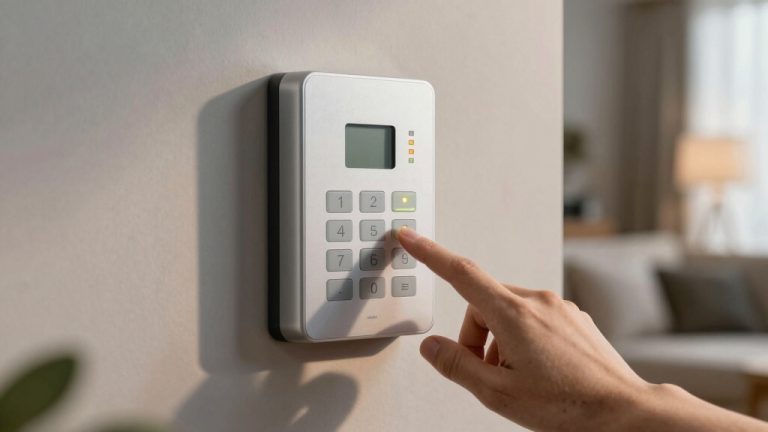
Before you begin replacing the battery in your ADT alarm system, make sure to disarm the system either at the base unit or through the ADT app to prevent accidental alarms.
Once disarmed, silence any low-battery alerts by pressing OFF on the control panel. This guarantees you won’t be disturbed during replacement.
Confirm that you obtained the correct replacement battery directly from ADT for compatibility. If your system experienced a power outage recently, wait at least 48 hours to verify if the backup battery requires replacement, as it may recharge fully.
By following these steps, you minimize risks of false alarms and guarantee you’re ready for a smooth battery replacement process.
Maintain safety and system integrity through this precise preparation before accessing the battery compartment.
Regular maintenance, including timely battery replacement, is essential to ensure reliable operation and prevent nuisance low-battery alerts.
Gather Your Tools and Materials for ADT Battery Replacement
To get started on replacing your ADT alarm battery, gather the necessary tools and materials to guarantee a smooth and efficient process.
First, have a Phillips head screwdriver ready, as some ADT base models require it to access the battery compartment.
Have a Phillips head screwdriver handy, since some ADT models need it to open the battery compartment.
Obtain an official replacement backup battery pack directly from ADT by calling 800-ADT-ASAP to confirm compatibility and performance.
Before proceeding, disarm your system at the base or through the ADT app to avoid triggering the alarm.
You may also want to have a clean workspace with good lighting to prevent mishandling small components.
Finally, keep a note of your battery model and serial number for reference during reassembly and future replacements.
Being methodical at this stage prevents errors and damage.
Remember that maintaining a reliable battery backup is essential for uninterrupted alarm functionality during power outages.
Open the Battery Compartment on Your ADT Base
To open the battery compartment on your ADT base, start by flipping it upside down.
You’ll find the battery compartment at the bottom.
Depending on your specific model, you’ll either need to twist the bottom panel counterclockwise or unscrew it.
Just a quick tip: keep an eye on the alignment marks on both the cover and the base.
This will help you make sure everything lines up perfectly when you put it back together.
Most ADT systems use sealed 10-year lithium batteries to minimize maintenance and ensure long-lasting power.
Locate Battery Compartment
Flip your ADT base upside down to gain access to the battery compartment located on the bottom.
The compartment’s position varies by model but is always on the base’s underside for easy access. Some models have a panel secured by a screw, while others feature a twist-lock mechanism.
Locate alignment marks to guarantee proper repositioning after battery replacement.
| Model | Battery Compartment Type |
|---|---|
| S501R0-01 | Twist-lock bottom panel |
| ADTBASE502R0 | Screw-secured panel |
| Common Feature | Alignment marks for reassembly |
| Access Point | Bottom side of base |
| Tools Needed | Phillips screwdriver (if required) |
Using fresh, high-quality batteries is important to ensure consistent performance and avoid premature low battery warnings, similar to recommendations for battery maintenance in other systems.
Remove Bottom Panel
You’ll need to carefully undo the bottom panel securing the battery compartment on your ADT base.
First, turn the base upside down to access the panel. Depending on your model, you may have to either push and twist the panel counterclockwise or remove a securing screw using a Phillips head screwdriver.
Apply steady pressure to avoid damaging the panel or locking mechanism. Once loosened, gently lift the bottom panel away from the base to expose the battery compartment.
Handle the panel carefully to prevent cracking or breaking the plastic clips. Make sure you keep any screws or small parts safely aside for reassembly.
This step provides direct access to the battery housing, preparing you for the next phase of battery replacement. Because many security sensors rely on mechanical reed switches that draw no power, maintaining battery health in your base is crucial for overall system reliability.
Identify Alignment Marks
Alignment marks serve as essential guides to guarantee the battery compartment cover fits correctly on your ADT base.
Once you remove the bottom panel, locate the vertical alignment marks etched on both the battery compartment cover and the base housing.
These marks indicate the precise orientation required for proper reassembly.
Carefully align the marks by matching them visually before attempting to replace the cover.
This step makes certain the cover seats securely, preventing gaps that could expose internal components or compromise the seal.
Misalignment may cause operational issues or damage the locking mechanism.
Take note that different ADT models may have varying mark positions, so always verify your base’s specific markings.
Following this alignment procedure methodically sets the foundation for secure closure and peak system performance.
For optimal system function, it’s important to verify and reset the clock after replacing the battery to ensure accurate timekeeping.
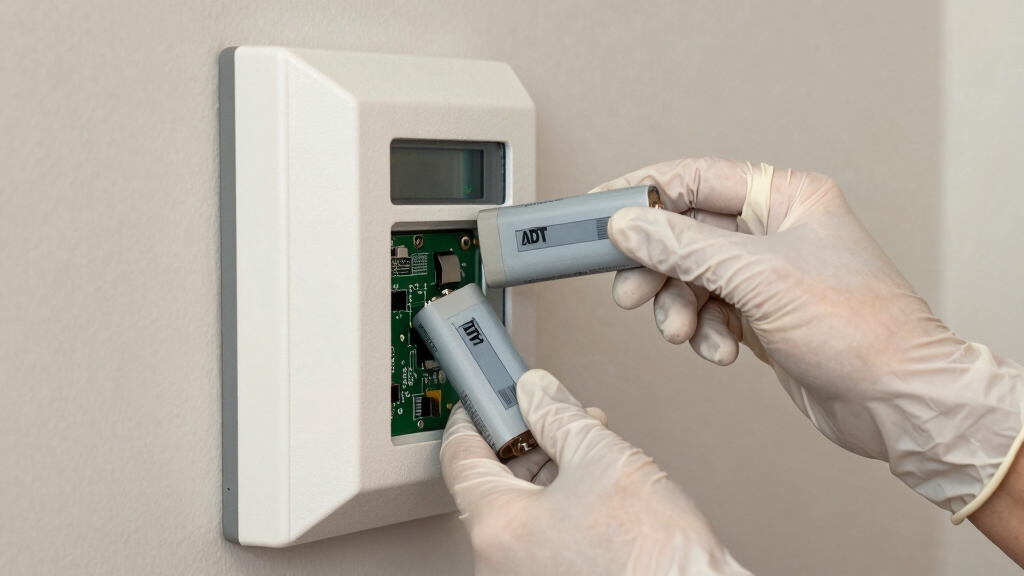
Remove the Old Battery Safely From Your ADT Base
Before lifting the old battery out of the compartment, make sure to carefully disconnect the battery plug from its connector.
Grip the connector gently, avoiding excessive force or twisting to prevent damaging the pins or wiring.
Once disconnected, lift the battery straight out of its housing, ensuring you don’t snag the connector cable.
Handle the battery with care, as rough handling can deform the housing or compromise the connector integrity.
Note the battery type and model for appropriate recycling. Use services like Call2Recycle.org to dispose of the battery responsibly.
Keep the battery compartment clear of debris or corrosion before proceeding.
Following these precise steps guarantees you remove the old battery safely without harming the base or connector assembly.
Always verify the exact battery type and size before replacing to maintain optimal performance and compatibility.
Install and Connect the New ADT Battery Correctly
First, go ahead and place the new battery into the compartment. Make sure it’s aligned properly so that the connector fits just right. You want to avoid any misalignment that could potentially damage the pins.
Once you’ve got that sorted, gently but firmly insert the battery plug. It should slot in without too much force.
After you’ve connected everything, take a moment to manage the cables. Just press them down slightly to ensure they don’t get in the way of the battery cover.
To ensure optimal performance, always install the battery with the correct polarity as indicated on the device.
Proper Battery Alignment
Make certain the new battery fits snugly in the compartment with the connector properly oriented before attempting to connect it. Carefully align the battery with the compartment guides to prevent stress on the connector pins. Misalignment can cause improper seating, risking intermittent power loss or damage.
Use the following table to verify alignment details:
| Aspect | Correct Alignment | Incorrect Alignment |
|---|---|---|
| Battery Position | Flush with compartment base | Tilted or raised |
| Connector Orientation | Matches compartment connector shape | Opposite or rotated |
| Cable Routing | Cables lie flat without tension | Cables kinked or pinched |
Ensuring these points prevents damage and guarantees reliable operation prior to connector plug insertion. It is important to use cables with proper insulation ratings to minimize risks of electrical hazards during battery replacement.
Connector Plug Insertion
Aligning the battery properly in the compartment sets the stage for a secure connection.
Once positioned, take the connector plug attached to the battery cable and carefully insert it into the matching socket on the base unit.
Make certain the plug’s shape and orientation match the connector to avoid bending pins or damaging contacts.
The plug should slide in smoothly without excessive force; if it resists, double-check alignment.
Confirm the plug is fully seated to guarantee uninterrupted power flow. Avoid twisting or forcing the connection, as this may cause permanent damage.
After insertion, inspect the connection visually to make sure of a flush fit with no gaps.
This precise, methodical approach assures reliable battery performance and maintains system integrity.
Proper handling of the battery connection is essential as it acts like a load wire ensuring continuous power delivery within the system.
Cable Management Tips
Effective cable routing guarantees a neat installation and prevents interference with the battery compartment closure.
After you connect the new battery plug, carefully push the cable down to sit flush within the compartment, avoiding any sharp bends or pinching.
Make certain the cable runs along the designated channel or side guides inside the base to maintain proper alignment.
Avoid excessive slack that could obstruct panel placement or cause connector strain.
Once positioned, verify the cable doesn’t prevent the bottom cover from seating fully.
Proper cable management not only ensures a secure fit but also protects the connector pins from damage during closure.
Confirm the compartment closes smoothly without resistance or gaps, then secure the panel as instructed to maintain system integrity and prevent operational issues.
Secure the Battery Compartment After Replacement
Once you’ve positioned the new battery correctly, secure the access panel by matching the vertical alignment marks on the cover and the base.
Press the panel firmly, then twist clockwise to lock it into place, or reattach the screw for models that require it.
Make certain the panel fits snugly to prevent dust or moisture ingress that could impair function.
| Action | Result |
|---|---|
| Align vertical marks | Proper fit and seal |
| Press panel firmly | Prevents loose parts |
| Twist clockwise | Locks compartment securely |
| Tighten screws | Maintains structural integrity |
| Confirm snug closure | Protects electronics |
Completing these steps guarantees your ADT alarm’s battery compartment remains secure and operational.
Recharge and Test Your ADT Alarm Battery Backup
Plug your ADT alarm base back into the electrical outlet to initiate the battery recharge process. Allow the system to complete its power-up sequence, which confirms the battery is correctly installed and charging.
For peak performance, let the battery recharge uninterrupted for at least 48 hours. During this time, monitor the system display or app for any low battery alerts or error messages.
Test the backup battery by temporarily disconnecting the main power source; the system should continue operating without interruption. If the alarm remains fully functional on battery power alone, the replacement was successful.
Avoid powering down the system during this recharge phase to prevent false alerts. This methodical approach guarantees your ADT alarm maintains reliable backup power and continuous security coverage.
Troubleshoot Common ADT Battery Replacement Issues
When you run into issues after replacing your ADT alarm battery, it’s important to methodically identify and resolve common problems to restore full system functionality.
First, verify the battery is compatible and properly connected; misalignment or loose plugs often cause power failures.
Check that the battery compartment is securely closed, ensuring the cover’s vertical marks align and any screws are tightened to prevent poor contact.
If the alarm continues beeping, confirm the system was fully disarmed before replacement and allow time for battery recharge if recently powered down.
Inspect the connector pins for damage or debris, which can interrupt power flow.
Finally, reboot the system by unplugging and reconnecting the base to initiate a fresh power-up sequence, confirming the new battery is recognized and functioning correctly.
Find Official ADT Battery Replacement Support
Where can you find reliable and compatible replacement batteries for your ADT alarm system? The best source is always official ADT channels to assure compatibility and maintain system integrity.
Follow these steps:
- Contact ADT Support Directly: Call 800-ADT-ASAP for verified replacement batteries tailored to your model. This minimizes the risk of damage or malfunction.
- Use the MyADT Website: Access the battery identification page on MyADT.com to confirm part numbers. Order genuine batteries online with confidence.
- Consult the ADT Help Center: Review model-specific battery replacement guides and troubleshooting instructions. This helps verify compatibility and proper installation steps.
Relying on official ADT resources guarantees that you receive batteries meeting exact technical specifications.
This preserves system reliability and safety. Avoid third-party batteries that may lead to operational failures or void warranties.
Frequently Asked Questions
How Long Does the ADT Battery Typically Last Before Needing Replacement?
The ADT alarm system battery typically lasts between 3 to 5 years before needing replacement.
You should monitor your system for low-battery alerts or beeping, which indicate it’s time for a new battery.
After a power outage, allow 48 hours for the battery to recharge fully before deciding to replace it.
Regular maintenance and using genuine ADT batteries guarantee peak performance and longevity of your backup power source.
Can I Use Third-Party Batteries in My ADT Alarm System?
You shouldn’t use third-party batteries in your ADT alarm system because compatibility and safety aren’t guaranteed.
ADT recommends obtaining replacement backup battery packs directly from them to ensure proper fit and function.
Using non-approved batteries may cause system malfunctions or void your warranty.
For precise compatibility, check MyADT.com’s battery identification page.
Always prioritize genuine ADT batteries to maintain system reliability and avoid operational issues during power cycles.
What Are the Signs My ADT Alarm Battery Is Failing Besides Beeping?
You mightn’t hear the beeping yet, but subtle signs hint the battery’s failing.
Your system could behave erratically, with random false alarms or delayed responses.
The keypad display might dim or flicker intermittently.
If your ADT base struggles to power sensors or smoke detectors consistently, that’s a red flag.
Monitoring these indicators carefully lets you act before a complete power loss disrupts your security system’s function.
How Do I Properly Recycle My Old ADT Alarm Battery?
You should never toss your old ADT alarm battery in regular trash.
Instead, disconnect it carefully and take it to a certified recycling center like Call2Recycle.org.
These facilities handle battery components safely, preventing environmental harm.
Before you drop it off, make certain it’s properly insulated to avoid short circuits.
Recycling your battery this way complies with hazardous waste regulations and supports responsible resource recovery.
Will Replacing the Battery Void My ADT System Warranty?
Replacing the battery yourself typically won’t void your ADT system warranty, provided you use an official ADT replacement battery and follow proper installation procedures.
Using incompatible batteries or improper handling might cause damage, potentially affecting warranty coverage.
Always verify battery compatibility through MyADT.com and handle components carefully.
If unsure, contact ADT support to avoid risking your warranty.
Document your replacement to maintain proof of proper maintenance.
Keep Your System Secure with Proper Battery Care
Now that you’ve reconnected the new battery and secured the compartment, the moment of truth arrives.
Power up your ADT system and watch the indicators flicker to life. Each light confirms your success.
If everything runs smoothly, you’ve restored critical protection without a hitch.
But if warnings persist, don’t hesitate to revisit your steps or consult official support.
Your vigilance guarantees your home stays secure, powered, and ready for whatever comes next.