To reset your Nest Smoke Alarm, firmly press and hold its center button until it chimes, glows blue, and announces the version number. Keep holding the button through the 10-second verbal countdown saying “erasing all settings.”
Release only when it restarts and says “Ready press to test.” This reset clears all settings and requires physical action on each unit, as it can’t be done via the app.
Keep following for details on safe access, troubleshooting, and reconnecting your device.
Key Takeaways
- Press and hold the center button firmly until the device chimes, glows blue, and announces the version number.
- Maintain continuous pressure on the button through the 10-second verbal countdown stating “erasing all settings.”
- Release the button only after the Nest Protect restarts and says “Ready press to test.”
- Reset must be done physically at each unit; it cannot be performed through the Nest app.
- Use a sturdy tool if needed to apply steady pressure safely, especially for ceiling-mounted units.
How to Reset Your Nest Protect Smoke Alarm?

To reset your Nest Protect smoke alarm, you’ll need to physically access the device and press its center button firmly until it chimes and glows blue. Use a long pole or broomstick if the unit is mounted high.
Hold the button continuously without releasing pressure; the device will verbally confirm activation by announcing its version number. Next, a countdown sequence begins, during which the device states “erasing all settings.”
Maintain steady pressure on the button throughout this 10-second timer to complete the reset. Once finished, the Nest Protect restarts automatically and announces “Ready press to test,” indicating a successful factory reset.
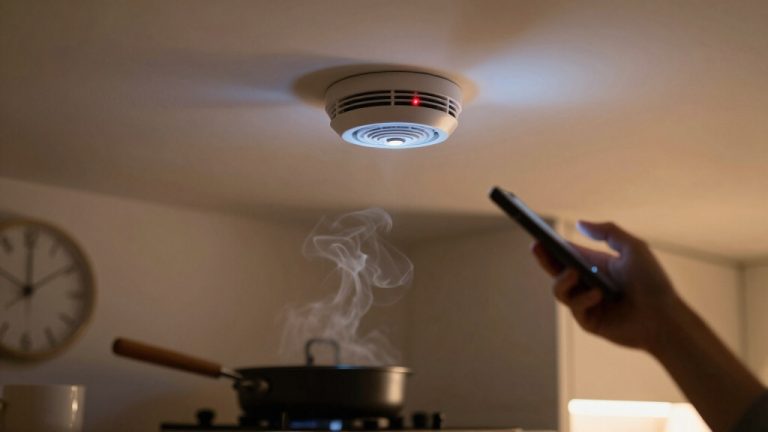
Remember that Nest Protect smoke alarms include battery backups to ensure continuous operation even during power outages.
Tools and Preparation Needed for Reset
Before you begin the reset process for your Nest Protect, gathering the right tools and preparing adequately will make the task smoother and safer.
You’ll need a sturdy long pole or broomstick to reach the ceiling-mounted device comfortably without a ladder. Make sure the tool allows you to apply firm, continuous pressure on the center button, as the reset requires holding it down throughout the sequence.
Remember, resets can’t be performed via the Nest app; you must physically interact with each unit individually. Prepare to maintain steady pressure for the entire countdown and guarantee the area beneath is safe in case of any unexpected device movement.
Having these tools and readiness will streamline the reset and protect your safety during the process. Additionally, understanding the interconnection feature of hardwired systems can help you anticipate how multiple alarms may respond during a reset.
Safely Accessing Your Ceiling-Mounted Nest Protect
If you need to access your ceiling-mounted Nest Protect, the best way to do it safely is by using a long pole or broomstick. This way, you can reach the device without putting yourself at risk of a fall.
When you’re ready to reset it, just make sure you have a good grip so you can press and hold the center button without any issues. And remember, climbing on wobbly surfaces is a no-go.
Your safety comes first, so always prioritize stable and secure access! Regular maintenance and inspections, similar to those recommended for safety devices, help ensure your Nest Protect continues to function properly.
Using Long Pole
Grab a long pole or broomstick to safely reach your ceiling-mounted Nest Protect without straining on a ladder. This tool allows you to apply firm, steady pressure to the center button, which is essential for initiating the reset sequence.
Position the pole’s end directly over the button, then press and hold without releasing. Maintain constant pressure throughout the entire reset countdown to make sure the device responds properly. Using a long pole prevents unnecessary risk while providing adequate control.
Before performing any reset, ensure the device is disconnected from power or its battery is removed to avoid any electrical hazard during the process.
Ensuring Safe Access
Although resetting your Nest Protect requires physical access, you can guarantee safety by using proper tools and techniques to reach the ceiling-mounted device.
Use a sturdy ladder or a long, stable pole like a broomstick to avoid overstretching or balancing hazards.
Make sure the area below is clear to prevent accidents if you drop the device or tools.
Always position yourself securely, maintaining three points of contact if climbing a ladder, and avoid sudden movements.
If you use a pole to press the button, make certain it’s firm enough to apply constant pressure without slipping.
Taking these precautions helps you safely access the Nest Protect, allowing you to reset it without risking injury or damaging the device.
Safety comes first when working with ceiling-mounted units.
Before beginning, ensure you disconnect power to prevent accidental activation or electrical hazards related to wiring inspection.
How to Press the Reset Button on Nest Protect?
Reach up and firmly press the center button on your Nest Protect using a long pole or broomstick to avoid strain. This secures safe access without needing a ladder.
Use a broomstick to press the Nest Protect center button safely without climbing a ladder.
Hold the button continuously until the device chimes and glows blue, confirming the reset process has started. You’ll hear a verbal version number announcement, signaling proper engagement.
Maintain steady pressure during this initial phase to avoid interruption.
Use a broomstick or pole for safe, comfortable reach. Press the center button firmly and hold it down.
Wait for the blue glow and chime as confirmation. Listen for the spoken version number before proceeding.
Keep holding the button without releasing pressure until next steps. This precise method guarantees your reset command registers correctly.
If the alarm continues to beep after resetting, check for loose wiring or sensor damage that may require further inspection.
What to Expect During the Reset Countdown?
When you hold the button to reset your Nest Protect, it’ll start a clear verbal countdown to guide you through the process.
Just remember to keep pressing firmly during this time.
But don’t worry! If you change your mind, you can easily cancel the reset by either releasing the button or pressing it again.
This way, you’re in control until everything’s wrapped up.
Regularly testing your alarm using the built-in test button helps confirm sensor and battery function to prevent malfunctions.
Verbal Countdown Guidance
As you hold down the center button on your Nest Protect, the device kicks off a verbal countdown that guides you through the reset process.
This audio feedback keeps you informed and reassured that the reset is proceeding correctly.
You’ll hear the device announce it’s “erasing all settings” while counting down for about 10 seconds.
It’s vital to maintain firm pressure on the button during this entire period to guarantee the reset completes successfully.
The countdown’s clear verbal cues let you anticipate each stage, making the process straightforward.
Expect to hear:
- A version number confirmation at the start
- “Erasing all settings” notification
- A continuous countdown from 10 seconds
- Clear voice prompts guiding you
- A final message indicating reset completion
If your Nest smoke alarm continues beeping after reset, consider checking the battery status as low batteries are a common cause of persistent chirping.
Countdown Cancellation Option
You can back out of the reset countdown at any time by pressing the center button again.
During the reset sequence, Nest Protect verbally announces a 10-second countdown while stating “erasing all settings.” You must maintain firm pressure on the button throughout this countdown.
If you decide not to proceed, simply press the button once more to cancel the reset immediately. The device will stop the countdown and revert to its prior state without erasing your settings. This cancellation option provides a vital way to avoid unintended resets.
Regularly testing your smoke detector is essential to ensure proper operation and avoid false alarms related to battery replacement.
Continuous Button Press
Canceling the reset countdown is one way to maintain control, but keeping the button pressed continuously throughout the countdown is what actually completes the reset process. When you hold the button down, the Nest Smoke Alarm verbally guides you through the reset sequence, confirming each step.
You must apply firm, uninterrupted pressure on the center button for the entire countdown, which lasts about 10 seconds. Releasing the button early cancels the reset, so maintain steady contact until the device confirms successful reset.
During the continuous button press, expect the following:
- Verbal countdown and status updates from the alarm
- Confirmation of “erasing all settings” message
- Device chimes and glows blue at start
- No interruption allowed until countdown ends
- Automatic restart with factory default settings afterward
For safe handling and to avoid damage during maintenance, always use a soft cloth or dry towel when interacting with your device.
How to Know When the Reset Is Complete?
Once the Nest Protect finishes its verbal countdown and restarts automatically, you’ll know the reset is complete when it announces, “Ready press to test.”
This message confirms that the device has erased all previous settings and returned to its factory default state. At this point, the device is fully reset and ready for reconfiguration.
| Indicator | Meaning |
|---|---|
| “Ready press to test” message | Reset complete, device ready |
| Automatic device restart | Reset process ended successfully |
| Absence of error sounds | No issues during reset |
Listen carefully for these signs to make certain your Nest Protect has reset properly before proceeding.
What Happens to Nest Protect Settings After Reset?
After the Nest Protect completes its reset and displays the “Ready press to test” message, all your previous settings will have been erased.
This means the device returns to its factory default state, requiring you to set it up again from scratch.
Your personalized configurations, including Wi-Fi connection and notification preferences, won’t be retained.
However, the device’s core safety functions, like smoke and carbon monoxide detection, remain fully operational throughout and after the reset.
Here’s what happens to your Nest Protect settings after reset:
All user data and network settings are deleted.
Device returns to factory default configuration.
Smoke and CO detection remain active and unaffected.
You must re-enroll the device in the Nest app.
Previous alerts, schedules, and preferences are removed.
What to Do If the Reset Process Doesn’t Work?
If your Nest Protect doesn’t reset as expected, you should first make sure you’re applying firm, continuous pressure on the center button using a suitable tool like a broom handle.
Make sure you hold the button without releasing it until the device chimes, glows blue, and announces the version number. If it still doesn’t respond, check that the device is properly powered.
Hold the button firmly until the device chimes, glows blue, and states the version number before troubleshooting power.
Replace batteries if needed or verify wired connections. Also, ensure you’re not interrupting the 10-second countdown by releasing the button prematurely.
If these steps fail, physically remove the device from its backplate and inspect for debris or damage that might prevent button engagement.
Persistent issues might require contacting Nest supportingor considering a replacement, as an unresponsive Nest Protect could compromise your home’s safety.
How to Reconnect Your Nest Protect to the App?
Should you successfully reset your Nest Protect, the next step involves reconnecting it to the Nest app to restore full functionality. You’ll need to physically access the device to retrieve the QR code on its back, as this is essential for pairing.
After removing the Protect from its backplate, open the Nest app to begin the setup process anew. Follow the app’s prompts carefully to scan the QR code and enter any required security information. This re-enrollment is vital because the reset erased all previous settings.
Remove Nest Protect from backplate to access QR code.
Open Nest app and start new device setup.
Scan QR code located on device back.
Enter security code if prompted.
Complete app-guided configuration for full functionality.
When and Why You Should Factory Reset Your Nest Protect?
Although your Nest Protect functions continuously to safeguard your home, there are specific circumstances when performing a factory reset becomes necessary. You should reset when moving to a new home, transferring ownership, or troubleshooting persistent issues that app reconnection can’t fix.
Resetting wipes all settings, returning the device to factory defaults. You must reconfigure it through the Nest app afterward.
| When to Reset | Why Reset |
|---|---|
| Moving or selling your home | Clears personal data |
| Device malfunction persists | Resolves software glitches |
| Preparing for new setup | Guarantees clean configuration |
Factory reset keeps detection fully operational, maintaining safety throughout the process.
Frequently Asked Questions
Can I Reset Multiple Nest Protect Devices Simultaneously?
Oh, wouldn’t it be grand if you could just wave a magic wand and reset all your Nest Protect devices at once? Unfortunately, you can’t.
You have to reset each device individually by physically accessing it and holding down its button through the entire reset sequence.
It’s a hands-on process, no shortcuts or app tricks. So, get ready to tackle each unit one by one, ensuring a thorough and proper factory reset every time.
Does Resetting Affect Nest Protect’s Battery Life?
Resetting your Nest Protect doesn’t affect its battery life. The process only clears settings and returns the device to factory defaults; it doesn’t drain the battery markedly.
Your smoke and carbon monoxide detection stay fully operational throughout, so the battery continues powering essential functions. You can reset without worrying about battery degradation.
However, keep monitoring battery status regularly to guarantee your device stays reliable and ready to protect you.
Will Resetting Nest Protect Delete Alarm Event History?
Think of resetting Nest Protect like wiping a chalkboard clean. It erases all the previous marks.
Yes, resetting your Nest Protect will delete all alarm event history stored on the device. You won’t be able to retrieve past alerts or notifications after the reset.
This process restores the device to factory settings, so you’ll start fresh, losing all previously recorded alarm events permanently. Keep that in mind before you reset.
Is a Factory Reset Necessary for Software Updates?
No, you don’t need a factory reset for software updates on your Nest Protect.
The device updates automatically over Wi-Fi in the background, keeping its firmware current without any action from you.
Factory resetting wipes all settings and is only necessary for troubleshooting or ownership changes.
So, unless you’re transferring or experiencing issues, just let the updates install themselves.
Your smoke and CO detection will stay uninterrupted.
Can a Nest Protect Reset Cause False Alarms?
You might expect a reset to trigger false alarms, but it won’t. While you hold the button and hear countdowns, the Nest Protect keeps detecting smoke and carbon monoxide normally.
The reset erases settings without causing false alerts. However, if real smoke or CO is present during reset, the alarm will sound as it should. This ensures your safety remains uncompromised throughout the process.
Fix Issues Fast by Resetting Your Nest Smoke Alarm Properly
Resetting your Nest Protect might seem like a hassle, but it’s actually quick and straightforward.
While a simple reset clears temporary issues, a factory reset wipes all settings, so use it only when necessary.
Don’t let minor glitches turn into major problems; act promptly to keep your home safe.
With clear steps and the right approach, you’ll have your Nest Protect back online and reliable in no time.