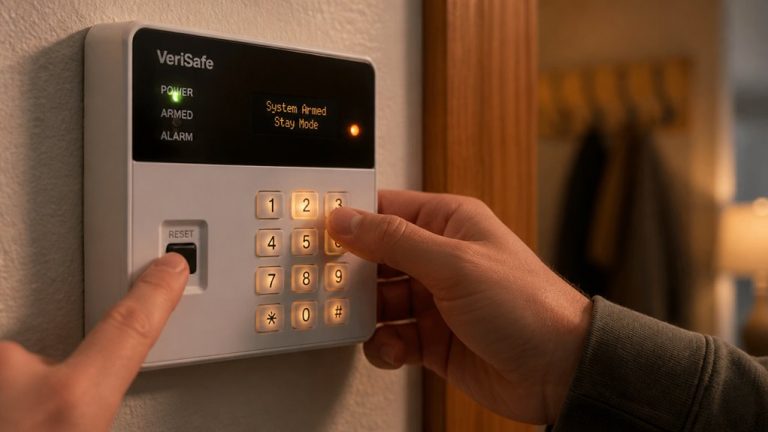
To test your hardwired smoke detector, first verify the steady green LED confirms AC power is on. Press and hold the test button for at least five seconds to activate the alarm’s circuitry, horn, and backup battery.
Listen for a loud, continuous alarm; if it’s weak or absent, replace batteries or the unit. For interconnected systems, all alarms should sound simultaneously.
Regular monthly tests guarantee reliable protection. Continuing will guide you through detailed maintenance and troubleshooting steps.
Key Takeaways
- Confirm the detector has steady green LED indicating AC power before testing.
- Press and hold the Test/Hush button for at least five seconds to activate the alarm and circuitry.
- Verify all interconnected alarms sound simultaneously to ensure network functionality.
- Listen for a loud, continuous alarm; weak or absent sound indicates battery or unit replacement.
- Reset the alarm after testing and conduct monthly tests to maintain backup battery reliability.
How to Identify a Hardwired Smoke Detector
When you need to determine whether a smoke detector is hardwired, start by checking for a steady green LED light, which indicates the unit is receiving AC power.
Begin by looking for a steady green LED, signaling the smoke detector is powered by AC electricity.
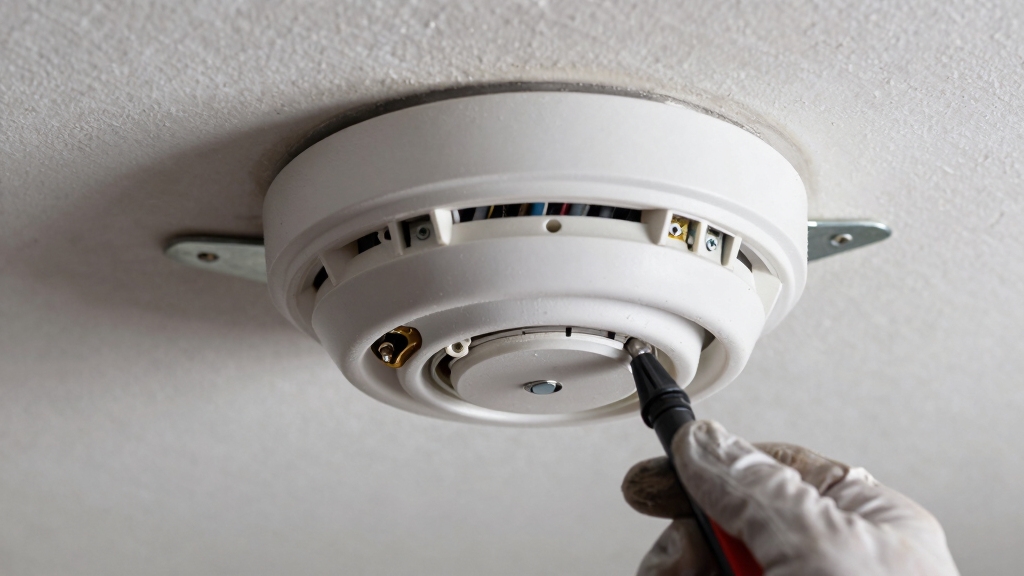
Next, inspect the detector’s base or ceiling mount for wiring connections; hardwired units have electrical wires connected directly to the back.
Remove the batteries temporarily; if the detector continues to operate, it confirms a hardwired system with battery backup.
Additionally, listen for simultaneous alarms throughout the home, which signals an interconnected hardwired network.
Observe the LED indicators: a flashing red light alongside the green power LED denotes normal operation.
It is important to understand that hardwired smoke detectors require a battery backup to ensure continuous operation during power outages.
How to Test Your Hardwired Smoke Detector?
To test your hardwired smoke detector, start by making sure it’s getting AC power. Just check for a steady green LED light and look over the wired connections. If everything looks good there, you’re off to a great start!
Next, go ahead and press and hold the test button for at least five seconds. This will help you verify that the alarm’s circuitry, horn, and battery backup are all working properly.
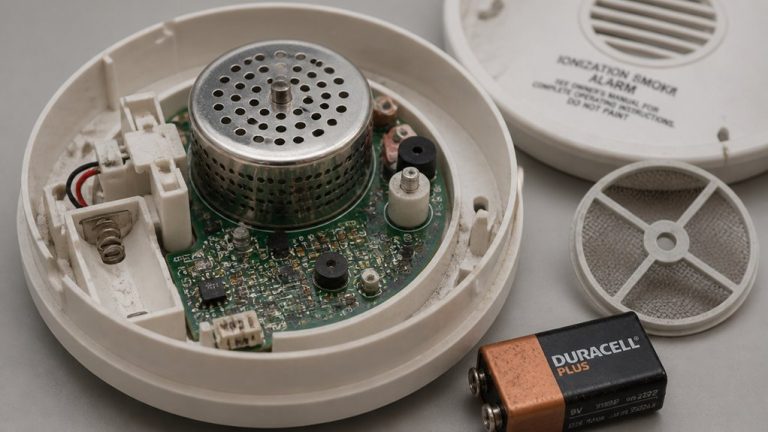
Oh, and don’t forget about the backup batteries! It’s a good idea to replace them every six months. Keep an ear out for any chirping sounds, as that could mean the batteries are running low.
Regular maintenance will ensure your smoke detector is always ready to keep you safe!
For best results, make sure your hardwired detector is connected to a dedicated 120V circuit to guarantee continuous power and reliable operation.
Identifying Hardwired Units
Start by examining the smoke detector’s LED indicators and wiring connections to confirm it’s hardwired. Look for a steady green LED light, which signifies receipt of AC power.
Next, inspect the back or ceiling for visible wiring; hardwired units connect directly to your home’s electrical system. Remove the batteries temporarily. If the unit remains operational, it confirms a hardwired setup with battery backup.
Additionally, activate one alarm to check if interconnected units sound simultaneously, indicating a networked hardwired system. Note that a flashing red light alongside the green LED signals normal operation.
These precise steps help you methodically distinguish hardwired smoke detectors from battery-only models, ensuring accurate identification before proceeding to functional testing.
For continuous operation during power outages, many hardwired smoke detectors include a backup battery system that automatically activates when mains power fails.
Performing Standard Test
Press and hold the Test or Hush button on your hardwired smoke detector for at least five seconds to initiate the standard test. This activates the electronic circuitry, horn, and battery, producing a loud, ear-piercing siren.
If your system is interconnected, all alarms should sound simultaneously, confirming network integrity. On smoke-only models, the alarm will cease immediately upon button release.
Observe the steady green LED to verify AC power during the test. If any unit fails to sound or sounds weak, replace batteries or the alarm as needed.
Conduct the test in a controlled manner, ensuring minimal background noise to accurately assess alarm functionality. Document test results and reset the alarm after completion.
Routine standard tests maintain detector readiness and compliance with safety protocols. Use the built-in test buttons regularly to help pinpoint specific units that may be malfunctioning or have low batteries.
Maintaining Backup Batteries
After completing the standard test to verify your hardwired smoke detector’s circuitry and sound, focus on maintaining the backup batteries that guarantee operation during power outages. Replace these batteries every six months, regardless of test outcomes, to guarantee reliability.
Conduct monthly tests by pressing the Test/Hush button for at least five seconds to confirm battery and circuitry function. If you hear a chirping sound, immediately replace the backup batteries.
After installation, hold the test button to discharge any residual charge and prevent false alerts. Weak or absent alarm sounds during testing signal battery failure, requiring prompt replacement.
Always shut off electricity before battery maintenance to avoid shock. Keep a maintenance log, reset alarms after testing, and schedule reminders for ongoing battery upkeep to maintain peak detector performance.
Ensure that the backup batteries are of the correct type and installed with proper polarity to maintain continuous operation.
When to Test and Why Testing Matters?
Regularly testing your hardwired smoke detector is essential to ensure it functions correctly when you need it most.
Test your unit at least once a month by pressing and holding the test button for 5 seconds to verify the circuitry, horn, and battery backup operate properly.
Testing guarantees the detector responds promptly to smoke, maintaining your home’s safety.
If you notice a weak or no sound during the test, replace the backup batteries immediately.
Additionally, regular testing helps identify sensor faults or power issues early.
Avoid waiting for a low battery chirp or an emergency; proactive testing minimizes risk.
Consistent checks assure the detector’s reliability, giving you confidence that it will alert you effectively in a fire event.
After testing, if false alarms occur, consider cleaning and maintenance to prevent nuisance triggers and ensure proper function.
How to Test Interconnected Smoke Detector Systems?
Testing each unit individually helps confirm its functionality, but verifying that all alarms in an interconnected system respond simultaneously is equally important.
Begin by pressing the test button on a single detector; this should trigger every unit in the network to sound.
Position a helper at the furthest point in your home to confirm the alert is audible throughout.
If any alarm sounds weak or muffled, consider installing additional detectors in that area.
For a more thorough check, use an approved aerosol smoke spray near one detector’s sensor to activate the system naturally.
Make certain all components, including strobes and sirens, respond correctly.
Document test results and reset the system after verification.
This methodical approach guarantees your interconnected detectors will alert you effectively in an emergency.
Remember that interconnected smoke alarms increase the chance of early detection by 50%, significantly enhancing home safety.
How to Maintain Backup Batteries in Hardwired Detectors?
You should replace the backup batteries in your hardwired smoke detectors every six months to guarantee uninterrupted operation during power outages.
Begin by shutting off electricity to the unit to prevent electrical shock. Remove the detector from its mounting bracket and carefully extract the old batteries.
Shut off power, detach the detector, and carefully remove the old batteries to ensure safety.
Insert fresh, manufacturer-recommended batteries, assuring correct polarity alignment. After replacement, press and hold the test button for at least five seconds to discharge any residual charge and verify proper operation.
Listen for a loud, continuous alarm indicating battery and circuitry functionality. If the alarm chirps after replacement, repeat the test button procedure.
Reattach the detector securely and restore power. Maintain a strict replacement schedule and test monthly to ensure backup batteries remain reliable and the unit functions correctly during AC power loss.
It is important to dispose of old batteries properly following local regulations to avoid environmental harm.
What to Do When Your Hardwired Smoke Detector Fails?
If your hardwired smoke detector isn’t beeping during testing, don’t panic! First, check the power and make sure all battery connections are secure. It’s a good idea to replace the backup batteries too, just to rule that out.
Next, give those sensors a good cleaning. Sometimes, dust and debris can cause issues.
If you’ve tried all that and the detector still isn’t working, or if it’s been more than 10 years since you installed it, it’s probably time to think about replacing the whole unit. Keeping your home safe is the priority, after all!
Remember to replace detectors every 10 years since sensors degrade and lose sensitivity over time.
Troubleshooting Common Issues
When a hardwired smoke detector fails to sound during testing or exhibits irregular behavior, start by verifying its power supply and battery condition.
Make certain the steady green LED is lit, confirming AC power. Check backup batteries for proper installation and replace if chirping or weak.
Press and hold the test button for at least 5 seconds; absence of a loud alarm indicates electrical or battery faults.
Inspect wiring connections at the detector’s base, confirming no loose or damaged wires. Clean dust or debris from the sensor with a vacuum or cloth, as contamination can impair function.
For interconnected systems, test multiple units to isolate failure points. If problems persist despite power and battery integrity, consult the manufacturer’s troubleshooting guide before considering replacement.
Before testing, notify central monitoring and place the system in test mode to prevent false alarms or unnecessary emergency responses.
When To Replace Detector?
Although regular maintenance and testing can prevent many issues, hardwired smoke detectors have a finite lifespan and will eventually require replacement. Typically, replace your detector every 10 years, as sensor degradation compromises reliability.
If your unit fails to respond during testing despite confirmed AC power and fresh backup batteries, it’s time for replacement. Begin by shutting off electricity to the detector to avoid electrical shock. Remove the unit, inspect for dust or corrosion, and clean if necessary.
If functionality doesn’t restore, install a new detector matching your system specifications. Always verify new units operate correctly by conducting a full test of interconnected alarms. Document replacement dates and schedule routine inspections to maintain peak performance and guarantee safety across your home network.
Frequently Asked Questions
Can Hardwired Smoke Detectors Be Connected to Smart Home Systems?
Yes, you can connect hardwired smoke detectors to smart home systems by using compatible smart modules or interconnected smart alarms.
You’ll integrate them with your home automation hub, allowing remote monitoring, alerts, and control via smartphone apps.
Make certain your detectors support smart connectivity or use adapters designed for this purpose.
Always follow manufacturer instructions carefully to maintain safety and functionality.
Verify that interconnectivity between units remains intact after installation.
What Is the Best Type of Battery for Backup in Hardwired Detectors?
You should use lithium 9-volt batteries for backup in hardwired smoke detectors.
They offer longer life, better performance in extreme temperatures, and reliable power during outages.
Avoid alkaline batteries, as they drain faster and may cause chirping alerts.
Always replace batteries every six months, regardless of brand, to guarantee continuous protection.
Test your detector monthly after installation to confirm proper operation and battery functionality.
How Do Environmental Factors Affect Hardwired Smoke Detector Sensitivity?
Environmental factors like dust, humidity, and temperature directly affect your hardwired smoke detector’s sensitivity.
Dust buildup can block sensor chambers, reducing detection accuracy, so clean regularly.
High humidity or steam may trigger false alarms by mimicking smoke particles.
Extreme temperatures can impair sensor function, causing delayed or missed alerts.
Maintain stable, clean conditions around your detector to guarantee peak performance and reliable early warning during emergencies.
Are Hardwired Smoke Detectors Compatible With Carbon Monoxide Detectors?
Certainly, compatibility comes clearly when considering hardwired smoke detectors and carbon monoxide detectors.
You’ll find many hardwired units combine both sensors, allowing simultaneous sensing and signaling.
These combination detectors integrate smoke and CO detection circuits, sharing power and interconnect wiring efficiently.
When connected, they synchronize alarms, ensuring safety signals sound system-wide.
Just verify manufacturer specifications to confirm compatibility and proper installation for seamless, synchronized safety surveillance in your space.
What Are Common Causes of False Alarms in Hardwired Smoke Detectors?
False alarms in hardwired smoke detectors often result from dust accumulation, insect intrusion, or cooking fumes near the sensor.
Humidity and steam can also trigger nuisance alarms, especially in bathrooms or kitchens.
Electrical issues like low backup battery voltage or power surges may cause false alerts too.
To prevent this, you should regularly clean the detector, ensure proper placement away from moisture and cooking areas, and maintain stable power supply conditions.
Maintain Peak Performance for Your Hardwired Smoke Detector
Testing your hardwired smoke detector is like tuning a precision instrument. It guarantees your safety system performs flawlessly when it matters most.
Regularly follow the outlined steps to identify, test, and maintain your detector and its backup batteries. Don’t overlook interconnected systems, as their coordinated function is vital.
If your detector fails, address it immediately to maintain reliable protection. Staying methodical in maintenance keeps your home’s alert system sharp and ready at all times.