To install Night Owl wired security cameras, first gather your tools and test each camera and cable for functionality.
Choose mounting spots at least 7 feet high, angled slightly downward for peak IR and coverage. Secure cameras firmly using proper anchors.
Route cables neatly with clips, avoid sharp bends, and connect each camera to the DVR and power source.
Configure your DVR and pair cameras via the Night Owl Protect app to confirm clear feeds and remote access.
Following these steps guarantees a reliable setup tailored to your space and security needs.
Key Takeaways
- Gather all tools, Night Owl DVR, wired cameras, cables, and test each component for functionality before mounting.
- Select camera locations at least 7 feet high, angled slightly downward, avoiding private areas to comply with privacy laws.
- Mount cameras securely using stable surfaces and anchors, protecting outdoor units under eaves to prevent weather damage.
- Route cables neatly along walls using clips or covers, avoid tight bends, and ensure secure, weatherproof connections to DVR and power.
- Connect DVR to monitor and network, update firmware, pair cameras via app, verify live feed quality, then finalize permanent mounting.
Prepare Tools and Materials for Installation
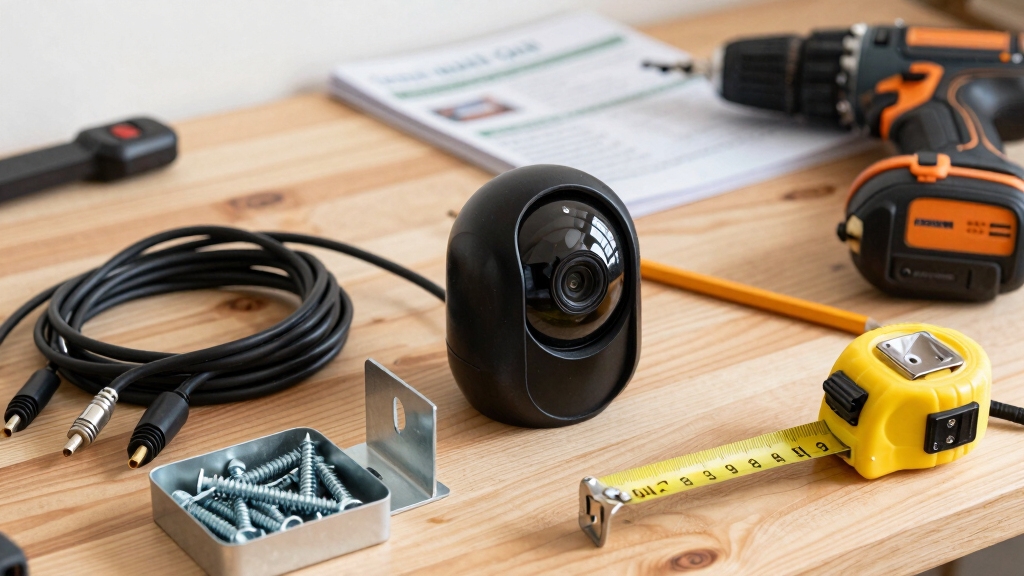
Gather all necessary tools and materials before starting the Night Owl wired security camera installation to guarantee a smooth process. You’ll need a drill, screwdriver, mounting hardware including screws and anchors, a ladder for outdoor mounting, and a pencil to mark screw hole positions.
Prepare all essential tools and materials first to ensure a smooth Night Owl camera installation.
Collect the Night Owl DVR with a pre-installed hard drive, wired cameras equipped with 60 to 100-foot cables, a power adapter with splitter, and HDMI or VGA cable for monitor connection. Include an Ethernet cable for internet connectivity.
Before mounting, test all components individually to make certain full functionality. Confirm you have protective gear for drilling and that your camera cables are long enough for planned locations.
Organizing these tools and materials upfront prevents delays and makes certain precise, efficient installation. Since Night Owl wired cameras use coaxial cables, ensure they are properly shielded to maintain signal integrity throughout the cable runs.
Select Optimal Locations for Night Owl Cameras
When you’re setting up your Night Owl cameras, aim to mount them at least 7 feet high. A slight downward angle will help maximize the effectiveness of the infrared sensors. This little tweak can make a big difference in how well the cameras perform.
It’s really important to think about where you place your cameras. You definitely want to avoid areas that might capture private spaces. This is crucial for staying on the right side of legal privacy requirements, like §18 U.S.C. §2511. Finding the right balance between getting ideal coverage and respecting privacy will help ensure you have both solid security and peace of mind about legal compliance. Additionally, performing systematic visual inspections of camera fixtures can help ensure no unintended surveillance devices are concealed nearby.
Ideal Mounting Height
When selecting ideal locations for Night Owl wired security cameras, mounting them at a height of at least 7 feet guarantees the infrared sensors function effectively, especially when the cameras are angled slightly downward.
This height optimizes motion detection range and reduces false triggers from small animals or debris.
Positioning the camera with a downward tilt enhances night vision by directing infrared illumination toward critical areas.
Make certain the mounting surface is stable to prevent vibrations that could affect image clarity.
Use a ladder and drill to secure cameras firmly above 7 feet with downward tilt.
Avoid obstructions in the camera’s field of view to maintain sensor accuracy.
Confirm cable length accommodates the height without tension or damage before final installation.
Proper height and angle ensure reliable performance and longevity of your Night Owl security system.
For exterior mounting, it is important to use weather-resistant cameras to ensure durability and consistent operation in varying conditions.
Privacy and Legal Considerations
Although selecting ideal camera locations focuses on coverage and functionality, respecting privacy and adhering to legal requirements is equally critical.
You must avoid positioning Night Owl cameras where they capture private areas such as neighboring properties, bathrooms, or bedrooms. This ensures compliance with privacy laws, including §18 U.S.C. §2511.
Mount cameras at least 7 feet high with a downward angle to optimize sensor performance while limiting intrusive views.
When planning placement, consider local regulations governing video surveillance; some jurisdictions require signage or consent.
Always test camera angles before finalizing installation to confirm they focus solely on intended public or semi-public areas.
This approach protects privacy, prevents legal liability, and maintains system integrity without compromising security coverage or infringing on others’ rights.
Additionally, combining concealed cameras with visible deterrents can effectively balance stealth and prevention to enhance overall security.
Camera Mounting Techniques for Best Coverage
When it comes to mounting your cameras, aim for a height of at least 7 feet. This height not only helps with infrared sensor efficiency but also allows for a wider field of view. Plus, angling the cameras slightly downward can really make a difference in what they capture.
It’s also a good idea to install outdoor cameras under eaves or awnings. This way, they’ll have some protection from the weather. Just make sure to use the right mounting hardware and anchors—stability is key here. For wired setups, safe handling during installation prevents damage and ensures the reliability of your security system.
Ideal Mounting Height
To optimize infrared sensor performance and achieve exhaustive coverage, mount your Night Owl wired security cameras at a minimum height of 7 feet with a slight downward angle. This height maximizes the infrared sensor’s ability to detect motion effectively across the monitored area while minimizing obstructions.
Placing cameras too low risks tampering and limits field of view. Mounting too high reduces image detail critical for identification.
Keep these technical points in mind: Maintain a consistent 7-foot height to enhance night vision and motion detection accuracy. Guarantee the camera’s downward tilt avoids blind spots directly beneath the unit.
Use secure mounting hardware and confirm stability to prevent shifts that impair sensor alignment. Following these guidelines secures reliable, all-encompassing surveillance coverage. Adjusting camera position and settings like sensitivity can further reduce false alerts and improve detection accuracy.
Optimal Camera Angles
When positioning your Night Owl wired security cameras, precise angle adjustment is essential for maximizing coverage and sensor efficiency. Mount each camera at least 7 feet high, then tilt it slightly downward to optimize infrared sensor performance, especially for side-to-side motion detection.
Mark screw hole locations carefully, drill pilot holes, and secure cameras with screws for stable positioning. Aim the lens to cover key areas without blind spots, overlapping adjacent camera views when possible. Avoid overly steep angles, which reduce effective range and image clarity.
Use a ladder to fine-tune angles during installation, verifying coverage via live feed before final mounting. Proper cable management along walls enhances durability and prevents signal loss, so secure cables with clips or cord covers. Correct angle setup assures reliable motion detection and peak video quality.
Additionally, ensure that all wiring is inspected for damage or loose connections during installation to maintain a reliable function of your security system.
Securing Outdoor Cameras
Consistently securing outdoor Night Owl cameras with proper mounting techniques guarantees peak coverage and equipment longevity.
Mount your cameras at least 7 feet high, angling them slightly downward to optimize infrared sensor performance and motion detection. Position cameras under eaves or awnings to shield them from weather and extend lifespan.
Before drilling, mark screw hole locations precisely with a pencil. Use appropriate anchors for the mounting surface, like drywall or concrete, to guarantee a stable installation.
Secure cables neatly along walls with clips or cord covers to prevent damage and maintain a clean setup.
Mark pilot holes accurately and drill with proper anchors for solid mounting. Angle cameras downward for peak infrared and side-to-side coverage. Protect cables with clips and route them away from potential damage zones.
Regularly inspect and maintain your camera wiring to avoid power or wiring issues that could impair functionality over time.
Connect Cameras to Your Night Owl DVR
Start by running your camera cables carefully to the DVR, guaranteeing each connection is secure and properly matched. Use BNC or Ethernet connectors depending on your camera model, verifying polarity and cable type compatibility.
Firmly insert each cable into the corresponding DVR port, confirming a snug fit to prevent signal loss. Connect power adapters to the cameras, then plug into the power splitter linked to a reliable power source.
Avoid loose or exposed connections to maintain system integrity. Once all cables are connected, power on the DVR and cameras, observing indicator lights for proper function.
Check the DVR interface for each camera’s signal presence, confirming successful connection before proceeding. This precise setup guarantees stable video transmission and system reliability. Regular maintenance, including inspecting cables and connectors, is essential to ensure reliable alerting and operation over time.
Route and Secure Wired Camera Cables
Carefully run your camera cables along planned routes, securing them with clips or cord covers to prevent damage and maintain a neat appearance.
Run camera cables neatly along planned paths, securing them to avoid damage and ensure a tidy setup
Make certain cables are kept away from sharp edges and high-traffic areas to avoid wear and accidental disconnections.
When routing through walls, drill appropriately sized holes and use grommets or rubber collars to protect cables from abrasion.
Use weatherproof cable covers and rubberized collars for outdoor Ethernet cable protection.
Secure cables every 12-18 inches with mounting clips to prevent sagging or strain.
Avoid tight bends or kinks in cables to maintain signal integrity and prevent damage.
Following these guidelines preserves cable functionality and enhances system reliability while providing a clean, professional installation look.
Ensure that cables used meet CL2 or CL3 safety ratings for in-wall installations to comply with NEC safety standards.
Configure Your Night Owl DVR and Network
Once you’ve routed and secured your camera cables, connect your Night Owl DVR to a monitor using an HDMI or VGA cable to access the initial setup interface.
Power on the DVR; the startup wizard guides you through time, date, and language settings. Next, connect the DVR to your router with an Ethernet cable to enable remote access.
Update the firmware when prompted to guarantee peak security and performance. Configure network settings via the on-screen menu, setting a static IP if preferred for stability. Enable DHCP if using dynamic IP assignment.
| Step | Action | Purpose |
|---|---|---|
| Connect to Monitor | HDMI/VGA cable | Access setup interface |
| Network Connection | Ethernet cable to router | Enable remote viewing |
| Firmware Update | Follow on-screen instructions | Security and functionality |
Pair Cameras Using the Night Owl Protect App
After configuring your Night Owl DVR and establishing network connectivity, you’ll move on to pairing your cameras through the Night Owl Protect app.
Launch the app, sign in, and select “Add Device.” Use your smartphone’s camera to scan the QR code located on the back of each wired camera, which links it to your DVR.
Launch the app, sign in, and scan each camera’s QR code to link it to your DVR.
Assign a descriptive name to each device for easy identification within the app. The app confirms successful pairing by displaying the camera’s operational status as “online.”
You can pair multiple cameras simultaneously and configure settings such as motion detection sensitivity and recording schedules.
- Scan QR codes on cameras to initiate pairing
- Name each camera for streamlined monitoring
- Verify camera status to confirm connectivity and functionality
Test and Finalize Your Night Owl System
Regularly testing each camera next to your NVR before permanent mounting helps you identify and resolve connectivity issues early.
Connect each camera to the DVR using the corresponding BNC or Ethernet cable. Then power the system on to verify live video feed displays correctly on the monitor.
Check for clear image quality, proper infrared illumination, and stable connection without interference. Secure power cables, ensuring tight connections at both camera and power supply ends.
Use cable tie straps or air conditioning line fixtures to fasten cables neatly along walls, preventing strain or damage.
Confirm all cameras appear online in the Night Owl Protect app and communicate reliably with the DVR. Once you’ve verified full operational status and secure cable routing, proceed with permanent mounting to finalize your Night Owl system installation.
Frequently Asked Questions
Can Night Owl Cameras Record Audio Along With Video?
Yes, Night Owl cameras can record audio along with video if your specific model supports audio input.
You’ll need to connect an external microphone to the camera or DVR, depending on the system design.
Make sure the audio feature is enabled in the DVR settings and configured properly through the Night Owl Protect app.
How Do I Reset My Night Owl DVR to Factory Settings?
Resetting your Night Owl DVR to factory settings is straightforward: first, power off the device.
Then, press and hold the reset button, usually found on the back panel near the ports.
While holding the button, power the DVR back on.
Keep holding the reset button for about 10-15 seconds until the system restarts.
This process wipes all custom settings, restoring defaults and allowing you to start fresh.
Are Night Owl Cameras Compatible With Other DVR Brands?
Night Owl cameras generally aren’t compatible with other DVR brands due to proprietary encoding and communication protocols.
You’ll find that Night Owl uses unique firmware and signal processing, which limits interoperability.
While some analog cameras may connect to universal DVRs via BNC cables, Night Owl’s digital and HD models often require their specific DVRs for full functionality, including remote viewing and app integration.
To avoid issues, stick with Night Owl systems for seamless operation.
What Is the Warranty Period for Night Owl Security Cameras?
Night Owl security cameras typically come with a one-year limited warranty covering defects in materials and workmanship. You should register your product promptly to guarantee warranty validity.
The warranty excludes damage from misuse, unauthorized modifications, or natural disasters. If you encounter issues within this period, contact Night Owl’s customer support for repair, replacement, or troubleshooting.
Always keep your purchase receipt as proof of warranty eligibility.
Can I Expand Storage Capacity Beyond the Pre-Installed Hard Drive?
Yes, you can expand storage beyond the pre-installed hard drive in your Night Owl DVR.
Most models support upgrading to larger capacity SATA hard drives, typically up to 4TB or more, depending on the DVR series.
To do this, power down the unit, remove the existing drive, install the new drive securely, and reassemble.
After powering up, format the new drive via the DVR menu to enable full recording functionality.
Secure Your Home Today With Proper Camera Installation
Installing your Night Owl wired security cameras is like assembling a high-tech puzzle. Each piece must fit perfectly.
By carefully preparing your tools, selecting prime locations, securely mounting cameras, and properly connecting cables to your DVR, you guarantee reliable surveillance coverage.
Don’t forget to configure settings and pair devices through the Night Owl Protect app.
Finally, test your system thoroughly to assure seamless operation and protect your property with precision and confidence.