To install your Eufy security camera, first plan camera positions for optimal views and wiring routes, minimizing cable length.
Fully charge cameras before mounting securely using proper anchors and leveling tools.
Connect via the eufySecurity app on a stable 2.4GHz Wi-Fi, scanning the QR code and confirming online status.
For outdoor units, position solar panels angled toward the south with ample sunlight exposure. Test live feeds and adjust settings to guarantee reliable operation.
Following these steps guarantees a robust setup and smooth monitoring experience.
Key Takeaways
- Plan camera positions for optimal views, secure mounting, and direct wiring routes avoiding obstructions and electrical interference.
- Fully charge cameras, remove protective films, and verify battery levels before mounting on stable surfaces using appropriate anchors and tools.
- Manage wiring with clips or conduits, label cables, and ensure power connections are secure to prevent video loss or connectivity issues.
- Use the eufySecurity app to pair cameras via QR code, connect to a stable 2.4GHz Wi-Fi, and confirm online status before finalizing placement.
- Test live feeds and recordings, adjust settings for motion sensitivity and resolution, and troubleshoot any connectivity or mounting stability problems.
Plan Your Eufy Camera Layout and Wiring for Best Coverage
Begin by mapping out your intended camera positions with careful attention to direct wiring routes to your DVR or monitoring system. Identify locations that offer optimal field of view while minimizing cable length and complexity.
Prioritize mounting points with structural stability to support brackets securely. Sketch wiring paths that avoid interference from electrical lines and physical obstructions, ensuring cables remain protected and accessible.
Verify that all cables can reach the DVR without excessive slack or tension. Consider the placement of power sources for cameras requiring wired power.
Use conduit or cable raceways where necessary to protect external wiring. This methodical layout reduces signal loss and potential damage, enhancing system reliability.
Meticulously document each camera’s position and wiring route before procurement and installation to streamline the process and prevent costly adjustments. Be sure to record the unique UID identifiers of each camera to ensure proper device management and secure connectivity.
Fully Charge and Prepare Your Eufy Cameras Before Installation
You should always fully charge your outdoor Eufy cameras before starting the installation process to guarantee uninterrupted setup and peak performance.
Use the provided USB-C cable and allow approximately 6 hours for a full charge. Charging beforehand guarantees the battery is at maximum capacity, preventing mid-installation power interruptions.
Before installation, remove all protective films and plastics from the cameras to avoid overheating or sensor issues.
| Step | Details |
|---|---|
| Charging Time | ~6 hours via USB-C cable |
| Preparation | Remove protective films |
| Verification | Check battery level on app or LED |
Following these steps methodically guarantees your cameras are ready for flawless installation and operation. It is also important to prepare a clean workspace with good lighting to prevent mishandling small components during installation.
Connect and Pair Your Eufy Cameras Using the App
To connect and pair your Eufy cameras, launch the eufySecurity app and navigate to the Device tab. Tap “Add Device,” then select your camera type.
Plug your indoor camera into a power outlet and wait for the LED to turn solid blue, indicating readiness. Use the app to scan the QR code located on the camera’s bottom.
Plug in your indoor camera and scan the QR code on its bottom once the LED glows solid blue.
Next, select your 2.4GHz Wi-Fi network and enter the password when prompted. The app will initiate the pairing process; make certain the camera remains powered during this time.
Once the app confirms successful pairing, you can proceed with mounting. Completing this step before physical installation guarantees a stable connection and smooth setup.
Avoid moving the camera until pairing finishes to prevent connection failures.
For optimal performance, verify the camera’s operational status as “online” within the app to confirm a successful connection and stable communication with your system camera operational status.
Mount Indoor Eufy Cameras for Optimal Viewing Angles
After successfully pairing your indoor Eufy camera through the app, focus on positioning it for ideal viewing angles.
Choose a location that offers clear, unobstructed sightlines to the key areas you want monitored.
Use the mounting bracket to secure the camera firmly on a stable surface, guaranteeing it’s level to avoid skewed footage.
Adjust the camera’s tilt and pan manually, confirming the view in the live feed on your app.
Avoid pointing the camera directly at windows or bright lights to reduce glare and false motion detection.
Once satisfied, tighten screws securely to maintain the set angle.
Confirm Wi-Fi signal strength at the mounting location to guarantee uninterrupted streaming.
Finally, organize cables neatly to prevent strain or accidental disconnection.
For optimal coverage, position cameras in mid-wall height or corners to maximize hallway and living area coverage.
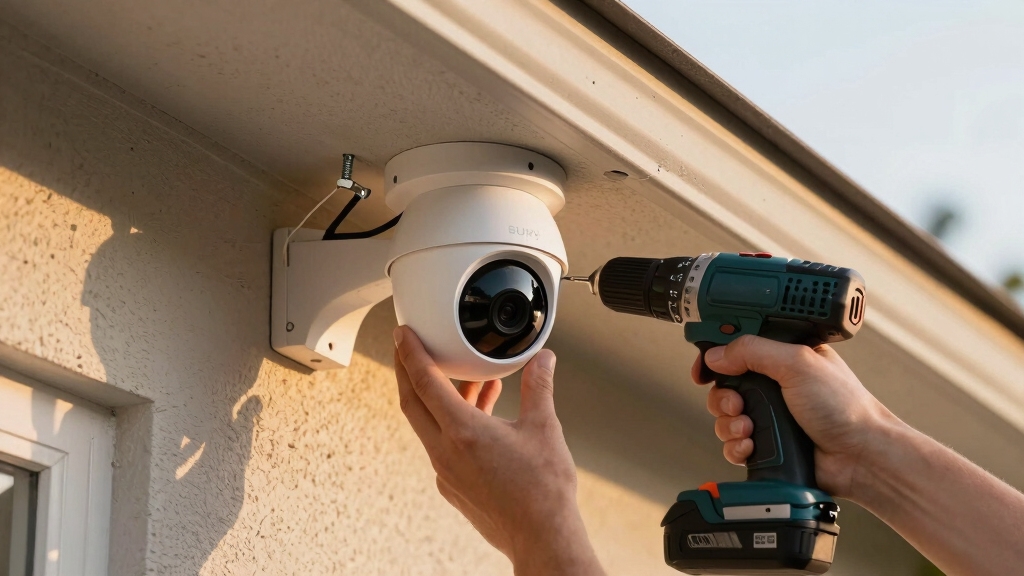
Install Outdoor Eufy Cameras With Secure Mounting
Begin by selecting a stable exterior surface for mounting your outdoor Eufy camera. Ensure it provides ideal coverage and is within Wi-Fi range. Use the mounting template to mark precise drill points and prepare for secure attachment. Follow these steps for a reliable installation:
- Drill 6mm holes at marked locations. Insert wall anchors appropriate for the surface (brick, wood, or siding).
- Firmly screw the mounting base to the wall. Verify it’s level with a torpedo level for accurate alignment.
- Attach the camera to the mount. Tighten the restraining nut and bolt to prevent movement. Adjust the camera angle for the best view and solar panel exposure if applicable.
Confirm the mount’s stability to withstand weather and tampering. Consider using cameras with a high IP rating to ensure reliable outdoor performance under varying environmental conditions.
Manage Cables and Protect Wiring After Installation
Securely fasten cables along walls or baseboards to prevent strain and accidental disconnection. Use cable clips or adhesive mounts spaced evenly every 12-18 inches.
For outdoor installations, employ conduit or weatherproof cable covers to protect wiring from environmental damage. Avoid sharp bends and keep cables away from heat sources.
Label cables near junction points for easier identification during maintenance.
| Task | Recommendation |
|---|---|
| Cable Fastening | Clips or adhesive mounts |
| Outdoor Protection | Conduit or weatherproof covers |
| Cable Routing | Avoid sharp bends |
| Identification | Label near junction points |
Using cables with the appropriate CL2 or CL3 ratings ensures safety and compliance for in-wall installations.
Following these steps guarantees secure, organized wiring that maintains signal integrity and prolongs cable lifespan after installation.
Position Solar Panels for Maximum Sunlight on Eufy Cameras
When positioning solar panels on your Eufy cameras, angle them slightly lower than the average sun altitude to capture peak sunlight throughout the day. Aim the panel southward to maximize exposure, especially during winter months when the sun remains lower.
Adjusting this angle guarantees your camera receives at least two hours of direct sunlight daily, maintaining continuous power.
Follow these steps:
- Determine the average solar altitude for your location using an online tool.
- Mount the solar panel with a tilt approximately 10-15 degrees less than this altitude.
- Ensure the panel faces an unobstructed southern sky, avoiding shadows from trees or buildings.
This methodical setup optimizes solar efficiency, providing your Eufy camera with reliable, endless power.
Configure Wireless and Solar Power Settings for Eufy Cameras
Once you’ve got those solar panels in place, it’s time to adjust their angle. This little tweak will help ensure they soak up sunlight consistently throughout the day, especially during those winter months when the sun mightn’t be as strong.
Next up, let’s talk about wireless connectivity. Make sure you choose a stable 2.4GHz Wi-Fi network that has a strong signal right where your camera is set up. By making these adjustments, you’ll boost power efficiency and keep your camera performing reliably.
Additionally, it is important to inspect wiring connections to avoid power and connectivity issues that could impact your camera’s performance.
Solar Panel Positioning
To optimize your Eufy camera’s solar panel performance, position it facing south and angle it lower than the average sun altitude.
Ensure it receives at least two hours of direct sunlight daily. This orientation maximizes solar energy absorption throughout the year, especially during winter months.
When mounting, follow these precise steps:
- Align the panel toward the southern sky, considering local sun path and seasonal shifts.
- Set the panel angle slightly below the average solar altitude to capture low winter sun rays efficiently.
- Secure the panel tightly with the provided nuts and bolts to prevent movement or misalignment.
Proper panel positioning guarantees uninterrupted power by maximizing sunlight exposure.
This reduces battery drain and ensures consistent camera operation. Avoid shading from trees or structures for peak results.
If sunlight is limited, consider supplementing with USB charging as a reliable alternative to maintain battery levels indoors.
Wireless Connectivity Optimization
Optimizing wireless connectivity and solar power settings enhances your Eufy camera’s reliability and efficiency.
First, make certain your camera connects to a stable 2.4GHz Wi-Fi network, as it provides better range and penetration than 5GHz.
Use the eufySecurity app to verify signal strength at the installation site, adjusting the camera or router placement if needed.
Next, configure the solar panel angle to maximize daily sunlight exposure, ideally facing south and tilted lower than the average sun altitude. This ensures at least two hours of direct light.
In the app, enable solar charging status monitoring to track power input and battery health.
Finally, confirm that the camera maintains a continuous connection by testing live feeds and adjusting Wi-Fi settings or relocating the solar panel to prevent power interruptions.
Consider that solar panel reliability depends on sufficient sunlight exposure, as shaded or low-light environments reduce effectiveness.
Test Eufy Camera Feeds and Adjust Settings for Best Performance
Before finalizing your Eufy camera installation, thoroughly test the live feeds and recorded footage to ensure dependable connectivity and clear video quality.
Start by verifying the live stream on your app for latency and clarity.
Begin by checking your app’s live stream for smoothness and clear image quality.
Next, review recorded clips to confirm proper motion detection and storage.
Finally, assess Wi-Fi signal strength at the camera location to prevent dropouts.
Follow these steps precisely:
- Check live feed for smooth frame rate and absence of artifacts.
- Analyze recorded video for correct triggering, duration, and resolution.
- Adjust camera settings such as resolution, motion sensitivity, and recording schedules to optimize performance.
Perform these checks systematically to guarantee reliable surveillance and maximize your Eufy camera’s effectiveness. Additionally, ensure that power supplies and cables are secure and free from damage to avoid intermittent video loss.
Troubleshoot Common Eufy Camera Installation and Connectivity Issues
After verifying your camera feeds and adjusting settings for peak performance, you may still encounter installation or connectivity issues that affect system reliability.
Start troubleshooting by confirming your Wi-Fi signal strength at the camera location using the eufySecurity app. Weak signals require repositioning the router or using Wi-Fi extenders.
Make sure the camera firmware and app are up to date to prevent compatibility issues. Check mounting stability to avoid misalignment or loose connections disrupting the feed.
Verify power supply continuity for wired or solar cameras. For pairing failures, reset the camera and repeat the QR code scan process.
If connectivity drops persist, inspect for network interference or change your router’s channel settings. Finally, securely organize cables and verify all screws and anchors are tight to maintain system integrity.
Frequently Asked Questions
Can Eufy Cameras Record Continuously Without Cloud Subscription?
You can record continuously on Eufy cameras without a cloud subscription by using local storage options. Eufy offers onboard storage via microSD cards or local backup through their HomeBase device.
This setup lets you store footage directly without relying on cloud services. Just make sure you configure recording schedules and storage management in the app.
Continuous recording depends on available storage capacity and power supply stability to avoid interruptions.
How Do I Reset My Eufy Camera to Factory Settings?
Need to start fresh with your Eufy camera? To reset it to factory settings, locate the reset button, usually a small pinhole on the device.
Use a paperclip to press and hold this button for about 10 seconds until the LED flashes red. Release the button, and the camera will reboot, erasing all personal configurations.
After resetting, you’ll need to set it up again via the eufySecurity app.
Are Eufy Cameras Compatible With Smart Home Systems Like Alexa?
Yes, your Eufy cameras are compatible with smart home systems like Alexa. You can control live streams, receive motion alerts, and manage settings through Alexa-enabled devices.
To enable integration, link your Eufy Security account within the Alexa app by enabling the Eufy skill and completing the authentication process. This seamless connection allows you to use voice commands for camera functions, enhancing your smart home automation effectively and securely.
Can Multiple Users Access the Same Eufy Camera Feed Simultaneously?
Yes, multiple users can access the same Eufy camera feed simultaneously by sharing device access via the EufySecurity app.
You’ll need to invite users through the app’s sharing settings, granting them permission to view live feeds and recordings.
Each user must have the app installed and a registered Eufy account.
This method guarantees secure, controlled access without compromising your camera’s connectivity or performance.
The Bottom Line: Reliable Coverage Starts with Smart Installation
By carefully planning your Eufy camera layout and following precise installation steps, you’ll optimize coverage and functionality.
While some believe wireless setups alone guarantee flawless connectivity, real-world tests show that strategic wiring and solar positioning markedly enhance performance and reliability.
Don’t overlook thorough testing and troubleshooting to address potential issues early.
Adhering methodically to these guidelines guarantees your Eufy security system operates at peak efficiency, delivering dependable surveillance where and when you need it most.