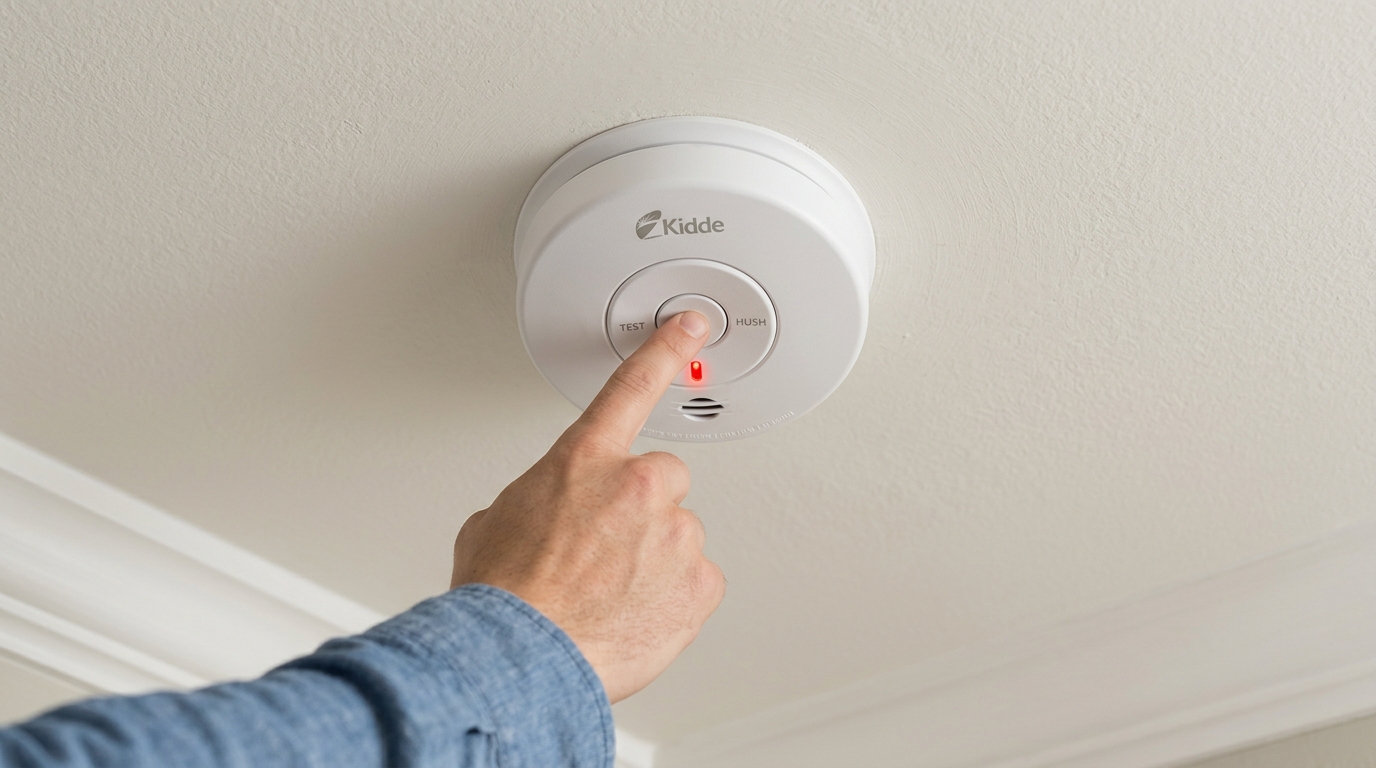
To reset your Kidde smoke detector, press and hold the test button for 8–12 seconds for smart models and 5 seconds for hardwired units until you hear confirmation beeps or see reset messages.
For battery-operated detectors, quickly press and release the test button. After resetting, always test the alarm to make certain it sounds loudly.
If beeping persists, replace weak batteries or clean sensor vents. Keep following for details on troubleshooting, maintenance, and replacement guidelines to keep your device reliable.
Key Takeaways
- Press and quickly release the test button to start a basic reset; alarm returns to normal standby mode after reset.
- For smart Kidde models, hold the center button for 8–12 seconds until display shows “Resetting Wireless Settings.”
- Hardwired units require power disconnection, battery removal, holding test button for five seconds, then reconnecting power and battery.
- After reset, press and hold the test button to confirm a loud alarm, ensuring the reset was successful.
- Reset clears wireless settings on smart models, requiring reconnection to Wi-Fi or network after the process.
How to Reset Basic Battery-Operated Kidde Smoke Detectors?
To reset a basic battery-operated Kidde smoke detector, first locate the test button on the device. Press and release it quickly to start the reset sequence.
After pressing, the alarm should return to its normal standby mode. If you recently reconnected the battery, listen for a single chirp; this signals normal operation.
Make sure no additional chirping follows the initial sound, as that could indicate unresolved issues. If your detector keeps chirping, double-check the battery or clean the sensor vents.
After resetting, always press the test button again to confirm the alarm sounds loudly, ensuring the unit functions correctly. Remember to test monthly and replace the detector if it continues to malfunction despite resets.
It is also important to replace your Kidde smoke alarm every 10 years from the manufacture date printed on the unit to ensure reliable sensor sensitivity.
Resetting Smart Kidde Smoke Detectors
To reset your smart Kidde smoke detector, start by pressing and holding the center button for about 8 to 12 seconds.
You’ll notice the display showing “Resetting Wireless Settings” while it works on resetting its network connections.
Once you hear three beeps, that’s your cue—the reset is complete! After that, the IAQ sensor will automatically recalibrate itself.
Make sure to wait for the voice prompt saying “Ready to connect, follow QuickStart instructions” to begin the fresh setup process for your wireless connection.
Pressing Center Button
Press and hold the center button on your smart Kidde smoke detector for 8 to 12 seconds to initiate the reset process. The device will emit three beeps, confirming the reset.
During this time, the display may show “Resetting Wireless Settings,” and the IAQ (Indoor Air Quality) sensor will automatically recalibrate. This reset applies to Smoke/CO, Smoke/CO+IAQ, and Smoke+IAQ models. Avoid releasing the button too early to ensure the reset completes successfully.
Always ensure firm, continuous pressure on the center button throughout the reset to avoid canceling the process prematurely, similar to best practices used in reset procedures for smart alarms.
| Step | Action | Indicator/Result |
|---|---|---|
| 1 | Press and hold center button | Begin reset process |
| 2 | Hold for 8-12 seconds | Device beeps 3 times |
| 3 | Watch display | Shows “Resetting Wireless Settings” |
| 4 | Release button after beep | IAQ sensor recalibrates automatically |
Wireless Settings Reset
When you hold down the center button on your smart Kidde smoke detector for 8 to 12 seconds, the device initiates a wireless settings reset. The display will show “Resetting Wireless Settings,” and you’ll hear three beeps confirming the reset.
This process clears all wireless network connections, so you’ll need to reconnect the device to your Wi-Fi afterward. The IAQ sensor will also reset and recalibrate automatically during this process.
Make sure to complete the reset without interruption by keeping the button pressed until you hear the confirmation beeps. After the reset, verify the device’s functionality by testing the alarm.
This method applies to Smoke/CO, Smoke/CO+IAQ, and Smoke+IAQ models, ensuring your smart detector maintains peak wireless performance.
For continued safety, remember to perform a monthly test after any reset to ensure the alarm remains fully operational.
Resetting Hardwired Kidde Smoke Detectors
Although hardwired Kidde smoke detectors are connected directly to your home’s electrical system, you still need to disconnect power before performing a reset.
Start by removing the smoke alarm from its mounting bracket and unplugging it from the power source. Next, take out the battery. If your model has a sealed battery, check the user guide for removal instructions.
Press and hold the test button for five seconds while the unit remains disconnected from power and battery. This action prepares the detector for reset.
Afterward, reconnect the battery and power supply, then reinstall the detector on its bracket. A single chirp will confirm the reset was successful.
Avoid touching any other buttons or settings during this process to make certain the device resets properly.
Regular maintenance, including battery replacement, is essential to ensure backup power keeps the alarm functional during outages.
Testing Your Kidde Smoke Detector After Reset
After completing the reset, you should immediately test your Kidde smoke detector to confirm it functions correctly.
Once reset, promptly test your Kidde smoke detector to ensure it operates properly.
Testing verifies the reset was successful and the alarm will alert you in an emergency. Follow these steps:
- Press and hold the test button until the alarm sounds loudly.
- Listen carefully for a consistent, strong alarm tone without interruption.
- Release the button once the alarm sounds to avoid draining the battery.
- If the alarm fails to sound, check the battery connection or reset procedure and try again.
Regular monthly testing guarantees ongoing functionality and safety. Confirm your unit’s expiration date to determine if replacement is necessary, even if the alarm passes the test.
Proper testing prevents false confidence in your smoke detector’s readiness. Additionally, maintaining a schedule for regular testing helps identify malfunctions early and ensures reliable operation.
Fixing Persistent Beeping After Reset
If your Kidde smoke detector continues to beep persistently after a reset and test, it signals an unresolved issue that requires immediate attention.
First, check the battery; replace it if it’s weak or dead, as failing batteries often cause continuous chirping. For hardwired units, make certain the power connection is secure and the battery backup is properly installed.
Verify the unit isn’t expired; look for the manufacture date on the back. Units older than 10 years need replacement.
Also, confirm the reset procedure was done correctly: battery-operated models require a quick press of the test button. Smart devices need an 8-12 second hold, and hardwired units must have power disconnected during reset.
If beeping persists despite these steps, consider replacing the unit to maintain safety.
Regularly vacuum around the detector to prevent dust buildup which can cause false alarms and persistent beeping.
Cleaning Dust to Prevent False Alarms
Hey there! Just a quick reminder: it’s really important to keep those sensor vents clean to avoid any dust buildup. You know how annoying false alarms can be, right? Regular cleaning can help with that.
So, here’s a tip: grab a vacuum with a soft brush attachment. It’s perfect for gently removing dust from all the openings. Just be careful not to damage the sensors while you’re at it!
Regularly inspecting and cleaning detectors helps remove dust and pollen that worsen moisture-related chirping.
Sensor Vent Cleaning
Regularly cleaning the sensor vents on your Kidde smoke detector prevents dust buildup that can trigger false alarms.
Keeping these vents clear guarantees your device functions accurately and avoids unnecessary disruptions. Follow these steps to clean the vents properly:
- Power off the smoke detector before cleaning to avoid accidental alarms.
- Use a soft brush or a vacuum with a soft attachment to gently remove dust from the sensor vents.
- Avoid using liquids or compressed air, which may damage the sensors or force dust deeper inside.
- After cleaning, restore power and test the alarm to confirm it’s operating correctly.
Performing this maintenance every few months helps maintain your smoke detector’s reliability and extends its effective lifespan. During periods of construction or painting, it is advisable to temporarily cover the detector with a manufacturer-approved cover to protect it from dust and debris.
Dust Impact On Alarms
Dust buildup can easily throw off your smoke detector’s sensors, causing false alarms that disrupt your daily routine.
You should regularly inspect and clean the unit’s sensor vents to maintain peak function. Dust particles interfere with the sensor’s ability to detect smoke accurately, leading to nuisance alarms.
Proper maintenance, including cleaning and battery checks, is essential to reduce false alarms triggered by environmental factors such as humidity and dust buildup, which can degrade sensor performance and cause false alarm risk.
Below is a quick guide to dust impact and cleaning frequency:
| Dust Level | Sensor Impact | Cleaning Frequency |
|---|---|---|
| Low | Minimal interference | Every 6 months |
| Moderate | Occasional false alarms | Every 3 months |
| High | Frequent false alarms | Monthly |
| Heavy | Sensor malfunction | Immediate cleaning |
| None | Peak performance | As needed |
Vacuuming Techniques
Effectively vacuuming your smoke detector’s sensor vents minimizes false alarms caused by dust buildup.
Dust can clog sensors, triggering unnecessary alarms, so regular cleaning is essential. Follow these steps for precise vacuuming:
- Turn off power or remove the battery to prevent accidental alarms.
- Use a vacuum cleaner with a soft brush attachment to gently clean sensor vents.
- Avoid pressing too hard or inserting objects inside the detector to prevent damage.
- Clean surrounding areas to reduce dust accumulation near the device.
Perform this cleaning monthly or whenever dust buildup is visible. Proper vacuuming improves sensor accuracy, extending your alarm’s reliability and reducing nuisance alerts.
After vacuuming, restore power and test the alarm to verify it functions correctly.
Preventing False Alarms From Humidity and Placement
Although smoke detectors are essential for safety, placing them near areas with high humidity can cause frequent false alarms. To prevent this, avoid installing your Kidde smoke detector in bathrooms, kitchens, or near heating and cooling vents where steam and moisture accumulate.
High humidity triggers sensor malfunctions, leading to nuisance alarms. Instead, position detectors at least 10 feet away from these sources. Also, avoid placing them in drafty areas or near windows where sudden air currents may affect sensor accuracy.
Regularly inspect and vacuum sensor vents to remove dust that can compound false alarms. By carefully selecting the installation site with these factors in mind, you’ll reduce false alarms. This ensures your Kidde smoke detector functions reliably without unnecessary resets or disruptions.
When and How to Replace Kidde Smoke Detector Batteries?
You should replace your Kidde smoke detector batteries as soon as you hear that continuous chirping or see the low-battery indicator.
It’s pretty annoying, right? So, don’t wait too long!
When you’re picking out new batteries, make sure you’re using the type recommended by Kidde. It’s important!
And when you’re putting them in, double-check the polarity. You want to make sure it’s installed correctly.
This little step can save you from false alarms and help keep your smoke detector working reliably.
Battery Replacement Indicators
Regularly monitoring your Kidde smoke detector’s battery status is essential to maintaining reliable protection. You’ll notice specific indicators that signal when it’s time to replace the batteries. Pay close attention to these signs to avoid false alarms or device failure.
- Chirping Sounds: A regular, intermittent chirp indicates low battery power needing immediate replacement.
- No Response on Test: If pressing the test button fails to sound the alarm, the battery may be dead.
- Frequent False Alarms: Weak batteries can cause unnecessary alarms even after cleaning sensors.
- Age of Battery: Replace batteries annually or when the detector reaches its 10-year lifespan, especially for sealed 10-year batteries.
Act promptly on these indicators to make certain your smoke detector functions ideally.
Proper Battery Installation
Make sure your Kidde smoke detector continues to provide reliable protection by installing batteries correctly and replacing them at the right time. Always use the recommended battery type specified in the user manual to guarantee compatibility and peak performance.
Remove the detector from its mounting bracket to access the battery compartment. Insert the new batteries, observing the correct polarity, usually marked inside the compartment. Once installed, close the compartment securely to prevent loose connections.
Replace batteries annually or immediately if the device chirps, signaling low power. After installation, press the test button to confirm the unit responds with a loud alarm. If you notice continuous beeping despite fresh batteries, inspect for dirt or consider a full reset.
Proper battery care keeps your smoke detector functioning effectively and safeguards your home.
How to Check If Your Kidde Smoke Detector Is Recalled?
Because over 11 million Kidde smoke detectors have been recalled due to sensor and battery defects, it’s critical to verify whether your unit is affected.
With over 11 million Kidde smoke detectors recalled, checking your unit for defects is essential for safety.
Start by locating your smoke detector’s model number and manufacturing date, usually printed on the back.
Then, visit the official Kidde recall website or trusted safety sites to cross-check this information.
Follow these steps to check your recall status:
- Find the model number and manufacture date on your unit.
- Access Kidde’s official recall database online.
- Input your model number and date to verify recall eligibility.
- If recalled, contact Kidde immediately for a free replacement.
Completing these steps guarantees your home’s safety and compliance with recall directives.
When to Replace Your Kidde Smoke Detector?
You should replace your Kidde smoke detector immediately if it continues to beep after you’ve cleaned it, replaced the batteries, and performed a reset.
Persistent beeping often indicates sensor failure or battery defects that can’t be resolved by maintenance.
Additionally, check the expiration date printed on the back or side of the unit.
Smoke detectors generally have a 10-year lifespan.
If your model is part of a recall due to sensor or battery issues, replace it promptly using Kidde’s free replacement program.
Sealed 10-year battery failures also warrant replacement.
Finally, if your detector shows signs of physical damage or fails the monthly test after reset, it’s time to install a new unit to guarantee your safety and compliance with fire safety standards.
Frequently Asked Questions
How Often Should Kidde Smoke Detectors Be Professionally Inspected?
You should have your Kidde smoke detectors professionally inspected at least once every year to make sure they’re functioning correctly and haven’t developed any hidden issues.
Regular professional checks complement your monthly testing and cleaning routines, catching problems you might miss.
If your unit keeps beeping after resets and battery changes, schedule a professional inspection immediately to identify whether it needs repair or replacement.
Don’t wait; fire safety depends on reliable detectors.
Can Kidde Smoke Detectors Connect to Home Security Systems?
Yes, you can connect certain Kidde smoke detectors to home security systems, especially their smart models. You’ll want to use Kidde’s smart Smoke/CO alarms compatible with Wi-Fi or specific security hubs.
To integrate, follow the device’s app instructions to link it with your home system. This enables real-time alerts and monitoring.
Make sure your security system supports Kidde devices for seamless communication and enhanced safety control from your phone or central panel.
What Is the Lifespan of the IAQ Sensor in Smart Kidde Detectors?
You can expect the IAQ sensor in smart Kidde detectors to gracefully serve you for about 10 years, matching the unit’s overall lifespan.
During this time, it continuously monitors indoor air quality, recalibrating as needed after resets to maintain accuracy.
To keep it performing at its best, reset your device as instructed and test monthly.
When the sensor’s time has passed, replacing the entire unit guarantees your safety remains uncompromised.
Are There Specific Models Compatible With Smart Home Assistants?
Yes, Kidde offers specific smart smoke detectors compatible with smart home assistants like Alexa and Google Assistant.
Models such as the Smoke/CO+, Smoke/CO+IAQ, and Smoke+IAQ integrate wireless connectivity, allowing you to receive alerts and control the devices through your smart home system.
When choosing, make sure the model explicitly states smart home compatibility, so you can seamlessly monitor safety from your phone or voice commands.
How to Dispose of Old or Recalled Kidde Smoke Detectors Safely?
You should never toss old or recalled Kidde smoke detectors in regular trash due to battery and sensor hazards.
First, check local regulations for electronic waste disposal or hazardous materials programs.
Remove batteries safely and recycle them separately if possible.
Kidde offers free replacements for recalled units; contact them to return your device using provided instructions.
Always package detectors carefully to avoid damage during transport and follow community guidelines to ensure safe, responsible disposal.
Keep Your Guard Up: Maintain Your Smoke Detector the Right Way
Resetting your Kidde smoke detector isn’t rocket science, but it’s absolutely vital—like your life depends on it. Ignoring a persistent beep or skipping regular battery checks? That’s inviting disaster!
Follow these steps meticulously, test after resetting, and replace batteries promptly. Don’t let humidity or poor placement trick your device.
Staying sharp guarantees your smoke detector works flawlessly, protecting you and your loved ones from fire hazards. Remember, a well-maintained detector is your first line of defense!