To install security cameras, first sketch your layout, focusing on entry points and high-traffic areas to optimize coverage and avoid blind spots.
Choose wired or wireless cameras based on power and connectivity needs, and plan neat cable routes avoiding obstructions. Use the right tools: stud finder, drill, and fish tape.
Mount cameras at 8-10 feet height for clear views and tamper resistance. Sync devices with your network and test all feeds to verify functionality.
Detailed steps will guide you through setup, adjustments, and security configurations.
Key Takeaways
- Plan camera placement by sketching your home layout focusing on entry points, windows, porches, and driveways for full coverage and no blind spots.
- Choose wired PoE cameras for reliability or wireless for easy installation, considering power sources, Wi-Fi quality, and battery capacity.
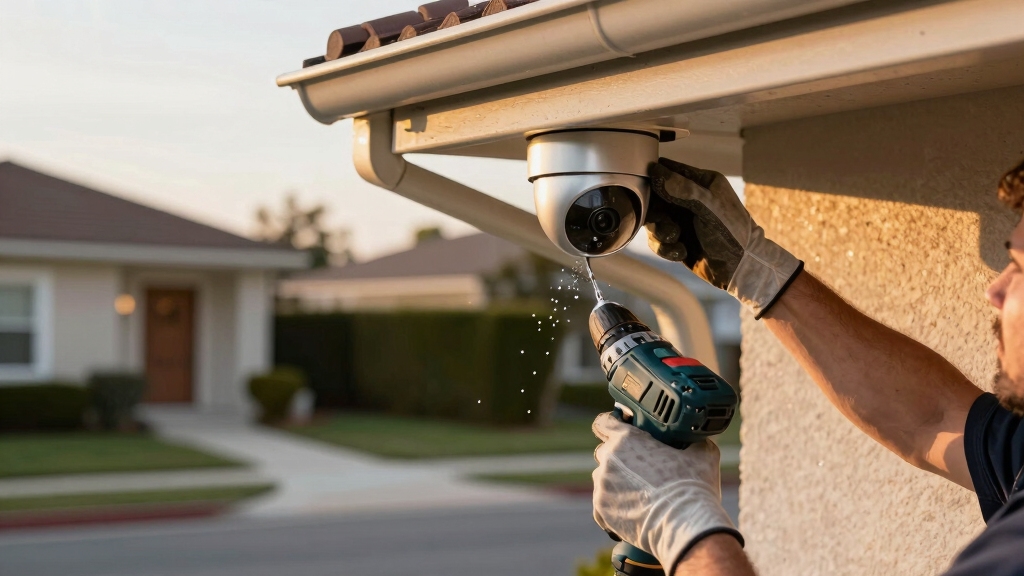
- Use a stud finder and drill pilot holes to mount cameras securely at 8–10 feet height, avoiding direct sunlight and obstructions.
- Route cables neatly using fish tape, cable clips, and conduits, sealing outdoor holes and avoiding wiring or plumbing hazards.
- Test each camera’s function before mounting, sync devices via the manufacturer’s app, and verify stable, interference-free video feeds after installation.
Planning Your Security Camera Installation
Before installing your security cameras, start by carefully planning their placement to maximize coverage and effectiveness.
Sketch your home layout, marking priority areas such as entry doors, off-street windows, porches, stairways, driveways, and interior common rooms.
Map your home, highlighting key spots like doors, windows, porches, and common areas for optimal camera placement.
Diagram camera positions both inside and outside, ensuring first-floor entry points are fully covered.
Walk around your home to verify clear lines of sight, avoiding obstructions like trees or decorations.
Plan cable routes for neatness and functionality, using a stud finder to steer clear of wiring or plumbing.
Mount cameras at least 10 feet high to reduce tampering risk, and angle them for best viewing.
This thorough planning phase is essential for a secure, efficient camera system that protects all critical areas.
Use conduit or cable raceways to protect external wiring and enhance the durability of your installation.
Choosing the Right Cameras for Your Home
When you’re picking out cameras for your home, it’s a good idea to start by deciding if you want wireless models or wired systems. Wireless cameras are great for easy installation, while wired systems offer reliable power and data through Power over Ethernet (PoE).
If you lean towards wireless, make sure to think about battery life. It’s important to choose units that weigh between 8 to 16 ounces; this makes for secure mounting and longer operation.
The type of camera you choose can really impact where you place it, how easy it’s to maintain, and the overall performance of your system. Keep in mind that wireless cameras depend heavily on Wi‑Fi quality and may suffer signal interference, affecting video reliability.
Wireless Versus Wired
Although both wireless and wired security cameras provide reliable surveillance, choosing the right type depends on your home’s layout, installation preferences, and connectivity needs.
Wireless cameras simplify installation since you avoid drilling for cables, making them ideal for renters or areas without easy access to power outlets.
However, make certain your Wi-Fi has a strong signal at each camera location to maintain uninterrupted streaming.
Wired cameras, especially those with Power over Ethernet (PoE), deliver consistent power and data over a single cable, reducing interference and offering higher reliability.
When installing wired systems, plan cable routes carefully to conceal wiring and avoid structural hazards.
Choose wireless for flexibility and ease; pick wired for stability and longer-term setups.
Assess your home’s structure and network before deciding to optimize coverage and system performance.
For best results, consider mounting cameras at the recommended 8–10 feet height with a slight downward angle to maximize field of view and reduce vandalism risk.
Battery Life Considerations
Frequently, battery life becomes the critical factor in selecting wireless security cameras that meet your home’s surveillance needs.
You should evaluate battery capacity, typically measured in milliampere-hours (mAh), to estimate runtime between charges.
Consider cameras with energy-efficient sensors and motion detection to reduce power consumption.
Pay attention to standby versus active usage times, as continuous recording drains batteries faster.
Cameras with removable batteries simplify replacement, while integrated batteries require recharging.
Look for models supporting solar panel integration or external power sources if long-term operation is necessary.
During installation, position cameras to maximize solar exposure if applicable.
Regularly monitor battery status via the manufacturer’s app to schedule timely recharges.
Prioritize cameras offering optimized power management features to maintain reliable surveillance without frequent maintenance interruptions.
Additionally, consider Power over Ethernet (PoE) options for cameras where wiring can simplify power delivery and reduce battery dependence.
Essential Tools for Installing Your Cameras
When you’re getting ready to install your cameras, there are a few essential tools you’ll want to have on hand. A drill with the right bits is a must, along with a stud finder to help you locate those sturdy spots in the wall. Plus, don’t forget about cable management supplies to keep everything looking neat and tidy.
Safety should always come first! Make sure you have gloves and eye protection to shield yourself from any potential injuries while you’re drilling or handling cables. Taking the time to gather these tools and gear beforehand will really help your installation go smoothly and keep safety at the forefront.
It’s also important to test all components individually before mounting to confirm full functionality and avoid installation issues.
Must-Have Installation Tools
Gather essential tools before starting your security camera installation to guarantee a smooth and efficient process. Having the right equipment ensures precise mounting, clean cable management, and secure connections.
Make sure you have these must-have tools ready:
- Cordless drill with drill bits and screwdriver heads: For drilling pilot holes, securing mounts, and installing screws accurately.
- Stud finder and measuring tape: To locate studs for secure mounting and measure ideal camera placement height and spacing.
- Cable tools (fish tape, cable clips, RJ45 crimping tool): To route cables neatly through walls and connectors for wired or PoE systems.
Preparing these tools beforehand streamlines your installation, prevents damage, and guarantees professional results. Additionally, understanding the importance of weather-resistant housings helps ensure your outdoor cameras remain durable and functional under various environmental conditions.
Safety Equipment Essentials
Prioritize your safety by equipping yourself with essential protective gear before starting the installation process.
Wear safety glasses to protect your eyes from dust and debris when drilling. Use gloves to prevent cuts and improve grip on tools and equipment.
A sturdy ladder with non-slip feet is critical for reaching elevated mounting points safely. Always inspect it for stability before use.
If working with electrical wiring, use insulated tools and turn off power at the circuit breaker to avoid shocks.
Consider wearing a dust mask in confined or dusty areas. Finally, secure loose clothing and tie back long hair to prevent entanglement in tools.
These precautions minimize injury risks and guarantee a safe, efficient installation of your security cameras. Additionally, planning camera placement based on lighting and wiring accessibility helps maximize system efficiency and protection during installation.
Setting Up Your Security Camera Software and Syncing Devices
Download the manufacturer’s app and create an account before physically installing your cameras. This prepares you to connect devices smoothly and manage settings efficiently.
Next, scan each camera’s QR code at ground level to link it to your Wi-Fi network. For wired cameras, follow app prompts to confirm power and network status.
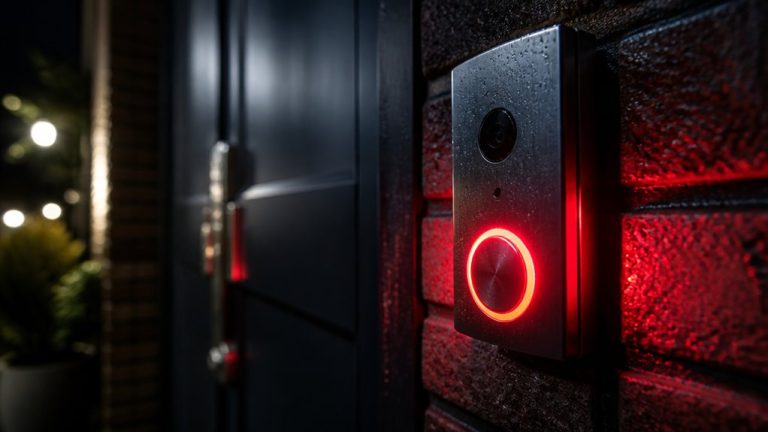
Ensure you sync your cameras with other smart devices like video doorbells or sensors through the app’s integration options. Fully charge batteries on wireless models before mounting to avoid interruptions.
Verify live feeds and adjust camera angles in-app to confirm optimal coverage. Completing these steps guarantees your system operates cohesively, securing your property with reliable, real-time monitoring accessible from your smartphone or computer.
Each camera’s connection is secured using a unique UID identifier, which enables safe remote access without complicated router configurations.
Where to Mount Wireless Security Cameras for Best Coverage?
When it comes to mounting your wireless security cameras, aim for a height of at least 10 feet. This helps prevent tampering and ensures you get a clear view of the area.
Now, think about the key spots to cover. Entry doors, driveways, porches, and stairways are all strategic locations that can really enhance your security.
And don’t forget to check for any obstructions! It’s important to make sure nothing is blocking the camera’s line of sight. That way, you’ll have the best coverage possible.
Strategic placement at entry points maximizes deterrence by causing offenders to avoid surveilled locations, making your system more effective as part of a broader prevention strategy.
Optimal Camera Height
Mounting wireless security cameras at a height of at least 10 feet guarantees peak coverage and reduces the risk of tampering.
This elevation gives you a broad field of view, capturing faces and activities without distortion.
When positioning your cameras, consider these technical aspects:
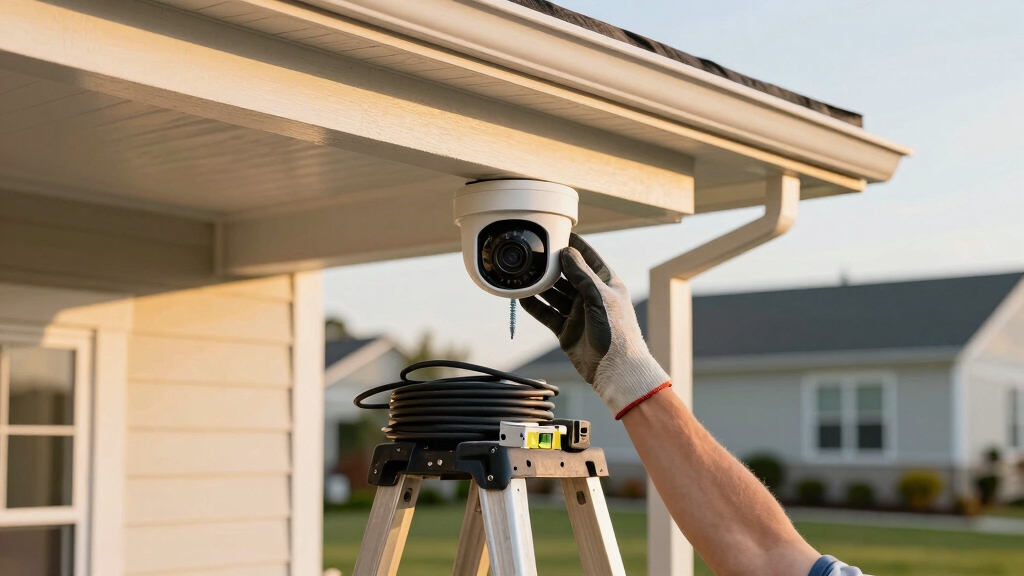
- Mount cameras on solid surfaces or studs to assure stability and prevent movement.
- Angle lenses slightly downward to maximize the detection zone while avoiding obstructions.
- Avoid mounting near direct light sources to reduce glare and maintain image clarity.
- Proper installation also helps minimize issues caused by lighting and environmental factors, ensuring clearer footage.
Strategic Placement Areas
Placing cameras at the recommended height of 10 feet sets the stage for ideal coverage, but pinpointing strategic locations guarantees thorough surveillance.
Focus on high-traffic entry points: front and back doors, garage entrances, and accessible windows. Position cameras to cover porches, driveways, and stairways, ensuring overlapping fields of view to eliminate blind spots.
Mount outdoor cameras facing downward at a slight angle to capture faces and movements clearly while minimizing glare from lights. Indoors, install cameras in common areas like living rooms or hallways for all-encompassing monitoring.
Always confirm a clear line of sight free from obstructions such as trees or décor. Use your home’s layout sketch to plan placements, ensuring each camera complements others for seamless coverage and enhances overall security effectiveness.
How to Neatly Install Wired Security Cameras?
Begin by drilling a larger center hole through walls using a spade bit to accommodate the camera cables. Then carefully run them inside the walls with fish tape to maintain a clean appearance.
Next, use cable conduits or Power over Ethernet (PoE) cables to streamline wiring and reduce clutter. Secure cables along ledges or baseboards with clips to keep them tight and unobtrusive.
Finally, mount the camera base on a sturdy surface such as soffits or wall studs, ensuring cables remain hidden.
Connect cables from the camera to the power source only after cutting power. Route cables neatly to the DVR/NVR location. Adjust the camera angle after securely fastening the mount.
Running and Hiding Security Camera Cables Effectively
When running security camera cables, you’ll want to carefully plan routes that keep wiring hidden and protected from damage.
Carefully plan cable routes to keep security wiring hidden and protected from potential damage.
Start by using a stud finder to avoid electrical wiring and plumbing behind walls. Run cables through existing conduits or install new cable conduits for a clean, professional look.
Utilize fish tape to pull cables through tight spaces or behind drywall. Secure cables with cable clips placed every 12-18 inches along baseboards or ceilings to prevent sagging.
Avoid sharp bends exceeding cable bend radius to maintain signal integrity. Conceal cables inside wall cavities or soffits when possible, drilling minimal holes and sealing them afterward.
For outdoor runs, use weatherproof conduit and make certain cables are rated for exterior use. Following these steps guarantees a neat, durable cable installation that protects your system’s functionality.
Connecting Cameras to Your Network or DVR/NVR
Hook your security cameras to your network or DVR/NVR by carefully following manufacturer guidelines. Make sure power is off before connections to prevent electrical damage and ensure proper synchronization.
For wired cameras, use RJ45 connectors for PoE systems, linking each camera with a single cable for power and data. For wireless units, connect via the app using QR codes or manual network entry.
When interfacing with a DVR/NVR, confirm each camera’s input matches the assigned channel. Run cables securely to the DVR/NVR, avoiding interference and physical damage.
Connect each camera to the network switch or directly to the DVR/NVR’s ports. Power on the system only after all connections are firmly established, then verify device recognition. This method guarantees stable, interference-free camera feeds.
Testing and Adjusting Your Security Cameras
Regularly testing and adjusting your security cameras guarantees peak performance and coverage.
Begin by verifying each camera’s live feed via the app or NVR interface, ensuring no connectivity issues or lag occur.
Check the field of view for blind spots, adjusting the angle or position as needed to cover entry points and critical areas.
Test night vision by observing low-light footage, confirming clarity and motion detection sensitivity.
Assess for obstructions such as foliage or glare from direct light sources; reposition cameras to eliminate these.
Tighten mounts if wobbling occurs and confirm cable security in wired setups.
Repeat this process periodically to maintain peak surveillance and adapt to environmental changes.
This ensures your system continuously delivers reliable, clear imaging and thorough site coverage.
Enabling Privacy and Security Features in Your Camera App
Although your security cameras provide constant surveillance, enabling privacy and security features within the camera app is essential to protect your data and control access.
Start by activating strong password protection and two-factor authentication to prevent unauthorized entry. Next, enable end-to-end encryption for video streams and stored footage, guaranteeing data remains secure during transmission and storage.
Activate strong passwords, two-factor authentication, and end-to-end encryption to secure your video streams and stored footage.
Finally, configure privacy zones to block out areas you don’t want recorded, respecting household privacy and reducing irrelevant alerts.
Set automatic firmware updates to maintain security patches. Review and limit user permissions within the app. Disable remote access when not needed to reduce exposure to cyber threats.
Following these steps guarantees your camera system is both effective and secure.
Frequently Asked Questions
How Do I Maintain and Clean My Security Cameras Regularly?
You should clean your security cameras monthly by gently wiping lenses with a microfiber cloth to remove dust and smudges. Avoid harsh chemicals; use a mild lens cleaner if necessary.
Check mounts and cables for stability and damage, tightening screws as needed. Inspect camera angle to guarantee an unobstructed view.
Also, regularly update firmware via the manufacturer’s app to maintain performance and security. Keep the camera housing free from debris for peak operation.
Can Security Cameras Work in Extreme Weather Conditions?
Yes, security cameras can work in extreme weather conditions if you select models rated for such environments.
Look for cameras with IP65, IP66, or higher ratings, ensuring resistance to dust and water.
Choose units with built-in heaters or fans to handle temperature extremes.
Install cameras under eaves or protective housings to shield from direct exposure.
Regularly inspect seals and mounts to maintain weatherproof integrity and prevent damage from moisture or debris.
What Are Common Signs of Faulty Security Camera Operation?
You’ll notice common signs of faulty security camera operation like blurry or distorted video, intermittent connection drops, and failure to power on.
Lagging or frozen images also indicate issues. Audio cutting out or inconsistent night vision performance signals problems.
Check for physical damage, loose cables, or improper mounting angles. If the camera app can’t detect or sync with your device, troubleshoot network or software conflicts immediately to restore functionality.
How Do I Upgrade Camera Firmware Safely?
To upgrade camera firmware safely, first make sure your camera is fully charged or connected to power.
Download the latest firmware from the manufacturer’s official website or app. Connect your camera to a stable Wi-Fi network, then follow the app’s update instructions precisely.
Avoid interrupting the process by not powering off the camera or disconnecting Wi-Fi.
After completion, verify the firmware version in the app to confirm a successful update.
Are There Legal Restrictions on Security Camera Placement?
Yes, legal restrictions exist on security camera placement. You must avoid recording areas where people expect privacy, like bathrooms or neighbors’ private property.
Position cameras to cover your property lines without intruding on public spaces.
Check local laws regarding audio recording, as it often requires consent. Always disclose surveillance when required by law, such as in rental properties.
Review regulations in your jurisdiction to ensure compliance before installation.
From Setup to Stronghold: Perfecting Your Security System
Now that you’ve prepped, chosen, and mounted your cameras, the final step holds a pivotal secret: fine-tuning their angles and settings.
Don’t rush this phase; subtle adjustments can mean the difference between blind spots and full coverage.
As you connect devices and secure your network, stay vigilant. Overlooking privacy features could expose your system to vulnerabilities.
Master these last details, and you’ll transform your home into an impenetrable fortress, ready for anything.