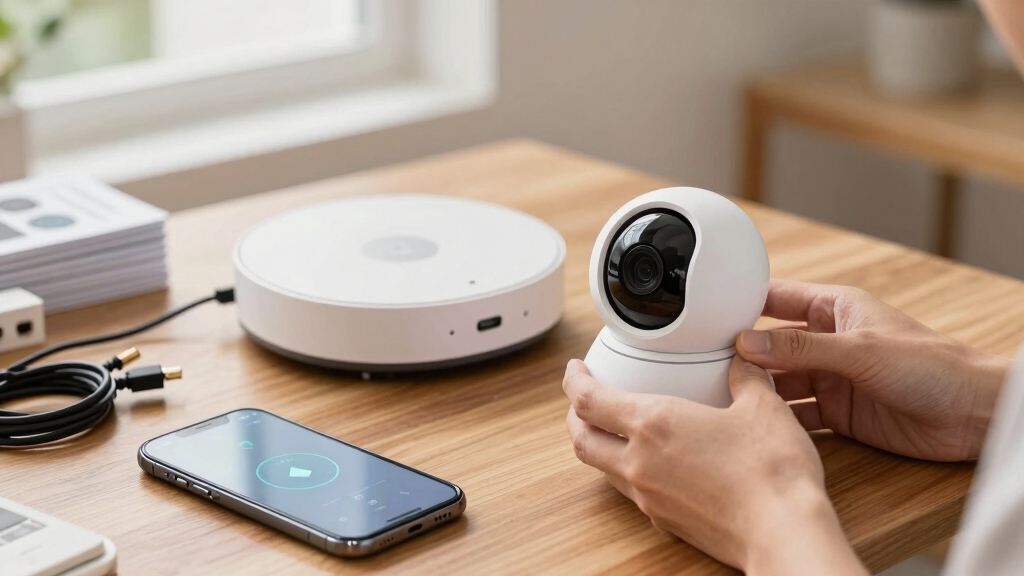
To integrate cameras with your home security system, first verify they support your platform’s protocols and make certain firmware is up to date.
Connect cameras to your Wi-Fi, assign static IPs, and confirm network bandwidth suffices for streaming.
Add cameras manually via your system’s configuration panel, authenticate devices, and verify live feed functionality.
Link camera accounts with smart home apps for centralized control, enable voice commands, and configure advanced AI features.
Follow best practices to avoid compatibility and network issues as you optimize your setup.
Key Takeaways
- Confirm camera compatibility with your smart home platform and supported protocols before integration to avoid conflicts.
- Connect cameras to your home Wi-Fi, assign static IPs, and ensure sufficient bandwidth for stable video streaming.
- Manually add cameras via system settings, authenticate devices, and verify live feed access for proper integration.
- Regularly update camera firmware and configure strong encryption to maintain security and performance.
- Link camera accounts to smart home apps and enable voice control for seamless monitoring and hands-free management.
How to Check Camera Compatibility With Your Security System?
When integrating cameras with your home security system, you need to make sure they support open standards and are compatible with your existing smart home platforms like Google Home, Amazon Alexa, or Apple HomeKit.
Start by verifying the camera’s resolution and wireless options, ensuring they match your system’s specifications and network capabilities. Confirm brand interoperability to avoid integration conflicts.
Check system synchronization features and software integration capabilities for seamless operation. Review performance metrics such as frame rates and latency to maintain real-time monitoring quality.
Also, evaluate the user interface for ease of management across devices. Failing to perform these checks can result in connectivity issues or reduced functionality.
Use manufacturer documentation and compatibility lists as your primary references before purchase or installation.
Additionally, consider cameras with unique UIDs for secure identification and remote access within integrated smart platforms.
Setting Up Your Network for Camera Integration
After confirming your cameras’ compatibility with your security system, the next step involves configuring your network to support stable and secure video transmission.
Start by connecting your cameras to your home Wi-Fi through their mobile app, ensuring the network can handle the bandwidth for high-quality streaming.
Assign static IP addresses to simplify camera management and prevent IP conflicts.
If possible, plug IP cameras into an external network switch to keep them on the same subnet, reducing latency.
Consider setting up VLANs to segregate CCTV traffic from other devices, enhancing security and performance. Verify encryption settings on your router and cameras to safeguard data.
Properly configuring your network infrastructure lays the foundation for uninterrupted, secure video feeds essential for effective camera integration.
Using video compression techniques like H.265 helps manage bandwidth and storage efficiently without sacrificing video quality.
Step-by-Step Guide to Adding Cameras
First up, you’ll want to get your camera network set up. This means assigning static IPs and making sure your Wi-Fi connections are nice and stable. It’s super important to have a solid foundation for everything else.
Once that’s sorted, it’s time to manually add each camera. You’ll do this through your security system’s interface. Just make sure you verify the credentials and select the right models for each camera.
Finally, let’s test everything out! Access the live video feeds and check that everything’s communicating well with your central hub. This step is key to ensuring everything’s running smoothly.
Also, consider implementing WPA3 encryption and keeping firmware updated to maintain network security throughout the system.
Camera Network Configuration
Starting with a proper network configuration guarantees your cameras integrate smoothly into your home security system. First, connect each camera to your home Wi-Fi network via its mobile app, assuring stable internet access.
Assign static IP addresses to simplify management and improve reliability. If using IP cameras, plug them into an external network switch to maintain consistent connectivity.
To optimize performance, configure VLANs that separate CCTV traffic from other network data, preventing bandwidth congestion. Verify your network supports the required bandwidth for high-quality video streaming, especially for HD cameras with night vision.
Finally, confirm camera compatibility with your security system’s software and smart home platforms to enable seamless synchronization and centralized management. This structured setup assures robust, efficient camera integration.
Each camera’s unique UID identifier plays a crucial role in secure device authentication and remote access within your network.
Manual Camera Addition
To add cameras manually, first access the configuration panel within your security system’s interface. Move through to the system and camera management sections.
Next, select the camera on your network, check its box, and initiate the quick add function. You may need to reset the camera or enter its password during this process. For devices like Raspberry Pi, select the appropriate model, such as a webcam.
Confirm addition by verifying live video feed through your central hub. It is important to verify camera angles before finalizing the integration to ensure proper coverage and compliance with privacy considerations.
| Step | Action | Notes |
|---|---|---|
| 1 | Access configuration panel | Navigate system > camera management |
| 2 | Select camera on network | Use IP or device list |
| 3 | Authenticate camera | Reset or enter password |
| 4 | Add camera | Use quick add or manual input |
| 5 | Verify integration | Confirm live feed access |
Integration Testing Methods
Begin integration testing by systematically verifying each camera’s connection to the security system.
First, confirm that each camera is powered, connected to the correct network, and assigned a static IP for easy management.
Next, access the centralized management interface and ensure each camera appears in the device list without errors.
Test live video streaming for latency and resolution consistency, validating bandwidth sufficiency.
Verify synchronization with the smart home hub and confirm access control triggers activate camera recording as configured.
Conduct motion detection and AI analytics tests to check false alarm reduction.
Finally, simulate network interruptions to assess system recovery and remote monitoring functionality.
Document all results and resolve any discrepancies before finalizing the integration.
Additionally, inspect all power cables and connections to ensure stable power delivery and prevent video loss during operation.
This methodical approach guarantees reliable camera performance within your security ecosystem.
How to Integrate Cameras With Smart Home Platforms?
Alright, let’s get started! First things first, you’ll want to check if your cameras are compatible with the smart home platforms you’re using, like Google Home, Amazon Alexa, or Apple HomeKit. It’s super important to make sure they can connect!
Once you’ve confirmed compatibility, the next step is to link your camera accounts within the respective apps. This will allow you to control everything from one central location, making your life a whole lot easier.
And don’t forget about voice control! Configuring voice commands can really enhance your experience. Imagine managing your camera functions hands-free—it’s a game changer for home security.
For the best results, consider strategic placement of your cameras to maximize their deterrent effect and coverage.
Platform Compatibility Verification
When integrating cameras with smart home platforms, you’ll need to verify that your devices support open standards and protocols compatible with systems like Google Home, Amazon Alexa, or Apple HomeKit.
Check that the camera firmware and software are regularly updated to maintain compatibility and security. Confirm that your camera’s resolution and wireless options align with your platform’s requirements to avoid performance issues.
To guarantee seamless integration, focus on these key aspects:
- Confirm the camera supports the desired smart home ecosystem protocols (e.g., MQTT, UPnP, or proprietary APIs).
- Verify brand interoperability, guaranteeing the camera works smoothly with your existing devices and hubs.
- Assess synchronization capabilities, including real-time video streaming and command responsiveness within the platform’s app.
Additionally, consider the impact of network vulnerabilities in wireless systems, ensuring strong encryption and regular updates to protect video feeds and maintain secure integration.
Account Linking Procedures
To link your camera accounts with smart home platforms, you’ll need to navigate each platform’s app or interface to establish secure connections between devices.
Start by authenticating your camera brand within the platform, then authorize data sharing to enable seamless control and monitoring. Always use unique credentials and enable two-factor authentication for security.
| Step | Action |
|---|---|
| 1. Authenticate | Log into smart home platform |
| 2. Authorize | Grant camera access permissions |
| 3. Sync Devices | Select cameras to integrate |
| 4. Verify Setup | Confirm live feed and controls |
Following these procedures guarantees smooth integration. This enables real-time video streaming and centralized management from your smart home platform. For enhanced functionality, enable the Eufy skill in your smart home app to access voice control and alerts.
Voice Control Integration
Although integrating cameras with smart home platforms typically involves account linking, enabling voice control adds a new layer of convenience and accessibility.
Voice commands allow you to access camera feeds, trigger recordings, and adjust settings hands-free.
To integrate voice control effectively, follow these steps:
1. Verify Compatibility: Make certain your cameras support voice assistants like Amazon Alexa, Google Assistant, or Apple Siri.
Check firmware updates that enable voice command functionality.
2. Link Accounts: Connect your camera system’s app with the smart home platform’s ecosystem.
This allows voice commands to control cameras securely.
3. Configure Voice Commands: Customize commands through the smart home app for specific actions, such as “Show front door camera” or “Start recording backyard.”
This integration streamlines security management, providing real-time, hands-free control over your surveillance system.
For optimal performance, ensure camera placement is optimized based on lighting and wiring accessibility to maximize system efficiency and protection.
Unlock Advanced Features for Smarter Camera Integration
Releasing advanced features lets you transform basic camera setups into intelligent security solutions. You can integrate AI-powered analytics to reduce false alarms and employ intelligent search tools for rapid event review.
Linking cameras with access control triggers recordings on entry events, enhancing situational awareness. Remote monitoring with real-time alerts keeps you informed anywhere.
These smart integrations improve threat detection and streamline security operations without complex coding.
| Feature | Benefit | Implementation |
|---|---|---|
| AI Video Analytics | Reduces false alarms | Enable via camera software |
| Intelligent Search | Speeds up event review | Use integrated management interface |
| Access Control Sync | Triggers recording on entry | Link via centralized hub |
| Remote Monitoring | Real-time alerts | Mobile app notifications |
| Machine Learning | Customizable triggers | Deploy models with minimal coding |
Troubleshooting Common Camera and Security System Issues
Integrating advanced features like AI analytics and remote monitoring enhances your security system’s effectiveness, but it also introduces potential points of failure.
Advanced features improve security but also increase potential failure points to address.
When troubleshooting, focus on these key areas:
- Connectivity Issues: Check Wi-Fi signal strength and guarantee cameras have static IPs. Use VLANs to separate CCTV traffic to minimize interference.
- Compatibility Conflicts: Verify cameras support your system’s protocols and smart home platforms. Mismatched firmware or unsupported models can cause integration failures.
- Software and Firmware Updates: Regularly update camera and system firmware. Outdated software can disrupt synchronization and AI analytics functions.
Frequently Asked Questions
Can I Integrate Cameras From Different Brands in One Security System?
Yes, you can integrate cameras from different brands into one security system, but you need to make sure they support open standards and compatibility with your smart home platforms like Google Home, Alexa, or Apple HomeKit.
Verify that their resolutions, wireless protocols, and software integration capabilities align. Use a centralized management solution or compatible software to synchronize them.
Test the system thoroughly to ensure seamless operation and unified video streaming across devices.
How Do I Ensure Data Privacy When Using Smart Home Cameras?
You ensure data privacy by enabling end-to-end encryption on your smart home cameras and using strong, unique passwords for each device.
Regularly update firmware to patch security vulnerabilities. Segment your network with VLANs to isolate camera traffic and disable unnecessary features like cloud storage if privacy is a concern.
Review privacy settings in the app, limit data sharing permissions, and opt for cameras that comply with industry security standards and offer local storage options.
What Power Options Are Available for Wireless Security Cameras?
You’ve got several power options for wireless security cameras. Most rely on rechargeable lithium-ion batteries, offering months of use before recharging.
Some models support solar panels to extend battery life or maintain continuous power outdoors. Others use Power over Ethernet (PoE) for wired power with data through a single cable.
Additionally, you can find cameras with replaceable batteries for easy swaps, giving you flexibility depending on installation and usage needs.
How Often Should I Update the Camera Firmware for Security?
You should update your camera firmware as soon as manufacturers release new versions, typically every few months or when critical security patches appear.
Regular updates fix vulnerabilities, improve performance, and add features. Check for updates monthly or enable automatic updates if available.
Staying current ensures your system resists cyber threats and maintains compatibility with your security platform, keeping your surveillance reliable and secure. Don’t delay updates to avoid exposure.
Can I Store Camera Footage Locally Without Using Cloud Services?
You can absolutely store camera footage locally without using cloud services. Many cameras support local storage options like microSD cards or network-attached storage (NAS).
Just make sure your system allows configuring storage paths and that your device has enough capacity. Using local storage gives you full control over your data and avoids recurring cloud fees.
But remember to back up footage regularly to prevent data loss from hardware failure or theft.
From Setup to Safety: Your Security System Complete
Integrating cameras with your home security system is like fitting together essential puzzle pieces. Each step guarantees seamless connectivity and enhanced protection.
By verifying compatibility, optimizing your network, and following setup instructions carefully, you’ll create a reliable surveillance system.
Don’t forget to leverage smart home platforms and advanced features for maximum efficiency. If issues arise, troubleshoot promptly to maintain system integrity.
With precision and care, your integrated security will work flawlessly to safeguard your home.