
First, turn off the breaker controlling your FireX smoke detector circuit and verify power is off with a voltage tester. Press the test button to discharge residual charge.
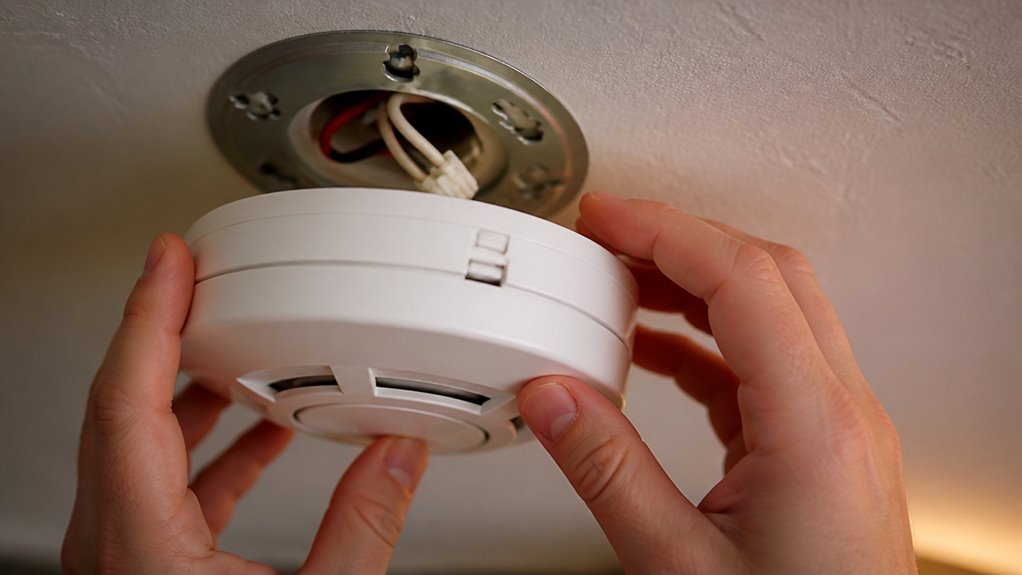
Firmly grasp the detector, rotate it counterclockwise to release the mounting bracket, then carefully disconnect the wiring harness by squeezing locking tabs. Never pull wires directly.
For end-of-life alarms, follow model instructions to permanently disable them. Reconnect or replace the unit properly before restoring power.
Preparing properly guarantees safe removal and accurate troubleshooting steps follow.
Key Takeaways
- Turn off the breaker controlling the smoke alarm circuit and verify power is off with a voltage tester before starting.
- Press and hold the test/hush button to discharge any residual charge after power removal.
- Rotate the detector counterclockwise about a quarter turn to release it from the mounting bracket.
- Disconnect the wiring harness by squeezing locking tabs and pulling the connector straight out, avoiding wire strain.
- Permanently disable the alarm by turning the red slotted arrow to the disable position and discharging residual battery power.
Turn Off Power Before Removal
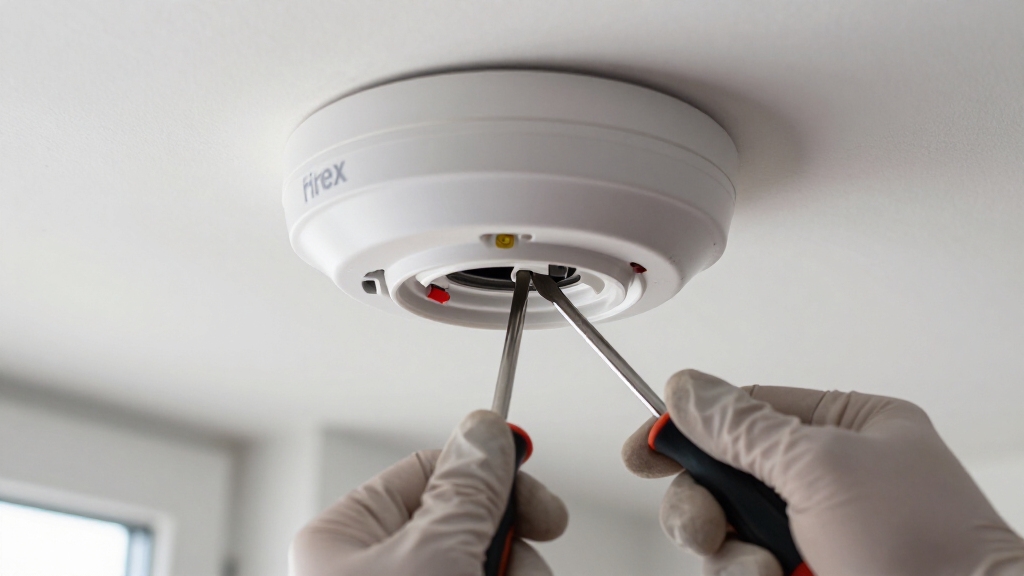
Before you begin disconnecting your FireX smoke detector, make sure you turn off the breaker that controls the smoke alarm circuit.
This step guarantees no electrical current flows to the unit, preventing shocks or short circuits during handling.
After switching off the breaker, verify power is off using a reliable circuit tester or voltage tester.
Never proceed if the tester indicates live current.
Remember, hardwired FireX alarms may still receive AC power even after you rotate them off the base, so double-check all power sources.
Avoid pulling on wires directly; handle the plastic harness and locking tabs carefully when disconnecting.
Finally, consider pressing and holding the test/hush button after power removal to discharge any residual charge stored in the alarm’s internal circuits for safe handling.
If you are unsure which breaker controls the smoke detector circuit, use a circuit breaker finder to accurately identify it before turning off power.
Remove Your FireX Smoke Detector From the Mounting Bracket
Once you’ve confirmed the power is off and safely discharged any residual charge, you can begin removing your FireX smoke detector from its mounting bracket.
Ensure power is off and residual charge discharged before removing your FireX smoke detector safely from its bracket.
Handle the unit carefully to avoid stressing the wiring harness. Follow these steps:
- Grasp the detector firmly and prepare to rotate it counterclockwise.
- Apply steady pressure to twist the alarm approximately a quarter turn until it releases from the mounting base.
- If the alarm resists, gently compress any side tabs or locate a release slot to assist separation.
- Support the unit continuously to prevent it from dropping and straining the wires.
Always verify that power is cut off at the breaker and confirm with a voltage detector before starting removal.
Release the Wiring Harness Safely
After you’ve removed the FireX smoke detector from its mounting bracket, carefully locate the quick-connect wiring harness on the back of the unit.
Before touching the connector, make certain the circuit breaker is off and confirm no power with a voltage tester.
Grasp the plastic housing of the wiring harness; never pull the wires directly.
Squeeze the locking tabs on the connector firmly while gently pulling the plug straight out.
If the connector resists, wiggle the tabs slightly but avoid excessive force to prevent damage.
Keep the detector supported to avoid strain on the wires.
This cautious approach guarantees a safe disconnection without compromising the wiring or the smoke detector’s base assembly.
Always follow model-specific instructions if available.
For hardwired alarms, it is essential to turn off the main breaker controlling the circuit before disconnecting to ensure safety.
Permanently Disable End-of-Life FireX Alarms
To permanently disable an end-of-life FireX alarm, you’ll need to engage its built-in disable feature designed specifically for safe disposal. This procedure is essential for preventing nuisance chirps and ensuring the unit is safe to discard. Follow these steps carefully:
To disable an end-of-life FireX alarm, use its built-in feature for safe disposal and to stop nuisance chirps.
- Remove the side tab from the alarm base if your model requires it.
- Use a screwdriver to turn the red slotted arrow to the “PERMANENTLY DISABLE and DISCHARGE ALARM” position.
- Listen for a click or feel the mechanism lock in place, confirming disablement.
- Hold the test/hush button briefly to discharge any residual battery power.
This disables the alarm’s battery internally, making it safe for disposal without risk of electrical charge or false alarms. Always consult your FireX model’s manual for exact instructions. Proper disposal is important because sealed lithium batteries and electronic components require special disposal to avoid environmental harm.
Reconnect or Replace Your FireX Smoke Detector
With your FireX alarm safely disabled and removed, you can proceed to reconnect the existing unit or install a replacement.
First, confirm all wiring is intact and matches the new or existing alarm’s terminals. Typically, this means black to black (hot), white to white (neutral), and interconnect wires aligned properly.
When reconnecting, gently insert the wiring harness plug until it locks securely. Attach the alarm to the mounting bracket by aligning pins or tabs and twisting clockwise until firmly seated.
Avoid forcing connections to prevent damage. After installation, restore power at the breaker and test the alarm using its test button to verify correct operation and interconnect functionality.
If you replace the unit, choose a compatible FireX model to confirm wiring and mounting compatibility for safe, reliable performance.
Many hardwired detectors include backup batteries to maintain operation during power outages, ensuring continuous safety.
Troubleshoot FireX Alarm Removal and Wiring Issues
When you run into trouble removing your FireX alarm or disconnecting its wiring harness, careful troubleshooting can prevent damage and guarantee safety.
First, always turn off the breaker and verify power is off with a tester before touching wires. Next, avoid pulling wires; instead, handle the plastic harness and locking tabs gently.
If the alarm resists rotation, compress side tabs or use a flathead screwdriver carefully to release stubborn clips. When disconnecting the wiring harness, squeeze the locking arms firmly while wiggling slightly rather than forcing the connector.
- Confirm breaker is off and power is disconnected.
- Rotate the alarm counterclockwise with steady pressure.
- Compress or release tabs to free tight connectors.
- Use gentle wiggling to disengage the wiring plug safely.
For added safety, remember that certain critical zones like fire detection systems generally cannot be bypassed, so proceed with caution when working around critical zones.
Frequently Asked Questions
How Do I Test if My Firex Smoke Detector Is Compatible With Newer Models?
To test if your FireX smoke detector is compatible with newer models, first check the model number on the unit.
Then, review the new model’s documentation for compatibility notes, especially regarding wiring and interconnect features.
You can also perform a functional test by connecting both units in a controlled setup to verify interconnect signaling.
Always follow manufacturer instructions carefully. If uncertain, consult a professional electrician to avoid wiring mistakes or system failures.
Can I Relocate My Firex Smoke Detector to a Different Room Safely?
You can relocate your Firex smoke detector, but it’s vital to follow safety codes and manufacturer guidelines.
Studies show 49% of home fire deaths occur when alarms are poorly placed or nonfunctional.
Before moving it, turn off power, disconnect carefully, and make certain the new location provides peak coverage.
Verify wiring compatibility and maintain interconnect functionality.
Consult local fire codes and Firex docs to avoid compromising protection or violating regulations during relocation.
What Are the Signs That My Firex Smoke Detector Battery Is Failing?
You’ll notice your FireX smoke detector battery is failing if it emits regular chirping or beeping sounds, usually once every 30 to 60 seconds.
The detector might also show a flashing LED indicator or fail to respond correctly during test mode.
Don’t ignore these signs; replace the battery promptly to maintain safety.
Persistent low-battery alerts after replacement might indicate a deeper issue requiring professional inspection or full unit replacement.
How Often Should I Clean or Maintain My Firex Smoke Detector?
You should clean your FireX smoke detector at least twice a year to guarantee peak performance.
Use a soft brush or vacuum with a gentle attachment to remove dust and debris from vents and sensors.
Avoid harsh chemicals or water. Regular maintenance prevents false alarms and sensor failure.
Also, test the alarm monthly and replace batteries annually or when low battery chirps occur.
Stay cautious and follow manufacturer guidelines for your specific model.
Are There Any Wireless or Smart Firex Smoke Detector Upgrade Options?
Yes, FireX offers wireless and smart upgrade options, but availability depends on your model and region.
You can upgrade to interconnected wireless alarms that communicate via radio frequency, enhancing home safety without complex wiring.
Some models integrate with smart home systems, providing app alerts and remote monitoring.
Before upgrading, verify compatibility with your existing setup and consult FireX documentation to guarantee proper installation and functionality.
Disconnect Your Firex Smoke Detector Safely
Now that you’ve safely disconnected your FireX smoke detector, you understand the importance of powering down first and handling wiring carefully.
Isn’t it better to be thorough than risk damage or false alarms?
Remember, permanently disabling end-of-life alarms requires caution.
Reconnecting or replacing devices should follow manufacturer guidelines.
If issues arise, troubleshoot methodically to avoid hazards.
Taking these precise, technical steps guarantees your home remains safe and your detectors function properly.