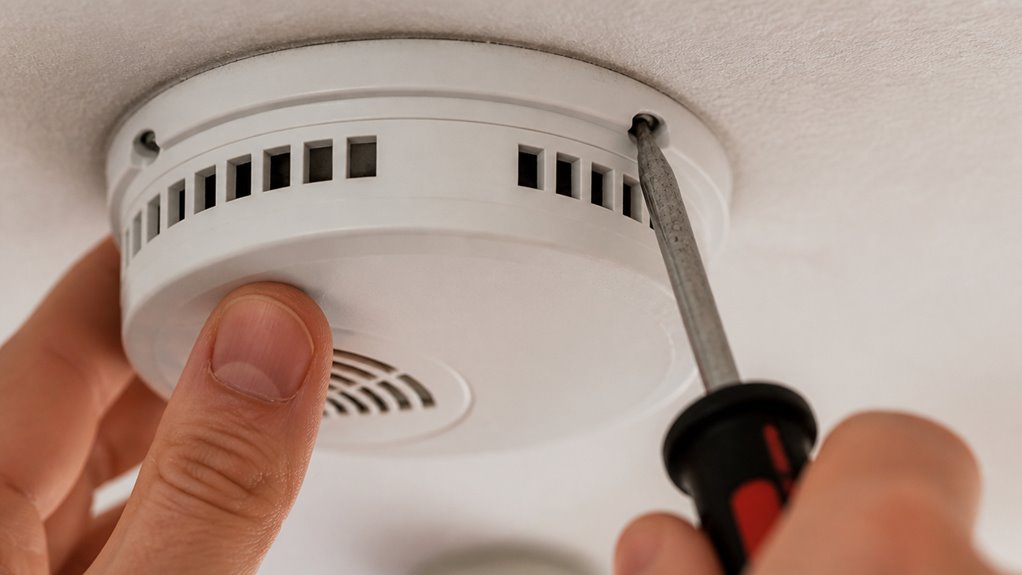

To unscrew your smoke detector, first identify its type and mounting style. Look for screws or a twist-lock with alignment arrows.
Turn off power at the breaker to guarantee safety. If screwed in, use the correct screwdriver; if twist-lock, rotate counterclockwise about a quarter turn or press a release tab.
Disconnect the wiring harness or remove backup batteries carefully. Then clean the mounting area before reinstalling. Follow these steps, and you’ll be prepared to maintain or replace your unit safely.
Key Takeaways
- Turn off power at the circuit breaker before attempting to unscrew the smoke detector.
- Locate and remove any screws on the side or back of the detector using the appropriate screwdriver.
- If a twist-lock system is present, rotate the detector counterclockwise about a quarter turn to release it.
- Press any release tab or remove a securing metal pin if the detector resists twisting or unscrewing.
- Carefully lower the detector without pulling on wires once screws or locking mechanisms are disengaged.
Identify Your Smoke Detector Type and Mounting Style
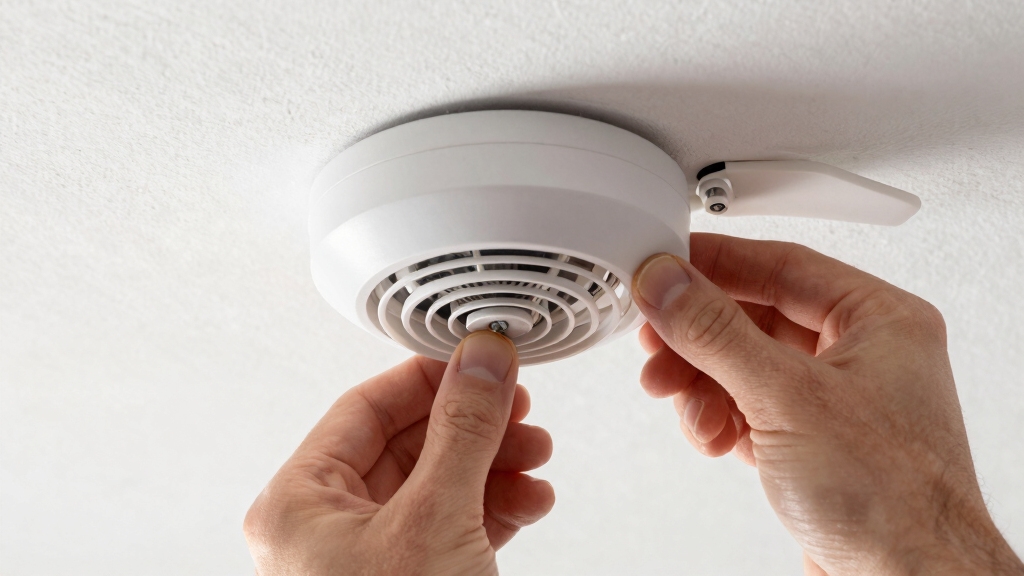
Before you begin unscrewing your smoke detector, you need to identify whether it’s battery-operated or hardwired and determine its mounting style.
First, inspect the unit for a power cord or wiring harness; absence indicates a battery-operated model. Look for a backup battery compartment if it’s hardwired.
Next, examine the mounting mechanism. Check for screws on the side or back, which require unscrewing.
Alternatively, many models use a twist-lock system, marked by alignment arrows; these rotate about a quarter turn to release. Some units have a release tab or small metal pin securing the bracket.
Note the brand and model number often printed on the housing; this helps you access specific removal instructions.
Confirming these details guarantees you select the correct tools and approach for safe, efficient removal.
Also, be sure to check for and disengage any tamper-resist features before attempting to remove the alarm to avoid damage or improper disconnection.
Turn Off Power Safely Before Removing Your Smoke Detector
Although it may seem straightforward, turning off power at the circuit breaker is a critical safety step you must take before removing your smoke detector.
First, locate your breaker panel, typically found in the basement, garage, or utility closet. Identify the breaker labeled “Smoke Detectors” or “Hallway Lights” and switch it off.
If unsure, turn off the main breaker, but use a flashlight to navigate during temporary blackouts.
Next, verify power is off by testing a nearby light switch or outlet on the same circuit. This guarantees no electrical current is present, preventing shocks or short circuits during removal.
Following these steps protects you from hazards when handling hardwired smoke detectors, maintaining a safe work environment throughout the process.
Always verify power absence with a voltage detector before starting work to ensure complete electrical safety.
Remove the Smoke Detector From Its Mounting Bracket
Once you’ve confirmed the power is off, grasp the smoke detector firmly and rotate it counterclockwise about a quarter turn to disengage the twist-lock mechanism.
Align any visible marks or arrows to unfasten the mounting bracket. If the unit resists, press the release tab while turning or use needle-nose pliers to remove a metal pin if present.
For screw-mounted detectors, unscrew with the appropriate screwdriver. Carefully lower the detector without pulling on wires.
Always verify conductors are de-energized before handling the unit to ensure electrical safety during removal.
| Step | Action |
|---|---|
| 1 | Grasp detector firmly |
| 2 | Rotate counterclockwise ~90° |
| 3 | Align marks to release twist-lock |
| 4 | Press release tab or remove pin if stuck |
| 5 | Unscrew screws if applicable |
Disconnect Smoke Detector Wiring and Backup Batteries
After removing the smoke detector from its mounting bracket, carefully unplug the wiring harness by squeezing the locking clips on the plastic connector.
If the harness is secured with wire nuts, twist them counterclockwise to disconnect the wires gently. Cap each exposed wire with a wire nut to prevent electrical arcs.
Tuck the disconnected wires back into the electrical box neatly to avoid interference during reinstallation.
If your smoke detector has a backup battery, remove it by sliding or pulling it out of its compartment.
Make certain no power source remains connected before proceeding. This step is vital for hardwired units with battery backups to avoid unintended power flow or damage during maintenance.
Always keep disconnected components organized and handle wiring with care to maintain safety and functionality.
Be sure to shut off electricity to the detector before removal to avoid electrical shock.
Clean Up and Prepare for Reinstalling Your Smoke Detector
Before reinstalling your smoke detector, clean up the mounting area thoroughly to assure a secure fit and reliable operation.
Use a damp cloth to remove dust, dirt, and debris from the mounting surface and electrical box.
Inspect the mounting bracket for damage or corrosion and replace it if necessary.
Make certain all exposed wires are capped with wire nuts to prevent short circuits.
Verify the wiring harness and connectors are intact and ready for reconnection.
Confirm the backup battery slot is clean and free of corrosion if applicable.
Once clean, align the detector with the mounting bracket.
Reconnect the wiring harness or battery, and secure the unit with screws or twist-lock.
Finally, restore power at the circuit breaker and test the detector’s functionality promptly.
Regularly replacing the backup battery is essential to maintain continuous protection during power outages.
Frequently Asked Questions
How Often Should Smoke Detectors Be Replaced Entirely?
You should replace smoke detectors every 10 years to guarantee reliable operation.
Over time, sensors degrade and may fail to detect smoke properly.
Check the manufacture date printed on the device to determine its age.
If you notice frequent false alarms or the unit isn’t responding to tests, replace it immediately.
Regular replacement maintains your safety and compliance with fire safety standards.
Don’t delay; updating detectors is vital.
Can I Use a Cordless Drill to Remove Smoke Detector Screws?
Yes, you can use a cordless drill to remove smoke detector screws if you have the correct screwdriver bit installed.
Use a low torque setting to avoid stripping screws or damaging the detector.
Proceed slowly and maintain control to prevent slipping.
If screws feel tight or delicate, switch to a manual screwdriver for better precision.
Always make certain power is off before handling the device to maintain safety.
What Do I Do if My Smoke Detector Keeps Beeping After Battery Removal?
If your smoke detector keeps beeping after battery removal, reset it, check for backup batteries, and inspect for dust or debris.
You’ll need to press and hold the test button for 15-20 seconds to reset the unit.
You’ll want to remove any backup battery if it’s hardwired.
You’ll also want to clean the detector’s sensor area with compressed air.
If it persists, replace the unit or consult the manufacturer’s manual.
Are There Any Legal Requirements for Smoke Detector Placement in Homes?
Yes, you must follow legal requirements for smoke detector placement in homes.
Install detectors inside each bedroom, outside sleeping areas, and on every level, including basements.
Mount them on ceilings or high on walls, away from drafts and cooking appliances to avoid false alarms.
Local building codes or fire safety regulations may specify exact locations and types.
Always consult your jurisdiction’s guidelines to guarantee compliance and maximize safety.
How Do I Test a Smoke Detector After Reinstalling It?
After reinstalling the smoke detector, restore power at the circuit breaker.
Press and hold the test button on the detector until you hear a loud alarm, confirming its functionality.
If the alarm doesn’t sound, double-check wiring connections and power supply.
For battery-operated units, confirm fresh batteries are installed.
Finally, use canned smoke or a smoke detector tester spray for additional verification of the sensor’s response.
Final Safety Checks After Removing a Smoke Detector
Now that you’ve mastered unscrewing your smoke detector, you’re practically a home safety superhero.
With precise steps—identifying the type, cutting power, detaching wiring, and handling batteries—you’ve conquered what feels like defusing a bomb.
Remember, safety first: never rush this process. Following these exact instructions guarantees your detector stays reliable and ready, protecting your home like a vigilant guardian.
You’re not just unscrewing a device; you’re securing peace of mind.