To wire smoke detectors in series, first turn off power and verify wires are de-energized. Use 2-wire cable from the power source to the first detector, then 3-wire cable between detectors, matching black to hot, white to neutral, and red or yellow to interconnect terminals.
Secure all connections with wire nuts and test continuity before restoring power. Mount detectors as specified and insert backup batteries if needed. Proper wiring guarantees synchronized alarms and reliable operation; you can explore detailed safety and troubleshooting tips next.
Key Takeaways
- Turn off power and verify conductors are de-energized before wiring smoke detectors in series to ensure safety and code compliance.
- Use 3-wire cable (black, white, red/yellow) between detectors, connecting black to hot, white to neutral, and red/yellow to the interconnect terminal.
- Follow manufacturer instructions for terminal labeling and secure all wire connections with wire nuts and electrical tape to prevent faults.
- Confirm continuity of the interconnect circuit before restoring power to ensure all alarms communicate properly in series.
- After wiring, restore power, test each detector individually and together, and verify all alarms sound simultaneously for proper interconnection.
Prepare for Safe Smoke Detector Wiring
Before you start wiring your smoke detectors, make sure you turn off the circuit breaker and verify all conductors are de-energized with a voltage detector.
This step eliminates the risk of electric shock and prevents damage to the devices. Always follow the manufacturer’s wiring instructions, as terminal labeling and interconnect requirements vary by model.
Use only hardwired, interconnected smoke alarms approved for series interlinking according to your local electrical code. Typically, these systems require a dedicated circuit containing black (hot), white (neutral), interconnect, and ground conductors.
Make certain you have the proper tools and UL-approved wire connectors, and that all grounding is correctly bonded, especially when using metal boxes.
Confirm all materials and installation methods comply with applicable electrical codes to guarantee safety and functionality throughout the wiring process.
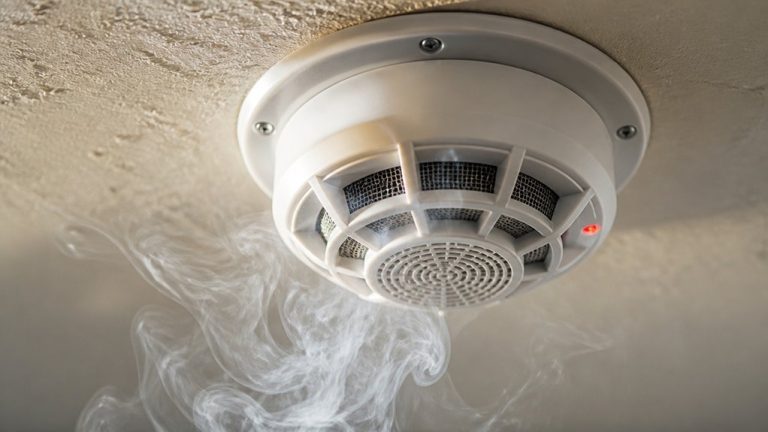
Note that First Alert smoke detectors do not include built-in cameras, so separate security devices are necessary for video monitoring.
Identify Cables and Wires for Series Smoke Detectors
Proper cable selection and wire identification are essential when wiring smoke detectors in series to guarantee safe and reliable operation.
Choosing the right cables and identifying wires correctly ensures safe, reliable smoke detector wiring in series.
You’ll start with a 2-wire cable from the power source to the first detector. Then use 3-wire cable between detectors.
The typical conductors include black for hot/live, white for neutral, red or yellow for the interconnect signal, and bare or green for ground.
Note that some alarm harnesses show the interconnect lead as yellow, even when the circuit wire is red.
Always strip about ½ inch of insulation before splicing and connect like colors unless the manufacturer specifies otherwise.
Correct identification guarantees proper connections for power, neutral, interconnect, and ground.
This prevents miswiring and ensures all detectors function in sync.
It is also important to secure connections with wire nuts and insulate with electrical tape to prevent shorts and faults, enhancing electrical safety.
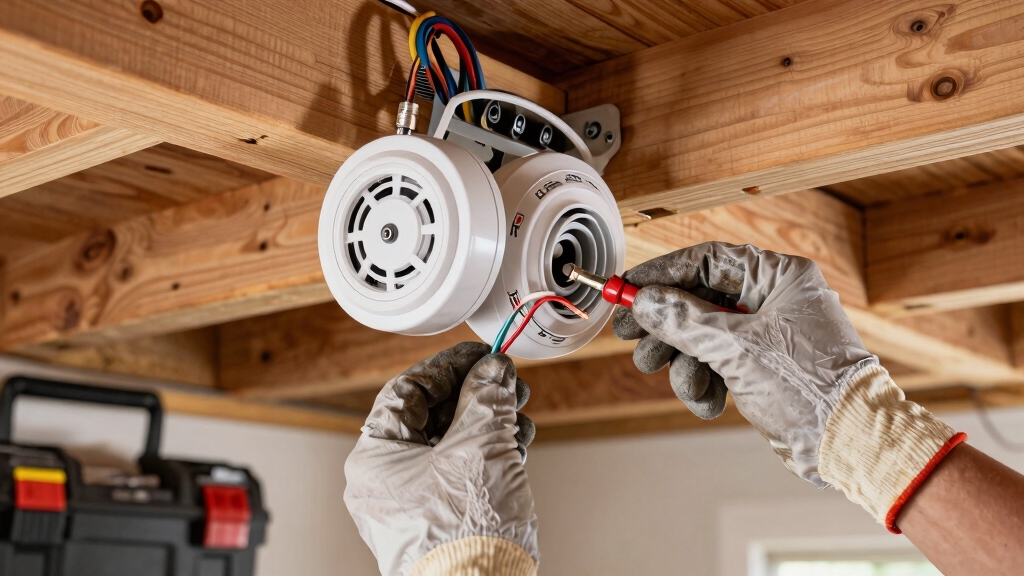
Wire the First Smoke Detector
Once you’ve identified and prepared your cables, connect the incoming black (hot) wire directly to the detector’s HOT terminal. Ensure a secure and clean connection for consistent power flow.
Next, attach the incoming white (neutral) wire to the detector’s NEUTRAL terminal.
Then, connect the interconnect conductor, usually red or yellow, to the INTERCONNECT terminal as specified by the manufacturer.
Bond all ground wires together and attach a pigtail to the metal box if required. Use UL-approved wire nuts or connectors, making sure no bare copper is exposed outside the connector.
Strip insulation about ½ inch for each conductor to guarantee proper contact. Tighten all terminals firmly to prevent loose connections that could cause intermittent operation or failure.
Confirm all wiring complies with local electrical codes and manufacturer instructions before proceeding.
Always turn off the circuit breaker and verify wires are de-energized before making connections to ensure electrical safety standards.
Wire Additional Smoke Detectors in Series
To wire additional smoke detectors in series, run a 3-wire cable from the first detector to the next, maintaining consistent conductor color coding: black to black (hot), white to white (neutral), and red or yellow to interconnect terminals.
Run a 3-wire cable between detectors, matching black, white, and red/yellow wires for proper interconnection.
Each detector must be connected in sequence so the interconnect signal propagates through the chain without interruption.
Make certain all splices are tight and secure to prevent intermittent alarms or communication failures.
Trim excess cable so only a short length extends into each box before termination.
Keep these tips in mind:
- Use wire nuts or UL-approved connectors for all splices.
- Follow the manufacturer’s wiring instructions for terminal identification.
- Confirm continuity of the interconnect conductor before restoring power.
This precise wiring ensures reliable simultaneous alarm triggering across all detectors.
Ensure you also use 12-3 or 14-3 wiring to meet electrical code requirements and maintain system reliability.
Mount Smoke Detectors and Finish Installation
After wiring the detectors in series and securing all connections, focus on mounting each smoke detector and completing the installation.
Begin by installing the mounting plate at each location, feeding conductors through it carefully.
Secure the detector body using the manufacturer’s specified twist-lock or screw-on method.
Make certain all wires are neatly tucked into the electrical box to prevent pinching or damage during mounting.
If your alarms include battery backup, insert fresh batteries before replacing covers and trim pieces.
Confirm that all splices and grounds are finalized and mechanically sound prior to securing devices.
Keep the installation organized and tight to avoid intermittent faults.
Do not restore power at this stage; complete the physical installation first to ensure safety and compliance with wiring standards before moving on to testing or energizing the circuit.
Remember to verify the interconnected alarms function after installation to confirm all devices communicate properly for optimal safety.
Restore Power to Smoke Detectors
Before you restore power, it’s a good idea to double-check that all your wire connections are secure and properly insulated. You don’t want any surprises later on!
If your alarms take backup batteries, go ahead and insert those. It’s a smart move to ensure they keep working, even if there’s a power hiccup.
Once you’ve done that, you can turn the circuit breaker back on. This will re-energize the smoke detector series, and you should be all set!
Remember to verify that the breaker controlling the smoke detectors is correctly identified and labeled to ensure safe maintenance and troubleshooting of the hardwired detectors.
Confirm All Connections Secure
Once you’ve completed all wiring and mounting steps, restoring power allows you to verify that every connection is secure and functioning correctly.
Begin by switching the circuit breaker back on to energize the smoke detector series. Observe each unit for power indication, such as LED status lights.
Then, test the interconnect functionality to assure alarms communicate properly.
Check these key points to confirm secure connections:
- All wire nuts or connectors remain tight with no exposed conductors visible.
- Each detector powers on and responds to the test button individually and as part of the network.
- Interconnect signals propagate through the full chain without interruption or delay.
Address any loose or faulty wiring immediately to maintain system reliability and code compliance. Be sure to verify that each hardwired smoke detector also has a functioning battery backup to ensure continuous operation during power outages.
Insert Backup Batteries
Typically, you’ll insert backup batteries into each smoke detector after restoring power to guarantee uninterrupted operation during outages. Locate the battery compartment on each unit, remove the cover, and insert fresh, manufacturer-recommended batteries with correct polarity.
This step guarantees the alarm functions even if the primary power fails. Always replace batteries annually or when low battery alerts activate. Secure the compartment cover firmly to prevent loose connections.
Regular maintenance such as replacing the 9V alkaline battery every six months ensures reliable operation and extends the life of your smoke detector.
| Step | Detail |
|---|---|
| Locate Battery Compartment | Usually at the back or side |
| Insert Batteries | Match polarity (+/-) |
| Use Recommended Type | Alkaline or lithium preferred |
| Secure Cover | Prevent loose battery contact |
| Test Alarm | Press test button post-install |
This guarantees reliable backup power and consistent detector readiness.
Power On Circuit Breaker
After inserting backup batteries and securing the compartments, you can reinstate power by switching the circuit breaker back on.
Before doing so, double-check that all wiring connections are secure and that no copper conductors are exposed outside wire nuts.
Turn the circuit breaker to the ON position to energize the smoke detector circuit.
Once power is restored, verify that the detectors receive line voltage and that the interconnect system functions correctly.
Remember to:
- Confirm the correct circuit breaker controls the smoke detector circuit to avoid energizing unintended circuits.
- Observe all safety protocols during power restoration to prevent electrical hazards.
- Test all interconnected alarms simultaneously to ensure the series wiring is operational.
Proper power restoration completes the installation and enables reliable smoke detection.
Many hardwired detectors include backup batteries to maintain operation during power outages and ensure continuous safety monitoring.
Insert Backup Batteries (If Applicable)
Usually, smoke detectors with battery backup require you to insert fresh batteries before final assembly. Locate the battery compartment, typically on the back or side of the unit.
Insert the correct battery type, commonly AA, AAA, or a 9-volt, following the polarity markings precisely. Make sure the batteries fit securely without forcing them, as poor contact can cause malfunctions or false alarms.
If the smoke detector has a sealed lithium battery, it may already be installed and non-replaceable, so verify the model specifications. After inserting batteries, check that the compartment door closes firmly to maintain a reliable connection.
This step guarantees uninterrupted power during AC outages, keeping your system compliant and operational until power is restored and the hardwired connection resumes full functionality.
Be sure to use batteries from reputable brands to ensure optimal performance and longer life.
Test and Troubleshoot Smoke Detector Wiring
Always test your smoke detector wiring immediately after installation to make certain each unit functions properly and communicates with the others. Press the test button on each detector individually and verify that all interconnected alarms sound simultaneously.
If any detector fails to trigger the others, check for wiring continuity, especially the interconnect conductor.
Follow these steps to troubleshoot effectively:
Confirm all black (hot), white (neutral), and interconnect wires are securely connected per manufacturer instructions. Use a voltage detector to ensure power is present at each unit before testing. Inspect wire nuts and splices for tightness and absence of exposed copper to prevent intermittent signals.
Accurate testing and troubleshooting ensure reliable alarm operation and full series synchronization.
Frequently Asked Questions
Can Smoke Detectors From Different Brands Be Interconnected in Series?
You generally shouldn’t interconnect smoke detectors from different brands in series.
Different manufacturers often use proprietary interconnect wiring and signaling methods, which may cause communication failures or false alarms.
To guarantee reliable operation and code compliance, stick to alarms from the same brand and model series designed for interconnection.
Always follow the manufacturer’s instructions and local electrical codes to ensure proper synchronization and safety across all interconnected detectors.
How Many Smoke Detectors Can Be Safely Connected in One Series Circuit?
Imagine a chain of smoke detectors lighting up your home with safety.
You can safely connect up to 18 smoke detectors in one series circuit, as most manufacturers and code guidelines recommend.
Exceeding this risks signal degradation and unreliable alarms.
Always check the specific device’s instructions and local codes, as some systems might limit you to fewer units.
Keep your wiring tight and secure to maintain proper communication across the entire series.
What Is the Maximum Cable Length Allowed Between Interconnected Detectors?
You should keep the maximum cable length between interconnected smoke detectors under 100 feet to assure reliable signal transmission. Exceeding this distance can cause voltage drop and communication failures, compromising alarm synchronization.
Use 3-wire cable (hot, neutral, interconnect) with proper gauge as specified by the manufacturer and local electrical codes. Always verify wiring integrity and test the system thoroughly after installation to maintain consistent alarm operation across all detectors.
Are There Specific Codes for Smoke Detector Wiring in Commercial Buildings?
Yes, you must follow strict codes for smoke detector wiring in commercial buildings, like a conductor following sheet music precisely.
The National Fire Protection Association’s NFPA 72 outlines requirements, including dedicated circuits, proper grounding, and interconnect wiring.
You’ll need to comply with local electrical codes and use UL-listed devices. Always make certain your installation meets these standards to maintain safety, reliability, and legal compliance in commercial settings.
How to Handle Interconnect Wiring in Multi-Level Homes With Complex Layouts?
In multi-level homes with complex layouts, run dedicated interconnect wiring (typically red or yellow) between all smoke detectors, ensuring continuity through every level.
Use 3-wire cable to carry hot, neutral, and interconnect signals between units.
Plan cable routes to avoid interference and secure connections tightly.
Verify all interconnect terminals match manufacturer specs.
Test each detector’s interconnect function after installation to confirm alarms trigger simultaneously across all floors.
Wire Smoke Detectors Safely Before You Power Up
Now that you’ve wired your smoke detectors in series, don’t rush to finish just yet.
The real test lies ahead: power restoration and system checks.
One missed connection or faulty wire can leave you vulnerable when it matters most.
Take a moment to verify every link and battery backup.
Your careful attention here could be the difference between safety and disaster.
Are you ready to make certain your home is truly protected?