
To connect your security camera, first identify its type: wired IP, wireless IP, or analog. Gather compatible cables like Ethernet for IP or coaxial for analog.
For wired IP, run Cat5e or higher Ethernet cables to a PoE switch or injector to deliver power and data through one cable.
For wireless, confirm a strong Wi-Fi signal during app pairing with correct credentials.
Verify connections, assign IP addresses, and test video and alerts for reliable performance. Detailed setup and optimization steps follow below.
Key Takeaways
- Choose the camera type (wired IP, wireless IP, or analog) and ensure compatibility with your existing hardware and network infrastructure.
- For wired IP cameras, run Cat5e/Cat6 Ethernet cable to a PoE switch or use a PoE injector to provide power and data.
- For wireless cameras, connect to a stable Wi-Fi network via the manufacturer’s app, entering Wi-Fi credentials during the pairing process.
- Securely mount the camera in a location with good coverage, avoiding glare and tampering, and connect power sources accordingly.
- Test live video feed, adjust camera settings, and configure remote access with static IP or DDNS for external monitoring.
How to Choose the Right Security Camera for Your Setup?
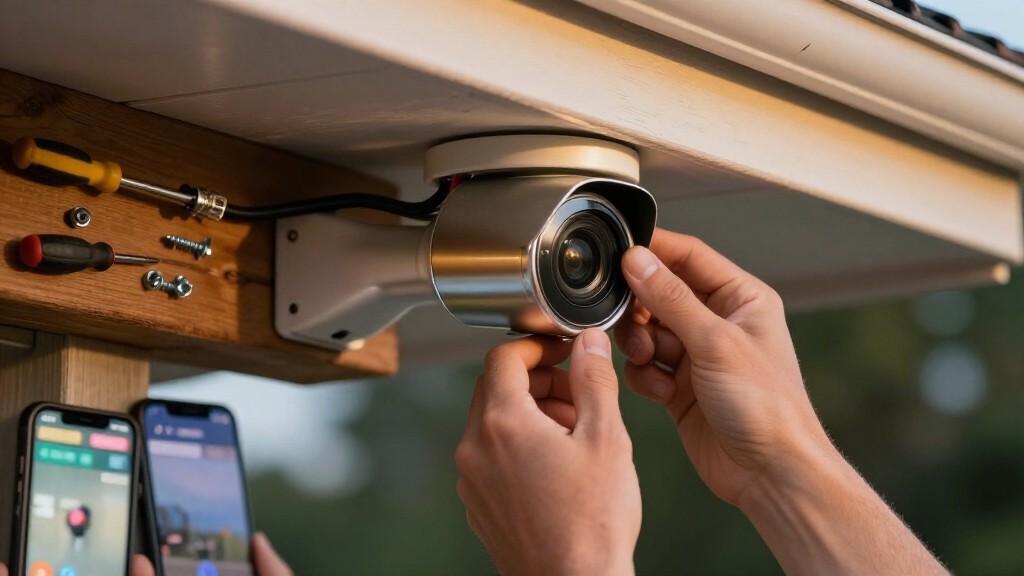
How do you determine which security camera fits your specific setup?
First, assess your preferred connection type: wired IP cameras need Ethernet cables connecting to a router, NVR, or PoE switch.
Wireless IP cameras require a stable Wi-Fi network plus power.
Analog cameras use coaxial cables and BNC connectors to link with DVRs.
Consider whether your setup supports PoE, allowing data and power over one cable, simplifying installation.
Confirm your network infrastructure. Does it support direct internet access or require bridging devices?
Select a camera compatible with your existing hardware to avoid extra adapters or power supplies.
Prioritize cameras matching your system’s recording and viewing capabilities, guaranteeing seamless integration.
This technical evaluation guarantees you pick a camera optimized for your network and installation environment.
Additionally, evaluating battery capacity is crucial for wireless cameras to ensure adequate runtime and reduce maintenance needs.
Gather Essential Hardware and Tools for Installation
Gathering the right hardware and tools is essential for a smooth security camera installation.
First, identify your camera type: wired IP, wireless, or analog.
Then collect the corresponding cables: Ethernet for wired IP, coaxial for analog, and power adapters for non-PoE or wireless models.
If your IP camera supports PoE, secure a PoE switch or injector to streamline power and data delivery via a single Ethernet cable.
You’ll also need mounting tools: a drill, screws, anchors, and possibly fish tape to route cables through walls or ceilings.
Don’t forget a router or NVR/DVR to manage network access and recording functions.
Verify all connectors: BNC for analog, RJ45 for Ethernet, match your devices.
Having these essentials ready guarantees a precise, efficient installation without interruptions.
It’s also important to pre-test all components individually to confirm cable length sufficiency and functionality before beginning final installation.
Connect Wired Security Cameras Using Ethernet and PoE
To get your wired security cameras up and running, the first step is to run an Ethernet cable from your camera to the PoE switch or router. If your camera supports PoE, you’ll want to plug it into a PoE-enabled port. This way, you’ll be able to deliver both power and data through the same cable—pretty convenient, right?
Once you’ve got everything connected, make sure the cable is securely plugged in. It’s a good idea to double-check this before you power on the system; it helps ensure a stable connection.
Be sure to use weatherproof cables and connectors for outdoor installations to protect against moisture and corrosion.
With everything set up, you’re well on your way to having a reliable security camera system!
Ethernet Cable Connection
Connect your wired security camera to your network using an Ethernet cable to guarantee reliable data transmission and power delivery via PoE if supported.
First, select a high-quality Cat5e or Cat6 cable to assure bandwidth and durability. Plug one end into the camera’s Ethernet port and the other into your router, NVR, or PoE switch.
Secure connections to prevent interruptions. After connecting, the camera will typically receive an IP address automatically via DHCP.
Using PoE simplifies installation by combining power and data transmission over a single cable, reducing cable clutter and setup complexity for NVR/IP camera setups.
| Step | Action |
|---|---|
| Cable Type | Use Cat5e or Cat6 Ethernet cable |
| Connection Points | Camera to router/NVR/PoE switch |
| IP Assignment | Automatic via DHCP or manual setup |
This setup assures stable video streaming and network integration.
PoE Power Setup
Power your wired security camera efficiently by using Power over Ethernet (PoE), which delivers both data and electrical power through a single Ethernet cable.
To set up, connect your PoE-capable camera directly to a PoE switch or use a PoE injector between the router and the camera.
Make certain your Ethernet cable supports the required standards (Cat5e or higher) to handle power transmission.
After connecting, the camera will receive power and network access simultaneously, eliminating the need for separate power adapters.
Verify all connections are secure before powering on.
Once powered, the camera should automatically obtain an IP address via DHCP.
Access the camera interface through its IP to finalize configuration.
This streamlined setup reduces cable clutter and simplifies installation for your wired security system.
For enhanced reliability and local storage, consider pairing PoE cameras with a Network Video Recorder (NVR) to maintain stable wired connections and secure footage backup.
Set Up Wireless Security Cameras Using Wi-Fi and Apps
First things first, you’ll want to place your wireless camera where it can pick up a strong Wi-Fi signal. This step is super important to ensure you have a solid connection while you’re setting everything up.
Once you’ve got the camera in a good spot, go ahead and download the manufacturer’s app on your mobile device. This is where the fun begins as you’ll start the pairing process.
After you open the app, just follow the prompts it gives you. You’ll either need to enter your Wi-Fi credentials or scan a QR code, and then you’ll be all set to connect the camera to your network. Easy peasy!
Be sure to connect to a stable 2.4GHz Wi-Fi network for better range and penetration to keep your camera online reliably.
Initial Camera Placement
Position your wireless security camera close to your Wi-Fi router during the initial setup to guarantee a stable connection while pairing through the manufacturer’s app.
This proximity minimizes signal interference and packet loss, assuring the camera successfully authenticates on your network.
Avoid physical obstructions like walls or metal objects that degrade Wi-Fi strength.
Once paired, test the live video feed in the app to confirm connectivity.
After successful pairing, relocate the camera to its final mounting location, verifying the Wi-Fi signal remains strong enough for uninterrupted streaming.
Use a Wi-Fi analyzer app if needed to identify optimal spots.
Safeguard the camera’s power source is accessible at the new location.
Proper initial placement prevents connection failures and reduces troubleshooting during setup.
For enhanced home security, consider integrating the camera with a wireless alarm system to expand protection coverage.
App Installation Process
Once you’ve placed your camera near the Wi-Fi router, download the manufacturer’s app from the App Store or Google Play to initiate setup.
Open the app and create an account if required. Use the “Add Device” or similar function to start pairing.
The app will prompt you to scan the QR code on the camera or enter Wi-Fi credentials manually. Make sure you input the correct network name (SSID) and password to avoid connection failures.
Follow on-screen instructions carefully to complete the initial sync. The app will confirm when the camera has successfully joined the network.
After pairing, you can access live video, adjust settings, and configure alerts directly within the app.
Keep the camera near the router until the setup finishes to maintain a stable connection.
Regularly inspecting and cleaning cameras every 2 to 4 weeks can prevent issues caused by spider webs that might obstruct the camera lens and affect performance.
Network Connection Setup
With your camera linked to the app and confirmed on the network, the next step is setting up its Wi-Fi connection to guarantee consistent communication.
Begin by positioning the camera near your Wi-Fi router to ensure a strong signal during setup. Open the manufacturer’s app, navigate to the “Add Device” section, and select your camera model.
When prompted, scan the camera’s QR code or manually enter your Wi-Fi network name (SSID) and password. The app will initiate the pairing process, assigning the camera an IP address via DHCP.
Wait for confirmation that the camera joined the network successfully. Finally, verify live video streaming and alert functions within the app to confirm stable Wi-Fi connectivity and full system operation before relocating the camera to its final position.
It is important to confirm Wi‑Fi signal strength at the camera location to prevent connectivity issues and optimize performance.
Configure Network Settings for Remote Camera Access
Before you can access your security camera remotely, you need to configure its network settings to allow external connections securely.
Start by assigning a static IP address within your router’s subnet to prevent IP changes that disrupt access. Next, enable port forwarding on your router, directing the camera’s service port (usually HTTP port 80 or a custom port) to the camera’s static IP.
Assign a static IP and enable port forwarding to ensure uninterrupted remote access to your security camera.
Configure Dynamic DNS (DDNS) if your internet service uses a dynamic IP, allowing consistent remote address resolution. Secure your camera by changing default passwords and enabling encryption protocols like HTTPS if supported.
Finally, verify remote access by connecting through the DDNS hostname or public IP plus forwarded port, ensuring the camera’s live feed is reachable outside your local network. For enhanced safety, maintain regular testing and immediate response to any alerts or malfunctions, similar to recommended practices for smoke alarm maintenance.
Mount and Position Your Security Camera for Best Coverage
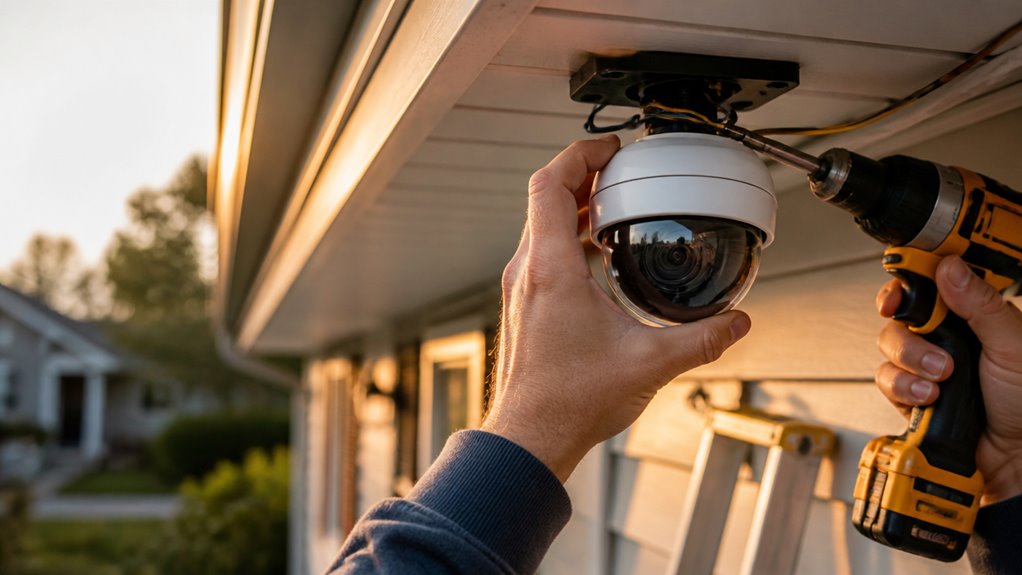
When mounting your security camera, prioritize locations that maximize the field of view while minimizing obstructions and glare. Position the camera high enough to prevent tampering but angled to capture entry points clearly.
Avoid direct sunlight or reflective surfaces that cause image distortion. Use the table below to match mounting height and angle to common scenarios:
| Location | Recommended Height | Best Angle |
|---|---|---|
| Front Door | 8-10 feet | Slightly downward |
| Backyard | 10-12 feet | Wide horizontal |
| Garage Entrance | 7-9 feet | Focused on doorways |
Ensure the mounting surface is stable and use appropriate anchors for weight support. Adjust the camera after installation to verify the coverage meets your security needs.
Test Your Security Camera for Power, Video, and Alerts
Regularly testing your security camera guarantees it receives power, transmits video correctly, and sends alerts as expected.
Begin by confirming all cables and power sources are securely connected. For wired IP cameras, verify Ethernet and PoE connections. For wireless models, make sure the power adapter is plugged in and the camera links to Wi-Fi.
Access the camera’s live feed via its IP address or app to confirm video transmission. Check image clarity and adjust focus or orientation if needed.
Trigger motion detection or other event settings to test alert functionality. Confirm alerts arrive on your mobile device or email promptly.
Finally, review the camera’s status in its interface to detect any power or network errors. Performing these tests guarantees reliable surveillance and quick troubleshooting if issues arise.
Frequently Asked Questions
Can I Use a Security Camera Without Internet Access?
Yes, you can use a security camera without internet access by connecting it directly to a local recording device like an NVR or DVR.
For wired analog cameras, connect via coaxial cables to a DVR. Wired IP cameras can link to a PoE switch or router for local network recording without internet.
Wireless cameras typically need internet for full functionality, but some models support local storage or offline viewing through direct device connections.
How Do I Secure My Camera Against Hacking Attempts?
Over 60% of IoT devices are vulnerable to hacking. To secure your camera, change default passwords to strong, unique ones immediately.
Regularly update firmware to patch security flaws. Disable unused features like UPnP and remote access if not needed.
Use WPA3 encryption on your Wi-Fi and place your camera on a separate VLAN or guest network.
Finally, monitor logs and enable two-factor authentication when available to block unauthorized access.
What Is the Difference Between NVR and DVR Systems?
NVR systems record digital video from IP cameras over a network, offering higher resolution and easier scalability.
DVR systems capture analog video signals from cameras using coaxial cables, then convert them to digital.
You’ll use NVRs for IP camera setups and DVRs for analog systems.
NVRs support advanced features like remote access and analytics more efficiently, while DVRs are simpler but limited to lower-quality feeds and traditional coax connections.
Can Multiple Cameras Share the Same IP Address on a Network?
Think of IP addresses like unique phone numbers. Each device needs its own to avoid confusion.
You can’t have multiple cameras sharing the same IP address on a network because it causes conflicts. This prevents proper communication.
Assign each camera a unique IP, either dynamically via DHCP or statically. This guarantees your system identifies and manages each camera accurately.
It avoids data collisions and ensures smooth, reliable video streaming and control.
How Do I Extend Ethernet Cable Length Beyond 100 Meters?
To extend Ethernet cable length beyond 100 meters, you need to use network devices like Ethernet switches or PoE extenders at intervals.
Place a switch or PoE injector every 90-100 meters to regenerate the signal and power if needed.
Alternatively, use fiber optic cables with media converters for longer distances.
Avoid passive cable splicing, as it degrades signal quality and can cause connection issues.
Choose the Right Connection for Your Camera Type
By following these steps, you’ll have your security camera up and running faster than a lightning bolt striking a steel tower.
Imagine flawless video streaming, instant alerts, and crystal-clear coverage guarding your property like a digital fortress.
With precise connections and correct positioning, you’ll turn any space into an impenetrable stronghold.
Don’t just install a camera; engineer an unbreakable watchtower that never blinks or sleeps, protecting what matters most with absolute certainty.