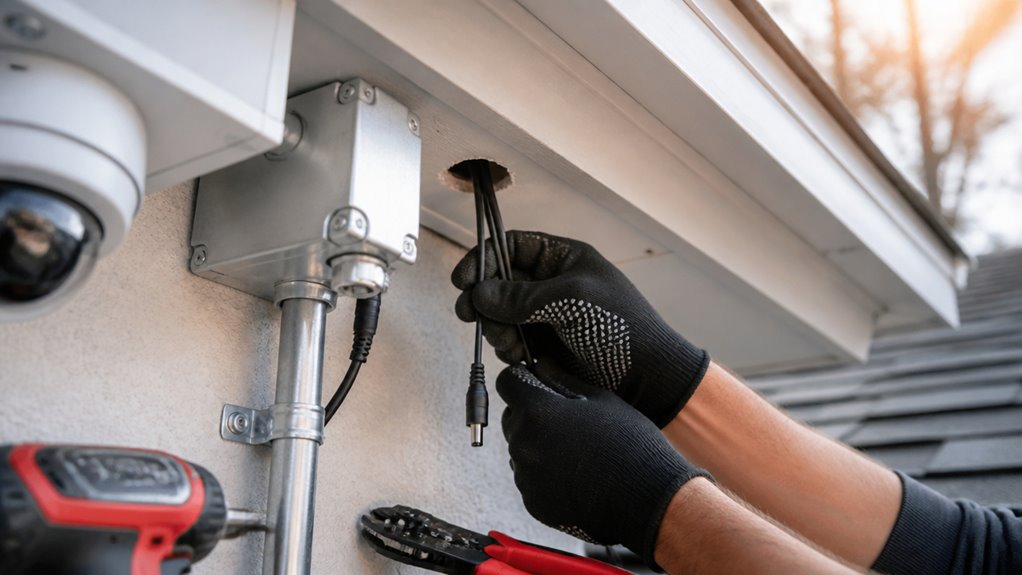

You’ll start by planning your camera layout to cover key areas and avoid blind spots.
Then gather weatherproof cables, connectors, and the right tools.
Carefully drill entry points and route cables through conduits or raceways, securing them with UV-resistant ties.
Terminate cables precisely, seal connections with dielectric grease and silicone, and protect junctions in outdoor-rated boxes.
Finally, test each camera for power and video quality to guarantee reliability.
Following these steps sets a strong foundation for the rest of your installation process.
Key Takeaways
- Plan camera locations and wiring routes for optimal coverage and minimal signal interference.
- Use weatherproof cables, connectors, and protective conduits for outdoor durability and moisture resistance.
- Drill appropriately sized holes and route cables away from high-traffic or exposed areas to prevent damage.
- Terminate wires carefully, ensure correct pin alignment, and insulate connections to maintain signal integrity.
- Test cable continuity, camera power, and video transmission before securing mounts and finalizing installation.
Plan Wiring Layout for Optimal Security Camera Coverage
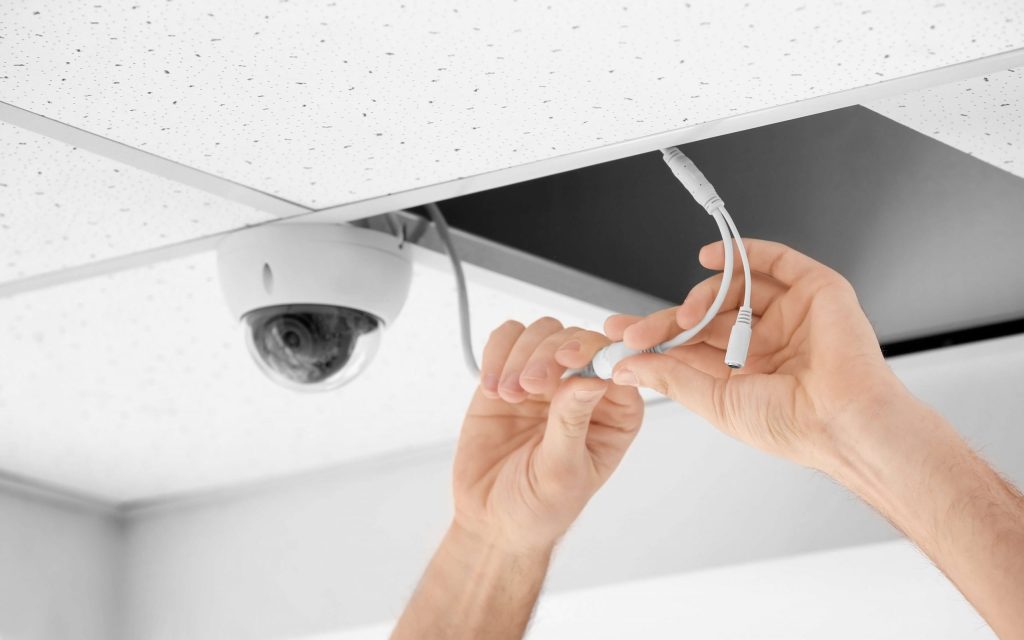
Before you run any cables, you need to plan the wiring layout carefully to guarantee your security cameras cover all critical areas effectively.
Careful wiring layout planning ensures your security cameras cover every critical area effectively.
Start by identifying key monitoring points such as entrances, driveways, and blind spots. Ensure each camera has an unobstructed line of sight.
Assess each camera’s field of view, typically between 70 and 110 degrees, to avoid overlap or gaps. Next, map out the cable routes to your DVR or NVR.
Minimize sharp bends that can degrade signals. Determine ideal camera angles to maximize coverage while planning to conceal cables for a clean installation.
Finally, select outdoor-rated wiring suited to your site’s distance requirements, power needs, and environmental exposure to maintain long-term reliability and performance.
Plan cable routes to conceal wiring, protect external wiring with conduit or raceways, and avoid structural hazards for a durable installation.
Gather Tools and Materials for Security Camera Wiring
Gather essential tools and materials to guarantee a smooth and efficient security camera wiring installation. You’ll need precision tools like wire strippers and a multimeter for accurate testing. Weatherproof cables and connectors are necessary to promote durability.
Selecting the right gauge power wires and appropriate mounting hardware is vital for safety and stability. Prepare everything before you start to avoid delays or errors during installation. Be sure to verify cable connections remain secure and intact throughout the process to prevent future issues.
| Tool/Material | Purpose |
|---|---|
| Drill and drill bits | Create cable entry points |
| Wire strippers | Strip insulation without damage |
| Multimeter/Cable tester | Verify electrical continuity |
| Weatherproof cables | Resist environmental damage |
Organize these items systematically to streamline your installation process.
Drill and Route Security Camera Cables Safely
First things first, let’s talk about planning those cable routes. You’ll want to choose paths that steer clear of high-traffic areas and spots where they might get exposed.
This way, you’ll minimize the risk of any damage to your cables.
Next up, when you’re drilling, make sure to use the right size drill bits. This helps you create clean holes that can easily fit conduit or a bunch of cables without cramping them up.
It really makes a difference!
And don’t forget about the outdoor cables! It’s super important to protect them with weatherproof materials.
Plus, make sure to seal all the entry points to keep moisture from sneaking in.
That’ll help your setup stay in great shape for a long time!
Also, be sure to route cables directly back to the DVR or NVR to keep everything organized and make troubleshooting easier.
Safe Cable Routing
When routing security camera cables, make sure you drill holes slightly larger than the wire bundle to allow easy passage and future adjustments.
Plan cable routes to avoid sharp bends that can damage wires or degrade signal quality. Use fish tape to guide cables through wall cavities, attics, or basements efficiently.
Always route cables away from high-traffic zones and potential damage points to guarantee longevity. If running cables outdoors, bury conduit according to electrical codes or secure cables under protective covers.
Maintain separation between power and data cables to reduce interference. Label cables clearly at both ends for easier troubleshooting.
Secure cables with appropriate clips or ties, guaranteeing they’re snug but not overly tight to prevent crushing. These careful routing steps will safeguard your system’s performance and durability.
Additionally, assigning static IP addresses to each camera helps simplify management and prevent network conflicts.
Proper Drilling Techniques
Begin drilling by selecting the correct drill bit size to match the diameter of your conduit or cable bundle. Ensure holes are slightly larger than the wires to facilitate easy passage and future adjustments.
Use a steady hand and maintain perpendicular alignment to avoid angled holes that complicate cable routing. Drill slowly to prevent cracking or damaging the mounting surface, especially on drywall or masonry.
After drilling, clean debris to guarantee smooth cable passage. Follow these guidelines:
Mark hole locations precisely using a template or measurement. Use a pilot bit for hard materials to control drill entry.
Wear safety goggles and gloves to protect from flying debris. Avoid drilling near electrical wiring or plumbing.
Test fit cables through holes before finalizing installation. Secure cable with clips spaced about 6 inches apart to minimize movement and ensure weather-resistant installation.
Outdoor Cable Protection
Properly protecting outdoor security camera cables is essential to guarantee system longevity and performance.
First, drill holes slightly larger than cable bundles to avoid pinching or damage.
Route cables through weatherproof conduits: PVC buried at least 18 inches deep or metal conduit at 6 inches per code. Use fish tape to guide cables smoothly through walls or attics, preventing sharp bends that degrade signals.
Seal all entry points with silicone or duct seal to block moisture infiltration.
Install wire guards along exposed runs to protect against physical damage and animal interference.
Employ weather-rated connectors and cables designed for outdoor conditions.
Finally, secure cables tightly with corrosion-resistant fasteners, maintaining neat, unobstructed paths that facilitate future maintenance and system upgrades. Use junction boxes to secure and weatherproof all cable connections, preventing moisture intrusion.
Install and Properly Terminate Security Camera Wiring
Crimping and securing connectors on your security camera wiring guarantees reliable signal transmission and power delivery. Start by stripping cable ends carefully to expose conductors without nicking wires.
Match wire colors precisely when inserting into connectors to maintain correct pinouts. Use an ethernet crimper for RJ-45 connectors, ensuring pins lock firmly.
For coaxial cables, attach BNC connectors so the center conductor contacts the pin solidly. Finally, insulate connections with electrical tape or heat shrink tubing to prevent shorts and corrosion.
- Strip wires to proper lengths for connectors
- Align wires by color code before insertion
- Crimp connectors with the correct tool firmly
- Inspect terminations for secure pin contact
- Insulate all connections to avoid exposure and shorts
Using high-quality coaxial cables is essential for maintaining signal integrity over long distances in analog HD camera systems.
Protect Outdoor Security Camera Wiring From Damage
To keep your outdoor security camera wiring safe, it’s really important to weatherproof all the cable connections. You can do this by using silicone sealant or weatherproof connectors; this helps prevent any moisture damage.
Once that’s done, don’t forget to secure your cables! Using protective conduits or wire guards is a great way to shield them from physical impacts and environmental hazards.
For best results, consider using materials with IP65+ rating to ensure resistance against moisture and dust ingress.
Weatherproofing Cable Connections
When sealing outdoor security camera wiring, you’ll need to use weatherproof connectors and durable cables designed specifically for exposure to the elements. Properly sealing connections prevents moisture intrusion, corrosion, and signal degradation.
Start by applying dielectric grease to connector contacts to repel water. Use heat-shrink tubing over splices for a tight, water-resistant seal. Wrap connections with self-fusing silicone tape to block moisture without adhesive residue. Finally, encase connections in weatherproof junction boxes or enclosures rated for outdoor use.
- Select cables with UV and moisture resistance.
- Use weatherproof RJ-45 or BNC connectors with sealing gaskets.
- Apply dielectric grease inside connectors before assembly.
- Cover splices with heat-shrink tubing and silicone tape.
- Mount connectors inside outdoor-rated enclosures for added protection.
This methodical approach guarantees long-term reliability for your outdoor camera wiring. Additionally, positioning cameras under eaves or soffits can protect wiring from direct exposure to harsh weather conditions, enhancing durability and performance of the outdoor security system.
Physical Cable Protection
To safeguard outdoor security camera wiring from physical damage, implement robust protective measures that shield cables from environmental hazards and accidental impact.
Use conduit pipes or cable raceways to encase wires, preventing cuts or abrasions. Secure cables with UV-resistant ties and clamps to reduce movement and wear.
Bury conduits at code-compliant depths to avoid accidental digging damage. Additionally, avoid routing cables through high-traffic or exposed areas.
Ensure cables are secured every 12–18 inches with mounting clips to maintain signal integrity and prevent damage.
| Protection Method | Material | Benefit |
|---|---|---|
| PVC or Metal Conduit | PVC, galvanized steel | Shields cables from impact |
| UV-Resistant Ties | Nylon | Prevents cable movement |
| Cable Raceways | Plastic or metal channels | Organizes and protects wires |
Implement these strategies methodically to extend cable lifespan and maintain system reliability.
Test and Troubleshoot Your Security Camera System
Although installation may be complete, rigorous testing and troubleshooting remain critical to ensure your security camera system functions reliably.
Begin by powering on the system and verifying that all cameras receive power and transmit video to the recorder.
Next, inspect each video feed for clarity, proper angle, and coverage.
Test recording functions to confirm footage is saved correctly.
If issues arise, use a multimeter or cable tester to check cable integrity.
Finally, confirm all mounts and connections are secure.
- Verify power supply and camera activation
- Inspect video feed clarity and coverage
- Test recording and playback functions
- Check cable continuity with a tester
- Secure all connections and mounts before finalizing
Frequently Asked Questions
Can I Use Wireless Cameras Instead of Wired Ones?
Yes, you can use wireless cameras instead of wired ones.
Wireless systems simplify installation by eliminating cable routing and drilling. However, you’ll need to guarantee strong Wi-Fi coverage and stable power sources.
They may face interference or range limitations compared to wired setups.
Evaluate your environment’s connectivity and security needs carefully before choosing wireless. Wired cameras often provide more reliable, consistent video quality and power delivery for thorough surveillance.
How Do I Secure My Camera System From Hacking?
To secure your camera system from hacking, you should change default passwords to strong, unique ones immediately.
Keep your firmware and software updated regularly.
Enable network encryption like WPA3 on your Wi-Fi and isolate cameras on a separate VLAN or subnet.
Disable remote access if unnecessary, or use a VPN for secure connections.
Finally, monitor logs for unusual activity and use firewalls to restrict unauthorized access to your camera network.
What Is the Best Camera Resolution for Night Vision?
Wondering what resolution gives you the clearest night vision?
You want at least 1080p (Full HD) for detailed images in low light.
However, 4K resolution is ideal if you need to capture fine details like faces or license plates.
Higher resolution cameras paired with quality infrared LEDs or starlight sensors guarantee better clarity.
Just remember, higher resolution demands more storage and bandwidth.
Can I Connect Multiple Cameras to a Single Power Source?
Yes, you can connect multiple cameras to a single power source, but you must ensure the power supply provides adequate voltage and current for all cameras combined.
Calculate the total power consumption by summing each camera’s requirements. Use appropriate gauge wiring to handle the load and avoid voltage drops.
Always implement proper fusing or circuit protection for safety. Distribute power carefully to maintain stable operation and prevent overloading the power source.
How Long Do Security Camera Cables Typically Last Outdoors?
Think of your outdoor security cables like a sturdy bridge weathering seasonal storms. Typically, they last 5 to 10 years, depending on quality and exposure.
Using outdoor-rated, UV-resistant cables and proper sealing extends their lifespan. Regularly inspect for wear, moisture intrusion, or damage.
Proper installation, like burying conduits at correct depths and avoiding sharp bends, ensures signal integrity and durability. This helps your system perform reliably over time.
Final Check Before You Finish the Wiring
By carefully planning your security camera wiring layout and gathering the right tools, you guarantee a smooth installation.
Coincidentally, the same precise drilling and routing techniques that protect your cables also simplify troubleshooting later.
When you properly terminate and shield outdoor wiring, you not only guard against damage but also enhance system reliability.
Following these steps methodically means your security setup works flawlessly because meticulous installation and ongoing testing go hand in hand.
[…] to ensure safety and stability in your system, be sure to select the correct gauge power wires and appropriate mounting hardware when connecting multiple […]