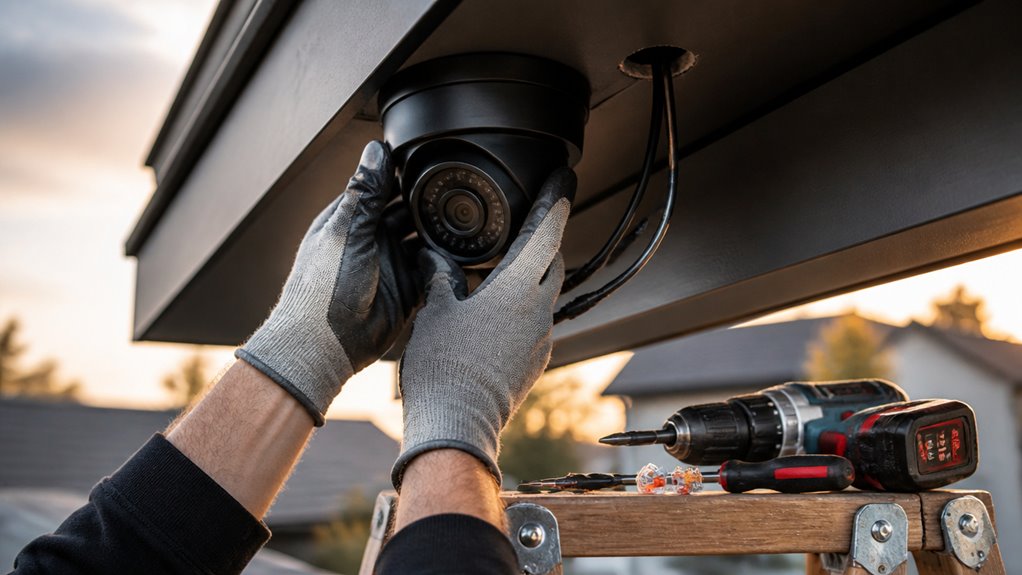

To install a wired security camera, first plan coverage by targeting entry points and minimizing blind spots.
Mount cameras securely at 8–12 feet for ideal view and tamper resistance.
Route cables neatly through walls using conduit or clips, ensuring proper power and video connections to your DVR or NVR.
Confirm all connectors are secure and test live feeds for clarity.
Adjust angles as needed and maintain regular checks.
Following these steps sets a solid foundation for creating a thorough surveillance setup.
Key Takeaways
- Plan camera locations prioritizing entry points and ensure mounting height is at least 10 feet for optimal coverage and tamper resistance.
- Select appropriate cables and power options, preferably using PoE to simplify installation with a single Ethernet cable for power and data.
- Use a camera template to mark and drill precise mounting holes on stable surfaces, securing brackets firmly and angling cameras slightly downward.
- Route and protect cables neatly through walls or conduit, avoiding sharp bends and interference, and label cables for easy identification.
- Connect cameras to DVR/NVR ports, verify secure connections and power, then test live feeds for clarity, focus, and proper field of view.
Plan Your Wired Security Camera Layout for Maximum Coverage
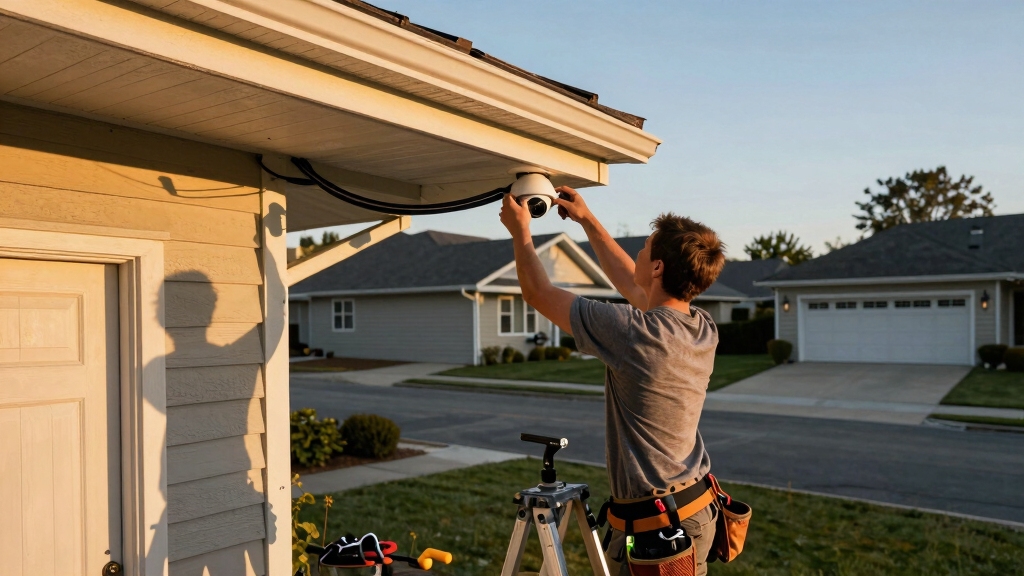
Before you start mounting cameras, plan your layout carefully to guarantee complete coverage of critical areas.
Prioritize key entry points like the front door, back door, garage, and ground-floor windows.
Map each camera’s field of view to minimize blind spots and avoid overlapping coverage.
Select mounting locations that allow direct cable runs to the DVR or NVR, ensuring a cleaner installation and reducing cable clutter.
Position cameras at least 10 feet high to deter tampering and secure a stable mounting surface.
While you don’t need to take into account Wi-Fi range for wired cameras, verify app connectivity if you’re using a hybrid system.
Plan cable routes to conceal wiring and protect external wiring with conduit or raceways to improve durability and aesthetics.
This systematic approach lays the foundation for efficient installation and reliable surveillance coverage throughout your property.
Choose the Best Wired Security Camera System
With your camera layout finalized, the next step is selecting a wired security camera system that matches your coverage needs and installation constraints.
Focus on resolution, cable type, and power options (PoE or separate). Consider the DVR/NVR capacity for the number of cameras and storage requirements.
Evaluate weatherproof ratings for outdoor units and compatibility with monitoring software.
Choosing a system that supports PoE technology can simplify installation by combining power and data transmission over a single cable.
| Feature | PoE System | Non-PoE System |
|---|---|---|
| Power Delivery | Single Ethernet cable | Separate power & video |
| Installation | Simplified, fewer cables | More complex wiring |
| Cost | Higher upfront | Lower initial cost |
| Scalability | Easy expansion | Requires additional power |
| Reliability | Stable, centralized power | Potential power points |
Choose a system balancing ease of installation, cost, and long-term reliability.
Prepare Tools and Materials for Wired Camera Installation
Alright, let’s kick things off by putting together a solid equipment checklist. You’ll want to gather all the essentials like cameras, DVR or NVR units, cables, power supplies, and mounting hardware. It’s super important to have everything you need on hand.
Now, about the tools—make sure you’ve got the right ones! Think drills, fish tape, and cable clips. These will really help make your installation smooth and efficient. You don’t want to be scrambling for tools halfway through!
And hey, don’t forget to prep all your materials ahead of time. This little step can really streamline your setup and help avoid any annoying delays. Trust me, it makes a big difference!
Additionally, consider if your cameras support Power over Ethernet to simplify power delivery and reduce cable clutter during installation.
Essential Equipment Checklist
Several key tools and materials are essential to guarantee a smooth wired security camera installation.
You’ll need the cameras themselves, a DVR or NVR recorder, appropriate power supplies, and cables—either Ethernet for PoE cameras or separate video and power cables for non-PoE models.
Mounting hardware such as brackets, screws, and wall anchors must be on hand for secure placement.
Additionally, prepare a drill with suitable bits, a screwdriver, fish tape for cable routing, and cable clips to secure wiring neatly.
For outdoor installations, consider conduit or wire guards to protect cables from environmental damage.
A ladder will help you reach elevated mounting points.
Confirm that all materials match your camera system specifications to avoid compatibility issues during setup.
Ensure your power solutions include surge protection and stable voltage to maintain continuous camera operation.
Choosing Proper Tools
Gather the essential tools and materials before beginning your wired camera installation to guarantee efficiency and accuracy. Having the right tools at hand prevents delays and ensures precise work, especially when drilling, routing cables, and mounting hardware.
Make sure to prepare these key tools:
- Drill with assorted bits for pilot holes and wall anchors
- Screwdriver set compatible with mounting hardware
- Fish tape or cable rods to guide cables through walls
- Ladder for safe access to elevated mounting points
Using purpose-built tools minimizes damage to walls and cables. It also facilitates neat wiring and secures mounting brackets firmly. Prioritize quality and compatibility with your specific camera model.
Proper tool selection streamlines each installation step, reducing errors and improving system reliability. Additionally, always test all components individually before mounting to confirm full functionality and cable length sufficiency.
Preparing Installation Materials
Before installing your wired security cameras, make sure you have all necessary materials organized and ready. Collect the cameras, DVR or NVR, power supply, and appropriate cables: Ethernet for PoE or separate video and power cables for non-PoE systems.
Prepare mounting brackets, screws, and wall anchors suited to your installation surfaces. Assemble tools like a drill with suitable bits, screwdrivers, fish tape for cable routing, cable clips, and a ladder for elevated mounts.
For outdoor installations, include conduit or cable guards to protect wiring from weather and physical damage. Verify that cables are long enough to reach the recorder without strain. Organizing these materials before starting will streamline the installation process, reduce errors, and ensure a secure, professional setup. Consider that NVR systems often utilize Power over Ethernet to simplify cabling by combining power and data transmission in a single cable.
Mount Camera Brackets Securely and at the Right Height
Alright, let’s get started!
First, you’ll want to mark the bracket positions accurately. Using the camera template is a great way to ensure everything is placed just right.
Now, when it comes to height, aim to mount those brackets at least 10 feet off the ground. This will help reduce the chances of tampering while also providing optimal coverage of the important areas you want to monitor.
Lastly, make sure to secure those brackets firmly on stable surfaces. This is key for supporting the camera’s weight and keeping everything aligned perfectly. Happy mounting!
For best results, angle the cameras slightly downward to capture clear faces and activities while avoiding blind spots, which enhances overall security camera angles.
Accurate Bracket Placement
Positioning your camera brackets accurately is critical to ensuring reliable coverage and system stability.
Before drilling, use the camera template to mark screw holes precisely.
Confirm the mounting surface is solid and can support the camera’s weight to avoid future loosening or damage.
Drill pilot holes to prevent cracking and guarantee exact alignment.
Secure brackets with appropriate anchors or mounting pins, especially on drywall or masonry.
Verify the bracket angle matches your planned field of view.
Avoid placing brackets near obstructions that may block the camera lens.
Assure cable paths from the bracket allow neat, protected wiring runs.
Temporarily mount and test camera positioning before final tightening.
This methodical approach guarantees accurate bracket placement and a stable foundation for your security system.
Additionally, consider optimizing angles and overlapping fields of view to minimize blind spots and enhance overall surveillance coverage.
Optimal Mounting Height
Mount your camera brackets at an ideal height to maximize coverage while minimizing tampering risks. Aim for at least 10 feet above ground, which balances broad field of view with security against vandalism.
Adjust height depending on lens type and target area, ensuring clear identification without blind spots. Secure the bracket firmly into a stable surface to prevent shifts over time.
Visible cameras placed at strategic heights act as an effective psychological barrier, signaling increased risk to potential offenders.
| Mounting Height | Purpose |
|---|---|
| 8–10 ft | Standard perimeter |
| 10–12 ft | Enhanced security |
| 12–15 ft | Wide-angle coverage |
| 6–8 ft | Low entry points |
| 15+ ft | Overhead monitoring |
Use this guide to position each bracket precisely, improving both performance and durability of your wired cameras.
Route and Protect Cables for Clean, Safe Wiring
When routing cables for your wired security camera system, ensure each cable runs directly back to the DVR or NVR. This maintains organization and simplifies troubleshooting.
Plan cable paths that avoid sharp bends, high-traffic areas, and sources of electrical interference. Protect outdoor cables using conduit or trunking to shield against weather and physical damage.
Seal all exterior wall penetrations with silicone to prevent moisture intrusion and pest entry.
To route and protect cables effectively:
Use fish tape to pull cables through walls or soffits cleanly. Secure cables with clips or cable ties to prevent sagging or tangling.
Avoid running cables parallel to power lines to reduce interference. Label cables at both ends for easy identification during maintenance.
Following local electrical codes for securing cables ensures safety and compliance throughout the installation process.
Connect Power and Video Cables Correctly for Each Camera
Hook up each camera’s power and video cables carefully to guarantee reliable operation. For PoE cameras, connect the Ethernet cable directly to the PoE port on your NVR or PoE switch, assuring the RJ-45 connectors are fully seated.
For non-PoE cameras, plug the power adapter into a stable outlet. Then link the video cable to the corresponding DVR input port. Match each cable with its camera to avoid confusion during troubleshooting.
Double-check every connector for secure attachment and verify polarity if applicable. Avoid loose connections that could cause intermittent signals or power loss. Properly route cables to prevent strain on connectors and maintain signal integrity.
Confirm all connections before powering the system to make certain each camera transmits video and receives power without interruption.
Set Up DVR/NVR and Connect Cameras Correctly
Before powering on your system, make certain the DVR or NVR is positioned in a well-ventilated area near your router or monitor for peak connectivity and access.
Position your DVR or NVR in a well-ventilated spot near your router for optimal connectivity and easy access.
Next, connect each camera cable to the corresponding port on the DVR/NVR, ensuring secure seating to avoid signal loss. For PoE setups, plug cameras directly into PoE-enabled ports; for non-PoE, connect video and power cables separately.
Label each cable to simplify troubleshooting and maintenance. Finally, organize and secure cables to prevent strain or damage.
Match each camera to the correct DVR/NVR input port. Securely terminate Ethernet cables with RJ-45 connectors if applicable. Confirm all power connections are stable before powering up.
Arrange cables neatly to maintain airflow and ease future access.
Test Camera Feeds and Adjust Angles for Optimal Views
To guarantee each camera delivers clear and complete coverage, power on your DVR or NVR and verify live feeds from every installed camera.
Examine each feed for clarity, focus, and correct exposure. Check that the field of view captures the intended zones without blind spots or excessive overlap.
Adjust the camera angles by loosening the mounting bracket screws and repositioning the camera to optimize coverage.
Eliminate glare or obstructions by slightly tilting or rotating each unit. Once angles are set, tighten mounting hardware securely to maintain stability.
Confirm image quality under varying lighting conditions.
Finally, inspect all cable connections to make certain of uninterrupted signal transmission.
This methodical adjustment process guarantees that every camera provides peak surveillance coverage before completing the installation.
Troubleshoot and Maintain Your Wired Camera System
Although wired camera systems are generally reliable, occasional issues can arise that require prompt troubleshooting to maintain continuous surveillance.
Start by systematically checking power connections and cable integrity. Confirm each camera’s input matches the correct DVR/NVR port to isolate faults quickly.
Begin troubleshooting by verifying power connections and ensuring each camera is linked to the correct DVR/NVR port.
Clean lenses regularly to prevent image degradation from dust or moisture.
To maintain peak function:
Inspect and tighten all cable connections and mounting brackets periodically.
Verify the recorder and cameras power up correctly; replace faulty adapters promptly.
Test live feeds and playback routinely to detect recording failures early.
Seal any exterior cable penetrations to prevent moisture ingress and pest interference.
Frequently Asked Questions
Can I Use Wireless Cameras With My Existing Wired System?
You generally can’t directly connect wireless cameras to a wired security system because they use different transmission methods.
However, you can integrate wireless cameras by using a hybrid DVR/NVR that supports both wired and wireless inputs or by adding a network bridge that converts wireless signals to wired connections.
Make certain your system’s software supports the wireless cameras to maintain functionality like live viewing and recording across all devices.
How Do I Extend Cable Length Without Signal Loss?
To extend cable length without signal loss, use high-quality, shielded cables rated for your system. Cat6 or coaxial cables are ideal for video.
Incorporate signal boosters or repeaters at intervals exceeding recommended distances, typically 100 meters for Ethernet. For longer runs, consider using PoE extenders or fiber optic converters to maintain signal integrity.
Always test the extended cable for continuity and video quality before finalizing installation to guarantee reliable performance.
What Is the Typical Lifespan of Wired Security Cameras?
You can expect wired security cameras to last about 5 to 10 years, depending on build quality and environmental conditions.
High-quality models with weatherproof casing and proper installation usually hit the upper end.
Regular maintenance, like cleaning lenses and checking connections, extends lifespan.
Harsh weather or physical damage can shorten it.
Choosing durable materials and protecting cables during installation guarantees your system remains reliable over time.
Are Wired Cameras Compatible With Smart Home Systems?
Yes, wired cameras can be compatible with smart home systems, but it depends on the model and integration capabilities.
You’ll need cameras that support protocols like ONVIF or connect through a compatible DVR/NVR with smart home integration.
Some wired cameras link to platforms like Alexa, Google Home, or Apple HomeKit via a hub or app.
Verify compatibility before purchase to guarantee seamless control and automation within your smart home setup.
How Do I Securely Dispose of Old Security Camera Equipment?
Don’t just toss old security gear into the wind; you need to protect your data and the environment.
First, wipe all storage devices thoroughly to erase footage.
Then, dismantle equipment, separating hazardous materials like batteries.
Recycle electronic parts at certified e-waste centers or return them to manufacturers if they offer take-back programs.
Finally, document disposal for compliance.
Following this method keeps your data safe and helps reduce environmental impact.
Finish Your Wired Security Camera Setup with Confidence
Now that you’ve heroically wrestled cables into submission and played electrical matchmaker, your wired security camera system should be up and running, assuming you didn’t confuse power and video cables in a spectacular display of technical bravado.
Remember, meticulous planning and methodical installation prevent your masterpiece from turning into a spaghetti nightmare.
Keep testing, adjusting, and troubleshooting like a true pro because in surveillance, perfection isn’t optional; it’s mandatory.