You can install a smoke detector without drilling by using strong adhesive pads, heavy-duty Velcro strips, or magnetic mounts designed for no-drill setups.
First, clean the wall or ceiling with a mild cleaner and let it dry completely. Then, firmly press the adhesive or magnetic plate for at least 30 seconds and allow curing time if needed before attaching the detector.
Position it near the ceiling, away from vents or kitchens. For detailed placement tips and maintenance, keep exploring essential guidance.
Key Takeaways
- Clean and dry a flat, smooth mounting surface thoroughly before applying adhesive or magnetic mounts.
- Use heavy-duty adhesive pads, Velcro strips, or magnetic plates designed for smoke detectors.
- Press adhesive firmly for at least 30 seconds and allow up to 24 hours curing time for strong bonding.
- Snap the detector securely onto the adhesive or magnetic base and gently test its attachment strength.
- Test the alarm monthly, replace batteries annually, and relocate away from kitchens to avoid false alarms.
Why Choose No-Drill Smoke Detectors?
When you want to set up smoke detectors without damaging your walls or ceilings, no-drill options come in handy.
They let you maintain your home’s integrity, avoiding unsightly holes and costly repairs.
If you rent or live in a space with restrictions, these detectors provide a practical solution that meets safety requirements without permanent alterations.
You’ll save time and effort since installation is simpler and faster, requiring no special tools.
No-drill detectors also offer flexibility; you can reposition or replace them easily without leaving marks.
Plus, many models use reliable adhesives or magnetic mounts designed for secure attachment.
Choosing no-drill smoke detectors guarantees you protect your home and family effectively while preserving your living space’s appearance and structure.
Many of these detectors still require battery backups to ensure continuous operation during power outages.
No-Drill Smoke Detector Types and Mounting Options
You’ll find some great battery-powered smoke detectors that are perfect for no-drill installation. Many of these models come with strong adhesives or magnetic bases, making it super easy to set them up without any tools.
Now, when it comes to choosing the right mounting option, you’ve got a few choices. Heavy-duty Velcro strips, 3M tapes, and magnetic plates are all solid options that ensure a secure fit. Plus, they won’t damage your walls or ceilings, which is a huge bonus!
Battery-powered detectors offer flexible placement and DIY installation but require periodic battery changes to maintain reliable operation.
Battery-Powered Alarm Choices
Explore a range of battery-powered smoke alarms designed specifically for no-drill installation. These options provide flexibility without damaging your walls or ceilings.
Choose from photoelectric models ideal for adhesive mounting, stick-on alarms with built-in adhesive, and units compatible with Velcro strips or magnetic bases. These choices allow for easy installation and repositioning without tools or holes.
When selecting an alarm, ensure it has a flat base for proper adhesive contact and meets safety standards. Battery-powered models offer portability and quick setup, making them perfect for renters or temporary needs.
Reliable adhesion depends on both the alarm’s design and the mounting surface. Cleaning the area thoroughly before installation is essential for a secure fit. This approach keeps your home safe without compromising its appearance.
For optimal safety, install smoke detectors within 10 feet of bedrooms to ensure maximum alarm audibility and effectiveness.
Adhesive and Magnetic Mounts
Battery-powered smoke alarms often come ready for no-drill installation, but selecting the right mounting method can make all the difference in security and convenience.
You can choose adhesive mounts like 3M Scotch Mount tapes or HPX Powerpads for a strong, permanent hold on clean, flat surfaces.
Velcro strips offer temporary or semi-permanent options, ideal if you want easy removal or repositioning.
Magnetic mounts provide a non-invasive solution, using adhesive-backed plates on both ceiling and detector for quick attachment without damage.
Before installing, clean the surface thoroughly and position the detector according to NFPA guidelines—usually near the ceiling’s center or high on walls, away from cooking areas.
Always press adhesives firmly and test the strength before relying on the installation for safety.
Proper placement maximizes early warnings and ensures reliable protection even without drilling.
Preparing Walls and Ceilings for Adhesive Mounting
Before installing your smoke detector with adhesive mounts, start by thoroughly cleaning the walls or ceilings where you plan to attach the device.
Use a mild sugar water solution to remove grease, dust, and grime, ensuring the surface is completely dry before proceeding.
Choose a flat, smooth area near the ceiling’s center or high on the wall, avoiding corners and airflow sources like vents.
Mark your spot at least 8 inches from walls and 10 feet from cooking appliances to prevent false alarms.
This preparation maximizes adhesive contact and holds strength, critical for reliable mounting.
Clean, dry surfaces improve tape or pad adhesion, reducing the risk of the detector falling.
Taking these steps guarantees your no-drill installation stays secure and compliant with safety guidelines.
Additionally, avoid placing the detector near areas with high humidity levels to reduce false alarms caused by moisture interference.
Step-by-Step Guide to Installing No-Drill Smoke Detectors
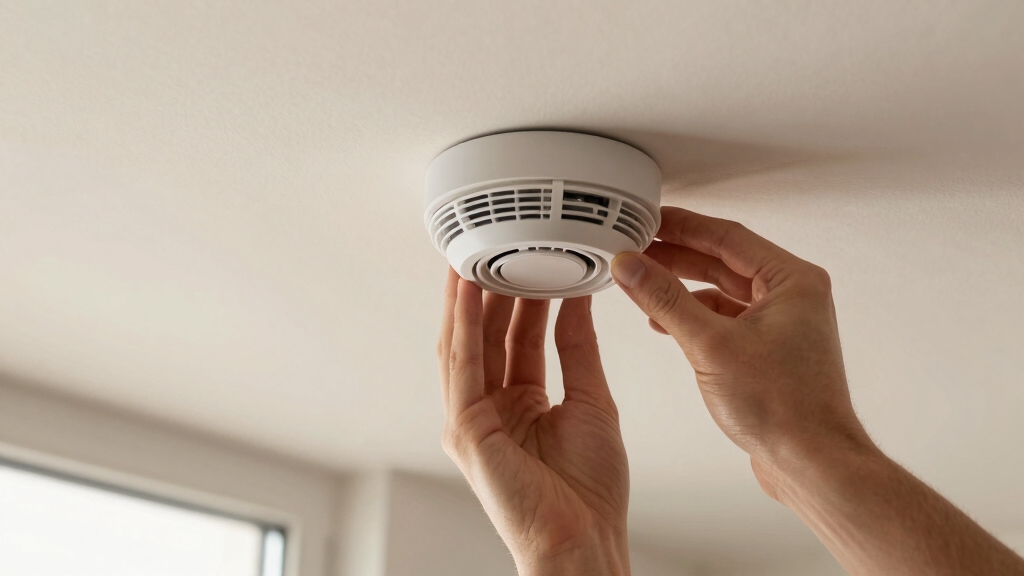
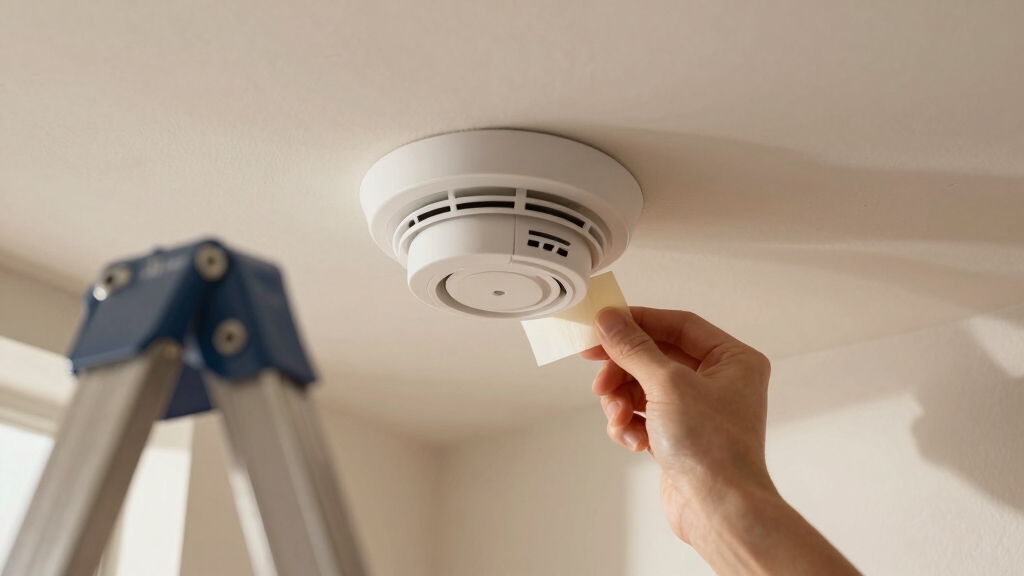
Start by firmly attaching your chosen adhesive pad or magnetic plate to the clean, dry ceiling or wall surface you’ve prepared.
Press it for at least 30 seconds to guarantee a strong bond. If using adhesive tape, allow up to 24 hours for curing before mounting the detector.
Next, align the smoke detector’s base with the adhesive or magnet and snap it into place securely. For uneven surfaces, apply multiple adhesive strips for full contact.
After installation, gently test the attachment strength by trying to move the detector; it should hold firmly without shifting.
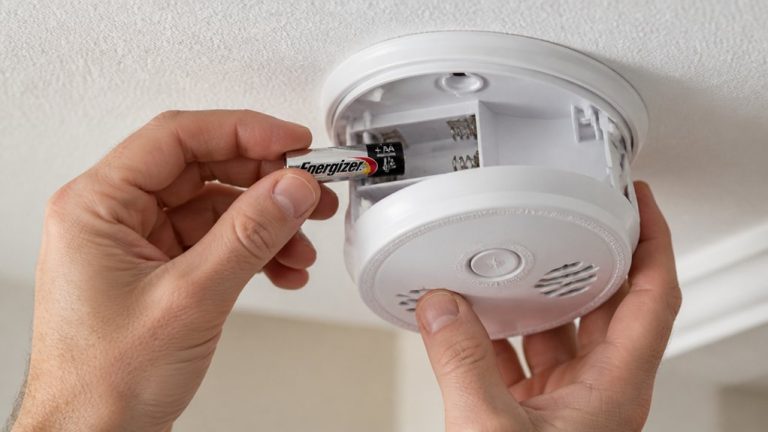
Finally, insert fresh batteries and test the alarm to confirm proper operation. This method guarantees a secure, damage-free installation without drilling or tools.
Remember to regularly inspect alarms to ensure they remain fully functional and safe over time.
Where to Place Smoke Detectors for Maximum Safety?
You definitely want to make sure you have smoke detectors on every level of your home, right? It’s super important to have them inside bedrooms and just outside sleeping areas, too. This way, you’ll have full coverage throughout your space.
When you install them, aim for the ceiling or high on the walls. But here’s a tip: keep them at least 10 feet away from cooking appliances. That way, you can avoid those annoying false alarms!
Oh, and try not to place them near windows, air vents, or spots that get really hot. This helps ensure they’re working as reliably as possible. Safety first, after all!
Photoelectric smoke detectors are especially effective in providing early warnings for smoldering fires due to their sensitivity to large smoke particles.
Ideal Detector Locations
Proper smoke-detector placement plays a vital role in guaranteeing early fire detection and maximizing your home’s safety.
Install detectors on every level of your home, inside each bedroom, and outside sleeping areas per NFPA guidelines.
Position smoke alarms on the ceiling center or high on the wall, no more than 12 inches from the ceiling.
Keep them at least 10 feet away from cooking appliances to prevent false alarms.
Avoid placing detectors near windows, air ducts, or heat sources, as airflow and temperature can affect performance.
For adhesive mounts, the top of the wall often provides better adhesion than ceilings.
Regular maintenance, including monthly testing and biannual cleaning, is essential to ensure detector reliability and optimal performance.
Avoiding False Alarms
Placing smoke detectors correctly not only guarantees early fire detection but also helps prevent false alarms that can cause unnecessary stress and desensitize you to warnings.
To avoid false alarms, position detectors at least 10 feet away from cooking appliances, where steam or smoke can trigger nuisance alerts.
Keep them away from windows, air ducts, or high-heat areas, as drafts and temperature changes may affect performance.
Mount detectors near the ceiling or high on walls, no more than 12 inches from the ceiling, for peak smoke detection.
Follow NFPA guidelines by installing alarms on every level, in every bedroom, and outside sleeping areas.
Consider relocating detectors away from kitchens, bathrooms, or heat sources to reduce environmental triggers and minimize false alarms.
Tips for Strong and Reliable Adhesive Mounting
Make certain a strong and reliable adhesive mount by thoroughly cleaning the surface before installation. Any grease, dust, or grime can weaken the adhesive bond, so use sugar water or a mild cleaner to prep the area.
Choose a flat, dry spot on the ceiling or high on the wall for maximum contact. Once clean, press the adhesive firmly for at least 30 seconds to guarantee a good grip.
Here are key tips to secure your smoke detector:
Use high-quality mounting tapes like 3M Scotch Mount for durability.
Apply multiple adhesive strips on uneven surfaces to increase hold.
Allow 24 hours for the adhesive to cure before attaching the detector.
Following these steps helps you avoid loose mounts and guarantee safety without drilling. Remember to test alarms regularly to ensure your smoke detector functions properly after installation.
Magnetic Bases for No-Drill Smoke Detector Installation
If you want a mounting option that combines ease with flexibility, magnetic bases offer a smart solution for no-drill smoke detector installation.
Magnetic bases provide an easy, flexible, no-drill way to mount smoke detectors securely.
These bases come in two parts: one adhesive plate sticks securely to your ceiling or wall, while the detector’s base has a corresponding magnetic plate.
You simply attach the adhesive plate to a clean, flat surface, press firmly, and let it set before snapping the detector into place.
This method allows quick removal and repositioning without damaging walls or ceilings.
Magnetic bases are especially useful if you want to relocate detectors or avoid permanent fixtures.
Just make sure the adhesive plate is strong enough to hold the detector’s weight.
Always position the smoke detector according to safety guidelines for peak protection.
Testing and Maintaining Your No-Drill Smoke Detectors
Regularly testing and maintaining your no-drill smoke detectors guarantees they function reliably when you need them most.
Since these detectors rely on adhesives or magnets, it’s vital to check both their alert systems and how securely they’re attached.
Test your alarms monthly by pressing the test button to make certain the sound is loud and clear.
Inspect the mounting to prevent accidental falls or loose adhesion.
Here’s how you can keep your no-drill detectors in top shape:
Replace batteries at least once a year or when the low-battery alert sounds.
Clean the detector’s surface and vents gently with a dry cloth to prevent dust buildup.
Verify adhesive or magnetic attachments remain firm, reapplying if loosened.
Consistent attention keeps your detectors ready to protect your home effectively.
Troubleshooting No-Drill Smoke Detector Problems
Encountering issues with your no-drill smoke detector can be frustrating, but many common problems have straightforward solutions.
If your detector isn’t sticking properly, check that the mounting surface is clean and dry.
Wiping with sugar water can remove grease.
Make sure you use the right adhesive like 3M tape or HPX Powerpads.
Press firmly for at least 30 seconds.
For magnetic mounts, confirm both plates are aligned and firmly attached.
If alarms trigger falsely, relocate the detector at least 10 feet from kitchens.
Also, avoid drafts and heat sources.
When the device fails to test or respond, replace batteries or reset the unit.
Regularly test your detector and inspect the mounting to maintain peak performance without drilling.
Frequently Asked Questions
How Long Do Battery-Powered No-Drill Smoke Detectors Typically Last?
Battery-powered no-drill smoke detectors typically last between 6 months to 10 years, depending on the model and battery type.
You’ll find some with sealed lithium batteries designed to last up to a decade without replacement.
Others use replaceable AA or 9V batteries needing changes every 6 to 12 months.
Always check the manufacturer’s guidelines and test your detector regularly to make certain it’s working reliably throughout its lifespan.
Can No-Drill Smoke Detectors Be Interconnected Wirelessly?
Imagine a network of smoke detectors softly blinking in unison, communicating wirelessly across your home.
Yes, you can interconnect no-drill smoke detectors wirelessly. Many modern models feature built-in wireless technology, allowing them to alert you simultaneously if one detects smoke.
This practical setup enhances your safety without complicated wiring or drilling.
It ensures every corner of your home is covered efficiently and conveniently.
Just follow the manufacturer’s pairing instructions carefully.
Are No-Drill Smoke Detectors Compliant With Local Fire Codes?
Yes, no-drill smoke detectors can be compliant with local fire codes if they meet the required safety standards and placement guidelines.
You need to make certain the alarms are installed on every level, near bedrooms, and away from cooking areas, following NFPA rules.
Use reliable adhesive or magnetic mounts that securely hold the device.
Always test your alarms regularly and check local regulations to confirm acceptance of no-drill installation methods.
What Should I Do if Adhesive Fails During Winter Months?
If adhesive fails during winter months, clean both surfaces thoroughly and warm the adhesive slightly before reapplying to improve bonding.
Consider switching to stronger tapes like HPX Powerpads or 3M Scotch Mount, which handle temperature fluctuations better.
You might also use magnetic mounting plates for easier adjustments. Always test the attachment strength after installation and monitor it regularly, especially in colder, drier conditions where adhesives tend to lose grip faster.
How Do No-Drill Smoke Detectors Compare in Price to Traditional Models?
No-drill smoke detectors often cost a bit more upfront, reflecting their premium for convenience and ease.
You’ll find battery-powered and adhesive models priced slightly higher than basic traditional alarms, due to their specialized mounting features.
However, you save on tools and wall damage repairs, making them practical investments.
In the long run, you get hassle-free installation without sacrificing safety, which can be worth every extra dollar you spend.
Effortless Safety: Smoke Detector Installation Done Right
Installing a smoke detector without drilling is like giving your walls a gentle hug—secure, damage-free, and effective.
By choosing the right no-drill options and following proper adhesive techniques, you guarantee safety without sacrifice.
Remember to place detectors strategically, test regularly, and maintain them well.
With these practical steps, you’ll keep your home protected and your walls intact, proving that safety and convenience can go hand in hand.