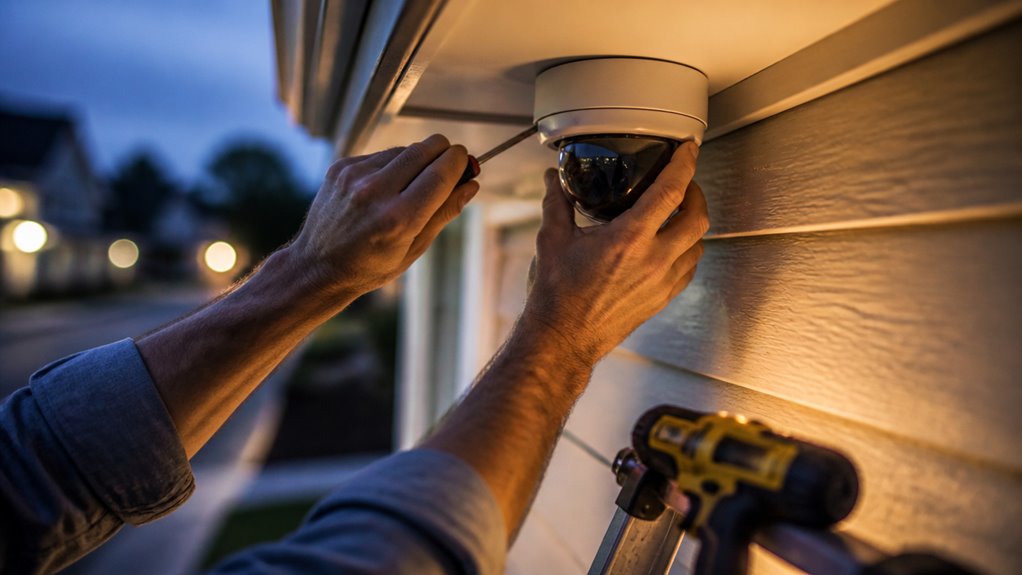

Yes, you can install security cameras yourself if you’re comfortable with tools and understand your property layout.
You also need to have the technical skills to manage cable routing, power, and network setup. DIY saves costs but demands precise camera placement and correct drilling.
Thorough testing of motion detection and night vision is crucial for reliable coverage. For complex wiring, roof drilling, or code compliance, professional help is advised.
Discover how to optimize installation for security and system performance in the next section.
Key Takeaways
- DIY installation saves money but requires comfort with tools, technical skills, and understanding of your property layout.
- Hire professionals for complex cable routing, roof drilling, or electrical work beyond your expertise to ensure safety and code compliance.
- Proper camera placement involves covering all entry points with overlapping fields of view to eliminate blind spots.
- Use appropriate tools for drilling, mounting, and cable routing, and always check for hidden wiring or plumbing before drilling.
- Test camera feeds during different lighting conditions and adjust sensitivity to reduce false alarms and ensure reliable monitoring.
Should You Install Your Security Cameras Yourself?
While installing security cameras yourself can save money and offer greater control over placement, it requires a clear understanding of your property’s layout. You also need to be comfortable with tools and familiar with the system’s setup process.
Installing security cameras yourself saves money but demands a solid grasp of your property and setup skills.
You’ll need to identify critical coverage areas and plan camera angles to eliminate blind spots. Additionally, you must decide between wired or wireless systems.
Wireless kits simplify setup with app pairing and battery installation. However, wired systems demand precise cable routing, drilling, and network connections.
Comfort with drills, anchors, fish tape, and cable testers is essential for wired installations. You must also manage device initialization and network security to prevent vulnerabilities.
Ultimately, your technical skills, property complexity, and confidence in handling tools determine whether DIY installation is feasible or if professional assistance is advisable. Proper mounting height and camera positioning play a crucial role in effective surveillance and tamper resistance.
Pros and Cons of DIY Security Camera Installation
Evaluating the pros and cons of installing security cameras yourself helps you make an informed decision tailored to your skills and property needs.
DIY installation lowers labor costs and offers flexible camera placement, but it demands competence with tools, wiring, and app setup. Wired systems require drilling, cable routing, and network connections that can be challenging.
Wireless setups simplify installation but risk signal drops and battery failures.
| Advantage | Challenge | Best Use Case |
|---|---|---|
| Lower labor cost | Difficult cable routing | Small homes, wireless kits |
| Flexible placement | Risk of improper setup | Basic layouts, tech-savvy users |
| Faster setup | Network security vulnerabilities | Simple systems, apartments |
Assess your comfort with these trade-offs before committing to DIY installation. Additionally, understanding camera placement and coverage is crucial to avoid blind spots and ensure comprehensive surveillance.
Planning Camera Placement for Maximum Coverage
First things first, let’s pinpoint all the primary entry points around your property—think doors, windows, and garage access. This way, you can ensure that those critical areas are under constant watch.
Once you’ve got that down, it’s time to take a good look at any potential blind spots. You know, those sneaky little areas where coverage might be lacking? You definitely want to address those so intruders can’t slip by unnoticed.
Now, grab your property layout and use it to your advantage. Strategically positioning your cameras for overlapping fields of view is a smart move. This not only maximizes your surveillance efficiency but also gives you peace of mind knowing you’ve covered all your bases.
Remember to mount your outdoor cameras at an optimal height of 8 to 10 feet with a slight downward angle to maximize coverage and reduce vandalism risk.
Identifying Key Entry Points
When planning your security camera layout, pinpointing key entry points is essential to guarantee all-encompassing coverage and effective monitoring.
Focus on all access points such as front, back, and side doors, garage entrances, and ground-level windows.
Evaluate approach pathways, driveways, and any secondary entries like gates or basement doors.
Use a detailed property sketch to mark these locations, then prioritize cameras to cover each with overlapping fields of view to reduce vulnerability.
Account for lighting conditions and potential obstructions when selecting exact mounting spots.
Strategically positioning cameras at these critical points makes certain intrusion attempts trigger alerts and recordings, optimizing your system’s deterrence and evidentiary value.
This targeted approach to entry point identification forms the foundation for a robust, reliable security setup tailored to your property’s unique layout.
To ensure comprehensive protection, plan to install at least one camera per entry point and increase coverage by 10–20% to address potential blind spots caused by architectural or landscaping features.
Eliminating Blind Spots
Although identifying key entry points is essential, you must also address blind spots to guarantee thorough surveillance coverage.
Blind spots create vulnerabilities that intruders can exploit, so plan camera placement meticulously to minimize them.
Use overlapping fields of view and strategic angles to make certain no area remains unseen.
Focus on these critical steps:
Position cameras to cover corners and areas shielded by structures or landscaping.
Adjust camera tilt and pan settings to extend coverage beyond direct lines of sight.
Employ multiple camera types (e.g., wide-angle and PTZ) to monitor both broad spaces and detailed zones.
Mount cameras at a height of at least 10 feet with a slight downward angle to maximize field of view and reduce tampering risk, ensuring clear coverage of all critical areas and elimination of blind spots with optimal camera height.
Essential Tools and Equipment for DIY Installation
Gathering the right tools and equipment is essential for a smooth and secure DIY security camera installation. You’ll need a drill with appropriate bits, mounting screws and anchors, and a mounting template for precision.
For wired systems, fish tape and spade bits help route cables through walls. Ethernet crimpers and testers are vital for wired network connections. Surveillance-rated hard drives guarantee reliable continuous recording.
Be sure to verify surface solidity before mounting to ensure a stable installation and avoid hazards.
| Tool/Equipment | Purpose | Notes |
|---|---|---|
| Drill & bits | Create mounting & pass-through holes | Use masonry bits for brick |
| Screws & anchors | Secure mounting bases | Match surface type |
| Fish tape | Route cables through tight spaces | Essential for wired setups |
| Crimpers & testers | Prepare & verify Ethernet cables | Needed for PoE cameras |
| Surveillance HDD | Reliable video storage | WD Purple or SkyHawk preferred |
Having these guarantees efficiency and system durability.
Mounting Wireless Security Cameras: Step-by-Step
Begin by selecting ideal locations for your wireless cameras, prioritizing solid surfaces near entry points, driveways, and other critical areas. Use mounting templates to mark precise drill points, guaranteeing stability and correct camera orientation.
Next, drill pilot holes and secure mounts with appropriate anchors and screws for the surface type. Attach the camera to the mount firmly, verifying it swivels and tilts as needed.
Insert batteries or connect power adapters before mounting to avoid removal later. Connect the camera to your Wi-Fi network using the companion app following manufacturer prompts.
Perform a live feed check to confirm coverage angles, adjusting mounts to eliminate blind spots and glare. This method guarantees peak performance, reliable connectivity, and secure installation for your wireless security system.
Ensure to verify Wi‑Fi signal strength at the camera location before finalizing installation to prevent connectivity issues.
Installing Wired Cameras: Drilling and Cable Routing Tips
When you’re setting up wired cameras, it’s a good idea to kick things off by drilling some pilot holes. Just make sure you’re using the right bit to avoid any damage to your walls or cables. You definitely don’t want to create extra work for yourself!
Once you’ve got those holes in place, grab some fish tape. It’s super handy for routing cables through tight spots. Just remember to keep an eye on those bends and tension; you want to keep things smooth and straightforward.
And hey, don’t forget to plan out your cable paths. This not only helps with maintaining signal integrity, but it also makes any future maintenance a whole lot easier. Trust me, a little foresight goes a long way!
Be sure to avoid sharp bends when routing cables, as these can degrade signal quality and damage the wiring over time.
Drilling Best Practices
Drill pilot holes carefully to guarantee precise cable routing and secure camera mounting when installing wired security cameras.
Start by marking exact drill points using a mounting template to avoid misalignment.
Use a drill bit slightly smaller than your mounting screws for pilot holes to prevent wood splitting or masonry cracking.
When drilling cable pass-through holes, choose a spade or hole saw bit sized correctly for your cable bundle.
Always wear safety goggles and check for hidden wiring or plumbing before drilling.
Key drilling tips include:
Use a level to ensure camera mounts are perfectly horizontal.
Drill slowly to maintain control and prevent damage.
Seal drilled holes with silicone to protect against moisture intrusion.
For installations on brick or concrete surfaces, ensure you use masonry anchors and pre-drill with the appropriate masonry bit.
Following these practices guarantees a durable, professional-grade installation.
Efficient Cable Routing
To achieve efficient cable routing for your wired security cameras, plan your cable paths carefully to minimize exposure and simplify future maintenance.
Identify the shortest, most direct routes that avoid high-traffic areas and electrical interference.
Use existing conduits or wall cavities when possible to protect cables from damage and weather.
Drill precise pass-through holes with appropriate-sized spade bits, ensuring clean edges to avoid cable chafing.
Employ fish tape to guide cables smoothly through walls, ceilings, or soffits, reducing the risk of kinks or breaks.
Secure cables with clips or conduits at regular intervals to prevent sagging and maintain a neat appearance.
Label cable ends clearly for easy identification during troubleshooting.
Proper planning and execution here will markedly improve your system’s reliability and simplify future upgrades or repairs.
Consider using Power over Ethernet (PoE) to simplify power delivery and enhance installation efficiency by reducing the number of cables needed.
How to Connect Your Cameras to Power and Network?
Begin by identifying the power source and network type your cameras require. These connections are critical for reliable operation.
Wired cameras often use PoE (Power over Ethernet), combining power and data in one cable. Others may need separate power adapters. Wireless cameras typically rely on batteries or AC adapters and connect via Wi-Fi.
To connect your cameras effectively:
Use quality Ethernet cables (Cat5e or higher) for wired connections to guarantee stable data and power delivery.
Securely plug power adapters into grounded outlets or use PoE injectors or switches for centralized power management.
Confirm Wi-Fi network strength at the camera location to avoid signal dropouts and interference.
Ensuring proper power and network connections prevents downtime and enhances your system’s performance and security.
Setting Up Your Security Cameras With Mobile Apps
Once your cameras are powered and connected to the network, you’ll move on to configuring them through the mobile app provided by the manufacturer.
Begin by downloading the app from your device’s app store and creating an account if required.
Follow the in-app prompts to add each camera, typically by scanning a QR code or entering a unique device ID.
Make sure you assign clear names to each camera for easy identification.
Adjust basic settings such as resolution, frame rate, and recording schedules according to your needs.
Connect the app to your home Wi-Fi securely and enable encryption features if available.
Finally, set up user permissions and notifications to monitor activity remotely.
This app-based setup centralizes control and guarantees your system operates optimally.
Testing Camera Angles, Motion Detection, and Night Vision
You’ll want to fine-tune each camera’s angle. This helps eliminate any blind spots and makes sure that all the critical areas are fully covered.
Once that’s done, take a moment to test the motion detection settings. It’s important to confirm that your system triggers alerts accurately and doesn’t end up giving you false positives.
And don’t forget about night vision! Check how well the cameras perform in low-light conditions. You want to make sure you’re getting clear, reliable images even after dark.
It’s all about ensuring your security setup works seamlessly around the clock.
Adjusting Camera Angles
Fine-tune each camera’s position by reviewing its live feed to guarantee peak coverage without blind spots or glare. Adjusting angles precisely secures optimal detection zones and image clarity.
Use your app’s real-time video to identify obstructions, overly bright areas, or weak coverage. Test adjustments during different lighting conditions to confirm consistent visibility.
For night vision, verify infrared LEDs illuminate the intended field without reflecting off nearby surfaces, which can cause glare.
Key focus areas include:
Aligning cameras to cover primary entry points and vulnerable zones while minimizing overlap.
Avoiding direct sunlight or bright artificial light sources that cause lens flare or washout.
Checking night vision effectiveness by observing infrared illumination and image contrast in low-light settings.
This methodical approach maximizes your system’s reliability and security performance.
Verifying Motion Detection
Regularly testing your security cameras’ motion detection guarantees they respond accurately to movement without false alarms or missed events.
Begin by walking through each camera’s field of view to trigger alerts while monitoring the live feed and notification system.
Adjust the sensitivity settings in the camera’s app to balance detection range and reduce false positives caused by pets, shadows, or foliage movement.
Verify coverage overlaps to avoid blind spots and assure critical areas like entry points are fully monitored.
Conduct tests during different times of day to account for varying light conditions affecting sensor performance.
Confirm that motion-triggered recordings start promptly and that alerts reach your device without delay.
This systematic verification assures your DIY-installed system functions reliably and maximizes security coverage.
Evaluating Night Vision
After verifying motion detection, the next step involves evaluating your cameras’ night vision capabilities alongside their angles and sensitivity settings.
Night vision is critical for effective 24/7 surveillance, so you need to test infrared (IR) illumination range, image clarity in low light, and glare from nearby light sources.
Adjust camera angles to avoid reflections or blind spots, ensuring peak coverage in darkness. Fine-tune motion sensitivity to reduce false alarms caused by small animals or shadows.
Test IR performance by walking through the camera’s field of view in complete darkness.
Adjust angles to prevent IR glare from nearby walls or windows.
Evaluate motion detection responsiveness during nighttime conditions to balance security and false triggers.
This systematic approach guarantees your system’s effectiveness around the clock.
When to Call a Professional for Security Camera Installation?
While installing security cameras yourself can save money and offer control, you should call a professional when the project involves complex cable routing, roof or soffit drilling, or electrical work beyond your comfort level.
DIY security camera installation saves money, but call a pro for complex wiring, drilling, or electrical tasks beyond your skills.
Professionals have the expertise to navigate difficult attic or masonry penetrations safely and guarantee cables are routed without signal loss or damage.
They also handle electrical connections to avoid fire hazards or voiding coverage.
If your installation requires multiple cameras with long cable runs or integration into existing electrical systems, a licensed installer guarantees compliance with local codes and peak system performance.
When safety risks or technical challenges exceed your skills, hiring a professional prevents costly mistakes.
It also ensures correct placement and achieves reliable, secure surveillance coverage tailored to your property’s unique layout.
Frequently Asked Questions
How Do I Secure My Security Camera System Against Hacking?
To secure your security camera system against hacking, start by changing default passwords to strong, unique ones.
Make certain your firmware is always up to date to patch vulnerabilities. Use WPA3 encryption for your Wi-Fi network and disable remote access if unnecessary.
Segment your camera network from other devices with a VLAN or guest network.
Regularly monitor device logs for suspicious activity and enable two-factor authentication when available to add an extra security layer.
What Is the Average Lifespan of DIY Security Cameras?
You’ll expect DIY security cameras to last around 3 to 5 years, depending on build quality, weather exposure, and maintenance.
You’ll face battery replacements every 6 to 12 months for wireless models, firmware updates to guarantee security, and occasional lens cleaning for clear images.
Lower-end models degrade faster under harsh conditions, while premium units with weatherproof casings and surveillance-rated components extend lifespan reliably.
Proper setup and care maximize your investment.
Can I Integrate DIY Cameras With Existing Smart Home Systems?
Yes, you can integrate DIY security cameras with existing smart home systems, provided the cameras support standard protocols like Wi-Fi, Zigbee, or Z-Wave.
Check compatibility with your hub or platform (e.g., Alexa, Google Home, or Apple HomeKit). Use the companion app to link devices and configure automation rules for alerts or recordings.
However, integration complexity varies, so make sure firmware updates and network security settings align for seamless, reliable performance.
How Do I Maintain and Clean Security Camera Lenses?
To maintain and clean security camera lenses, use a soft microfiber cloth to gently wipe away dust and smudges without scratching.
Avoid harsh chemicals; instead, apply a small amount of lens cleaner or isopropyl alcohol to the cloth, not directly on the lens.
Regularly inspect for moisture or debris buildup, especially after storms.
Keep housings sealed and check for damage to maintain clear images and peak performance over time.
Are There Legal Restrictions on Camera Placement and Recording?
Yes, you must respect privacy laws, local ordinances, and consent requirements.
Avoid pointing cameras at neighbors’ private spaces, recording audio without consent, or capturing public areas where expectations of privacy exist.
Check federal, state, and municipal regulations to guarantee compliance.
Use signage if required, secure recordings properly, and limit data retention.
Following these rules protects you legally and guarantees ethical surveillance practices.
This prevents potential lawsuits or fines.
Final Answer: Can I Install Security Cameras Myself?
Installing your security cameras yourself is like assembling a high-tech fortress brick by brick.
With careful planning, the right tools, and precise placement, you control every angle of your digital battlement.
Yet, if the maze of wiring or network setup feels like a labyrinth, don’t hesitate to call in the experts.
Your home’s safety deserves a foundation built on both your effort and professional precision, ensuring nothing slips past your vigilant watch.