
To change the battery in your ADT smoke detector, first identify the correct CR123A battery type and put the system in test mode to avoid false alarms.
Disarm your system, remove the detector by twisting it counterclockwise, then open the battery compartment and replace all batteries at once.
Reinstall and lock the detector securely, test it to confirm proper function, and clear any tamper alerts on the keypad.
Following these steps guarantees your system stays reliable and safe. More detailed guidance can help you complete this properly.
Key Takeaways
- Disarm the ADT system and put the smoke detector in test mode to prevent false alarms before battery replacement.
- Twist the detector counterclockwise about half an inch to remove it from the mounting plate and access the battery compartment.
- Remove all old batteries, wait 10-30 seconds, then insert new CR123A batteries with correct polarity.
- Reinstall the detector by aligning and twisting it clockwise until it locks securely in place.
- Test the detector by pressing and holding the test button until the alarm sounds, then clear any tamper alerts on the keypad.
Identify the Right Battery for Your ADT smoke detector
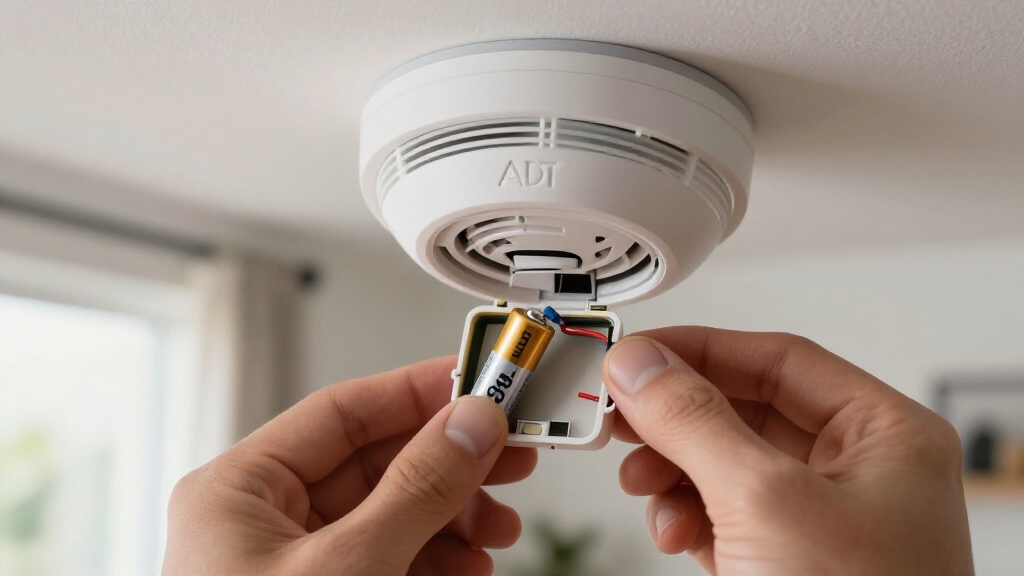
Before you replace the battery in your ADT smoke detector, you’ll need to identify the correct battery type for your specific model.
Using the wrong battery can cause malfunctions or void coverage. Most ADT Command smoke/CO detectors require CR123A batteries, but some models may use one, two, or four batteries.
Check your detector’s manual or ADT support materials to confirm the exact battery type and quantity needed. When replacing batteries in multi-battery detectors, replace all batteries simultaneously to avoid issues from mixing new and old cells.
Accurate identification guarantees your smoke detector functions reliably and prevents false alarms. If you’re unsure, refer to official ADT documentation or contact support to get the proper battery details before proceeding. It is important to obtain the official replacement battery directly from ADT to ensure compatibility and maintain your system’s support status.
Put Your ADT Smoke Detector in Test Mode and Disarm the System
To make certain a smooth and safe battery replacement, start by putting your ADT smoke detector into test mode and disarming the system.
Begin by setting your ADT smoke detector to test mode and disarming the system for safe battery replacement.
This step prevents false alarms and monitoring alerts during battery work. Access your ADT keypad or app to activate test mode, following your system’s manual for exact instructions.
Then, disarm the system to stop any trouble beeps or tamper alerts that might occur when you open the detector. If your system offers an OFF option to silence low-battery chirps, use it accordingly.
Remember, after power outages, allow up to 48 hours for battery recharge before replacing batteries, as alerts might be temporary.
Completing these preparations guarantees safety and prevents unnecessary alarms during the replacement process. Always ensure to bypass critical zones only when necessary to avoid compromising your system’s security during maintenance.
Remove Your ADT Smoke Detector to Access the Batteries
With your ADT system safely in test mode and disarmed, you can now remove the smoke detector to access the batteries.
Begin by grasping the detector firmly and turning it counterclockwise about half an inch to the unlatched position. This action disengages the detector from its mounting plate, allowing you to lift it off gently.
Be aware that removing the detector may trigger a tamper alert or cause a beeping sound; this is normal. Handle the unit carefully to avoid damaging the mounting base or internal components.
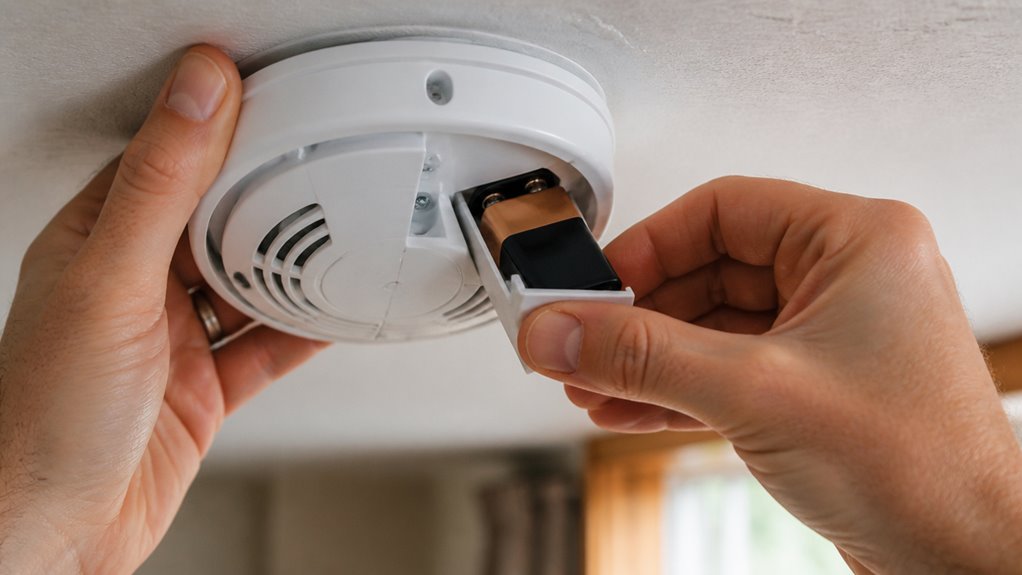
Once removed, locate the battery compartment on the back of the detector. You’re now ready to open the compartment and proceed with battery replacement.
Keep the detector close to avoid losing any parts and maintain control throughout the process. It is advisable to follow safe disconnection procedures to avoid damage and maintain system integrity when handling alarm components.
Replace Batteries Safely and Correctly in Your ADT Detector
Before you dive into replacing the batteries, it’s a good idea to check what type you need for your specific ADT detector model. Most of the time, you’ll be looking for CR123A batteries if you have a Command unit.
Now, before you start, don’t forget to power down the system or switch it to test mode. This step is super important to avoid any false alarms while you’re swapping out the batteries.
Once you’re ready, just follow the proper steps for removing and installing the batteries. This way, you can ensure that everything goes smoothly and safely during your battery change. Using fresh batteries ensures consistent voltage and prevents premature low battery warnings.
Battery Type Identification
Figuring out the right battery type is essential for keeping your ADT smoke detector functioning properly and avoiding false alarms or malfunctions. Most ADT smoke detectors use CR123A batteries, but some models require one, two, or four batteries.
Always consult your device’s manual or ADT’s support resources to identify the correct battery type. Using the wrong battery risks poor performance or damage.
| Detector Model | Battery Type | Quantity Needed |
|---|---|---|
| ADT Command Smoke | CR123A | 2 |
| ADT SSS5R0 | CR123A | 1 |
| Smoke/Heat Combo | CR123A | 4 |
| Older Models | AA | 1-2 |
| Consult Manual | Varies | Varies |
Replace all batteries simultaneously to maintain consistent power and avoid mixed-age battery issues. Backup batteries provide a fail-safe power source during mains outages to ensure continuous operation of your smoke detector.
Safe Battery Replacement
Knowing the correct battery type and quantity sets the foundation for a safe replacement process in your ADT smoke detector.
First, put your ADT system in test mode and disarm it to prevent unwanted alerts.
Remove the detector by turning it counterclockwise to release and lift it off the mount.
Open the battery compartment, remove all old batteries, and wait 10 to 30 seconds before inserting new ones, guaranteeing positive ends align with the plus signs.
Close the compartment and securely twist the detector clockwise until it locks.
Finally, press and hold the test button until the alarm sounds to confirm proper operation.
Exit test mode and reset the keypad if needed.
Proper handling avoids false alarms and ensures your detector functions reliably.
Always follow manufacturer guidelines and replace smoke alarms every 10 years to maintain sensor sensitivity and reliable detection.
Reinstall and Secure Your ADT Smoke Detector Properly
Align the smoke detector carefully with its mounting plate to guarantee a secure fit. Position the detector so the locking tabs match the plate’s slots.
Turn the detector clockwise firmly until it clicks or locks into place. This assures the tamper alert clears and the device operates normally.
Avoid forcing the unit, which may damage the mounting mechanism. After securing the detector, double-check it’s flush against the ceiling or wall, with no gaps.
Proper reinstallation prevents false alarms and maintains system integrity. Confirm that the battery compartment is fully closed before mounting.
Taking these steps guarantees your ADT smoke detector is correctly reattached, ready to function reliably until the next battery replacement or maintenance is needed. Regular testing of the unit using the test button is recommended monthly to ensure it remains fully operational.
Test Your ADT Smoke Detector After Battery Replacement
Once you’ve reinstalled your ADT smoke detector, the first thing you want to do is press and hold the TEST button. Keep it pressed until you hear the alarm sound—this lets you know everything is working properly.
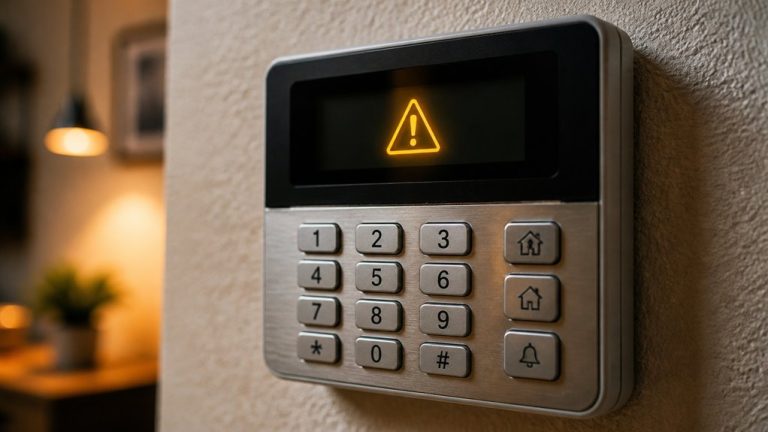
Next up, don’t forget to check the keypad for any tamper alerts. Clearing those alerts is important; it ensures that your system recognizes the device as secure and ready to go.
Finally, make sure to exit test mode. This step is crucial so that your monitoring functions can get back to normal. And that’s it! You’re all set.
Always allow at least 60 seconds for the system to reboot fully after power interruptions to ensure proper functionality.
Perform Detector Test
Once you’ve reinstalled the detector, press and hold the TEST button for about 30 seconds or until the siren sounds to verify proper operation.
This confirms the new batteries supply adequate power and the detector’s internal circuitry functions correctly.
If the siren doesn’t sound, double-check the battery orientation and make certain the detector is fully seated on its mount.
After a successful test, exit the system’s test mode following ADT’s instructions to resume normal monitoring.
If your system displays any tamper alerts or trouble signals, consult your user manual for specific reset procedures.
Performing this test promptly after battery replacement guarantees your smoke detector remains reliable, keeping your home protected without interruption.
Always follow manufacturer guidelines to maintain system integrity and safety.
For enhanced safety, consider devices that offer real-time push notifications to your smartphone for immediate alerts.
Clear Tamper Alerts
You’ll need to clear any tamper alerts triggered during battery replacement to restore your ADT smoke detector’s normal operation.
After reinstalling the detector and securing it to the mount, press and hold the TEST button for about 30 seconds until the siren sounds.
This confirms the detector is working properly. Next, enter the appropriate code on your ADT keypad to clear the tamper alert or stop any beeping.
If your system requires, reset the keypad following the manufacturer’s instructions.
Finally, disable the system’s test mode to resume normal monitoring.
Make certain the detector clicks firmly into place to avoid recurring tamper alerts.
Properly clearing these alerts guarantees reliable smoke detection and uninterrupted security system performance.
Regular maintenance, including battery replacement and alert clearing, is crucial to prevent faults that could impact emergency notifications and overall system reliability.
Clear Tamper Alerts and Restore Normal System Operation
Although removing and replacing the smoke detector’s batteries may trigger a tamper alert or beeping, you can clear these notifications by entering the appropriate code on your ADT keypad.
After reinstalling the detector, press and hold the TEST button until the siren sounds to verify functionality. Then, enter your system code to reset alerts and exit test mode. This process restores normal operation and silences tamper signals.
| Step | Action |
|---|---|
| 1 | Reinstall detector securely |
| 2 | Press and hold TEST button |
| 3 | Enter code on ADT keypad |
| 4 | Verify alarm silence |
| 5 | Exit system test mode |
Following these steps guarantees your ADT system is fully operational after battery replacement.
Frequently Asked Questions
How Long Do ADT Smoke Detector Batteries Typically Last?
ADT smoke detector batteries typically last between 5 to 10 years, depending on the model and usage.
You should regularly check battery status and replace them promptly when you hear low-battery alerts.
If your detector uses multiple batteries, changing them all at once guarantees consistent performance.
Keep in mind that environmental factors and system activity can affect battery life.
Stay proactive with maintenance to keep your smoke detector functioning reliably.
Can I Use Rechargeable Batteries in My ADT Smoke Detector?
You shouldn’t use rechargeable batteries in your ADT smoke detector.
These devices require specific battery types, typically non-rechargeable CR123A lithium batteries, to guarantee reliable power and proper function.
Rechargeables often have lower voltage and may not maintain consistent power, leading to false alarms or detector failure.
Always follow ADT’s guidelines and use the recommended batteries to keep your system working safely and effectively.
What Should I Do if My Detector Still Beeps After Battery Replacement?
If your detector still beeps after replacing the battery, remember that 70% of false alarms stem from improper battery installation.
First, check that the batteries are installed correctly with positive ends aligned to the plus signs.
Then, press and hold the TEST button for about 30 seconds to reset the detector.
Finally, clear any tamper alerts on your keypad and exit test mode.
If beeping persists, consult your system manual or contact ADT support.
How Do I Dispose of Old Smoke Detector Batteries Safely?
You should never throw old smoke detector batteries in regular trash.
Take them to a local battery recycling center or hazardous waste disposal site to guarantee safe handling.
Check with your municipality or retailer for designated drop-off locations.
If your area offers mail-in recycling programs, use those options.
Proper disposal prevents environmental harm and complies with regulations.
Always store used batteries safely until you can recycle them properly.
Will Changing the Battery Reset the Detector’s Memory or Settings?
Coincidentally, changing your ADT smoke detector’s battery won’t reset its memory or settings. You can swap batteries without worrying about losing configurations or programmed alerts.
Just make certain to disarm the system and put it in test mode before starting. After replacing batteries and reassembling the detector, test it to confirm normal operation.
This way, you maintain your device’s integrity and make sure continuous protection without interruption.
Final Thoughts on How to Change Battery in ADT smoke detector
Changing the battery in your ADT smoke detector makes sure it stays vigilant, protecting your home like a silent guardian.
By following each step carefully, from identifying the right battery to clearing tamper alerts, you’ll keep your system running smoothly without missing a beat.
Remember, a well-maintained detector is your first line of defense, so don’t skip testing after replacement.
Stay proactive, and your safety won’t just be a hope; it’ll be a guarantee.