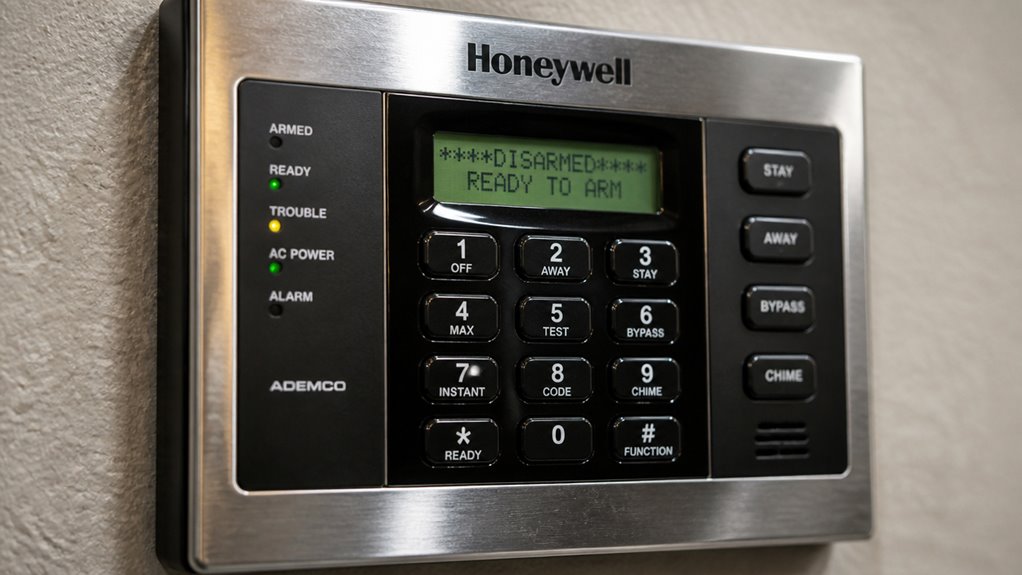

You can easily arm and disarm your Honeywell alarm panel using a 4-digit PIN, proximity tags, or encrypted keyfobs for quick access.
Close all doors and windows before arming. Enter your code promptly during entry delays to avoid alarms.
Manage user and master codes via the keypad for security control. Monitor indicator lights for system status and silence alarms safely when needed.
Keep your system updated and secure to protect your home. Explore more to optimize your panel’s features and settings.
Key Takeaways
- Arm the system by closing all entries, entering a 4-digit PIN, and pressing the arming or part-set key.
- Disarm the alarm by entering the user code and pressing the disarm key during the entry delay period.
- Manage user and master codes through the keypad menu, ensuring unique codes and prompt deletion when access is no longer needed.
- Acknowledge and silence alarms by entering the user code and pressing the silence button, keeping visual alerts active.
- Troubleshoot by verifying safety, checking power and wiring, then reset the panel after resolving issues using the reset control.
How to Arm Your Honeywell Alarm Panel Step-by-Step?
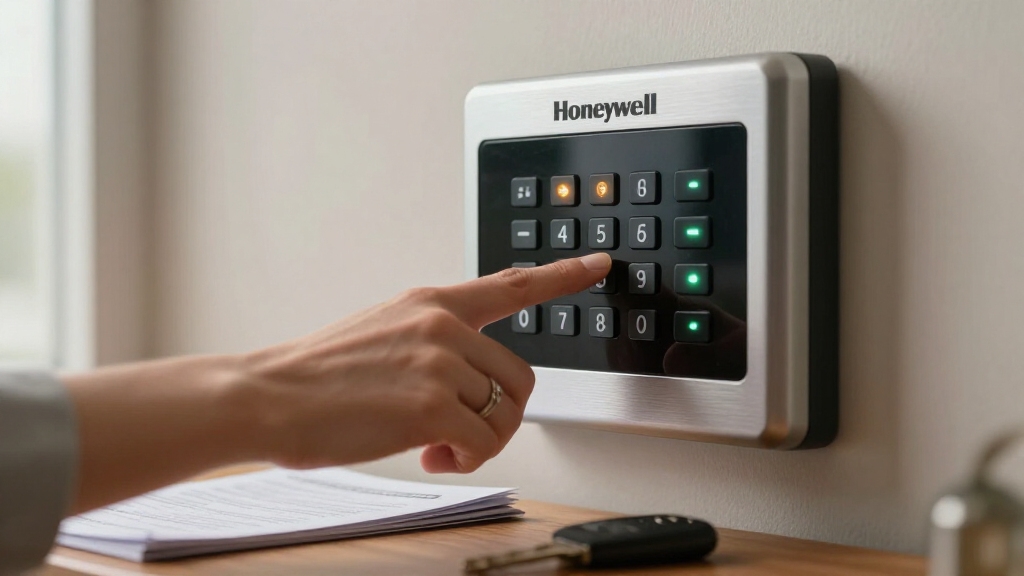
To arm your Honeywell alarm panel, start by securely closing all doors and windows in your protected area.
Next, access the keypad and enter your 4-digit user PIN code.
Next, use the keypad to input your unique 4-digit PIN code to proceed.
After entering your code, press the designated arming key to activate the system fully.
If you want to arm only part of the system, enter your PIN and press the part-set key instead.
You can also use a proximity tag at the prox reader or a wireless encrypted keyfob to arm the panel without typing a code.
Once armed, check the keypad lights and listen for confirmation beeps to make certain the system is active.
Remember to follow any panel prompts to complete the arming process correctly.
This method guarantees your property is protected efficiently and promptly.
For ongoing security, it is important to regularly update user codes to maintain control and prevent unauthorized access.
How to Disarm Your Honeywell Alarm Panel and Manage Exit/Entry Delays?
When you enter your home or protected area through a delay door, you’ll need to quickly disarm your Honeywell alarm panel to avoid triggering the alarm. Enter your 4-digit user code promptly, then press the disarm key.
The keypad will beep as a reminder during the delay period. The red armed indicator light will turn off once disarmed successfully.
Managing exit and entry delays helps you feel secure knowing you have time to disarm without panic. It also avoids false alarms caused by rushing or fumbling.
You can maintain control with clear keypad feedback and status lights. Always follow the panel’s prompts and enter your code in the correct sequence to guarantee smooth disarming.
This simple process keeps your home safe and your system responsive. If you experience beeping or trouble alerts, press *2 to access the trouble menu for identifying and resolving issues.
Using Proximity Tags and Keyfobs to Arm and Disarm Your Panel
Beyond entering codes manually, Honeywell offers convenient options like proximity tags and encrypted wireless keyfobs to arm and disarm your alarm panel.
You simply present a proximity tag to the panel’s prox or MAX reader, which instantly recognizes it and arms or disarms the system without typing a code.
Similarly, the encrypted wireless keyfob lets you control your panel remotely with dedicated buttons for arming, disarming, and part-setting.
These devices save time and enhance security by reducing the risk of code theft.
Make sure to keep your tags and keyfobs secure, and register each device with your system following the panel’s programming instructions.
Using these tools, you can quickly and effortlessly manage your alarm’s status with just a swipe or button press.
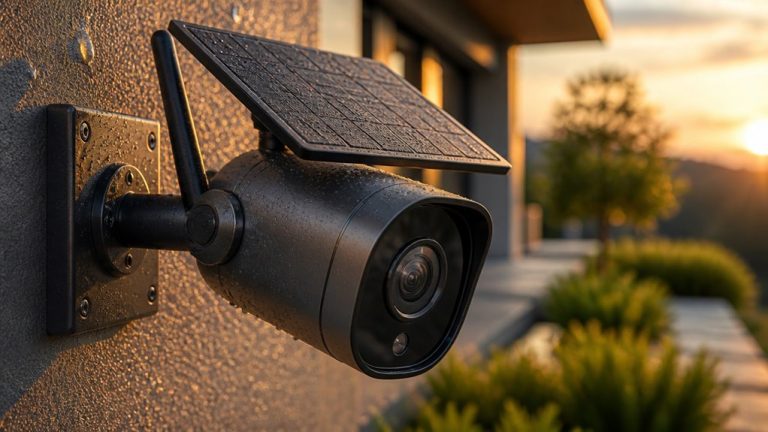
For added surveillance needs, separate devices like the Onelink Camera can provide video monitoring alongside your alarm system.
How to Manage User and Master Codes on Your Honeywell Alarm Panel?
Mastering user and master code management on your Honeywell alarm panel is essential for maintaining secure and flexible access control.
You start by entering the current master code to access the code management menu. From there, you can change or delete user codes or update the master code itself. This process keeps your system secure and personalized.
When managing codes, remember to:
- Regularly update master and user codes to prevent unauthorized access.
- Assign unique user codes for each individual to track system usage.
- Delete codes promptly when users no longer need access.
Additionally, it is important to consider the impact of bypassing zones on overall system security when managing access controls.
How to Set Up and Toggle Door Chime and Zone Functions?
You can easily turn the door chime on or off by entering your user code and pressing the chime key on your Honeywell panel. It’s pretty straightforward!
Now, when it comes to managing zone functions, you’ll usually need to enter some numbers on the keypad after you authenticate. This gives you control over specific areas, which is super handy.
Let’s take a closer look at how to use those keypad controls to toggle these settings effectively. It’s easier than you might think!
For example, to toggle door chimes, you enter your user code followed by 9 to enable or disable the sound, ensuring you have full control over your system’s alerts and notifications as described in the extra keypad functions.
Enabling Door Chime
Frequently, users want to enable the door chime feature to get audible alerts when doors open. This helps you stay aware of comings and goings without constantly watching the panel.
To enable or toggle the door chime, follow these simple steps:
Enter your user code on the keypad to access system controls. Press the chime key to turn the door chime on or off. Listen for keypad beeps or check indicator lights confirming the change.
This quick setup guarantees you won’t miss someone entering or exiting, boosting your peace of mind. The chime is especially useful in busy households or small offices where monitoring traffic is important. Remember to regularly test sensors and alarms to ensure all alert features, including the door chime, function properly.
Managing Zone Functions
Although enabling the door chime is straightforward, managing zone functions involves a few additional steps to tailor your Honeywell panel to specific areas of your property.
First, enter your user code to access the panel’s settings. Then, use the keypad to select the desired zone you want to configure.
You can toggle zone functions such as alarms or bypass settings by pressing the corresponding numeric keys. The panel provides confirmation through beeps and indicator lights, so listen carefully for feedback.
Adjusting zone settings helps you control which doors, windows, or sensors trigger alerts, allowing flexibility in monitoring.
For enhanced security, consider mapping entry points to ensure comprehensive coverage without redundancies when managing zone functions.
Using Keypad Controls
Getting the most out of your Honeywell panel means mastering the keypad controls for setting up and toggling features like the door chime and zone functions.
To enable or disable the door chime, just enter your user code and press the chime key. You’ll hear a beep confirming the change.
For zone functions, after code authentication, you can input specific numeric commands to activate or deactivate zones.
Remember, the keypad gives immediate feedback through beeps and indicator lights, so you always know if your settings took effect.
Enjoy peace of mind by customizing alerts to your needs. Feel empowered controlling your system with simple key presses. Stay confident knowing your panel responds instantly to your commands.
If you encounter persistent issues, performing a standard reset can help restore default settings without losing your programming.
Understanding Alarm and Trouble Indicators on Your Honeywell Panel
Your Honeywell panel is designed to keep you in the loop with alarm light signals and trouble condition alerts. Whenever there’s an alarm or a trouble situation, you’ll notice specific indicators lighting up and hear audible warnings.
It’s pretty straightforward to manage these notifications. You can easily acknowledge and silence the alerts right from the panel itself. This way, you can stay on top of everything without any hassle!
Before troubleshooting any issues, always ensure to contact authorities and place the system in test mode to maintain safety and compliance.
Alarm Light Signals
When an alarm or trouble condition pops up on your Honeywell panel, the alarm light signals help you quickly understand what’s happening. The alarm lights give you immediate visual feedback so you can act fast and confidently.
Here’s what the main signals mean:
- Flashing red alarm light: Your system detected a security breach or fire. It’s urgent; check the display for details.
- Solid red armed light: Your system is actively armed and protecting your property.
- Green AC power light: Indicates normal power supply and system readiness.
Always ensure that only authorized personnel operate the panel to silence alarms or reset the system safely and legally.
Trouble Condition Alerts
Although alarm lights grab your attention during emergencies, trouble condition alerts are just as important for maintaining your Honeywell panel’s reliability.
These alerts notify you when the system detects issues like low battery, AC power failure, or communication faults.
When a trouble condition arises, the panel typically shows a yellow or amber indicator light and may display a specific message on the keypad.
This helps you quickly identify the problem before it escalates.
Regularly monitoring these alerts makes sure your security system functions as intended.
Always address trouble conditions promptly by checking power sources, wiring, or contacting your service provider.
Staying proactive with trouble alerts keeps your Honeywell alarm panel dependable and ready to protect your property effectively.
Acknowledging And Silencing
Acknowledge alarms and trouble alerts promptly to maintain control over your Honeywell panel’s status. When an alarm sounds, you’ll want to silence it quickly without ignoring the issue.
Press the acknowledge or silence button on your keypad to stop the audible signal while keeping the alarm visible. This lets you stay aware of the problem without the distraction of noise.
Trouble alerts work similarly; acknowledging them lets you pause alerts and plan your next steps.
Remember these key points:
- Silencing stops the sound but keeps the alert active.
- Acknowledge multiple alarms individually if they appear.
- Always follow emergency procedures before resetting the system.
This approach guarantees safety and keeps your system responsive.
Silencing Alarms and Resetting Your Honeywell Panel Safely
Silence the alarm promptly to stop the audible alerts while keeping the alarm indication active on your Honeywell panel. To do this, enter your user code and press the designated silence or acknowledge button. This action stops the siren but keeps the alarm status visible, guaranteeing you’re aware of the event.
Before resetting, verify the cause of the alarm and make certain the area is safe. To reset the panel safely, only proceed once you’ve addressed the issue. Hold the reset control for about five seconds or follow the panel’s prompts to clear the alarm.
Avoid resetting prematurely, as this can mask ongoing problems. Always follow emergency procedures before silencing or resetting to maintain system integrity and safety.
Quick Tips for Model-Specific Honeywell Panel Features and Settings
Once you’ve safely silenced and reset your Honeywell panel, you can make the most of its unique features tailored to your specific model. Understanding these model-specific settings helps you optimize security and convenience effortlessly.
Whether you’re managing user codes, toggling chimes, or using proximity tags, the panel’s flexibility is designed to suit your lifestyle.
Here are quick tips to get started:
Customize user and master codes easily through the keypad menu for tighter control.
Enable or disable door chimes to stay aware of entry without constant noise.
Use encrypted wireless keyfobs or proximity tags for quick arming and disarming.
Frequently Asked Questions
What Should I Do if My Honeywell Panel Keypad Is Unresponsive?
If your Honeywell panel keypad is unresponsive, first check if the panel has power by confirming the green AC light is on.
If it’s off, verify the power source or backup battery is connected properly.
Try pressing the reset button or power cycling the system by unplugging it briefly.
If the keypad remains unresponsive, consult your manual for model-specific troubleshooting or contact Honeywell support for further assistance.
How Can I Update the Firmware on My Honeywell Alarm Panel?
To update your Honeywell alarm panel firmware, first check the model’s compatibility and download the latest firmware from Honeywell’s official website.
Connect the panel to a PC via a USB or serial cable as specified. Use Honeywell’s programming software to upload the new firmware, following on-screen instructions carefully.
Avoid interrupting the process to prevent system damage. If unsure, contact a certified installer or Honeywell support for assistance.
Are There Any Battery Backup Maintenance Tips for Honeywell Panels?
You should regularly check your Honeywell panel’s battery for corrosion, proper connection, and charge level.
Replace the battery every 3-5 years or when the panel signals low battery alerts.
Keep the battery terminals clean and secure.
Avoid exposing the battery to extreme temperatures or moisture.
If you hear continuous beeping or see a low battery warning, replace it promptly to guarantee uninterrupted backup power during outages.
Can I Integrate My Honeywell Panel With Smart Home Devices?
Oh sure, because nothing says “cutting-edge” like keeping your Honeywell alarm panel completely isolated from your smart home gadgets, right?
Actually, you can integrate your Honeywell panel with smart home devices, but it depends on your model and the compatible platforms.
Many newer Honeywell systems support integration via apps or third-party hubs like Alexa or Google Assistant.
This lets you arm, disarm, or get alerts remotely.
Check your panel’s specs and available smart home APIs for seamless control.
What Is the Warranty Period for Honeywell Alarm Panels?
Honeywell alarm panels typically come with a limited warranty lasting one year from the date of purchase. This covers defects in materials and workmanship under normal use.
However, warranty periods can vary by model and region, so you should check your specific product documentation or contact Honeywell directly for precise details.
Final Thoughts: Honeywell Alarm Panel User Guide
Now that you know how to arm, disarm, and manage your Honeywell alarm panel, you’re well on your way to keeping your home secure.
Remember, “an ounce of prevention is worth a pound of cure.” Regularly updating codes, understanding indicators, and using proximity tags will make your system more effective and user-friendly.
Stay proactive, follow the steps, and enjoy peace of mind with your Honeywell alarm panel’s reliable protection.