To install a burglar alarm system, first assess entry points and decide between wired or wireless components based on your site and needs.
Select a secure, accessible control panel location near power and network sources.
Mount door, window, and motion sensors carefully, ensuring proper alignment and radio range if wireless.
Wire or pair each sensor, then install alarm devices in tamper-resistant spots.
Finally, rigorously test the system to confirm reliable detection and notifications.
Following these steps will help you implement a robust security setup.
Key Takeaways
- Assess entry points and select sensor types based on door/window styles and system wiring or wireless needs.
- Choose a secure, low-visibility control panel location near power and network sources with proper environmental protection.
- Install sensors with precise alignment, maintaining recommended gaps and mounting heights to maximize detection and minimize false alarms.
- Route wiring carefully, secure connections, and pair wireless sensors with the control panel to ensure reliable communication.
- Test each sensor and alarm device individually to verify signal strength, alarm function, and system response before full operation.
Identify Entry Points and Choose Wired or Wireless System
Before you start installing your burglar alarm system, you need to pinpoint all possible entry points, including doors, windows, and any other vulnerable access areas.
Identify every entry point before installing your burglar alarm to ensure comprehensive security coverage.
Methodically inspect each perimeter point, noting locations that require sensor installation. Document door types (sliding, hinged) and window styles, as these affect sensor choice and placement.
Next, decide between a wired or wireless system early. Wired systems need cable routing and reliable power access, so map wiring paths to avoid interference and ensure clean installations.
Wireless systems rely on consistent radio signals; verify that all sensors will stay within the control panel’s radio range to maintain connectivity.
This planning stage guarantees your system covers all vulnerabilities effectively and supports your chosen technology’s requirements without costly adjustments later.
Consider the benefits of each system type, such as the robust, interference-free connections offered by wired systems versus the easier installation and scalability of wireless options.
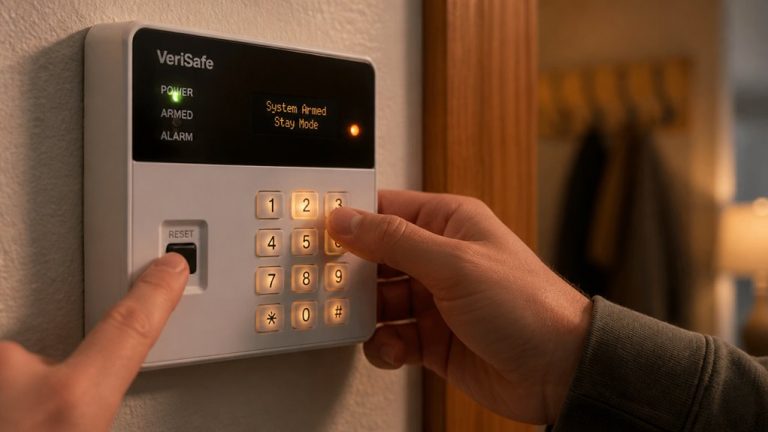
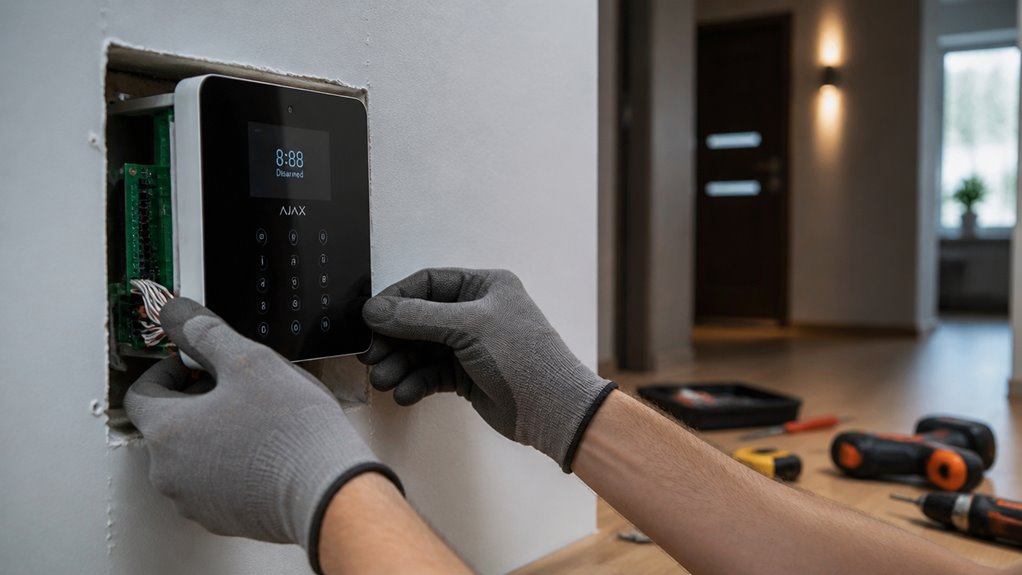
Choose and Prepare Your Control Panel Location
When picking a spot for your control panel, aim for a location that’s easy to reach for maintenance but also secure enough to prevent any tampering.
You want it to be in a place where you can get to it without hassle, especially when you need to make updates or troubleshoot.
Also, consider the power source. It’s important to have your panel close to a reliable outlet so it can keep running smoothly without any interruptions.
If your system is wireless or connected to a network, try to position the panel near your router or hub.
This way, you’ll ensure that all your sensors and devices can communicate effectively without any hiccups.
Avoid placing the control panel near large metal objects or sources of electronic interference to maintain strong network coverage.
Accessible Yet Secure Placement
Although the control panel must remain accessible for easy operation and maintenance, you need to place it in a secure location that limits unauthorized access.
Choose a spot near the main entrance but out of direct sightlines to deter tampering.
Assure mounting surfaces are stable and allow secure fastening.
Avoid locations prone to moisture or extreme temperatures that could impair functionality.
Mounting on a solid surface or stud is recommended to ensure stability and security of the control panel.
| Consideration | Recommendation |
|---|---|
| Visibility | Low, to prevent casual discovery |
| Accessibility | Easy for authorized users |
| Security | Locked enclosure or restricted area |
| Environmental Risk | Dry, temperature-controlled location |
This methodical approach balances usability with security, assuring your control panel remains reliable and protected.
Proximity To Power Source
Securing the control panel near a reliable power source guarantees uninterrupted operation and simplifies installation.
Choose a location close to a grounded electrical outlet to connect the supplied power adapter without excessive cable length. This minimizes voltage drop and signal interference.
Verify the outlet’s circuit stability and avoid shared lines with heavy appliances to reduce power fluctuations.
If the system includes a backup battery, position the panel so you can access it for periodic testing and replacement.
Make certain the wiring path is clean, protected, and compliant with local electrical codes.
Avoid placing the panel near moisture or heat sources that could degrade power supply components.
For added reliability, consider using dual-path LTE cellular communication to maintain system operation during power or Wi-Fi outages.
Network Connection Considerations
When preparing your control panel location, you’ll need to make certain it maintains a strong and stable network connection. This is critical for real-time communication and remote monitoring.
Position the panel close to your router or network hub to minimize signal loss and latency. For wired connections, guarantee Ethernet cables run securely without sharp bends or interference.
For wireless setups, verify signal strength with a network analyzer or signal meter before final mounting.
Consider the following:
Avoid metal enclosures or thick walls that degrade Wi-Fi signals.
Use a dedicated network or VLAN for security system traffic when possible.
Confirm compatibility between the panel and your network protocols, such as Wi-Fi standards.
Plan for backup connectivity options, such as cellular modules, in case of network failure.
Ensuring your system supports Power over Ethernet (PoE) can simplify installation and improve reliability.
These steps assure reliable system performance and uninterrupted monitoring.
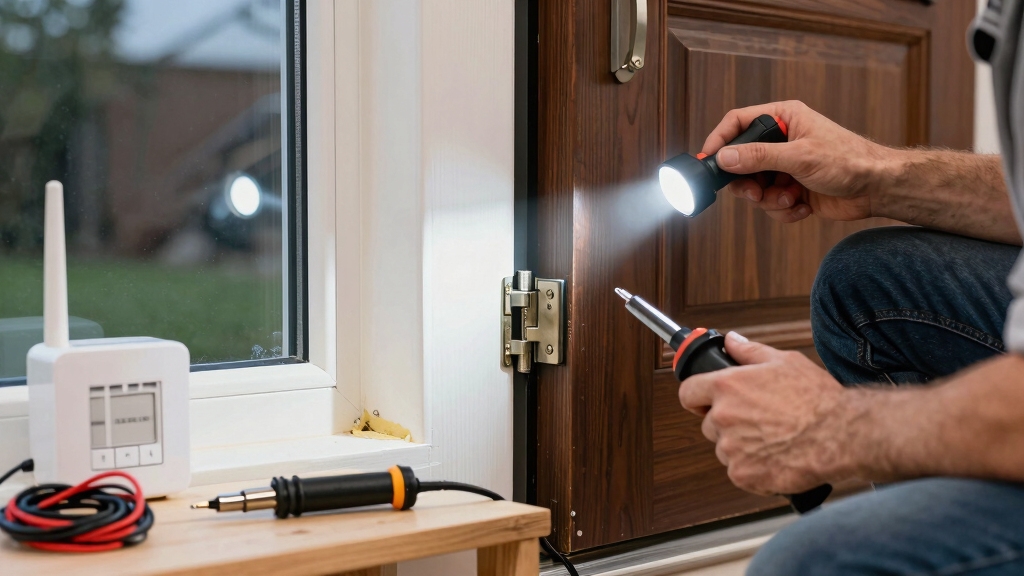
Install and Position Door, Window, and Motion Sensors
To get started, make sure to align your door and window sensors just right. This way, they’ll make solid contact when everything is closed. It’s a simple step, but it really helps ensure they work effectively.
Now, when it comes to motion detectors, aim to install them about 6 to 8 feet up, preferably in the corners of the room. This positioning allows them to cover open areas better. Just a quick tip: try to steer clear of placing them near windows or heat sources. Doing so can help cut down on those annoying false alarms, making your security system much more reliable. For optimal performance, consider installing motion-activated sensors with infrared/low-light capability to ensure reliable detection in various lighting conditions.
Door And Window Sensors
Door and window sensors require precise alignment to function reliably, as misaligned parts can trigger false alarms or fail to detect breaches.
You’ll want to mount the sensor and magnet on the door or window frame and the moving part, ensuring the two components meet exactly when closed. Follow these key steps:
Position sensors on the fixed frame and magnets on the moving panel, keeping a minimal gap (usually under 1/2 inch).
Use manufacturer templates or guides for exact placement.
For wired sensors, route cables discreetly and secure firmly to prevent loosening.
For wireless units, confirm each sensor pairs correctly with the control panel and stays within radio range.
Check alignment by opening and closing to verify the system arms and disarms without false triggers.
Regularly clean sensor lenses with a damp microfiber cloth to maintain sensor sensitivity and prevent false alarms.
Motion Detector Placement
After securing door and window sensors with proper alignment, turn your attention to motion detector placement to enhance overall coverage. Mount detectors 6–8 feet above the floor, ideally in corners, aimed toward the room’s center.
Avoid directing sensors at windows or heat sources to prevent interference. Make certain detectors cover main pathways without blind spots.
| Location | Height (feet) | Coverage Angle |
|---|---|---|
| Corner Mount | 6-8 | 90°-120°, wide view |
| Hallway | 6-8 | Narrow, linear path |
| Room Center | 6-8 | 360° (if supported) |
Position sensors within radio range of the control panel for wireless systems. Confirm stable mounting and unobstructed detection fields before finalizing installation. For enhanced security, ensure your door and window sensors maintain the recommended sensing distance to prevent false alarms and maximize reliability.
Avoiding False Alarms
Frequently, false alarms occur due to improper installation or positioning of sensors. You must carefully align and place door, window, and motion detectors to minimize interference.
For door and window sensors, ensure both parts are perfectly aligned and mounted securely to prevent misreads. Position motion detectors about 6 to 8 feet high, aiming toward the room’s center, avoiding windows or heat sources.
Follow these guidelines to reduce false alarms:
- Align door/window sensor components precisely to ensure consistent contact.
- Mount motion detectors away from direct sunlight, heating vents, or reflective surfaces.
- Avoid placing sensors near objects that could move, such as curtains or pets.
- Check that wireless sensors remain within reliable radio range of the control panel.
This methodical approach ensures reliable detection and minimizes false triggers. Using dual-technology sensors can further reduce false alarms by requiring simultaneous triggers from multiple sensor types.
Wire or Pair Sensors to the Control Panel
Begin by carefully routing cables from each sensor back to the control panel if you’re working with a wired system. Follow the manufacturer’s wiring plan to guarantee proper connections. Match positive and negative leads meticulously, securing each terminal firmly.
Tug test wires to confirm solid connections. For wireless sensors, enter pairing mode on the control panel and activate each sensor to enroll it. Assure each sensor signals successfully before proceeding.
| Task | Key Point |
|---|---|
| Wired Sensor Wiring | Follow wiring diagram precisely |
| Terminal Connections | Match polarity (+/-) exactly |
| Wireless Pairing | Use panel’s enrollment mode |
This methodical approach prevents connection issues and readies your system for reliable operation. Remember that wired door sensors use reed switches to indicate open or closed states for accurate zone status monitoring.
Install Alarm Devices and Protect Against Tampering
When installing alarm devices, position the siren or buzzer where it can maximize audible reach and deter intruders effectively.
Mount the alarm sounder in a high, hard-to-reach location to prevent tampering. For outdoor installations, use a protective housing rated for water and dust resistance to guarantee durability and continuous operation.
After securing all devices, reactivate the control panel’s tamper switch to monitor unauthorized access.
To protect against tampering, follow these steps:
Place sirens and buzzers in elevated, visible positions.
Use weatherproof enclosures for outdoor alarm devices.
Secure mounting hardware tightly to prevent removal.
Reactivate tamper switches on all installed devices.
This approach guarantees your alarm devices function reliably and resist sabotage attempts.
Test the Security System Thoroughly Before Use
With all devices securely installed and tamper protections reactivated, it’s time to verify that your security system operates as intended.
Begin by activating the system’s test mode per the user manual. Trigger each sensor individually: doors, windows, motion detectors, and glass-break sensors to confirm they send accurate signals to the control panel.
Observe the panel’s response, ensuring alarms sound promptly and notifications are dispatched if configured. Check detection zones for blind spots or false alarms by simulating intrusion scenarios.
Verify wireless sensor communication strength and confirm all delays and entry codes function properly. Finally, inspect all wiring and connections again, watching for signs of looseness or interference.
Only after completing these methodical checks should you deactivate test mode and place the system in full operational status.
Frequently Asked Questions
How Do I Reset the Alarm System After a False Alarm?
To reset your alarm system after a false alarm, first disarm it using your access code or key fob.
Then, enter the system’s reset command, often found in the user manual or control panel menu.
If your system has a dedicated reset button, press it.
Finally, verify that all sensors and the control panel indicate normal status.
If alarms persist, power cycle the control panel by unplugging and reconnecting it.
Can I Integrate the Burglar Alarm With Smart Home Devices?
Yes, you can integrate your burglar alarm with smart home devices if your system supports protocols like Z-Wave, Zigbee, or Wi-Fi.
Start by confirming compatibility with your smart hub or platform (e.g., Alexa, Google Home).
Then, follow the manufacturer’s instructions to link sensors and control panels via the app or hub interface.
Make certain secure network settings and test all connected devices for seamless communication and reliable alarm response.
What Maintenance Is Required for Wireless Sensor Batteries?
You’ll need to regularly check wireless sensor batteries for voltage levels, ideally every 3 to 6 months.
Replace batteries promptly when the system signals low power to prevent false alarms or sensor failure.
Use manufacturer-recommended battery types to guarantee compatibility.
During replacement, deactivate the sensor to avoid triggering alarms.
After installation, test each sensor to confirm proper operation.
Maintain a log to track battery changes systematically for efficient upkeep.
How Do I Update the Alarm System’s Firmware or Software?
Think of your alarm system’s firmware as the engine oil. Keeping it fresh guarantees smooth operation.
To update, connect your control panel to the internet via Wi-Fi or Ethernet. Access the system’s settings menu, locate the firmware/software update section, and follow prompts to download and install the latest version.
Make certain the power source remains uninterrupted during the process to avoid corruption. Finally, reboot the system and verify successful installation via status indicators or system logs.
What Should I Do if the Alarm Panel Loses Internet Connection?
If your alarm panel loses internet connection, first check your router and modem for power and connectivity. Restart them if needed.
Verify the panel’s network settings to guarantee it’s connected to the correct Wi-Fi or Ethernet. Inspect cables and antenna placement for damage or interference.
If the issue persists, reset the panel’s network configuration and re-establish the connection. Finally, consult your system’s manual or support for firmware updates or advanced troubleshooting.
Build an Effective Home Security System with Proper Alarm Installation
By carefully following each step, you’ll make certain a reliable burglar alarm system that protects your home effectively.
For example, consider a homeowner who installed sensors on all entry points and paired them wirelessly to a control panel in a central location.
After thorough testing, the system detected a simulated break-in instantly, triggering alarms and notifications.
This methodical approach guarantees your security setup works flawlessly when it matters most, giving you peace of mind.