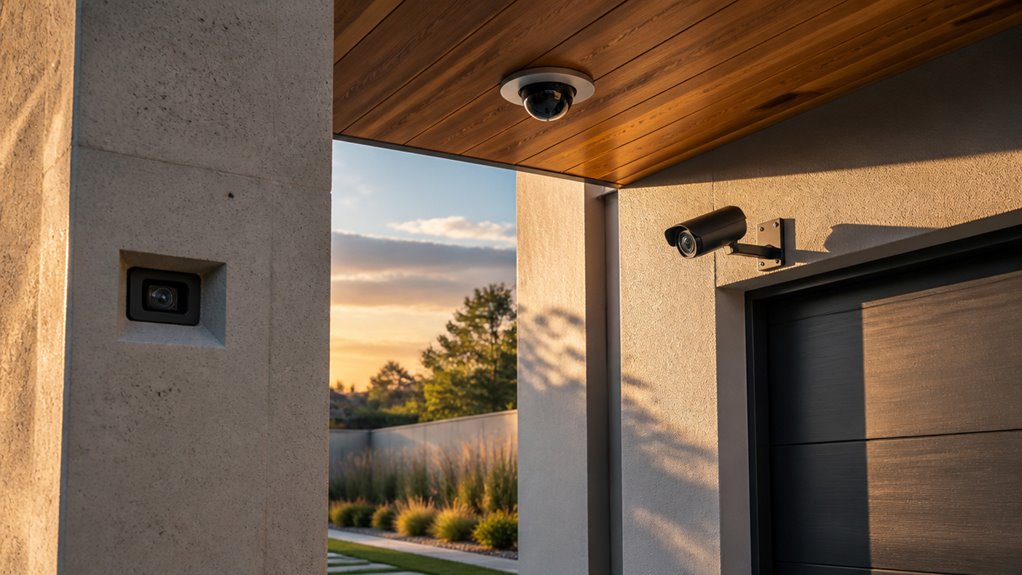

Mount your security cameras 8 to 10 feet high with a slight downward tilt of 15–30 degrees. This positioning captures clear facial details and deters tampering.
Prioritize entrances, ground-floor windows, and blind spots for maximum coverage. Use pole or corner mounts for versatile angles.
Select anchors suitable for your wall type: toggle bolts for hollow walls and masonry anchors for brick. For non-invasive setups, try heavy-duty adhesive strips or gutter mounts.
These foundational tips set you up well, with more advanced strategies waiting ahead.
Key Takeaways
- Mount cameras 8–10 feet high with a slight downward angle (15–30 degrees) for optimal facial recognition and tamper resistance.
- Use corner mounts to cover two building sides simultaneously, reducing blind spots and maximizing surveillance coverage.
- Select appropriate anchors and pre-drill pilot holes for secure installation on brick, concrete, or hollow walls.
- Conceal cameras inside objects like birdhouses or decorative planters to blend with surroundings without obstructing the lens.
- Weatherproof cameras by mounting under eaves, sealing connections, and using IP65+ rated devices for durability in harsh conditions.
Optimal Heights and Angles for Security Cameras
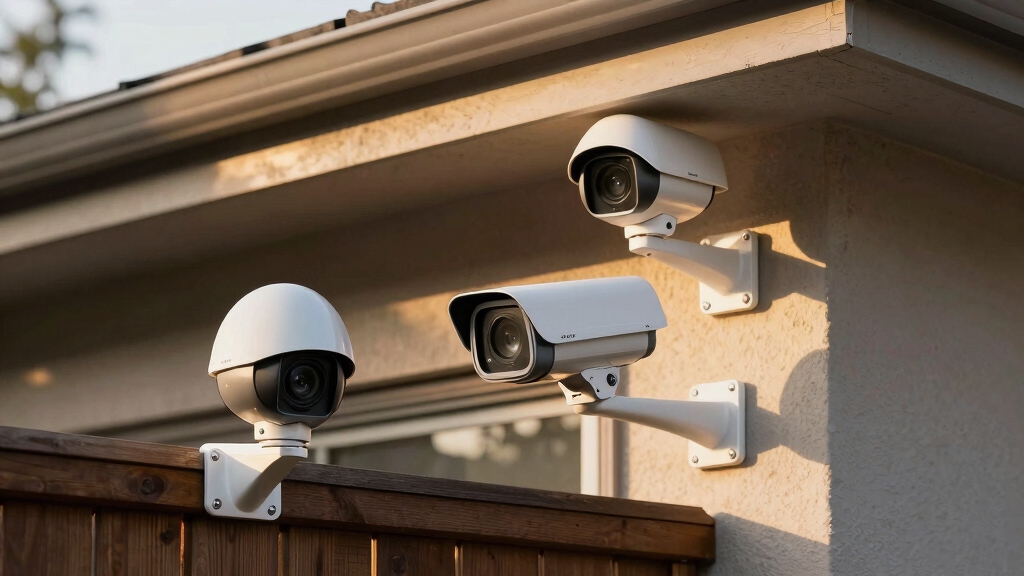
Position your security cameras between 8 to 10 feet above the ground to balance clear facial recognition and tamper resistance. This height prevents easy access while ensuring the lens captures detailed facial features.
Angle the lens slightly downward, focusing on entry points to maximize identification accuracy for individuals approaching the door. A tilt of about 15 to 30 degrees is optimal, allowing comprehensive coverage without distortion.
For indoor environments, mount cameras at 7 to 8 feet, which suits typical room heights and avoids obstructions. Make sure the camera’s field of view includes key areas without blind spots directly beneath the unit.
Maintain a stable, fixed angle to reduce motion blur and keep image clarity consistent. This enhances your security system’s effectiveness.
Mounting cameras at this height with a slight downward angle also improves infrared night vision performance for clearer images in low-light conditions.
Where to Place Security Cameras for Maximum Coverage?
Although it may be tempting to cover every corner, focusing your security cameras on high-risk access points like front and back doors guarantees maximum coverage with fewer devices.
Position cameras near off-street windows and ground-floor windows to monitor potential intrusion points. Don’t forget backyard areas and side gates, which often create blind spots.
For interior monitoring, place cameras at staircases, especially basement stairs, to track movement effectively. Make certain each camera’s field of view overlaps slightly with adjacent units to eliminate coverage gaps.
Ensure cameras are mounted at a height of at least 10 feet with a slight downward angle to maximize coverage and reduce tampering risk, as recommended in mounting best practices.
Drill-Free Mounting Solutions for Security Cameras
Covering high-risk entry points and blind spots with security cameras often requires flexible installation methods.
When drilling isn’t an option, you can rely on heavy-duty adhesive mounting strips for smooth, non-porous surfaces. This ensures a firm hold without damage.
Suction cups provide temporary placements on glass or painted metal, ideal for renters or short-term setups.
For roof eaves, gutter mount kits attach securely without penetrating surfaces, preserving structural integrity.
Vinyl siding clips offer a stable solution on fragile siding materials, preventing cracks or holes.
Alternatively, placing cameras on shelves or within decorative planters lets you avoid installation altogether while maintaining coverage.
These drill-free solutions let you adapt to various environments quickly and safely without compromising camera stability or field of view.
Visible cameras create a psychological barrier that signals high risk to potential offenders, enhancing the deterrent effect of strategic camera placement.
Choosing Hardware for Different Surfaces
When you’re mounting on brick or concrete, it’s best to use masonry anchors. Just drill some pilot holes, and you’ll get a secure hold. It’s pretty straightforward!
Now, if you’re dealing with hollow walls, toggle bolt anchors are your go-to. They give you the stability you need without risking any damage to the structure. Super handy, right?
And don’t forget about the versatility of pole and corner mounts. They’re perfect for positioning cameras on trees, lampposts, or even building edges. You’ll get prime coverage without any hassle!
For the best results, make sure to secure brackets firmly into stable surfaces to prevent shifts over time.
Masonry Anchor Installation
Securely mounting your security camera on brick or concrete requires using masonry anchors designed for these tough surfaces. First, drill a pilot hole with a masonry bit matching the anchor size.
Insert a plastic or metal anchor sleeve to provide a firm grip when you drive in the screw. Choose anchors suitable for outdoor use to withstand weather conditions.
Low voltage wiring used for security cameras typically requires cables with UV-resistant insulation to ensure durability in outdoor environments.
| Anchor Type | Best For |
|---|---|
| Plastic Sleeve | Light to medium loads |
| Metal Sleeve | Heavy-duty applications |
| Wedge Anchor | Structural mounting |
| Tapcon Screw | Direct screw into concrete |
Use the correct anchor to avoid loosening or damage. Always confirm anchor size matches screw diameter and length for maximum security.
Hollow Wall Solutions
Although hollow walls present unique challenges for mounting security cameras, selecting the right hardware guarantees a stable and reliable installation. Hollow walls lack solid backing, so you’ll need anchors designed to expand behind the drywall.
Toggle bolt anchors are ideal; they spread the load across a wider area, preventing screws from pulling out under weight or vibration. Before installing, drill appropriately sized pilot holes to accommodate the toggle mechanism without damaging the wall.
Avoid using plastic anchor sleeves alone, as they often fail under camera weight. Securely tighten the bolts, but don’t overtighten to avoid wall damage.
This approach guarantees your camera stays firmly mounted, maintaining proper alignment and function, critical for effective surveillance on hollow interior walls or drywall surfaces. For optimal coverage, ensure cameras are mounted at 8–10 feet height to balance field of view and tamper resistance.
Pole And Corner Mounts
To mount security cameras on poles or corners effectively, you’ll need specialized hardware designed to provide stability and ideal positioning.
Pole mounts secure cameras to trees, lampposts, or downspouts using adjustable straps or brackets. This ensures firm attachment despite weather conditions.
Corner mount adapters let you monitor two building sides simultaneously. This maximizes coverage with one device.
When selecting hardware, consider surface type and load-bearing capacity to avoid loosening or damage.
Follow these steps for optimal installation:
- Choose pole mount kits with corrosion-resistant materials for outdoor durability.
- Use corner adapters compatible with your camera model for seamless integration.
- Pre-drill pilot holes and use appropriate anchors for masonry or hollow walls.
This approach guarantees secure, weatherproof placement and broad surveillance angles. Additionally, verify mount stability by tightening screws and anchors to prevent misalignment or loose connections.
Pole and Corner Mounts for Unique Camera Angles
When you need to capture multiple angles or cover expansive areas, pole and corner mounts offer versatile solutions that standard wall mounts can’t match.
Pole mounts secure cameras on trees, lampposts, or downspouts, providing 360-degree views or elevated perspectives.
Pole mounts attach cameras to poles or trees, offering elevated positions and comprehensive 360-degree surveillance angles.
Use sturdy pole mount kits with adjustable brackets to guarantee firm attachment and precise aiming.
Corner mounts enable simultaneous monitoring of two building sides, reducing blind spots at vulnerable entry points.
Install corner adapters at building edges, positioning cameras 8 to 10 feet high and angling them downward slightly for peak facial recognition and coverage.
Both mounting options require suitable hardware: masonry anchors for brick or toggle bolts for hollow walls to guarantee stability.
These mounts enhance your system’s flexibility, letting you adapt surveillance angles effectively without compromising security or clarity.
For optimal performance, ensure mounting positions allow for overlapping fields of view to avoid blind spots and improve coverage.
Weatherproofing Tips to Protect Outdoor Cameras
Pole and corner mounts expose cameras to various weather conditions, making protection a priority for reliable operation. To guarantee your outdoor cameras function ideally, you need to mitigate exposure risks effectively.
Start by mounting cameras under eaves or overhangs, offering natural shielding from rain and sun. Next, use junction boxes to secure and weatherproof all cable connections. This prevents moisture intrusion that can damage internal components.
Finally, seal every connection point meticulously with waterproof tape or silicone sealant to block out humidity and dust. These steps extend your camera’s lifespan and maintain consistent performance regardless of weather. Additionally, selecting cameras with IP65+ ratings ensures robust protection against moisture and dust ingress, enhancing durability.
Here’s a quick guide:
- Position cameras under structural cover for direct protection.
- Encase cable connections in weatherproof junction boxes.
- Apply waterproof sealants at all potential moisture entry points.
Following these guarantees durable, weather-resistant installations.
Creative Ways to Conceal Your Security Cameras
Among various security measures, concealing your cameras effectively enhances both their functionality and aesthetic integration.
You can embed bullet cameras inside hollowed-out tennis balls or stuffed animals like teddy bears, blending them seamlessly into the environment.
Hollow birdhouses mounted high in trees provide excellent concealment and elevated vantage points.
For a more structural approach, use inverted mounting plates on fences or walls to hide camera bases.
Repurposing old photographic tripods allows unique overhead rig mounts, offering discreet angles without attracting attention.
When choosing concealment methods, make certain the lens remains unobstructed and the housing doesn’t interfere with signal transmission.
These tactics keep your cameras covert while preserving operational efficiency.
They deter tampering and maintain surveillance integrity in both indoor and outdoor settings.
Additionally, selecting housings with weather-resistant materials ensures durability and protection against environmental damage while concealed.
How to Balance Security and Style in Camera Placement?
When it comes to placing cameras, it’s all about finding that sweet spot between security and style. You want to make sure those cameras cover all the key entry points, but you don’t want them to clash with the vibe of your space, right?
One great way to do this is by integrating the mounts into your existing decor. Think about using discreet housings or even natural elements to help them blend in. This way, you can keep your space looking intentional and stylish, all while ensuring you have effective surveillance in place. It’s totally possible to have both security and a beautiful design!
Blending Cameras With Decor
Striking the right balance between security and style means integrating cameras seamlessly into your existing decor without compromising their functionality. To blend cameras effectively, focus on these key steps:
- Match materials and colors: Choose camera housings and mounts that complement your wall finishes or outdoor structures, minimizing visual disruption.
- Use decorative enclosures: Embed cameras within objects like lanterns, planters, or birdhouses designed to protect and conceal, maintaining aesthetic appeal while ensuring proper lens coverage.
- Select unobtrusive mounting hardware: Employ low-profile brackets or inverted plates that reduce shadows and avoid bulky attachments.
Strategic Yet Stylish Placement
While securing your property is paramount, maintaining an attractive environment requires thoughtful camera placement that doesn’t compromise design.
Position cameras 8 to 10 feet high to deter tampering while capturing clear facial details. Angle the lens slightly downward to encompass entryways effectively.
Focus on high-risk points like front doors, off-street windows, and backyard gates to eliminate blind spots without cluttering your space.
Use mounting options that blend with your architecture. Vinyl siding clips or decorative planters can secure cameras discreetly.
Weatherproof units by installing them under eaves or inside planter boxes, protecting hardware without sacrificing aesthetics.
Frequently Asked Questions
How Do I Secure Camera Cables Against Pets or Children?
To secure camera cables from pets or children, you should use protective conduit tubing or cable raceways to encase wires. This prevents chewing or pulling.
Fasten cables tightly along walls or baseboards with cable clips or adhesive mounts, avoiding loose loops. Conceal wires inside junction boxes or behind furniture.
Additionally, seal all connections with weatherproof junction boxes to prevent tampering. Regularly inspect cables for damage and replace any compromised sections promptly.
What Maintenance Is Required to Keep Cameras Functioning Properly?
You need to regularly clean the camera lenses to avoid dirt and smudges that reduce image clarity.
Check mounting hardware for tightness to prevent misalignment.
Inspect weatherproof seals and cable connections to avoid moisture damage.
Update firmware to enhance performance and security.
Test camera angles and functionality periodically to guarantee peak coverage.
Promptly replace any damaged components to maintain consistent operation and prevent downtime.
Can Security Cameras Be Integrated With Smart Home Systems?
Yes, you can integrate security cameras with smart home systems easily, and you’ll gain real-time alerts and remote access simultaneously.
Most cameras support Wi-Fi and connect to hubs like Alexa or Google Home, letting you control them via voice or app.
You’ll need compatible cameras and secure network setups to guarantee smooth communication.
Integration enhances monitoring, automates recordings based on triggers, and syncs with other smart devices for all-encompassing security management.
How Do I Troubleshoot Common Camera Connectivity Issues?
To troubleshoot common camera connectivity issues, first check your Wi-Fi signal strength near the camera; weak signals often cause drops.
Restart both the camera and router to reset connections. Verify firmware is updated for compatibility.
Confirm network credentials are correct and make certain no IP conflicts exist. If wired, inspect cables for damage.
Use your camera’s app diagnostics to identify errors. Finally, reposition the camera within ideal range to improve stability.
What Are the Legal Considerations for Recording Video on Private Property?
You’re steering a legal minefield when recording on private property, so tread carefully.
Always inform visitors with clear signage that recording is active, respecting privacy laws that vary by state or country.
Avoid capturing audio without consent, as wiretapping laws often prohibit it.
Never point cameras where people expect privacy, like bathrooms or neighbors’ yards.
When in doubt, consult local regulations to guarantee your surveillance stays on the right side of the law.
Final Tips for Smarter Security Camera Placement
By mounting your security cameras at prime heights and using pole or corner mounts, you guarantee maximum coverage and unique angles.
For instance, a local store doubled its surveillance efficiency by combining weatherproof cameras with drill-free mounts on corners, avoiding wall damage.
Balancing security with style, you can conceal cameras while protecting them from elements.
With the right hardware and placement, you’ll achieve reliable, discreet monitoring tailored to your environment.
[…] prevent fitment issues during installation. For enhanced security, consider mounting cameras at optimal heights and angles near your door to monitor access points […]