To test a gas line for leaks, first isolate and prepare the system by closing valves and removing insulation to expose joints.
Use a calibrated pressure gauge and pressurize the line with dry air or nitrogen to a safe test pressure, then monitor for pressure drops.
Apply a soap solution to joints and watch for bubbles, or scan with a calibrated electronic detector.
If you detect significant leaks or odors, shut off gas and contact a professional. More detailed steps and safety tips follow.
Key Takeaways
- Inspect and prepare the gas line by exposing all joints and isolating the test section with closed valves or capped ends.
- Apply a non-corrosive soap solution to all joints and fittings, then watch for bubble formation indicating leaks.
- Pressurize the line with dry nitrogen or clean air, using calibrated pressure gauges to monitor any pressure drops over time.
- Use an electronic gas detector to scan difficult areas, ensuring calibration and following safety protocols for accurate leak detection.
- Shut off gas supply immediately and call a professional if you detect major leaks, strong hissing sounds, or significant pressure drops.
Getting Your Gas Line Ready for Leak Testing
Begin by thoroughly inspecting your gas line system to guarantee all sections are accessible and ready for testing.
Thoroughly inspect your gas line system to ensure all areas are accessible and prepared for testing.
Check for visible damage, corrosion, or black stains on fittings and valves that may indicate chronic leaks.
Remove any insulation or obstructions covering joints, seams, and valves to ensure full exposure.
Confirm the piping schematic is accurate and isolate the section you plan to test by closing valves or capping open ends to prevent pressure loss.
Implement lockout-tagout procedures to secure the system and avoid accidental gas flow during testing.
Set up safety barricades or tape around the testing area if required.
Finally, ensure all tools and components are ready, and familiarize yourself with local codes specifying test pressure and duration before proceeding to the next steps.
Use calibrated pressure gauges and apply test pressure gradually, maintaining it for at least 10 minutes to accurately detect leaks during the inspection process using pressure testing procedures.
Tools and Materials You Need for Leak Testing
Before you start testing, gather all essential tools and materials to guarantee accurate and safe leak detection.
Having the right equipment assures you identify leaks effectively and comply with safety standards. Key items include:
- Soap solution in a spray bottle: For applying to joints and fittings to spot bubbles indicating leaks.
- Pressure gauge(s): To monitor system pressure at critical points during pressure testing.
- Dry nitrogen or clean air source: To safely pressurize the gas line without fuel gas hazards.
- Electronic gas detector or sniffer: Useful for detecting gas presence in pressurized lines, especially for small or hard-to-find leaks.
Make sure thread sealants are removed from test points before applying detectors. Use this toolkit to conduct a thorough, precise leak test before moving to inspection. For enhanced accuracy in complex systems, consider integrating pressure-based methods that monitor pressure changes dynamically during testing.
Visual and Odor Inspection for Gas Leak Testing
Once you’ve gathered the necessary tools and materials for leak testing, start by conducting a visual and odor inspection.
Carefully examine all pipe joints, fittings, valves, and seams for visible signs such as black stains or corrosion, which may indicate chronic leaks.
Inspect pipe joints, fittings, valves, and seams for black stains or corrosion signaling potential chronic leaks.
Next, perform an odor test by sniffing around the piping for the distinct mercaptan smell added to natural gas.
Make sure that all sections are isolated and no open ends remain to avoid false positives.
Use proper lighting and expose all joints for thorough evaluation.
This preliminary assessment helps you identify obvious leaks before proceeding with pressure or soap bubble tests.
Always adhere to safety protocols, including lockout tagout and area barricading, to maintain a secure testing environment throughout your inspection.
For added detection accuracy, consider using soapy water test on suspect areas to identify escaping gas through visible bubbles.
Choosing Pressure Levels and Test Durations
Although selecting the correct pressure levels and test durations depends on local codes and specific system requirements, you’ll typically apply pressures ranging from 15 to 30 psi for low-pressure gas lines.
The test duration varies widely, from as short as 15 minutes up to 24 hours, based on system complexity and regulatory standards.
To choose appropriate parameters, consider:
- Minimum pressure to simulate or exceed working conditions, often three times the operating pressure.
- Duration sufficient to detect pressure drops, commonly 15 minutes to 4 hours.
- Local code requirements as primary guidance for both pressure and time.
- Temperature effects on pressure readings, ensuring stable conditions during testing.
Accurately matching these factors helps you identify leaks reliably without risking damage to the gas line.
How to Set Up a Safe Pressure Test?
Selecting the right pressure levels and test durations sets the foundation for an effective pressure test. However, ensuring safety during setup is equally important.
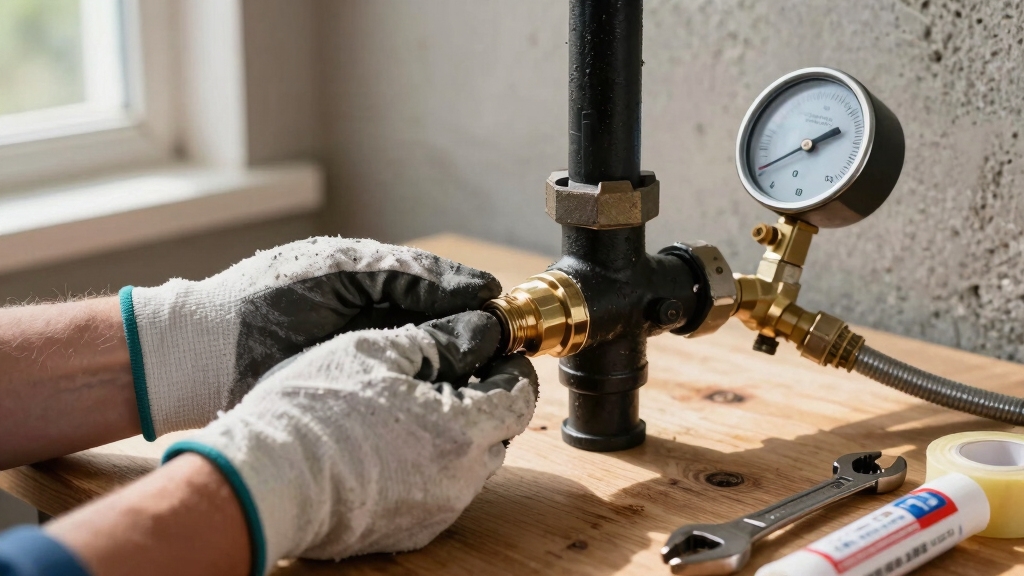
Begin by isolating the test section and confirming all valves and fittings are secure. Use dry nitrogen or air to avoid fuel gas hazards.
Calibrate your gauges and position them at both the inlet and the furthest point. Bleed trapped air to prevent false readings. Gradually apply pressure, monitoring for fluctuations due to temperature changes.
Always set up safety barriers and use lockout tagout procedures to protect the testing area.
It is essential to use properly rated and insulated low voltage wire for any electrical components involved to minimize shock risk during the test.
| Step | Action | Safety Tip |
|---|---|---|
| Isolation | Close valves, isolate section | Lockout tagout in place |
| Pressure Application | Gradual increase to test psi | Use dry nitrogen or air |
| Monitoring | Calibrate gauges, bleed air | Barricade area, watch for leaks |
How to Use the Soap Bubble Test to Spot Leaks?
Regularly applying the soap bubble test is one of the most straightforward and effective ways to detect gas leaks in pipe joints, fittings, valves, and seams.
You’ll apply a soap solution directly to these areas using a dauber or sprayer. After a few minutes, watch carefully for bubble formation; bubbles indicate escaping gas.
Smaller leaks might take longer—up to a minute or more—to show bubbles. Make sure to rewet surfaces and inspect thoroughly to avoid missing subtle leaks.
To perform the test correctly:
- Apply soap solution evenly to all joints and fittings.
- Observe for bubbles forming over several minutes.
- Reapply soap solution if necessary for a complete check.
- Clean residue with water or a damp rag after inspection.
Leaks can cause corrosion on metal components, which increases the risk of sparking and potential hazards.
How to Locate Leaks During Pressure Testing?
To locate leaks during pressure testing, start by applying a bubble leak detector to all joints, threaded connections, and weld seams.
You’ll want to ensure you cover all potential leak points thoroughly.
As you do this, keep an eye out for any bubble formation.
Those bubbles are a clear sign of escaping gas.
Also, listen closely for any hissing sounds — they can indicate larger leaks.
If you notice a significant drop in pressure, don’t hesitate to add more pressure.
This can help improve bubble visibility and make it easier to pinpoint exactly where the leaks are.
Additionally, methodically scan the entire line in all directions to ensure no areas are missed during inspection, following a systematic sweep methodology.
Applying Bubble Leak Detector
Apply a bubble leak detector carefully to all threaded connections, joints, and weld seams during pressure testing to pinpoint escaping gas. Use a non-corrosive solution like a soap mixture applied with a sprayer or dauber for precise coverage.
Observe closely for bubble formation, which signals leaks. Small leaks may take up to a minute to show bubbles, so remain patient and inspect thoroughly.
Keep these steps in mind:
Cover all potential leak points, including fittings, valves, and corroded areas. Maintain test pressure or increase slightly if bubbles aren’t forming. Rewet surfaces to verify persistent leak indicators.
Clean off residue after testing to prevent corrosion or interference. This method guarantees you identify leaks accurately before completing the pressure test. For enhanced safety, consider integrating mechanical reed switch sensors that operate reliably without power to monitor critical valve status during pressure tests.
Detecting Leak Indicators
Leaks during pressure testing often reveal themselves through subtle physical signs, and you’ll need to watch closely for these indicators.
Start by applying a soap solution to all joints, fittings, and seams.
Look carefully for bubble formation, which signals gas escaping from leaks.
Small leaks may take a minute or longer to show bubbles, so rewet and inspect surfaces repeatedly.
Listen for hissing sounds near suspect areas and tap pressure gauges to confirm slow drops.
Check straight pipe sections and weld seams thoroughly, as leaks can occur there as well.
If most pressure is lost, add pressure to enhance bubble detection.
Always clean residue after testing to avoid corrosion.
Following these practical steps helps you precisely locate leaks during pressure testing.
Proper identification and handling of load wires during electrical work is essential to ensure overall electrical safety.
Using Electronic Gas Detectors for Leak Testing
Electronic gas detectors are often the most effective tool for accurately identifying leaks in pressurized fuel gas lines where soap bubble tests aren’t practical. These devices sense combustible gas concentrations, alerting you to even minute leaks quickly and safely.
To use them effectively:
- Calibrate the detector before starting to make certain accurate readings.
- Slowly scan all joints, valves, and fittings, paying close attention to suspected areas.
- Maintain a consistent distance from the pipe surface to avoid false negatives or positives.
- Use audible and visual alarms on the device to pinpoint leak locations precisely.
Electronic detectors eliminate the need for applying liquids, making them ideal for inaccessible or sensitive components. Always follow manufacturer instructions and safety protocols.
If you detect a leak, shut off the gas supply immediately and consult a professional for repairs. Advanced detectors often include adjustable sensitivity settings to balance detection accuracy and false alarms for optimal performance.
Understanding Pressure Drop Results
When you monitor pressure drop results during gas line testing, you’re fundamentally evaluating the system’s integrity by measuring how much pressure decreases over time.
You should compare the observed drop against accepted standards.
Typically, a drop of no more than 2 psi over a 4-hour hold at 20 psi indicates a sound line.
A loss exceeding 10% of the test pressure signals a potential leak requiring further inspection.
Remember, pressure fluctuations can result from temperature changes or trapped air.
Make certain gauges are calibrated and air pockets bled before testing.
Log initial and final readings precisely.
If you detect an unacceptable pressure drop, isolate sections and use leak detection methods like soap bubble tests or electronic sniffers to pinpoint the source accurately.
Maintaining regular inspection and maintenance helps prevent leaks and ensures system safety.
When to Call a Professional for Gas Leak Issues?
If you notice major gas leaks, like strong hissing sounds or significant drops in pressure, it’s crucial to call a professional right away. These signs can indicate serious problems that need immediate attention.
When it comes to complex leak locations—think inaccessible weld seams or buried lines—you really need specialized equipment and expertise. Regular at-home tests just won’t cut it in these situations.
And if you catch any lingering gas odors or if you’re near potential ignition sources, don’t wait! It’s best to get qualified technicians involved as soon as possible. Safety should always come first.
Signs of Major Leaks
Although minor leaks can sometimes be managed with careful monitoring and basic testing, major gas leaks require immediate professional intervention due to their potential hazards.
You should call a professional if you observe any of the following signs, as these indicate a significant safety risk:
Strong, persistent odor of mercaptan (rotten eggs) near the gas line or appliances.
Visible damage such as black soot or corrosion on fittings or pipe joints.
Audible hissing or blowing sounds indicating rapid gas escape.
Sudden pressure drops during testing that exceed acceptable limits (more than 10% loss).
Don’t attempt to fix major leaks yourself. Shut off the gas supply if safe, evacuate the area, and contact licensed technicians to guarantee safe, thorough diagnostics and repairs.
Complex Leak Locations
Because gas leaks can occur in obscure or hard-to-access areas, pinpointing their exact location often goes beyond basic testing methods. When leaks hide behind walls, under floors, or inside buried lines, simple soap bubble tests or pressure checks mightn’t suffice.
You should call a professional if you encounter persistent pressure drops without visible leak evidence, suspect leaks in concealed piping, or detect strong gas odors without pinpointing the source. Experts use specialized equipment like electronic gas detectors and infrared cameras to locate elusive leaks safely.
Additionally, if you face large or rapidly worsening leaks, or if the gas line configuration is complex with multiple branches and valves, leave the inspection and repair to licensed technicians who understand local codes and safety protocols. Your safety and accurate diagnosis depend on their expertise.
Safety Risk Factors
When you detect a gas leak that involves large volumes of escaping gas, rapidly worsening pressure drops, or strong odors that you can’t trace, you must call a professional immediately.
These signs indicate a high-risk situation requiring expert intervention to guarantee safety and compliance with regulations.
Don’t attempt repairs on major leaks or inaccessible lines.
Contact a professional if you encounter:
- Persistent pressure drops exceeding 10% during testing
- Leaks near electrical wiring or ignition sources
- Gas odors inside confined spaces or poorly ventilated areas
- Inability to isolate or locate the leak using standard detection methods
Recognizing these risk factors prevents accidents and guarantees your gas system remains safe and reliable.
Frequently Asked Questions
Can Temperature Changes Affect Gas Line Pressure Readings?
Yes, temperature changes can affect gas line pressure readings. As temperature rises, gas expands, increasing pressure. When it drops, gas contracts, lowering pressure.
This fluctuation can mimic leaks during pressure tests, so you should account for ambient temperature shifts. Use calibrated gauges and monitor temperature to distinguish true pressure drops from thermal effects.
Maintaining stable conditions or correcting readings based on temperature helps you get accurate leak detection results.
Is It Safe to Test Gas Lines Indoors Without Ventilation?
No, it’s not safe to test gas lines indoors without ventilation.
Gas leaks can accumulate, creating explosive or toxic atmospheres. Always ensure proper ventilation to disperse any escaping gas.
Use dry nitrogen or air for pressure testing instead of fuel gas to reduce hazards.
If you must test indoors, continuously monitor gas levels with electronic sniffers.
Have safety measures like lockout tagout and barricades in place to protect yourself and others.
How Often Should Gas Lines Be Tested for Leaks?
You should test gas lines for leaks as regularly as a clock ticks, typically every year or after any significant work on the system.
Regular inspections, including pressure and soap bubble tests, secure safety and compliance with local codes.
If you smell gas or notice black stains, test immediately.
What Are the Signs of a Chronic Gas Leak Inside Walls?
You’ll notice black stains or discoloration on fittings and valves inside walls, which often indicate chronic gas leaks.
Additionally, a persistent sulfur-like mercaptan odor, even when no gas is in use, signals a slow leak.
You might detect hissing sounds or unusual pressure drops in your system.
These signs mean you should promptly inspect and repair the lines, as chronic leaks pose serious safety risks and require professional attention.
Can Homemade Soap Solutions Damage Gas Line Fittings?
No, homemade soap solutions like Dawn dish soap mixed with water won’t damage gas line fittings when used properly.
You should apply them gently with a dauber or spray bottle to avoid excess moisture buildup.
Just be sure to remove any excess thread sealant before applying and rinse off soap residue after testing.
This prevents corrosion or buildup that could compromise the fittings over time.
Always inspect fittings thoroughly after testing.
Ensure Safety with Thorough Gas Line Checks
Testing your gas line for leaks is essential for safety and efficiency. While some believe visual inspections alone suffice, pressure testing combined with electronic detectors provides a more reliable assessment.
By carefully setting pressure levels and monitoring drops, you can accurately pinpoint leaks. Always use the right tools and follow safe procedures to avoid hazards.
If uncertainty arises or results seem inconsistent, don’t hesitate to call a professional. Gas safety isn’t worth risking.