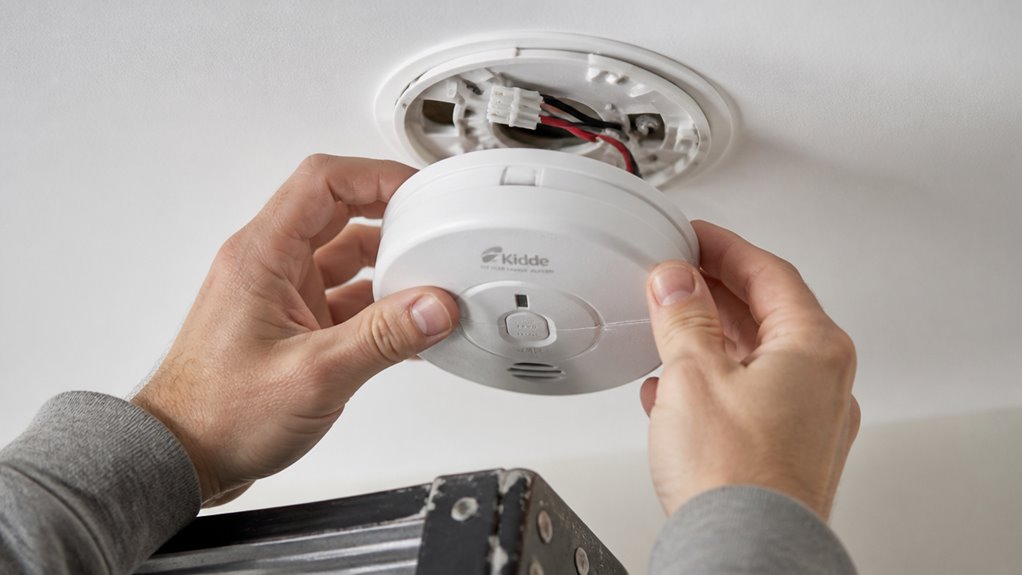
To replace a Kidde smoke alarm, first disconnect AC power and detach the unit by rotating it toward the OFF arrow.
Disengage any tamper-resist pins or tabs with pliers. Mount the new alarm securely, assuring compatibility and correct power type, then snap it into place and restore power.
Test monthly by pressing the button until a continuous beep sounds. Proper installation and maintenance extend alarm life and assure safety.
Detailed steps will guide you through installation, testing, and upkeep.
Key Takeaways
- Disconnect AC power harness by squeezing locking arms and pull alarm away; rotate battery or hard-wired model toward OFF arrow to detach.
- Remove tamper-resist pin with long nose pliers and press tamper-resist tab while rotating alarm off the mounting base.
- Identify current model number and power source type to select a compatible replacement from Kidde’s website or cross-reference tool.
- Install new alarm by aligning and twisting it clockwise onto the mounting base until it locks and tamper-resist features are engaged.
- Test the new alarm monthly by pressing the test button until a loud beep sounds and the indicator light flashes.
How to Safely Remove Your Kidde Smoke Alarm?
When removing your Kidde smoke alarm, start by disconnecting the AC power harness. Squeeze the locking arms on the quick connector and pull it away from the alarm’s bottom.
For battery-operated models, rotate the alarm in the direction of the OFF arrow on the cover to detach it from the trim ring. If you have a hard-wired version, grip the alarm firmly and rotate it counter-clockwise toward the OFF arrow to release it.
Make certain you handle the unit carefully to avoid damaging mounting components. Avoid forcing the alarm, as doing so may break the trim ring or connectors.
Once detached, place the alarm on a flat surface before proceeding with replacement or maintenance. This method guarantees a safe and damage-free removal process.
Also, ensure that any tamper-resist features are disengaged before attempting removal to avoid damage or difficulty.
How to Remove Tamper-Resist Features on Kidde Smoke Alarms?
Although tamper-resist features enhance security by preventing unauthorized removal, you’ll need to disengage them before fully removing your Kidde smoke alarm.
Begin by locating the tamper-resist pin, usually inserted through a securing hole. Use long nose pliers to firmly pull the pin out.
Locate the tamper-resist pin and use long nose pliers to firmly pull it out.
Next, identify the tamper-resist tab on the alarm’s base. Press down on this tab while simultaneously rotating the alarm in the direction of the OFF arrow printed on the cover.
This action releases the tab mechanism. Once both features are disengaged, you can safely rotate and detach the alarm from its mounting trim ring.
Remember, these steps vary slightly depending on your alarm model, so consult the user manual if unsure.
Disengaging these features correctly prevents damage during removal. For safe handling, always ensure the power source is disconnected as recommended in the reset procedures to avoid accidental alarms or damage.
When and Why You Should Replace Your Kidde Smoke Alarm?
After properly disengaging tamper-resist features to remove your Kidde smoke alarm, you should evaluate whether it’s time for a replacement.
Smoke alarms have finite lifespans and degrade in sensitivity over time, compromising safety.
Replace your unit if:
- It’s been 10 years since manufacture; smoke alarms lose effectiveness beyond this period.
- The alarm frequently triggers false alarms or fails monthly tests; these are signs of sensor malfunction.
- It’s a combination or carbon monoxide alarm older than 7-10 years, per model specifications.
Ignoring these indicators risks delayed fire detection.
Adhering to replacement intervals guarantees your home benefits from current safety standards and technology improvements.
Always consult your alarm’s label or manual for precise expiration dates and replace promptly to maintain peak protection.
Kidde alarms also feature integrated 10-year non-removable batteries that support their lifespan and provide reliable, maintenance-free power.
How to Choose the Right Kidde Smoke Alarm Replacement?
Selecting the right Kidde smoke alarm replacement starts with identifying your current model number, which guarantees compatibility and peak safety performance.
Locate this number on the back or inside the alarm’s cover. Enter it on Kidde’s website search bar to find exact replacements or updated models.
Check the product details page for specifications, including power source type: battery-operated, hardwired, or combination.
Also, look for tamper-resist features if needed. Confirm the replacement’s lifespan; most smoke alarms last 10 years, while combination units vary between 7 and 10 years.
If your model is discontinued, use the site’s cross-reference tool or contact Kidde support for guidance.
Choosing a model that matches your home’s wiring and safety needs secures proper function and compliance with current standards.
For optimal safety, ensure you install alarms in recommended locations such as inside each bedroom and on every floor, following key placement guidelines.
Best Locations to Install Your New Kidde Smoke Alarm
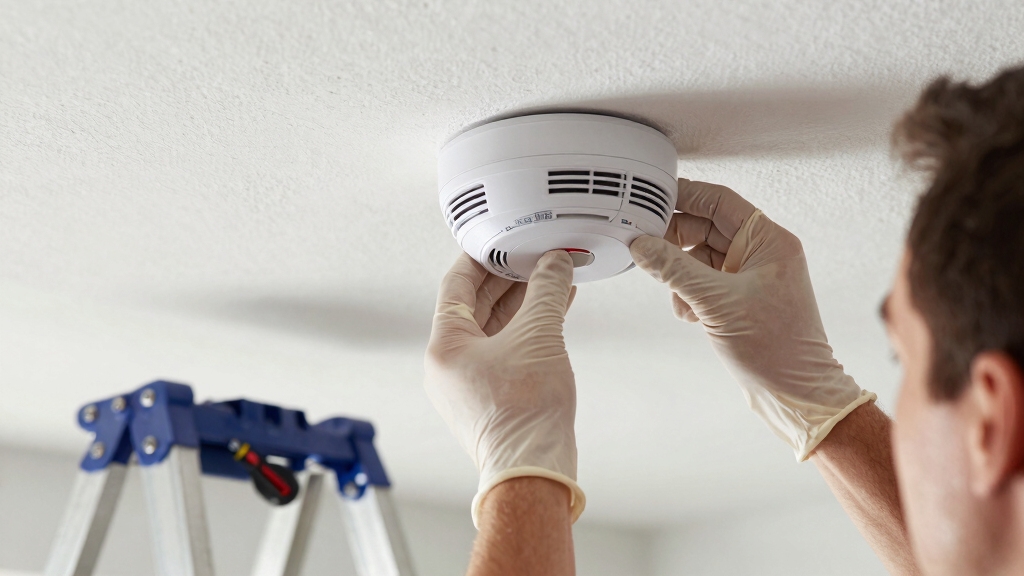
When installing your new Kidde smoke alarm, place it on the ceiling near the center of each room to guarantee peak smoke detection, since smoke naturally rises.
If ceiling installation isn’t feasible, mount the alarm on an inside wall, avoiding corners and areas near vents or high humidity.
For comprehensive coverage, especially in larger homes, install multiple alarms across different levels.
Follow these key placement practices:
- Position alarms centrally on ceilings or inside walls for direct smoke exposure.
- Avoid outside walls, corners, vents, and humid zones to prevent false alarms or detection delays.
- Install alarms on every level, including basements and sleeping areas, to ensure early warning.
Always consult your model’s user manual for specific placement guidance tailored to your Kidde smoke alarm.
For optimal safety, install smoke detectors near bedrooms and key living areas to maximize early warnings.
How to Install a Kidde Smoke Alarm Step-by-Step?
Start by choosing the ideal mounting location, preferably the center of the ceiling, to maximize smoke detection efficiency. If ceiling placement isn’t available, select an inside wall.
Use the mounting base to mark screw holes, then drill pilot holes smaller than the plastic anchors. Tap anchors flush into the holes with a hammer.
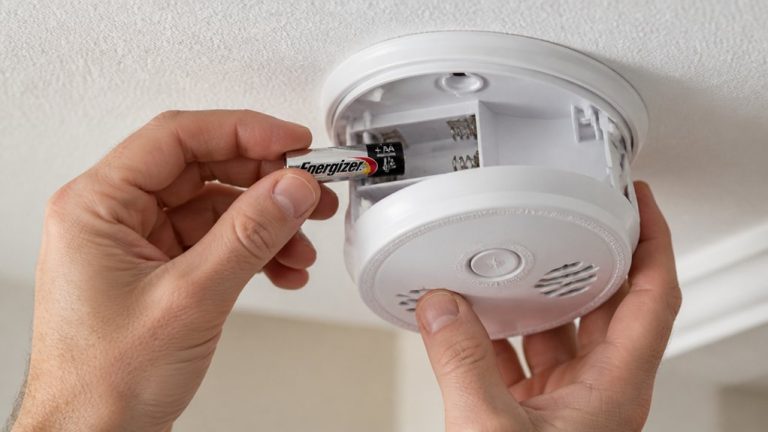
Partially drive screws into anchors, align the mounting base, and secure it firmly. Insert batteries into the alarm compartment, ensuring correct polarity.
For hard-wired models, connect the AC power harness by snapping the quick connector into place. Finally, twist the alarm clockwise onto the mounting base until it locks securely.
Confirm the tamper-resist feature is disengaged if present. Your Kidde smoke alarm is now properly installed and ready for testing. Remember to test your smoke alarm monthly to ensure proper function and reliable protection.
How to Test Your Kidde Smoke Alarm?
You should really test your Kidde smoke alarm every month. Just press and hold the test button until you hear that familiar alarm sound. It’s a quick and easy way to make sure everything’s working properly!
And don’t forget about the batteries! Aim to replace them at least twice a year. If you ever hear that low-battery chirp, it’s time to swap them out right away. By regularly testing and changing the batteries on time, you’ll ensure that your alarm is always ready to keep you safe. Also, after replacing batteries or restoring power, be sure to press and release the test button to complete the power restoration steps and reset the alarm properly.
Monthly Testing Procedure
Regularly testing your Kidde smoke alarm guarantees it functions correctly and provides reliable protection.
To perform your monthly test, follow these steps precisely:
- Press and hold the test button on the alarm’s face until you hear a loud, continuous beep. This verifies the sounder and circuitry work properly.
- Confirm the alarm’s indicator light flashes during the test, signaling the device’s active status.
- Release the button after the alarm sounds, assuring the device resets without error signals or false alarms.
If the alarm fails to sound or the indicator doesn’t flash, replace batteries or troubleshoot wiring immediately.
Conducting this monthly test maintains your alarm’s readiness for emergency situations and assures compliance with safety guidelines.
For optimal performance, it is also recommended to clean monthly using a vacuum or compressed air to remove dust and debris from vents and sensors.
Battery Replacement Timing
After confirming your Kidde smoke alarm functions properly during monthly testing, the next step is guaranteeing the battery remains reliable over time.
Replace the battery at least twice yearly to maintain peak performance and avoid unexpected failure. When your alarm emits a low-battery chirp, replace the battery immediately.
Use only recommended battery types specified in your model’s user manual. For hard-wired units with battery backup, guarantee the backup battery is replaced on the same schedule.
Always disconnect AC power before replacing batteries to prevent damage. After installing new batteries, press the test button to verify correct operation.
Keeping to this schedule guarantees your alarm provides continuous protection and alerts you promptly to fire hazards without interruption. Consider models with 10-year sealed lithium batteries to reduce replacement frequency and enhance reliability.
How to Maintain and Troubleshoot Your Kidde Smoke Alarm?
Consistently testing your Kidde smoke alarm guarantees it functions correctly and provides reliable protection.
Start by pressing the test button monthly to confirm the alarm sounds.
Keep batteries fresh by replacing them twice a year, or immediately if the low-battery chirp activates.
Clean your alarm’s sides and back regularly to prevent dust buildup, which can cause false alarms or failure.
Follow these key maintenance steps:
- Test alarm function monthly using the built-in test button.
- Replace batteries biannually and whenever low-battery chirps occur.
- Clean the unit’s vents and outer casing to maintain sensor accuracy.
If your alarm malfunctions despite these steps, check for AC power loss in hard-wired models.
Replace the unit if it’s past its expiration date.
Ensure you maintain the battery backup to keep your smoke alarm operational during power outages.
Frequently Asked Questions
Can I Connect Multiple Kidde Alarms to Sound Simultaneously?
Yes, you can connect multiple Kidde alarms to sound simultaneously by using their interconnect feature.
When one alarm detects smoke or carbon monoxide, it triggers all linked units.
Make sure you use alarms compatible with Kidde’s interconnect system, either wired or wireless models.
Follow the manufacturer’s wiring or setup instructions precisely for proper interconnection.
Test the system monthly to confirm all alarms respond together, enhancing your home’s safety effectively.
Are Kidde Smoke Alarms Compatible With Smart Home Systems?
Yes, Kidde smoke alarms can integrate with smart home systems, but only specific models support this feature.
You might think all Kidde alarms connect wirelessly, but only their Wi-Fi and Z-Wave enabled devices do.
To guarantee compatibility, check the model specifications for smart connectivity options.
Use the Kidde app or compatible smart hubs to monitor alarms remotely, receive alerts, and manage settings seamlessly within your home automation setup.
What Do Different Alarm Chirping Patterns Mean on Kidde Devices?
Different chirping patterns on Kidde alarms indicate specific issues.
A single chirp every 30-40 seconds signals low battery; replace batteries promptly.
Rapid chirps or continuous beeping usually mean a detected alarm condition. Check for smoke or fire immediately.
A chirp every 60 seconds may indicate end-of-life; replace the unit. Familiarize yourself with your model’s user manual for exact chirp codes to ensure timely responses and maintain safety.
How Do I Dispose of My Old Kidde Smoke Alarm Safely?
Think of your old Kidde smoke alarm as a retired guardian that needs careful handling.
To dispose of it safely, first remove the battery to prevent leaks or accidental activation.
Then, check local regulations; some areas require recycling due to electronic components and batteries.
Never toss alarms in regular trash if hazardous waste rules apply.
Finally, drop it off at an electronic waste facility or follow manufacturer guidelines for disposal, ensuring environmental safety.
Can Kidde Smoke Alarms Detect Carbon Monoxide as Well?
Yes, Kidde offers smoke alarms that detect carbon monoxide, including combination units. You’ll want to check your specific model number on Kidde’s website to confirm if it includes CO detection.
These combo alarms typically require replacement every 7-10 years, depending on the model. When choosing an alarm, follow placement guidelines carefully.
Test the device monthly to verify both smoke and carbon monoxide sensors function properly for your safety.
Final Tips Before Replacing Your Kidde Smoke Alarm
Replacing your Kidde smoke alarm means removing the old unit safely, disabling tamper-resist features carefully, and selecting the right replacement based on your needs.
It means installing the alarm in ideal locations, following step-by-step instructions precisely, and testing the device thoroughly.
It means maintaining regular upkeep and troubleshooting promptly.
By doing all these, you guarantee your home’s safety, prolong your alarm’s functionality, and comply with safety standards effectively.