To replace the 9V battery in your Kidde smoke detector, safely remove the unit by disengaging any tamper locks and detaching it from the mounting plate.
Open the battery compartment, note the old battery’s orientation, and pull it out carefully.
Insert a fresh 9V alkaline battery with correct polarity, then securely close the compartment.
Reattach the alarm, tighten screws firmly, and test it using the test button.
Following these steps guarantees reliable operation and proper maintenance for your device.
More detailed guidance can help guarantee long-term safety.
Key Takeaways
- Locate and open the battery compartment by pressing the latch or sliding the door on the Kidde smoke detector.
- Remove the old 9V battery, noting its orientation, and pull it straight out from the compartment.
- Insert a fresh Kidde-approved 9V alkaline battery, ensuring correct polarity alignment with metal contacts.
- Close the battery compartment securely until it snaps and reattach the detector to its mounting plate.
- Test the alarm by pressing and holding the test button for 5 seconds, listening for the alarm sound.
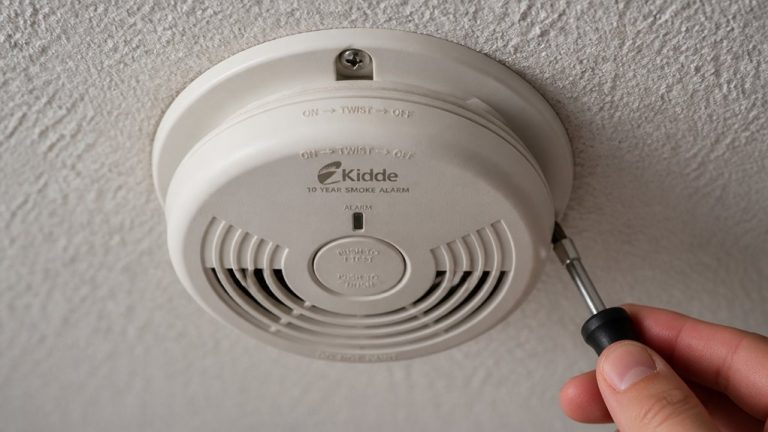
When to Replace Your Kidde Smoke Detector’s 9V Battery?
You should replace your Kidde smoke detector’s 9V battery promptly whenever you hear the low-battery chirp, which typically sounds every 30 to 40 seconds.
This alert can persist for at least seven days, signaling the battery’s diminished capacity.
Even if you don’t hear the chirp, Kidde recommends changing the battery every six months for many models to maintain peak performance.
Kidde’s branded 9V alkaline batteries can last up to two years in compatible alarms, but environmental factors and device age may reduce this lifespan.
Acting immediately after the chirp begins guarantees the alarm remains operational, preserving your safety.
Delaying replacement risks the detector failing to alert you in a fire emergency, so adhere strictly to these timing guidelines.
For best results, always use the correct 9-volt battery type specified for your model to ensure reliable operation.
What Tools and Batteries You’ll Need for Replacement?
Before replacing the battery in your Kidde smoke detector, gather the correct tools and a fresh 9V alkaline battery approved for your specific model.
Using the right components guarantees compatibility and reliable operation.
Here’s what you’ll need:
- A fresh 9V alkaline battery, preferably Kidde-branded or listed in your user guide.
- A small screwdriver, if your model has a tamper-resist locking mechanism.
- Safety gloves to avoid skin contact with dust or debris inside the detector.
- A clean workspace to place the detector and old battery during replacement.
Having these ready will streamline the process and help maintain your smoke detector’s peak performance.
Avoid using rechargeable or non-alkaline batteries, as they may not meet safety standards. Kidde alarms often feature integrated 10-year batteries that reduce the need for frequent replacements, enhancing long-term safety and convenience.
Removing Your Kidde Smoke Detector Safely
When removing your Kidde smoke detector, always make sure the unit is handled carefully to avoid damaging the mounting bracket or wiring.
First, check for a tamper-resist locking pin or tab; disengage or remove it if present.
For models with a mounting plate, twist the alarm in the direction of the Off arrow or counterclockwise to release it.
If your alarm is hardwired, locate the quick-connect wire harness on the back.
Squeeze the plastic prongs on the harness gently before pulling it free to avoid wire damage.
Support the unit firmly during removal to prevent dropping or stressing the wires.
Once detached, place the alarm on a stable surface with the battery compartment accessible, preparing for the next step in battery replacement.
Be sure to disengage tamper-resist features fully before removal to ensure safe access and avoid damage.
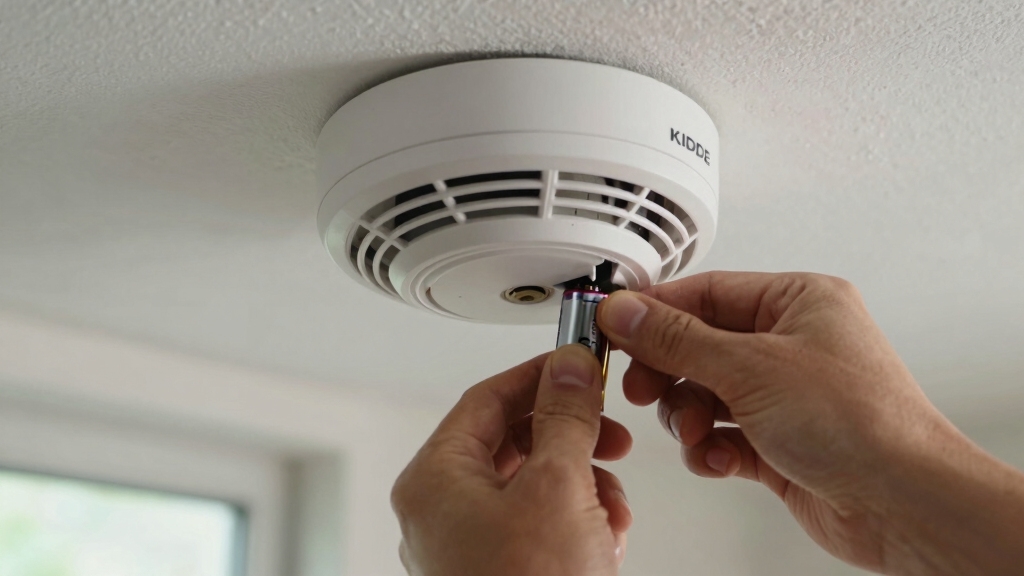
Opening the Battery Compartment and Removing the Old Battery
With the alarm removed and placed on a stable surface, locate the battery compartment door. Depending on your Kidde model, you may need to press a latch or slide the door open carefully.
Before removing the battery, note the orientation and connector placement to avoid confusion later.
Always note battery orientation and connector placement before removal to ensure correct replacement.
Follow these steps:
- Press or release the battery compartment latch to open the door.
- Identify any red battery reminder finger or safety lever and prepare to depress it.
- Pull the old 9V battery straight out, ensuring connectors disengage cleanly.
- Inspect the compartment for dust or corrosion before proceeding.
Removing the battery renders the alarm inoperative, so proceed promptly to the next step for replacement. It is important to use battery types recommended by Kidde to ensure proper functionality and safety.
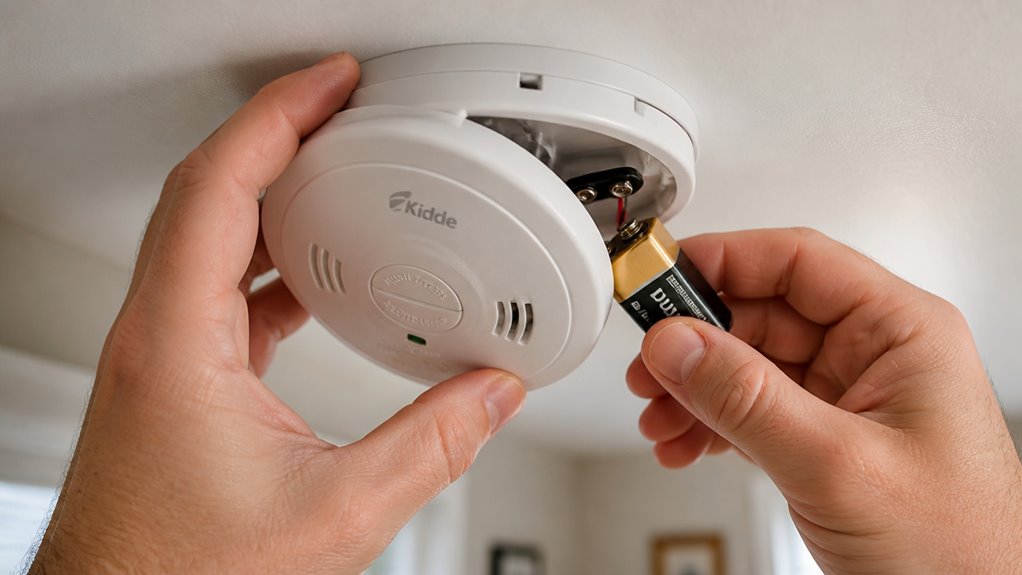
Installing the New 9V Battery Correctly in Your Kidde Alarm
Insert the new 9V battery by aligning its positive and negative terminals precisely with the metal contacts inside the compartment.
Verify the polarity diagram on the compartment label to assure correct orientation. Gently press the battery into place, making sure it seats firmly against the connectors.
If your model includes a red battery reminder finger or safety lever, press it down fully to secure the battery. Avoid forcing the battery, as misalignment can prevent the compartment door from closing properly or damage internal tabs.
Once the battery is correctly positioned, close the battery compartment door until you hear a snap or feel it lock securely. Confirm the door is flush with the alarm housing to guarantee proper contact and prevent accidental dislodging during operation.
Regular testing using the built-in self-test button is recommended to ensure the alarm functions correctly after battery replacement.
Reattaching and Securing Your Smoke Detector
Sure! Here’s a more conversational version of your text:
First things first, let’s get that smoke detector aligned with the mounting plate. Just make sure those arrows or guides line up perfectly. Once everything’s in place, twist the unit clockwise to lock it in. If you’re dealing with a hardwired model, don’t forget to reconnect any wiring before you finish up.
Oh, and here’s a good tip: after you’ve installed it, make sure to test the alarm. Just press the test button to check that everything’s working properly.
It’s a quick and easy step that gives you peace of mind! Regular monthly testing is recommended to ensure proper function of your smoke alarm.
Aligning Alarm Correctly
Secure the smoke detector by twisting it firmly onto the mounting plate until it locks into place, following the direction indicated by the On arrow or clockwise rotation.
Proper alignment guarantees the unit is securely attached and functions correctly.
To align the alarm correctly:
- Position the alarm so that its mounting tabs match the slots on the mounting plate.
- Twist the alarm clockwise, following the On arrow, until you feel resistance.
- Confirm the alarm is flush against the ceiling or wall, with no gaps.
- Make certain the unit doesn’t wobble or move when gently nudged.
Incorrect alignment can prevent the detector from locking or cause false alarms.
Always verify the locking mechanism engages fully before proceeding.
Ensure the detector is mounted in a well-lit, unobstructed location to maintain visibility and accessibility in case of emergency.
Securing Mounting Plate
Once your alarm is properly aligned and locked into place, focus on reattaching the mounting plate firmly to the ceiling or wall.
Make sure the mounting plate’s screw holes align with the existing anchors or drywall screws. Use a screwdriver to tighten screws securely without over-tightening, which can crack the plate or wall surface.
Confirm the plate sits flush against the surface for stability.
Proper installation also involves disabling any tamper-resist features to avoid damage during reattachment.
| Step | Action |
|---|---|
| Position Mounting Plate | Align holes with anchors/screws |
| Insert Screws | Use appropriate screwdriver |
| Tighten Screws | Secure firmly, avoid overtightening |
| Check Stability | Plate should be flush and stable |
Properly securing the mounting plate prevents alarm loosening and ensures consistent operation.
Testing After Installation
After you’ve reattached and firmly secured your smoke detector to the mounting plate, you’ll need to verify its functionality by performing a thorough test. This step guarantees the unit operates correctly with the new battery installed.
Follow these steps to test your Kidde smoke detector:
- Press and hold the test button for at least 5 seconds.
- Listen for the alarm to emit three short beeps followed by a pause, indicating a successful test.
- If the alarm doesn’t sound, check battery installation and mounting plate connection.
- Repeat the test after any adjustments until the alarm functions properly.
Regular testing after battery replacement confirms your smoke detector remains reliable and ready to protect your home.
For a more thorough reset, you can also press and hold the test button for 15–30 seconds to drain residual power and trigger reset chirps, ensuring the alarm is fully refreshed.
Testing Your Kidde Smoke Detector After Battery Replacement
To verify that your Kidde smoke detector is functioning properly, press and hold the test button for at least five seconds.
During this time, listen for a series of three short beeps followed by a pause, indicating the alarm is operational.
If the alarm fails to sound, double-check the battery installation and make certain the compartment is securely closed.
For hardwired models, confirm the wire harness is connected properly.
Avoid releasing the test button prematurely to prevent an incomplete signal.
Testing immediately after battery replacement confirms successful power restoration and sensor readiness.
Conduct this test regularly to maintain peak performance.
If the unit doesn’t respond correctly after several attempts, consider replacing the battery again or consulting the user manual for troubleshooting steps.
Proper testing safeguards your home’s fire safety system.
Remember, the green LED should blink every 60 seconds during standby mode to indicate continuous power.
How to Maintain Your Kidde Smoke Detector for Longer Life?
Regularly maintaining your Kidde smoke detector guarantees reliable operation and extends its service life. You should adopt a systematic approach to upkeep, focusing on key tasks to ensure peak performance.
Consistent maintenance of your Kidde smoke detector ensures dependable performance and prolongs its lifespan.
- Replace the 9V battery every 6 months or immediately after a low-battery chirp begins.
- Clean the detector’s exterior and vents monthly with a soft brush or vacuum to remove dust and debris.
- Test the alarm monthly by pressing and holding the test button for 5 seconds to verify proper function.
- Inspect for physical damage or wear, and replace the entire unit every 10 years or if it fails tests despite maintenance.
Following these steps will keep your Kidde smoke detector functioning effectively and reliably over time.
Frequently Asked Questions
Can I Use Rechargeable 9V Batteries in My Kidde Smoke Detector?
You generally shouldn’t use rechargeable 9V batteries in your Kidde smoke detector. Kidde recommends fresh alkaline 9V batteries because rechargeables often have lower voltage and can discharge faster. This can risk unreliable alarm performance.
Using the specified battery type guarantees proper functionality and longer life. Check your model’s user guide for approved batteries, but for safety and compliance, stick to fresh alkaline batteries designed for your detector.
How Do I Reset the Alarm After Battery Replacement?
To reset your Kidde smoke alarm after battery replacement, press and hold the test button for at least 15 to 20 seconds until the alarm beeps, then releases. This clears any low-battery or fault alerts.
If your model has a silence or hush button, use it briefly after testing. Always verify the reset by testing again; if the alarm continues chirping, check battery installation or consult the manual for model-specific reset instructions.
What if My Smoke Detector Still Chirps After Battery Replacement?
If your smoke detector still chirps after replacing the battery, picture a stubborn rhythm refusing to stop.
First, double-check the battery’s orientation. Make sure the positive and negative terminals align perfectly with the contacts.
Then, guarantee the battery compartment door snaps fully closed.
If it’s still chirping, reset the alarm by pressing and holding the test button for 15-20 seconds.
Persistent chirps may indicate a faulty unit needing replacement.
Can I Replace Batteries in a Hardwired Interconnected Kidde Alarm?
Yes, you can replace batteries in a hardwired interconnected Kidde alarm. First, disconnect the quick-connect wire harness by squeezing the plastic prongs before pulling it free.
Remove the alarm from the mounting bracket by twisting it toward the Off arrow. Then, open the battery compartment, remove the old 9V battery, and insert a fresh one, matching polarity.
Finally, reconnect the wire harness and remount the alarm securely. Test the unit after installation.
How Do I Dispose of Old 9V Batteries Safely and Properly?
You should never throw old 9V batteries in regular trash due to environmental hazards.
Instead, take them to a local battery recycling center or hazardous waste facility. Many hardware stores and retailers offer battery drop-off programs.
Before disposal, tape the battery terminals with non-conductive tape to prevent short circuits.
Always follow your area’s specific regulations for battery disposal to guarantee safety and compliance with environmental standards.
Protect Your Home With a Fresh 9V Battery
Replacing your Kidde smoke detector’s 9V battery is like tuning a finely crafted instrument. Precision guarantees safety.
By following these clear steps, you’ll keep your alarm vigilant, much like a watchful guardian.
Remember, regular maintenance extends its life and reliability, preventing silent threats.
Stay proactive, test often, and never underestimate the power of a fresh battery to keep your home secure and your peace of mind intact.