To keep spiders away from your security cameras, clean them every 2 to 4 weeks using soft brushes and compressed air. This removes webs without damaging lenses.
Reduce insect attraction by switching to yellow-toned bulbs and adjusting IR settings to lower intensity.
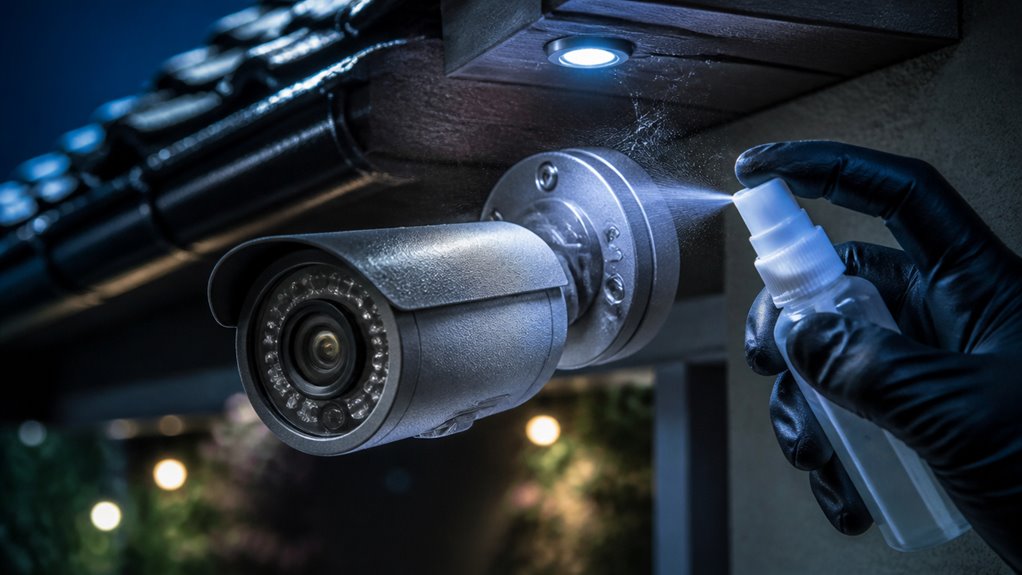
Apply natural or commercial repellents carefully on housings, avoiding contact with lenses.
Consider protective covers with airflow to disrupt web-building. Proper camera placement away from vegetation and bright lights also helps.
Effective maintenance and pest control strategies further enhance camera clarity and reliability.
Key Takeaways
- Clean security cameras and surrounding areas every 2 to 4 weeks to remove webs, dust, and spider activity promptly.
- Use yellow-toned outdoor lighting and position cameras away from bright lights to reduce insect attraction that draws spiders.
- Apply natural or commercial spider repellents carefully around camera housings, avoiding vents, lenses, and movable parts.
- Position cameras 8–10 feet high and several feet away from IR illuminators to minimize insect clustering near lenses.
- Inspect camera mounts and housings regularly for cracks or gaps that spiders may use to build webs or enter.
Why Spider Webs on Security Cameras Are a Problem?
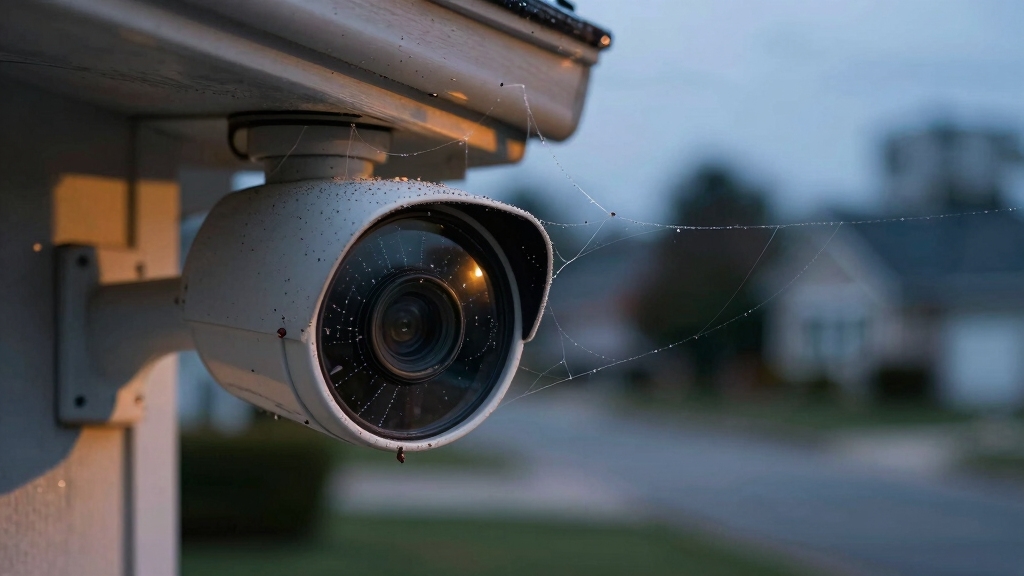
Spider webs frequently obstruct security cameras, reducing image clarity and compromising surveillance effectiveness.
When webs accumulate on lenses or housings, they distort or blur footage, making it difficult to identify subjects or events.
Webs also interfere with infrared illumination, degrading night vision capabilities. Additionally, webs attract insects, which draw spiders closer, exacerbating the buildup. This creates a cycle of obstruction and maintenance challenges.
You risk missing vital security incidents due to compromised video quality. Furthermore, spider webs can trap dust and moisture, potentially damaging camera components over time.
Similar to smoke alarms, spider webs can physically block sensors and disrupt optical systems, leading to reduced performance and false readings, highlighting the importance of regular cleaning to maintain device reliability. This is especially relevant for devices with optical sensor technology.
Ensuring clear, unobstructed camera views is essential for reliable monitoring. By understanding these technical impacts, you can prioritize preventive measures to maintain optimal camera performance and preserve the integrity of your surveillance system.
Cleaning Frequency to Prevent Spider Webs on Cameras
You know, it’s a good idea to clean your security cameras every 2 to 4 weeks. Just grab a soft brush or cloth—nothing too harsh—and gently remove any webs and debris that have accumulated.
While you’re at it, take a moment to inspect the housing and the area around the camera for any early signs of spider activity. Keeping up with this routine not only helps prevent buildup but also ensures that your camera’s view stays clear. Trust me, it makes a big difference!
Additionally, regular maintenance helps prevent moisture accumulation, which can impair image quality and camera functionality over time.
Optimal Cleaning Intervals
Regularly cleaning your security cameras every 2 to 4 weeks helps prevent spider webs and dust buildup that can obstruct the lens and degrade image quality. This interval balances effective debris removal while minimizing maintenance effort.
Inspect the camera housing and surrounding areas during each session to detect early spider activity and webs. Promptly remove any webs, as spiders rebuild quickly after disturbance.
Adjust cleaning frequency based on environmental factors; for example, cameras near vegetation or bright lights may require biweekly attention. Consistent cleaning disrupts spider nesting and maintains ideal camera function.
Establish a routine schedule to guarantee maintenance isn’t overlooked, preventing accumulation that complicates cleaning. By adhering to these intervals, you reduce spider-related obstructions and preserve image clarity, enhancing your security system’s reliability.
Additionally, regular cleaning helps maintain the solar panel’s maximum sunlight absorption, ensuring reliable power for cameras equipped with solar charging.
Effective Cleaning Tools
Choose cleaning tools that effectively remove webs and debris without damaging your security camera’s housing or lens. Cleaning every 2 to 4 weeks helps prevent spider webs from accumulating and interfering with camera performance.
Use soft brushes or microfiber cloths to gently clear webs without abrasion. Avoid harsh chemicals that can degrade plastics or coatings.
| Tool Type | Cleaning Frequency |
|---|---|
| Soft Brush | Every 2-4 weeks |
| Microfiber Cloth | Every 2-4 weeks |
| Compressed Air | Weekly (spot clean) |
| Silicone Lubricant | Monthly (housing) |
| Natural Sprays | Monthly (surrounding) |
Regular use of these tools maintains camera clarity and reduces spider buildup. This ensures uninterrupted security monitoring. To maximize cleaning effectiveness and protect your equipment, consider placing cameras 8–10 feet high where they are less prone to debris and spider webs.
Inspection During Cleaning
Maintaining a consistent cleaning schedule provides an ideal opportunity to inspect security camera housings and surrounding areas for early signs of spider activity.
Clean your cameras every 2 to 4 weeks, using a soft brush or cloth to remove webs and debris carefully. During each session, check for fresh webs, egg sacs, or spider presence near mounting points and housing crevices.
Promptly remove any webs, as spiders rebuild quickly. Pay attention to surrounding surfaces and trim nearby vegetation to reduce spider access routes.
Keeping mounting areas clean and free of insect buildup also lowers spider attraction. Make inspections part of your routine maintenance to catch infestations early and prevent obstruction or damage to camera lenses, ensuring uninterrupted surveillance performance. Additionally, proper camera placement can reduce exposure to environmental factors that attract spiders and other pests.
Tools and Techniques for Cleaning Camera Housings
Although cleaning security camera housings might seem straightforward, using the right tools and techniques is essential to prevent damage and guarantee effective removal of webs and debris.
Use a soft brush or microfiber cloth to gently remove spider webs and dust without scratching the housing or lens.
Avoid harsh chemicals; instead, opt for mild soap diluted in water for stubborn dirt.
Always cover the lens during cleaning to prevent moisture ingress.
Compressed air effectively blows away loose particles from crevices and vents.
Inspect the housing for cracks or gaps that may harbor spiders, and clean these areas thoroughly.
Clean camera housings every 2 to 4 weeks to maintain peak function and reduce spider activity.
Consistent, careful cleaning extends the camera’s lifespan and preserves image clarity.
To ensure optimal performance, regularly inspect for physical damage such as cracks or loose mounts that could compromise the housing’s integrity.
Reducing Insect Attraction With Camera Lighting
To keep those pesky insects away from your security cameras, try disabling the IR LEDs if you have other night vision options available. It’s a simple switch that can make a big difference!
Also, consider using yellow-toned bulbs near your cameras. They’re way less attractive to bugs compared to those bright white lights we often use.
And here’s a little tip: if you can, place the camera a few feet away from any main light sources. This will help reduce the chances of insects clustering right at the lens. It’s all about creating that perfect setup!
Additionally, maintaining glass cleanliness helps reduce IR light scattering, which can attract more insects and degrade image quality through glass surfaces.
Disable IR LEDs
Disable the IR LEDs on your security cameras when alternative night vision options are available to reduce insect attraction.
IR LEDs emit infrared light that attracts many insects, which in turn draws spiders seeking prey. By turning off these built-in IR illuminators, you limit the light source that lures insects close to the camera lens.
Instead, use external IR illuminators positioned several feet away or switch to cameras with low-light sensors that don’t rely on IR LEDs. This reduces insect clustering and spider web formation on camera surfaces.
When disabling IR LEDs, make sure your alternative night vision provides adequate coverage to maintain security effectiveness.
Regularly inspect the camera area to confirm reduced insect presence, adapting lighting strategies as needed to minimize spider activity linked to insect attractants.
For improved image quality in low-light conditions without relying on IR LEDs, consider cameras with reduced IR glare features such as turret cameras.
Use Yellow Bulbs
Frequently, bright white lighting near security cameras attracts swarms of insects, which in turn draws spiders that build webs on or around the camera housing.
To minimize this effect, switch to yellow-toned bulbs for any necessary lighting near your cameras. Yellow bulbs emit a spectrum less attractive to insects compared to traditional white light, reducing insect clustering and consequently spider presence.
When you install yellow lighting, make certain it provides adequate illumination for camera performance without creating harsh shadows or glare. This adjustment helps maintain image quality while lowering insect activity.
Use energy-efficient yellow LEDs or compact fluorescent bulbs designed for outdoor use to optimize durability and energy consumption. By controlling the light spectrum around your camera, you effectively reduce the ecological chain that leads to spider web buildup on your security equipment.
For optimal performance and safety, ensure that any LED lighting used near cameras includes proper heat management to prevent overheating and maintain long-term reliability.
Separate Light Sources
A key strategy to reduce insect attraction near your security cameras involves separating the camera from its primary infrared (IR) light source by several feet.
This spatial separation minimizes the concentration of insects directly at the camera lens, where they often gather due to IR illumination.
Instead, insects cluster closer to the external IR source, reducing spider activity around the camera housing.
When possible, use external IR illuminators positioned away from the camera or adjust existing lighting to redirect insect traffic.
Disabling built-in IR LEDs in favor of these separated light sources further limits attraction.
This method complements using yellow-toned bulbs and reduced bright white lighting nearby.
This effectively decreases insects and consequently spiders near your security system, enhancing both image clarity and device longevity.
For optimal performance, ensure your camera’s IR LED intensity settings are adjustable to fine-tune illumination without increasing insect attraction.
Selecting Bulbs and IR Settings to Deter Spiders
You can substantially reduce spider attraction by carefully selecting bulbs and adjusting IR settings on your security cameras.
Use yellow-toned bulbs near cameras instead of bright white ones to minimize insect clustering, which draws spiders.
When night vision is needed, disable built-in IR LEDs if you have an external IR source or alternative lighting.
IR LEDs can attract insects and indirectly spiders. Position the camera several feet away from main IR illuminators to reduce insect concentration at the lens.
This separation lowers spider activity around the camera housing. Adjust IR intensity to the minimum effective level to avoid excessive insect attraction.
These lighting strategies help create an environment less appealing to spiders without compromising camera performance or image quality.
Safe Application of Repellents on Security Cameras
Applying repellents to security cameras requires careful attention to protect delicate components while maximizing effectiveness.
You should avoid direct contact with lenses and sensors to prevent damage or image distortion. Before applying, cover the camera lens with a protective film or cloth.
Use repellents sparingly to reduce residue buildup that could attract dust or degrade materials over time.
Keep these tips in mind:
Apply a thin coat only on the camera housing, avoiding vents and movable parts to maintain functionality.
Use applicators like soft cloths or spray nozzles designed for precision to control coverage.
Allow repellents to dry completely before exposing cameras to moisture or reactivating power.
Following these steps ensures repellents work efficiently without compromising camera integrity or performance.
Using Natural and Commercial Spider Repellents on Cameras
You can definitely use natural repellents like peppermint oil or citrus sprays around your camera housing. They’re great for keeping spiders away without risking any damage. Plus, they smell nice!
Now, if you’re dealing with a really persistent spider problem, you might want to consider commercial spider repellent sprays. These can give you more targeted control, but you’ve got to be careful. Make sure to apply them sparingly to avoid getting any on your lens.
And don’t forget to cover the sensitive parts of your camera during treatment. It’s all about keeping your gear functional while keeping those pesky spiders at bay!
Natural Repellent Options
Utilizing natural repellents offers an effective way to discourage spiders from settling around security cameras without damaging sensitive components.
You can apply essential oils like peppermint or citrus around the camera housing, which spiders find unpleasant. Vinegar-based sprays also work well as a non-toxic option, creating a barrier that deters spiders from building webs nearby.
When applying, avoid direct contact with the lens to maintain clear footage.
Consider these natural repellent options:
- Peppermint oil or citrus sprays applied around mounts.
- Vinegar solutions used sparingly on housing and nearby surfaces.
- Flea collars or scented deterrents placed near the mounting point.
These methods provide a safe, eco-friendly approach to minimize spider activity while protecting your camera’s functionality.
Commercial Spray Applications
Combat spider infestations effectively by choosing appropriate commercial spider repellent sprays designed for outdoor use around security cameras.
You should select products labeled specifically for spider control and safe on electronics. Before application, cover the camera lens to prevent damage.
Then apply a thin, even coat on the housing and mounting areas. Avoid oversaturation, which can attract dirt or harm components.
Repeat treatments every few weeks, especially during peak spider activity. For a natural alternative, consider sprays containing peppermint oil or citrus extracts.
Always check manufacturer guidelines to make certain compatibility with your equipment. Combining commercial repellents with regular cleaning and inspection optimizes protection.
If spiders persist despite treatment, consult professional pest control to address broader infestations effectively while maintaining camera functionality.
Installing Physical Barriers and Airflow Around Cameras
When protecting security cameras from spiders, installing physical barriers and ensuring adequate airflow can markedly reduce web buildup.
You can block spider access and disrupt their web-building environment by combining protective covers with consistent airflow.
Here’s how to do it effectively:
Use fine mesh or weatherproof spider-resistant housings with smooth surfaces to prevent spiders from settling.
Install fans near cameras to create airflow that discourages web construction without interfering with camera operation.
Position barriers so they don’t obstruct the camera’s field of view or sensor coverage, preserving image quality.
Optimizing Camera Placement to Avoid Spider-Friendly Spots
In choosing where to mount your security cameras, prioritize locations that minimize spider access and nesting opportunities.
Avoid placing cameras near trees, bushes, or dense vegetation, as these provide spider pathways.
Keep cameras away from ledges or perches that attract insects and birds, which in turn draw spiders.
Select mounting points with smooth surfaces and fewer crevices to discourage web-building.
Position cameras away from strong light sources like porch lights that attract insects and spiders.
Regularly trim surrounding landscaping to reduce spider access routes.
Additionally, make certain cameras are installed where airflow can naturally deter spiders without affecting functionality.
Scheduling Maintenance and Pest Control for Camera Areas
Regularly scheduling maintenance and pest control for your camera areas guarantees consistent functionality and prevents spider infestations from taking hold.
You should integrate routine inspections and cleaning into your maintenance plan to identify and remove webs early.
Pest control treatments can reduce spider prey insects, discouraging spider presence.
To maintain camera performance and spider-free zones, focus on:
- Performing inspections every 2 to 4 weeks, using compressed air or a soft brush to clear webs and debris without damaging cameras.
- Applying appropriate repellents or insecticides around the mounting area, ensuring safety for the device and environment.
- Coordinating with professional pest control services for persistent or severe spider issues to protect your equipment long-term.
Consistent scheduling minimizes downtime and supports reliable surveillance.
Frequently Asked Questions
Can Spiders Damage the Internal Components of Security Cameras?
Spiders typically won’t damage the internal components of security cameras directly, as these parts are sealed and protected.
However, their webs can obstruct lenses and sensors, degrading image quality and camera performance.
Web buildup can trap moisture and dust, potentially leading to corrosion or overheating over time.
Do Spiders Prefer Certain Camera Brands or Models?
Spiders don’t prefer specific camera brands or models. Instead, they’re attracted to environmental factors like warmth, shelter, and insect presence near cameras.
Cameras with crevices or rough surfaces may offer better nesting spots, regardless of brand. Focus on housing design and placement rather than brand choice to reduce spider activity.
Regular cleaning and using smooth, sealed housings minimize spider attraction across all camera models.
Are There Any Long-Term Effects of Using Repellents on Camera Performance?
Repellents can be a double-edged sword, like a gentle rain that nourishes but may flood. Silicone-based sprays and Teflon coatings, if applied properly, generally don’t harm your camera’s optics or electronics.
However, overuse or improper application risks residue buildup, lens fogging, or sensor interference. Natural oils might degrade rubber seals over time.
To maintain peak performance, apply repellents sparingly, avoid lens contact, and perform regular inspections and cleanings.
How Do Weather Conditions Influence Spider Activity on Cameras?
Weather conditions directly affect spider activity around your cameras. Spiders thrive in warm, humid environments, increasing web-building during these periods.
Rain and strong winds tend to reduce spider presence by disrupting webs and discouraging activity.
Cooler temperatures slow spider metabolism, lowering their movement and web construction.
Can Pets or Animals Help Reduce Spider Presence Near Cameras?
Yes, pets and certain animals can help reduce spider presence near cameras by naturally disturbing webs and deterring spider activity.
Cats and dogs often disrupt spider habitats through movement and scent. Birds also prey on spiders and insects, indirectly lowering spider populations.
However, relying solely on animals isn’t foolproof. Combine their presence with regular camera cleaning and environmental controls for effective spider management around security equipment.
Protect Your Outdoor Cameras With Simple Prevention
Keeping spiders off your security cameras is vital for maintaining clear footage and reliable surveillance. Regular cleaning, ideally every two weeks, significantly reduces web buildup. Studies show spiders rebuild webs within 48 hours if neglected.
Combining proper lighting choices, natural repellents, and strategic camera placement creates an effective defense. By staying proactive with maintenance and pest control, you guarantee your security system performs at its best without spider interference.