You’ll need one security camera per 500 square feet or at least one for every entry point like doors, garages, and accessible windows.
Start with coverage for main access areas and living or high-traffic spaces, then add 10–20% more cameras to address blind spots caused by architectural features.
Consider your property size. Small homes need 2–3 cameras, medium ones 4–6, and larger properties require 6 or more.
Keep exploring to optimize placement and coverage effectively.
Key Takeaways
- Estimate one camera per 500 sq ft or one per entry point, including doors, garages, and accessible windows, for baseline coverage.
- Small homes typically need 2–3 cameras; medium homes require 4–6; large homes need 6 or more cameras for full coverage.
- Increase the initial camera count by 10–20% to cover architectural blind spots and complex sightline challenges.
- Prioritize cameras at all entry points, high-value areas like safes and storage rooms, and high-traffic zones for effective monitoring.
- Use strategic placement to maximize coverage with minimal overlap, elevating cameras 8–10 feet for tamper resistance and better visibility.
Determining Camera Needs by Property Size
When determining how many security cameras you need, property size plays a critical role in defining coverage requirements.
For small apartments or condos, 2–3 cameras typically suffice, covering entryways and main living spaces, often including a video doorbell.
Medium homes usually require 4–6 cameras to monitor front and back doors, driveways, and primary access points efficiently.
Large homes demand 6 or more cameras to comprehensively cover all entry points, common areas, and the perimeter.
A practical planning approach involves one camera per 500 square feet or one per entry point, adjusted upward by 10–20% to address blind spots.
It is also important to consider primary entry points and perimeter coverage to ensure no vulnerable areas go unnoticed.
Tackling Blind Spots From Complex Layouts
You’ll want to start by pinpointing those common blind spots caused by corners, side yards, and hallways in your property layout. It’s surprising how these areas can go unnoticed!
Once you’ve identified them, think about where to position your cameras. You’ll want to cover those vulnerable spots strategically to avoid any overlap or gaps.
And here’s a tip: using multiple camera angles can really make a difference. It ensures thorough coverage and helps reduce the risk from any hidden areas. You’ll feel much more secure knowing that you’ve got those angles covered!
For optimal effectiveness, position cameras to create overlapping fields of view to eliminate blind spots and maximize coverage.
Identifying Common Blind Spots
Although complex property layouts enhance privacy and aesthetics, they often create numerous blind spots that compromise security coverage.
You’ll find these blind spots typically in corners, side yards, hallways, and secondary access routes where direct lines of sight are obstructed.
Architectural features like overhangs, landscaping elements, and irregular property shapes further limit camera visibility.
To identify these gaps, assess each area’s sightlines methodically, checking for blocked views or shadowed zones.
Pay particular attention to entry points beyond the primary doors, such as windows or garage access, often overlooked despite vulnerability.
Recognizing these common blind spots lets you quantify additional camera needs precisely.
This ensures thorough coverage and minimizes security risks caused by hidden or poorly monitored spaces within your property’s complex layout.
Using cameras with adjustable lenses and concealed viewing angles can help reduce blind spots in challenging layouts.
Strategic Camera Positioning
Address blind spots effectively by positioning cameras to maximize coverage of complex layouts.
Start by mapping all critical access points, corridors, and corners where sightlines converge or overlap.
Place cameras to cover these zones with minimal overlap while ensuring no gaps remain.
Elevate cameras to reduce obstruction from landscaping or furniture and use wide-angle lenses in areas with expansive views.
Prioritize angles that capture both entrances and adjacent pathways to anticipate movement.
For irregular floor plans, integrate cameras at junctions of hallways and near secondary access points to intercept blind spots created by architectural complexity.
Calibrate each camera’s field of view precisely, considering range and resolution, so you don’t miss subtle details in shadowed or hidden areas.
This strategic placement reduces the number of cameras needed while enhancing overall security coverage.
Ensure to assign static IP addresses to each camera to simplify management and prevent network conflicts.
Using Multiple Camera Angles
When securing a property with a complex layout, employing multiple camera angles lets you close blind spots that single viewpoints miss. You’ll want to overlap fields of view to ensure thorough coverage, especially around corners, hallways, and side yards. This approach improves detection reliability and reduces vulnerabilities.
Consider these key factors for angle placement:
| Factor | Impact on Coverage |
|---|---|
| Overlapping angles | Eliminates blind spots, improves detail |
| Varied heights | Captures different perspectives |
| Strategic entry focus | Secures all potential access points |
Using cameras with Wide Dynamic Range (WDR) can further enhance visibility in challenging lighting conditions across these multiple angles.
Covering Every Entry Point With Security Cameras
To guarantee complete security coverage, you need to install cameras at every entry point of your property. Each access point, such as doors, windows, and garages, represents a potential vulnerability. Precise camera placement is critical to eliminate blind spots.
Prioritize coverage based on entry frequency and risk assessment. Ensure each angle captures clear, identifiable images.
Consider these key entry points for camera placement:
- Front and back doors for primary access monitoring
- Side doors and windows that offer secondary access
- Garage entrances to track vehicle and personnel movement
- Any additional external entry points like basement doors or gates
Mounting cameras at the optimal height of 8–10 feet helps balance field of view and tamper resistance for effective monitoring.
Aligning Camera Placement With Your Security Goals
Covering every entry point lays the groundwork for effective surveillance. Your camera placement must also reflect what you aim to achieve with your security system.
If your goal is intrusion deterrence, prioritize exterior cameras at vulnerable access points and blind spots. For monitoring family or staff, focus on interior common areas and hallways to track movement efficiently.
Analyze your property’s layout to identify zones where activity matters most and allocate cameras accordingly. Balance coverage between broad surveillance and detailed views, ensuring critical angles and high-traffic zones are monitored without excessive overlap.
Use your security goals to determine camera types and positioning. Match durability and field of view to specific indoor or outdoor requirements. This strategic alignment optimizes camera count and maximizes system effectiveness.
Strategic placement at entry points maximizes deterrence by creating a psychological barrier that causes offenders to avoid surveilled locations, enhancing overall security through increased perceived risk.
Prioritizing Cameras for Protecting High-Value Areas
To begin, it’s important to clearly identify those high-value zones—think safes, storage rooms, and outbuildings—that really need dedicated camera coverage.
Once you’ve pinpointed these areas, you can position the cameras strategically.
It’s all about monitoring those spots effectively while ensuring there are no blind spots.
Balancing thoroughness with cost efficiency is key here.
By prioritizing these critical points, you can make sure your security system is tackling the biggest risks effectively.
It’s a smart approach that pays off in the long run!
Optimizing camera placement based on blind spots and high-traffic areas ensures comprehensive monitoring and reduces vulnerabilities.
Identifying High-Value Zones
When prioritizing security camera placement, focusing on high-value zones markedly enhances protection effectiveness.
These zones represent areas with significant assets or vulnerabilities that, if compromised, could result in substantial loss.
You should systematically identify these locations to allocate your camera resources efficiently.
Key high-value zones often include:
- Safes and vaults: critical to monitor for unauthorized access attempts.
- Storage rooms: where valuable equipment or inventory is kept.
- Entry points adjacent to sensitive areas: to capture potential intruders before they reach the core assets.
- Outbuildings or detached structures: prone to being overlooked yet potentially housing important items.
Additionally, positioning cameras to cover vulnerable windows such as ground-floor or balcony-access windows can significantly reduce intrusion risks.
Dedicated Camera Placement
Focusing on high-value zones sets a clear priority for camera allocation. Dedicating specific cameras to these areas guarantees consistent, detailed surveillance.
Assign cameras exclusively to safes, storage rooms, and outdoor outbuildings to prevent blind spots. This targeted approach enhances image resolution and recording frequency for critical zones. It increases the chance of capturing actionable details. Choosing cameras with weatherproof housings rated IP65 or higher ensures durability for outdoor installations.
| High-Value Area | Camera Placement Focus |
|---|---|
| Safe Room | Fixed camera, close-range |
| Storage Room | Wide-angle, interior coverage |
| Outdoor Outbuildings | Weatherproof, exterior view |
| Main Entry Points | Door-focused, motion-detection |
| Valuables Display | Adjustable zoom, low light |
Prioritize camera specs and angles to optimize monitoring efficiency in these prioritized zones.
Balancing Coverage And Cost
Although thorough surveillance offers the best security, budget constraints often require you to prioritize camera placement.
Focus on protecting high-value areas first to maximize risk mitigation within your budget. Start by identifying zones with valuables, frequent access, or vulnerability to intrusion.
Allocate cameras to these spots before covering less critical spaces. This approach balances comprehensive coverage with cost-effectiveness.
Consider these factors when prioritizing camera placement:
Secure entry points and high-traffic access routes to monitor potential breaches.
Cover safes, storage rooms, and valuable equipment with dedicated cameras.
Deploy cameras in outdoor blind spots that could be exploited.
Use a mix of indoor and outdoor cameras tailored to each area’s environment.
Prioritize strategically to guarantee peak security without overspending.
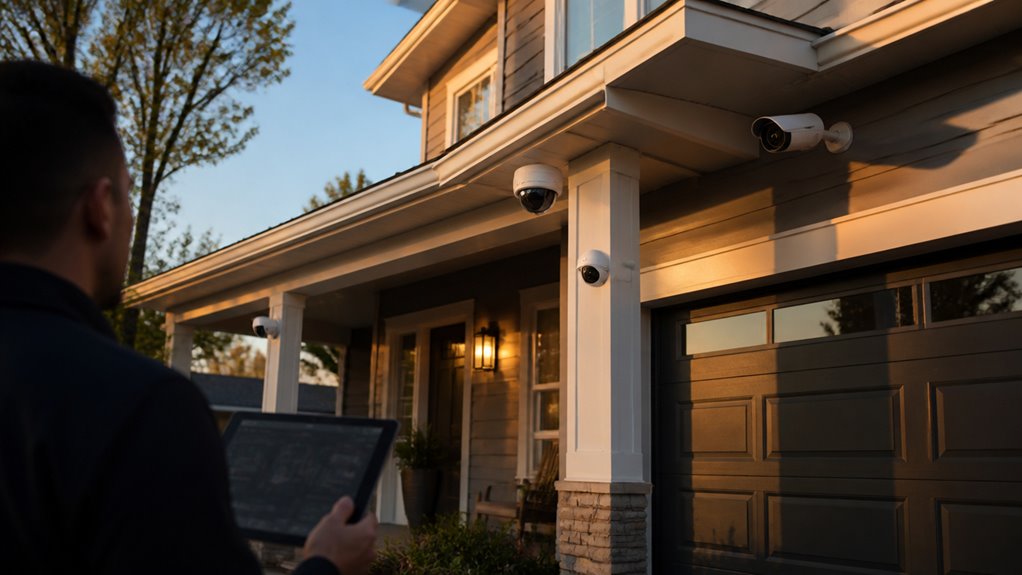
Key Exterior Camera Placement Areas to Cover
Effective exterior camera placement targets critical access points and potential blind spots to maximize coverage and security. You should prioritize monitoring front and back doors individually, as these are primary entry points vulnerable to intrusion.
Cover side yards, especially on larger or complex-layout properties, to eliminate blind spots created by building angles or landscaping. Don’t overlook driveway and garage areas; these spots require cameras to track vehicle movement and visitor approach.
Evaluate your property’s unique shape and landscape features to identify additional blind spots needing coverage. Position cameras to guarantee overlapping fields of view, minimizing gaps.
Use weather-resistant models with appropriate resolution for clear identification. This strategic placement optimizes your camera count, balancing thorough exterior surveillance with efficient resource allocation.
Best Interior Spots for Installing Security Cameras
Several key interior locations warrant camera installation to guarantee all-inclusive security coverage within your property. Prioritize areas where movement is frequent or valuables are stored to minimize blind spots and maximize surveillance efficiency.
Identify high-traffic and valuable areas for camera placement to ensure comprehensive security and reduce blind spots.
Strategic placement enhances detection of unauthorized access and monitors daily activity without excessive overlap.
Consider these critical interior spots:
- Main living areas: Capture common spaces for broad activity monitoring.
- Hallways and passageways: Track movement between rooms and detect intrusions.
- Rooms with valuables or safes: Provide focused surveillance on high-risk zones.
- Basements and upper hallways: Monitor secondary routes often exploited after entry.
Estimating Camera Count With Easy Rules of Thumb
Typically, you can estimate the number of security cameras needed by applying straightforward rules of thumb that factor in property size, entry points, and potential blind spots.
A common baseline is one camera per 500 square feet, which helps you cover broad areas systematically.
Additionally, assign at least one camera per entry point, including doors, garages, and accessible windows, to guarantee no access routes go unmonitored.
After initial placement, increase your count by 10–20% to address blind spots caused by architectural features or landscaping.
Prioritize vulnerable zones first, mapping all critical areas before finalizing camera quantity.
This analytical approach guarantees efficient coverage while minimizing gaps.
It allows you to balance security needs with cost and system complexity effectively.
How Camera Needs Differ Between Homes and Small Businesses?
When evaluating security camera requirements, you’ll find that homes and small businesses demand different strategies due to variations in layout, risk factors, and monitoring objectives.
Homes typically focus on perimeter security and interior monitoring of living spaces. Small businesses emphasize protecting commercial assets, inventory, and customer areas.
Business sites often require more extensive coverage due to multiple access points and higher foot traffic.
Key distinctions include:
Property complexity: Businesses usually have larger, more segmented areas needing thorough coverage.
Risk profile: Businesses face theft, vandalism, and liability risks. Homes prioritize intrusion deterrence and family safety.
Camera quantity: Small businesses often need 4–16 cameras. Homes usually require 4–8.
Monitoring focus: Businesses monitor sales floors and parking lots. Homes focus on entry points and common areas.
Frequently Asked Questions
What Camera Features Improve Night Vision and Low-Light Performance?
To improve night vision and low-light performance, you want cameras with infrared (IR) LEDs that illuminate dark areas without visible light.
Look for high-quality sensors like CMOS with larger apertures to capture more light. Features like wide dynamic range (WDR) balance bright and dark spots, while low lux ratings indicate sensitivity to minimal light.
Some cameras offer color night vision using supplemental white light or advanced image processing, enhancing clarity after dark.
How Do Weather Conditions Affect Outdoor Camera Durability?
Weather conditions affect outdoor camera durability like constant waves battering a sturdy ship’s hull.
You need cameras with weatherproof ratings (IP65 or higher) to resist rain, dust, and extreme temperatures.
Prolonged exposure to moisture can corrode components.
Freezing cold or intense heat can degrade circuitry.
UV-resistant housings prevent sun damage, and sealed enclosures keep lenses clear.
Proper weatherproofing guarantees reliable performance and extends your camera’s lifespan in harsh environments.
Can Security Cameras Integrate With Smart Home Systems?
Yes, security cameras often integrate seamlessly with smart home systems. You can connect them via Wi-Fi or hubs like Amazon Alexa, Google Home, or Apple HomeKit.
This integration enables you to control cameras, receive alerts, and view live feeds through a single app or voice commands. Make sure your cameras support the protocols your smart system uses, such as Zigbee, Z-Wave, or proprietary APIs for smooth interoperability and enhanced automation.
What Are the Legal Considerations for Recording on Private Property?
Oh, sure, you can just point cameras everywhere and record the entire universe. Except, legally, you can’t.
You’ve got to respect privacy laws: no audio recording without consent in many places. Avoid filming neighbors or public areas where people expect privacy.
Post clear signage if required, and check local laws on surveillance. Precision matters—you want your footage admissible, not a lawsuit magnet.
Always balance security with legal boundaries.
How Often Should Security Camera Footage Be Reviewed or Maintained?
You should review security camera footage regularly, at least weekly, to promptly detect unusual activity or malfunctions.
Maintenance, including cleaning lenses, checking connections, and updating firmware, should occur monthly to guarantee peak performance.
For high-risk areas, increase review frequency and perform detailed inspections biweekly.
Establish a consistent schedule tailored to your system’s complexity and usage to maximize reliability and security effectiveness, preventing unnoticed failures or missed incidents.
Cover Entry Points First, Then Fix Blind Spots
To get your security system right, you need to tailor camera numbers to your property’s size, layout, and high-value zones.
Don’t leave any stone unturned; cover every entry point and blind spot with precision.
Whether it’s a home or small business, matching placement to your goals guarantees effective monitoring.
Remember, more cameras don’t always mean better security; strategic positioning is where the rubber meets the road for true protection.