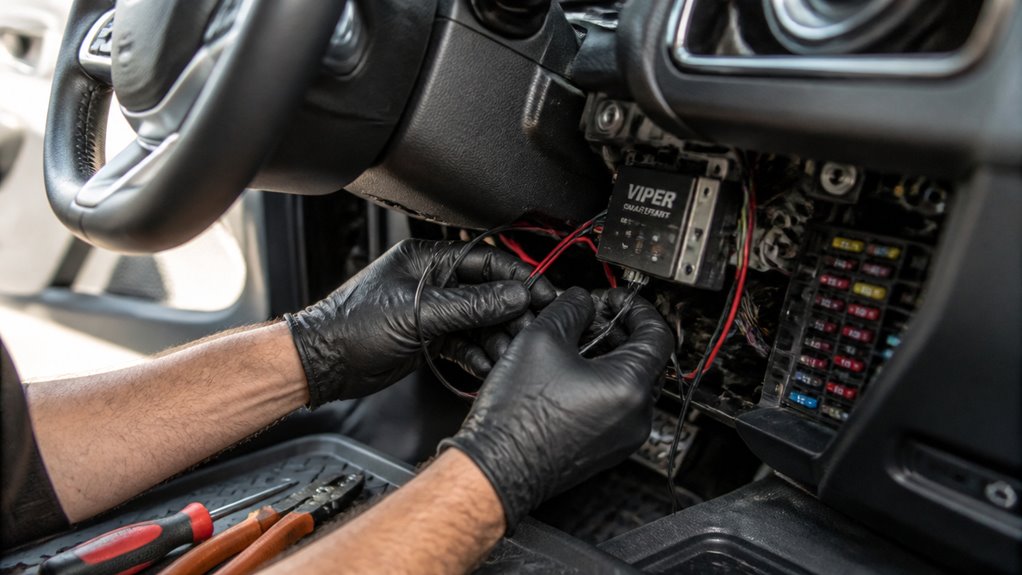

To install a car alarm system, first gather your tools and prepare a clear workspace. Then disconnect the negative battery cable for safety.
Locate factory wiring and mounting points by removing interior panels. Securely mount the control module and siren.
Connect power, ground, and trigger circuits using proper crimping and insulation techniques. Route wires safely through firewall grommets and integrate sensors.
Thoroughly test all functions before reassembling panels. Following these steps guarantees a reliable, professional alarm setup and system operation.
Key Takeaways
- Disconnect the negative battery cable and prepare tools like multimeter, wire strippers, and soldering iron to ensure safety and readiness.
- Remove interior panels carefully to access factory wiring harnesses and identify correct wires using the alarm wiring diagram.
- Securely mount the control module inside the dash and the siren under the hood on a metal surface away from heat sources.
- Connect power to a constant 12V source, ground to a clean metal spot, and make ignition, door, and hood trigger wire connections with proper insulation.
- Route wires through existing firewall grommets, secure harnesses neatly, then test the system fully before final panel reassembly.
Gather Essential Tools and Prepare Workspace
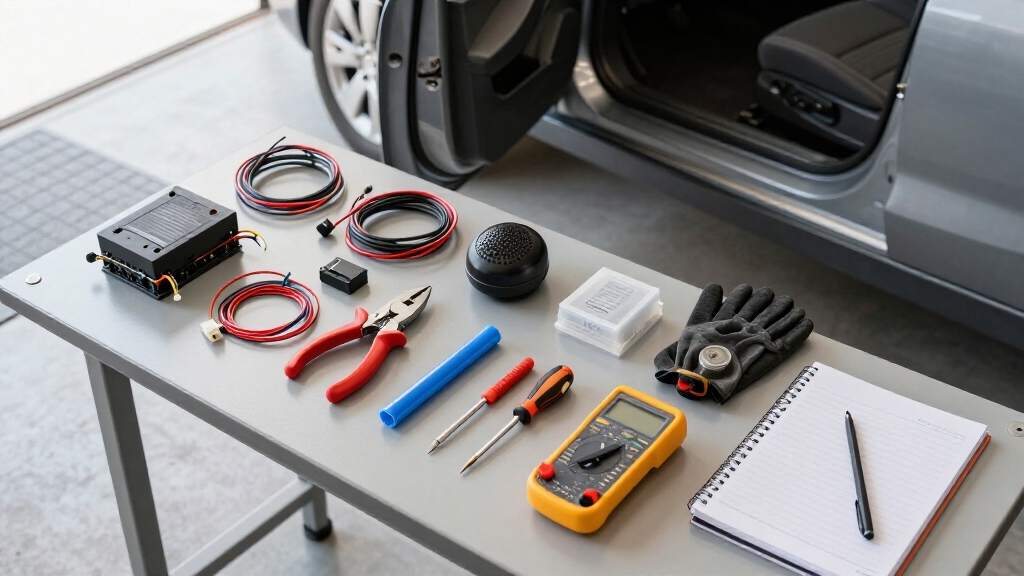
Begin by assembling all the essential tools before starting your installation. You’ll need a multimeter to verify voltage and continuity, wire strippers and crimping tools for secure connections, and a soldering iron for permanent splices.
Start by gathering essential tools like a multimeter, wire strippers, crimping tools, and a soldering iron for seamless installation.
Prepare a drill and socket set to remove panels and mount components. Electrical tape guarantees insulation, while zip ties keep wiring tidy. Clear your workspace by removing clutter and ensuring adequate lighting near the dashboard and engine bay.
Organize tools within reach to streamline workflow. Remove interior panels carefully to access wiring harnesses and mounting points without damage. Inspect potential drill sites from both sides to avoid wires or mechanical parts.
This preparation minimizes errors and accelerates installation, so you can efficiently proceed to the next steps. Also, be sure to plan wiring paths carefully to avoid interference and ensure clean routing for a reliable setup with wiring paths.
Disconnect the Battery and Ensure Safety
With your tools organized and panels carefully removed, the next step is to disconnect the negative battery cable. This prevents short circuits and accidental activation of electrical components while you work. Always use insulated tools to avoid sparks during disconnection.
After disconnecting, wait a few minutes to allow residual power to dissipate. To ensure safety and prepare for installation, consult both the vehicle service manual and alarm instruction manual for specific precautions.
Verify the vehicle’s ignition is off and all electrical accessories are disabled before disconnecting. Secure the disconnected cable away from the battery terminal to prevent unintended contact.
Following these steps minimizes risks and protects your vehicle’s electrical system throughout the alarm installation process. It is also important to disconnect the backup battery first when dealing with alarm systems to avoid electrical issues and false alarms.
Find and Access Factory Wiring and Mounting Points
First things first, you’ll want to locate the vehicle’s main wiring harnesses. These are usually found near the dashboard and just under the steering column. To get a good look at them, you may need to carefully remove some interior panels.
Once you have those panels off, you’ll be able to see the harnesses more clearly. This is also a good time to check for potential mounting points for the control module and sensors. Just remember to look for secure and hidden spots—these will provide a solid grounding for your components.
It’s also super important to avoid any areas that might interfere with moving parts or get too hot. Keeping everything safe and sound is key!
Before starting installation, it’s wise to disconnect the negative battery cable to ensure safety and prevent electrical issues during the process.
Locate Wiring Harnesses
To track down the factory wiring harnesses, carefully remove the interior panels near the dashboard where most ignition and door wiring bundles reside. You’ll focus on locating the main harnesses that supply power, ground, and signals for door triggers and ignition.
Use your vehicle’s service manual to identify these bundles and mounting points precisely.
Keep these key tips in mind:
Identify wiring colors and labels matching your alarm’s wiring diagram for accurate connections. Look for bundled wires secured with tape or plastic clips, often grouped near the steering column or fuse box.
Locate solid metal mounting points nearby; these serve as reliable grounding spots for your alarm system installation.
Proper identification guarantees a clean, effective setup without damaging existing wiring or components. Always ensure to follow the system’s entry delay timing to avoid triggering alarms during installation.
Remove Interior Panels
After locating the wiring harnesses near the dashboard, remove the corresponding interior panels carefully to expose the factory wiring and mounting points.
Use a trim removal tool or flat screwdriver wrapped in tape to avoid damaging clips or scratching surfaces. Start by unscrewing visible fasteners and gently prying panels away, noting each screw and clip location for reassembly.
Inspect behind panels for wiring harnesses, connectors, and mounting brackets. Avoid pulling or stressing wires during removal.
Keep track of any insulation or sound-deadening materials, repositioning them as needed. Confirm no hidden wires or components are obstructed before proceeding.
This access allows you to identify secure attachment points for the alarm control module and connect to vehicle wiring safely and accurately. When routing wires, it is important to plan cable routes to minimize distance and avoid signal interference for reliable system performance.
Identify Mounting Locations
Locating suitable mounting points requires careful inspection of the vehicle’s dash and engine compartments to guarantee secure, hidden placement for the alarm components. You’ll need to find factory wiring access points and solid metal surfaces that won’t interfere with existing parts.
Prioritize locations that protect components from heat, moisture, and tampering. When choosing mounting spots, consider these essentials:
Use the dash area behind panels for the control module, ensuring no obstruction or risk of damage. Mount the siren under the hood on a metal surface, at least 18 inches from heat sources like the exhaust manifold. Identify grounding points on bare metal near the firewall to guarantee reliable electrical connections.
Careful location selection guarantees durability and peak system performance. To enhance security, it is also important to disconnect power before working on wiring or mounting alarm components.
Mount the Alarm Control Module and Siren for Installation
Begin by selecting a concealed spot under or inside the dash to mount the alarm control module. Ensure it remains out of sight yet accessible for maintenance.
Use the vehicle’s existing mounting points or secure the module with zip ties or screws to prevent vibration damage.
Next, locate a solid metal surface under the hood, at least 18 inches away from heat sources like the exhaust manifold, for the siren.
Position the siren face down to minimize water intrusion. Use a drill to create mounting holes only after verifying clearance and avoiding wires or components behind the panel.
Secure the siren firmly with screws, ensuring it won’t rattle or loosen over time.
Properly mounting these components is critical for reliable alarm operation and longevity.
To prevent electrical malfunctions, it is important to install surge protection devices to guard the alarm system against voltage spikes and power surges.
Connect Power, Ground, and Key Wiring Circuits
Connect the alarm system to a reliable constant 12-volt power source and a solid ground point on bare metal.
Start by identifying a stable power feed that maintains voltage regardless of ignition state, such as the battery positive terminal or a fused line in the fuse box.
Locate a clean, unpainted metal surface for grounding to guarantee minimal electrical resistance.
Next, tap into the ignition wiring circuit to detect the key’s ON position.
Use a multimeter to confirm wire function before connecting.
Key points to remember: Verify power source voltage with a multimeter to avoid intermittent faults.
Choose a ground point free from corrosion and dirt.
Identify the ignition wire by testing continuity with the key in different positions.
These steps guarantee the alarm receives consistent power and accurate ignition status.
Additionally, inspecting wiring connections for looseness or damage helps prevent communication interruptions that could affect alarm operation.
Crimp and Solder Wiring Connections
Since reliable electrical connections are critical to your car alarm’s performance, you’ll want to use crimping and soldering techniques to secure wiring joints.
Start by stripping the wire ends evenly. Then twist and insert them into the appropriate crimp connector. Use a quality crimping tool to apply firm, uniform pressure.
After crimping, solder the joint to eliminate resistance and improve conductivity. Insulate the connection with heat shrink tubing for protection.
Proper handling of load wires during installation is essential to prevent electrical faults and ensure system safety.
| Step | Description |
|---|---|
| Strip Wires | Remove insulation evenly, exposing wire |
| Crimp Connector | Insert wire and compress connector firmly |
| Solder Joint | Heat and apply solder for solid contact |
| Insulate | Use heat shrink tubing to cover connection |
This method guarantees durability and prevents loose or corroded connections.
Route Wires Through the Firewall Safely and Securely
When you’re routing wires through the firewall, it’s super important to use the existing grommets. They help prevent any damage to the insulation, which is a big deal!
Also, consider protecting your wiring with rubber boots or silicone. This extra layer really helps avoid any abrasion from those sharp edges.
And don’t forget to secure the harness! Using tape or ties will keep everything stable and prevent movement once you’ve reassembled everything.
It just makes everything easier in the long run!
For added safety, ensure the wire insulation is rated for the automotive environment to resist heat and mechanical damage, following cable insulation ratings standards.
Use Existing Grommets
Although routing wires through the firewall can be challenging, using existing grommets simplifies the process. It reduces the risk of damaging the vehicle’s wiring or components.
Locate factory grommets that pass through the firewall; these are designed to protect and seal wires already. You’ll avoid drilling unnecessary holes, which can compromise the vehicle’s integrity and cause leaks.
When using existing grommets, follow these steps:
Carefully remove the grommet without tearing it, guaranteeing it remains intact for reuse. Route your alarm system wires alongside factory cables, avoiding sharp bends or pinches. Seal around the grommet with silicone or rubber boots if any gaps appear to maintain firewall protection.
This approach guarantees secure wire routing while maintaining factory-level protection against heat, moisture, and vibration.
Protect Wire Insulation
Protect your alarm system’s wiring by carefully insulating it as you route wires through the firewall. Use existing rubber grommets or drill a hole only after verifying clearance and avoiding hidden components.
Pass each wire through a rubber boot or apply a silicone sealant around the opening to prevent abrasion and moisture intrusion. Make certain insulation remains intact, avoiding any nicks or scrapes during installation.
Keep wires bundled and separate from moving parts, sharp edges, or heat sources that could degrade the insulation over time. Check that all wires have adequate slack to prevent tension but remain secure enough to avoid chafing.
Proper insulation protects wiring integrity, prevents shorts, and ensures reliable alarm operation. Take your time at this step to maintain both safety and system longevity.
Secure Wiring Harness
After insulating your wires thoroughly, focus on routing the wiring harness through the firewall with care to avoid damage and interference. Use existing grommets or drill a properly sized hole, ensuring no hidden components are behind the panel before drilling.
Protect the wires with rubber boots or silicone to prevent chafing against sharp edges. Secure the harness with cable ties or tape to maintain stability and prevent movement after reassembly. Keep wires away from moving parts and areas prone to contact or abrasion.
Key points to remember:
Use factory grommets or drill carefully, verifying clearance behind the firewall.
Shield wires with rubber boots or silicone for abrasion resistance.
Fasten wiring harnesses firmly to avoid strain or disconnection during vehicle operation.
Integrate Door Sensors, Hood Trigger, and Lock Circuits
When integrating door sensors, hood triggers, and lock circuits, you’ll need to carefully connect each component to guarantee the alarm system monitors all entry points effectively.
Begin by locating the vehicle’s door trigger wires, usually tied to the dome light circuit. Splice into them using T-taps or soldered connections insulated with heat shrink.
Next, identify the hood pin switch wire and connect it to the alarm’s hood trigger input. Ensure a secure ground reference to detect unauthorized opening.
For lock circuits, tie into the power door lock wiring harness as specified by the alarm and vehicle wiring diagrams. Use relays or diodes if required to prevent backfeed.
Verify all connections are solid, routed away from moving parts, and insulated to prevent shorts or interference.
Test Alarm Functions Before Final Assembly
Always test each alarm function thoroughly before reassembling the interior panels to guarantee proper operation.
Begin by reconnecting the negative battery cable and verifying all wiring connections are secure and insulated. Then, activate the alarm and check each feature systematically to confirm correct responses.
Reconnect the negative battery cable, ensure wiring is secure, then activate the alarm to verify all functions work correctly.
Focus on these critical tests:
Siren and LED indicator: Make certain the siren emits sound and the LED flashes when triggered.
Door and hood triggers: Open each door and the hood to verify the alarm arms and disarms properly.
Ignition and starter disable functions: Turn the ignition on to confirm the starter is disabled if applicable.
Perform all tests in sequence and resolve any malfunctions before final assembly to avoid disassembly later.
Reinstall Panels and Perform Final Checks
Before you get started with reinstalling the interior panels, it’s a good idea to double-check that all the alarm functions are working properly.
You want to make sure they respond just like they should.
Next up, take a moment to secure all the wiring harnesses.
This step is crucial because it helps prevent any movement or damage while you’re driving around.
Once everything is stable and you’ve tested the wiring, you can go ahead and carefully refit the panels.
Just be mindful to ensure that no wires are pinched or left exposed during the process.
Verify System Functionality
Begin by thoroughly testing every alarm function to guarantee the system operates as intended before reinstalling interior panels.
Confirm that the siren sounds promptly upon trigger activation, sensors respond accurately, and the LED indicator reflects system status correctly.
Verify door locks and ignition kill features engage and disengage seamlessly. Make certain no false alarms arise during operation.
Focus on these critical checks before panel reassembly:
- Test all sensor triggers, including doors, hood, and ignition inputs, for proper response.
- Confirm the alarm arms, disarms, and triggers without delay or error.
- Verify all wiring connections remain secure and insulated, with no exposed or loose wires.
Only after these validations should you reinstall panels, securing the system for reliable, long-term function.
Secure Wiring And Harnesses
With all system functions verified and wiring connections secure, you can now focus on properly routing and fastening the harnesses to prevent movement or damage.
Use zip ties or electrical tape to bundle wires neatly and secure them to stable mounting points. Avoid sharp edges and moving parts.
Assure wires maintain clearance from heat sources and areas prone to wear, such as pedal wells.
Protect any pass-throughs with rubber grommets or silicone seals to prevent insulation abrasion.
Double-check that all grounds are solid and connections insulated.
Confirm harnesses don’t obstruct mechanical linkages or driver foot space.
Before finalizing, gently tug each harness to verify stability.
Keeping wiring stable minimizes electrical faults and extends system reliability, preparing your installation for the final step of panel reinstallation and overall vehicle reassembly.
Reinstall Interior Panels
Carefully align and secure all interior panels, ensuring each clip and fastener engages properly to restore the vehicle’s original fit and finish.
Before reinstalling, double-check that wiring harnesses remain secured and no wires are pinched or exposed.
Reattach panels in reverse order of removal, applying consistent pressure to avoid damaging clips.
Perform these final checks to confirm system integrity:
- Verify all alarm functions operate correctly: siren, sensors, LED, and door triggers.
- Make certain no wires obstruct panel fitment or risk damage when panels are pressed in.
- Confirm all ground connections are solid and insulated.
Only after these validations reconnect the battery.
This assures your alarm system is fully integrated and your vehicle interior is restored without compromising functionality or safety.
Frequently Asked Questions
Can I Install the Alarm System Myself Without Professional Help?
Yes, you can install the alarm system yourself if you follow precise instructions and take safety precautions.
Disconnect the negative battery cable first. Use the vehicle’s service manual and carefully route wires to avoid damage.
Use proper tools for crimping or soldering connections and test each function before reassembly. If you’re comfortable with wiring and vehicle electronics, DIY installation is feasible.
However, don’t hesitate to seek professional help if unsure.
Will the Alarm System Drain My Car Battery if Left Armed Overnight?
Worried about your car battery draining overnight with the alarm armed?
Generally, a properly installed alarm system draws minimal current, usually just a few milliamps, so it won’t markedly drain your battery.
However, if your battery’s weak or the alarm has additional features like remote start, it could increase drain.
Always test current draw with a multimeter before finalizing installation to make certain it stays within safe limits and won’t leave you stranded.
How Do I Reset the Alarm System if It Malfunctions?
To reset the alarm system if it malfunctions, first disconnect the negative battery cable for about 10–15 minutes to clear any stored errors.
Reconnect the battery, then enter your vehicle and use the key fob or valet switch to disarm the system.
If the alarm doesn’t reset, consult the alarm’s instruction manual for a specific reset procedure, which may involve holding the valet button or cycling the ignition key in a specific sequence.
Are There Warranty Considerations When Installing Aftermarket Alarms?
Think of your car’s warranty like a delicate puzzle. Installing an aftermarket alarm could shift pieces unexpectedly. You might void parts of your warranty if the installation causes electrical issues or damages the vehicle.
Always check your manufacturer’s warranty terms before proceeding. Use professional installation to minimize risks and keep documentation proving the alarm didn’t cause problems.
This way, you protect your coverage while enhancing security.
Can the Alarm System Interfere With Other Electronic Devices in My Car?
Yes, your alarm system can interfere with other electronics if improperly installed.
To prevent issues, you need to guarantee proper grounding and use correct wiring techniques like crimping or soldering.
Avoid routing wires near sensitive components or moving parts.
Also, follow the vehicle’s wiring diagram precisely to avoid signal conflicts.
Testing each function thoroughly before final assembly helps you identify and resolve potential interference early.
Protect Your Vehicle With a Proper Alarm Setup
Now that you’ve carefully installed your car alarm system, remember: a well-protected vehicle is like a fortress on wheels.
By following each step precisely, you’ve enhanced your car’s security and peace of mind.
Don’t rush the final tests; this is your last line of defense against potential threats.
Stay vigilant, double-check connections, and enjoy the confidence that comes with a reliable, professionally installed alarm system.
Your car’s safety depends on your attention to detail.