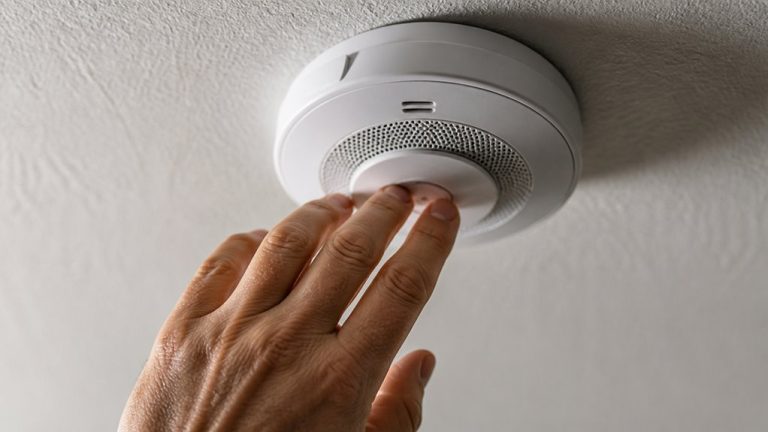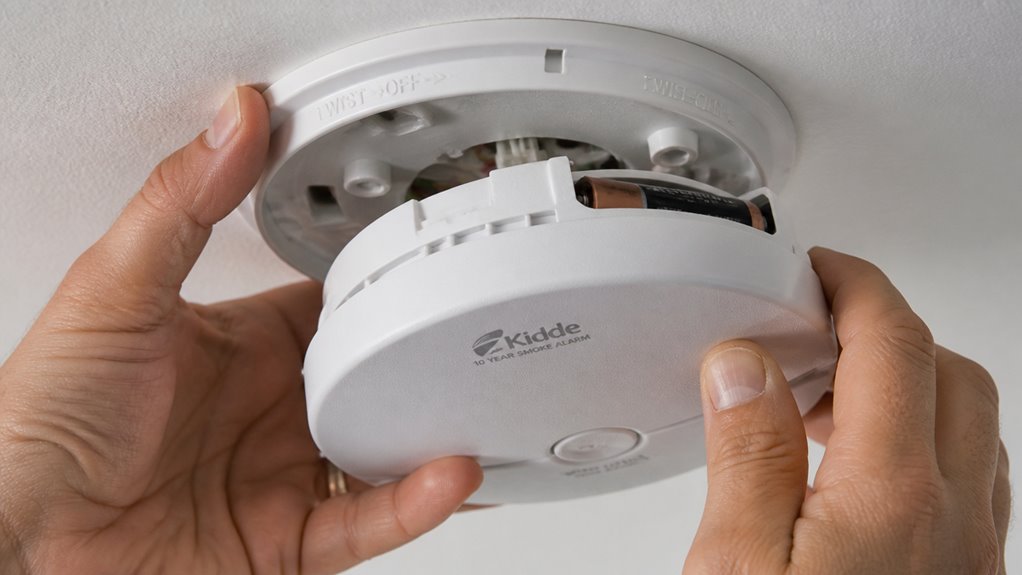

To remove your Kidde smoke detector, first turn off its power. Switch off the circuit breaker for hard-wired units or remove batteries from battery-operated models.
Next, unfasten any tamper-resist pins or tabs using appropriate tools. Then rotate the detector counterclockwise toward the OFF arrow to release it from the mounting plate.
For hard-wired alarms, disconnect the wiring harness only after detachment. Handling each step carefully guarantees safety and prevents damage. Keep going to uncover detailed removal and reinstallation tips.
Key Takeaways
- Turn off power at the circuit breaker or remove batteries to ensure the Kidde smoke detector is fully powered down before removal.
- Check for tamper-resist pins or tabs near the mounting base and disengage them using long-nose pliers or by pressing the tab while rotating.
- Rotate the battery-operated detector counterclockwise toward the OFF arrow on the mounting ring to release it from the base.
- For hard-wired models, disconnect the wiring harness by squeezing locking arms and pulling the connector straight out after detaching the detector.
- Remove the detector from the mounting plate and open the battery compartment if needed, ensuring compatibility before reinstalling.
Identify Your Kidde Smoke Detector Type
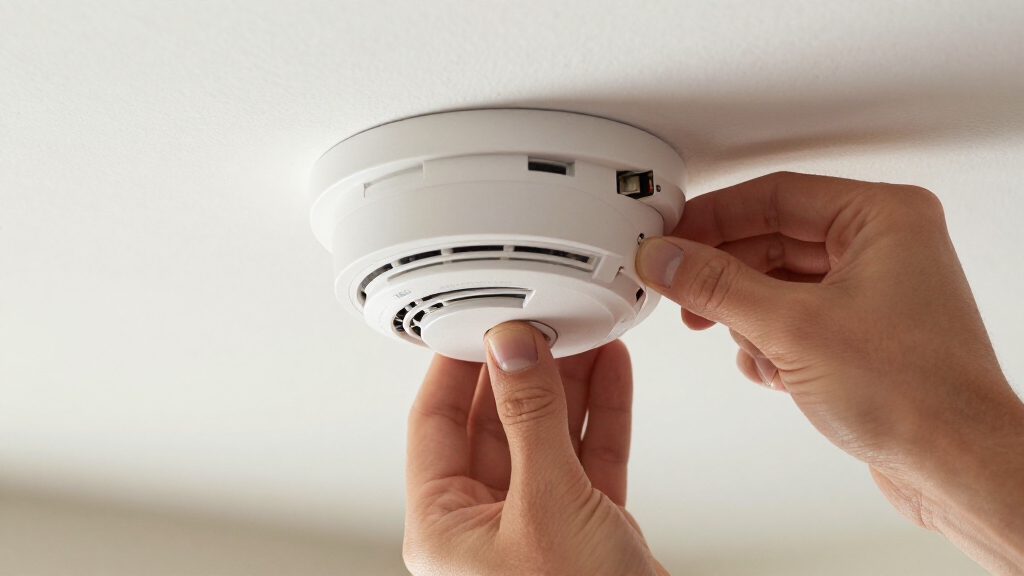
Before you remove your Kidde smoke detector, it’s essential to identify its type. Kidde offers battery-operated and hard-wired models, each requiring a different removal approach.
Identifying your Kidde smoke detector type is crucial before removal to ensure proper and safe handling.
Battery-operated units typically rotate off the mounting ring following the OFF arrow, detaching directly without wiring concerns. Hard-wired detectors connect to your home’s electrical system and require additional steps to disconnect the wiring harness safely.
Some models feature tamper-resist pins or tabs that block removal, so you’ll need to locate and disengage these before proceeding. Identifying whether your alarm is standalone or interconnected also matters, as interconnected units have plug-style connectors that must be released.
Accurately recognizing your Kidde smoke detector type makes certain you handle removal correctly. This prevents damage and maintains safety throughout the process.
For hardwired models, remember that the battery backup maintains alarm operation during power outages and should be handled carefully during removal.
Turn Off Power Before Kidde Smoke Detector Removal
Now that you’ve identified your Kidde smoke detector type and any tamper-resist features, the next step is to ensure power is completely turned off. For battery-operated alarms, removal is straightforward after rotating to the OFF position.
Hard-wired units require extra caution. Always switch off the circuit breaker before proceeding to avoid electrical hazards. Disconnect the AC wiring harness only after the detector is free from the mounting plate.
| Detector Type | Power Source | Power Off Method |
|---|---|---|
| Battery-operated | Batteries | Remove batteries or rotate OFF |
| Hard-wired | AC wiring | Turn off circuit breaker |
| Interconnected | AC + Battery backup | Turn off breaker + disconnect harness |
Following these steps ensures safe removal and prevents damage or shock during Kidde smoke detector removal. Remember to disengage tamper-resist features before attempting removal to avoid damage or alarm activation.
Unlock Tamper-Resist Features on Kidde Alarms
To unlock the tamper-resist features on your Kidde alarm, the first step is to check if your model has any pins or tabs that secure it in place.
If you spot tamper-resist pins, grab a pair of long-nose pliers and carefully remove them before you try to rotate the unit.
Now, if your alarm has tamper-resist tabs instead, simply press down firmly while you turn the alarm towards the OFF arrow.
This should release the lock, allowing you to proceed.
Always ensure to perform a monthly test after removal and reinstallation to verify proper function.
Identifying Tamper-Resist Features
How can you tell if your Kidde smoke detector has tamper-resist features?
Look for a tamper-resist pin or tab that secures the unit in place.
The pin usually fits into a small hole near the mounting base, preventing rotation until removed.
The tamper-resist tab requires pressing down during the removal twist to release the alarm.
These features are subtle but effective at preventing accidental or unauthorized removal.
Check the detector’s manual or inspect around the trim ring for these locking devices.
Models with these tamper-resist mechanisms won’t rotate freely off the mounting plate without disengaging them first.
Identifying these features early lets you prepare the correct tools, like long-nose pliers for pins, ensuring safe and smooth disassembly of your Kidde smoke detector.
Additionally, always disconnect power and remove the battery before attempting removal to avoid unexpected beeps or electrical issues.
Removing Tamper-Resist Pins
To remove tamper-resist pins on Kidde alarms, you’ll need the right tools and a steady hand. These pins prevent accidental removal, so releasing them is essential before rotating the unit off its mounting plate.
Use long-nose pliers to carefully pull the pin straight out of its hole. Avoid forcing the detector as this could damage the unit or mounting base.
Follow these steps:
- Power down the alarm and detach it from the trim ring as instructed.
- Locate the tamper-resist pin, a small metal rod securing the alarm.
- Grip the pin firmly with long-nose pliers and pull it out gently.
- Once the pin is removed, rotate the alarm counterclockwise to release it safely.
Always ensure the power source is disconnected before attempting removal to avoid electrical hazards.
This method guarantees a secure, damage-free removal of tamper-resist features on Kidde alarms.
Pressing Tamper-Resist Tabs
Press the tamper-resist tab firmly while rotating the Kidde alarm toward the OFF arrow to release the unit. This tab locks the alarm in place, preventing accidental removal.
Apply steady pressure on the tab with one hand while twisting the alarm counterclockwise with the other. If you don’t press the tab, the alarm won’t turn and will remain secured to the mounting base.
Once the tab is disengaged, the alarm will rotate freely off the trim ring. This feature is common on battery-operated and hard-wired Kidde models with tamper-resistant designs.
Always make certain you’ve disconnected power or removed batteries before attempting removal. Following this step correctly avoids damage and ensures safe, effective removal of your Kidde smoke detector.
Kidde alarms feature integrated 10-year batteries that are sealed and maintenance-free, so proper removal is essential to maintain their long-lasting safety benefits.
Remove Battery-Operated Kidde Smoke Detectors Safely
To get started, gently rotate your battery-operated Kidde smoke detector toward the OFF arrow. This will help you release it from the mounting plate.
Once it’s off, go ahead and open up the battery compartment to either disconnect or replace the batteries safely.
Just a quick reminder: always ensure that the power source is completely disconnected before you handle the unit any further. Safety first!
Remember to perform regular inspections to ensure your safety devices, including smoke detectors and fire extinguishers, are functioning properly and compliant with safety standards, such as verifying the integrity and condition before reuse or replacement.
Power Source Removal
Begin by rotating your battery-operated Kidde smoke detector in the direction of the OFF arrow on the cover to release it from the trim ring.
Once released, you can safely access the power source. Follow these steps to guarantee proper removal:
- Check for a tamper-resist pin or tab that may lock the unit; remove or press it as needed.
- Carefully lift the detector off the mounting plate after rotation.
- Remove the batteries to fully disconnect the power source.
- Set the detector aside safely to avoid damage or accidental reattachment.
Remember to dispose of the old battery properly by taping its terminals and taking it to a battery recycling center to prevent hazards.
Battery Compartment Access
To access the battery compartment on your Kidde smoke detector, you’ll typically need to remove the cover or open a designated panel after detaching the unit from the mounting plate.
Start by twisting the alarm in the direction of the OFF arrow to release it.
If your model has a tamper-resist pin or tab, clear it first using long-nose pliers or by pressing the tab while rotating.
Once removed, locate the battery compartment, usually a snap-open or sliding panel on the back or side of the unit.
Open it carefully to avoid damaging the cover.
Remove the batteries to fully deactivate the alarm.
Most Kidde detectors use AA or 9-volt batteries, so make certain you handle these safely and dispose of them properly before proceeding with any maintenance or replacement.
For safety, always ensure you have steady footing and a clear area when removing or handling ceiling-mounted smoke detectors.
Detach Hard-Wired Kidde Smoke Detectors
Although detaching a hard-wired Kidde smoke detector requires extra caution, you can safely remove it by first rotating the unit counterclockwise to the OFF position on the trim ring. This step disengages the detector from its mounting plate without forcing the device. Before you proceed, make certain the power source is off to avoid electrical hazards.
Detaching a hard-wired Kidde smoke detector starts by turning it counterclockwise to the OFF position safely.
Follow these steps to detach the unit:
- Rotate the detector counterclockwise until it aligns with the OFF arrow on the trim ring.
- Check for any tamper-resist pins or tabs; release them if present.
- Gently pull the detector away once released by the rotation.
- Leave the mounting plate attached to the ceiling for later reconnection.
This method prevents damage and prepares the unit for safe wiring disconnection. Always ensure total power isolation before handling hardwired smoke detectors to avoid electrical shock.
Disconnect Wiring Harness on Hard-Wired Models
To disconnect the wiring harness on hard-wired Kidde smoke detectors, first, you’ll want to focus on the quick connector. Simply press the locking arms on both sides to release it.
If you have interconnected units, there’s a little extra step. After you twist the alarm off the mounting plate, be sure to carefully unplug any additional connectors.
And remember, it’s important to handle these connectors gently. You don’t want to accidentally damage the wiring or the detector body!
Unlocking The Quick Connector
When you’ve removed the alarm from the trim ring, you’ll need to disconnect the wiring harness to fully free the unit. The wiring harness uses a quick connector with locking arms on both sides that secure the connection. To release it, follow these steps:
- Locate the quick connector at the base of the alarm.
- Squeeze the locking arms simultaneously to release the lock.
- While pressing the arms, gently pull the connector straight away from the alarm.
- Make certain the connector fully disengages before handling the unit further.
Never force the alarm free before releasing the connector to avoid damage. This step safely separates the detector from the ceiling wiring, allowing you to handle or replace the unit without electrical risk.
Handling Interconnected Unit Plugs
Interconnected Kidde smoke detectors often feature plug-style connectors that need to be disconnected after you rotate the alarm off its mounting bracket.
Once the unit is free, locate the wiring harness at the base. Squeeze the locking arms on both sides of the quick connector firmly to release it.
Pull the connector straight away from the alarm body. Don’t force it free, as the locking mechanism secures the connection tightly.
This step is vital to safely separate the detector from the electrical wiring. If your model includes a tamper-resist pin or tab, make sure it’s disengaged before attempting removal.
Always treat hard-wired alarms as live until the harness is disconnected. Properly disconnecting the plug prevents damage to both the detector and ceiling wiring, guaranteeing safe removal and future reinstallation.
Remove the Mounting Plate and Trim Ring
Once you’ve removed the smoke detector unit itself, you’ll need to take off the mounting plate and trim ring to fully detach the system from your ceiling.
This step guarantees the entire assembly is clear for replacement or maintenance.
Follow these steps to remove the mounting plate and trim ring:
- Locate the screws or clips securing the mounting plate to the ceiling.
- Use a screwdriver to carefully unscrew or release these fasteners.
- Gently pull the mounting plate and trim ring away from the ceiling, taking care not to damage the wiring or ceiling surface.
- Inspect the area for any remaining clips or adhesive, and remove them to free the entire assembly.
Replace or Remove Batteries in Kidde Alarms
After removing the mounting plate and trim ring, you can focus on replacing or removing the batteries in your Kidde smoke alarm.
For battery-operated models, open the battery compartment by accessing the cover; some may require pressing a tab or sliding the cover.
Carefully remove the old batteries, noting whether they’re AA or 9-volt types. If you’re replacing batteries, insert fresh ones with correct polarity.
For complete deactivation, remove all batteries to prevent the alarm from sounding.
Hard-wired or interconnected alarms often have backup batteries that also need attention.
Remember, battery removal is a separate step from detaching the alarm body. Handle tamper-resist pins or tabs as necessary to access the compartment.
This guarantees your Kidde alarm remains functional or safely disabled as intended.
Follow Safety Tips When Removing Kidde Detectors
Always prioritize safety when removing Kidde smoke detectors, especially hard-wired models. Handling electrical components demands caution to avoid injury or damage. Follow these essential safety tips:
- Turn off the power at the circuit breaker before removing hard-wired alarms to prevent electrical shock.
- For battery-operated units, remove batteries first to avoid accidental alarms or power issues.
- Use proper tools to release any tamper-resist pins or tabs, ensuring the detector detaches smoothly without forcing it.
- Disconnect the wiring harness only after the alarm is fully rotated off the mounting plate. Press locking arms on the connector to safely separate wiring.
Prepare Kidde Alarms for Reinstallation or Replacement
Before reinstalling or replacing your Kidde smoke detector, make sure the mounting plate and wiring harness are compatible with the new unit.
Check that the mounting plate fits securely and the wiring harness connectors match the new alarm’s plugs to assure a proper connection.
If you’re replacing a hard-wired model, verify the quick connector releases easily and the circuit breaker is off before proceeding.
For battery-operated alarms, confirm the battery compartment accommodates the correct batteries and the alarm locks firmly onto the mounting base.
Remove any tamper-resist pins or tabs from the mounting plate as needed.
Preparing the components this way prevents installation issues, guarantees reliable power connection, and maintains the alarm’s functionality and safety compliance after reinstallation or replacement.
Frequently Asked Questions
How Often Should I Test My Kidde Smoke Detector for Functionality?
You should test your Kidde smoke detector at least once a month to make sure it’s working properly.
Press and hold the test button until you hear the alarm sound, confirming full functionality.
Regular testing helps catch any issues early, keeping you safe.
Also, replace batteries annually or when the low-battery warning sounds.
Staying consistent with these checks guarantees your smoke detector will function effectively during emergencies.
What Is the Typical Lifespan of a Kidde Smoke Detector?
You should expect your Kidde smoke detector to last about 10 years. After that, its sensors can become less reliable, reducing its effectiveness.
Kidde usually prints the manufacture date on the back, so you can check when it’s time to replace it. Regular testing helps, but don’t rely on maintenance alone. Swap out the entire unit once it hits that decade mark to keep your home safe.
Can I Clean My Kidde Smoke Detector Without Removing It?
You can clean your Kidde smoke detector without removing it, but be gentle. It’s not a spaceship control panel!
Use a vacuum cleaner with a soft brush attachment to remove dust and cobwebs from the vents. Avoid spraying any liquids directly onto the unit.
Regular dusting keeps it working well, but deep cleaning or battery replacement might still require removal.
Always handle your detector carefully to maintain its safety and functionality.
What Should I Do if My Kidde Alarm Emits Frequent False Alarms?
If your Kidde alarm emits frequent false alarms, first clean it thoroughly to remove dust or debris.
Make sure it’s installed away from kitchens or bathrooms where steam or cooking fumes trigger it.
Check and replace old batteries, as weak power can cause false alerts.
If false alarms persist, reset the unit following the manual or consider replacing it, especially if it’s old or malfunctioning.
Always test the alarm after any intervention.
Are Kidde Smoke Detectors Compatible With Smart Home Systems?
About 30% of Kidde’s newer smoke detectors offer smart home compatibility.
If you want seamless integration, you’ll find many Kidde models work well with systems like Alexa or Google Assistant, letting you monitor alarms remotely.
However, not all Kidde smoke detectors support smart features, so you’ll need to check the specific model.
For full smart home integration, consider Kidde’s specialized smart alarms designed to connect directly to your home network.
Remove the Detector Safely Without Damaging Wiring
So, you’ve bravely faced your Kidde smoke detector and lived to tell the tale.
Remember, this isn’t rocket science—just a little patience, a bit of caution, and a knack for releasing tamper-resist features.
Don’t go yanking wires like a daredevil; treat it like the delicate gadget it is.
Now, go forth and remove, replace, or reset with confidence because your smoke detector deserves nothing less than your full, respectful attention.