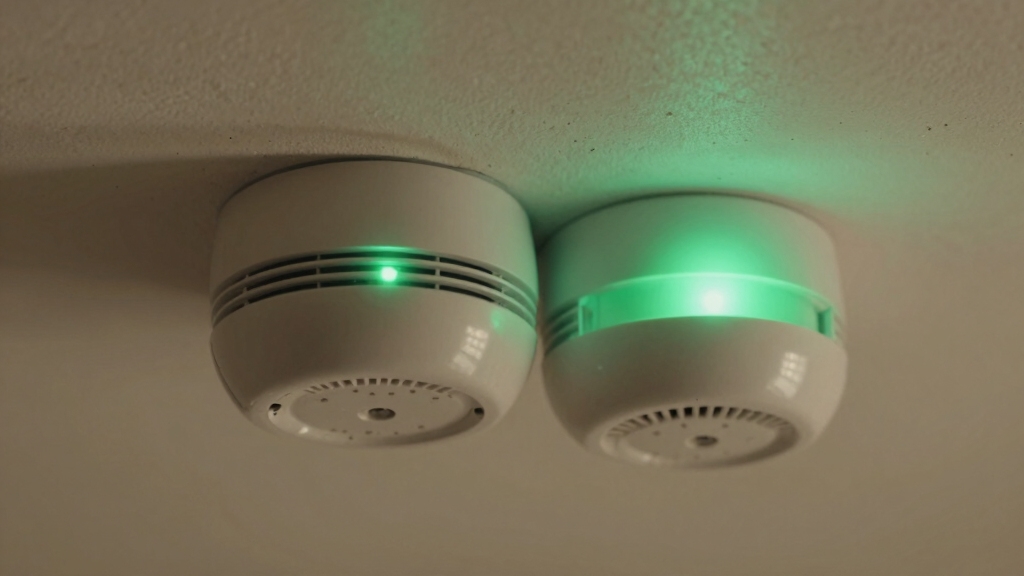
If your smoke alarm’s green light is flashing, it means the battery is low or there’s an urgent issue needing attention, like replacing the 9-volt battery and resetting the unit.
A solid green light shows normal power but doesn’t guarantee full sensor or horn function. Interconnected alarms can change these signals, so testing is essential.
Understanding these differences and proper maintenance helps make certain your alarm works correctly and keeps you safe.
Find out how brand specifics and resets affect these indicators.
Key Takeaways
- Flashing green on a smoke alarm indicates a low battery condition needing immediate replacement and reset.
- Solid green typically means steady power, either AC on hardwired units or normal operation after battery replacement on First Alert units.
- Flashing green combined with chirping signals urgent battery replacement or end-of-life of the alarm.
- Solid green confirms power presence but does not guarantee full sensor, horn, or interconnect functionality.
- After replacing batteries, press and hold the test button to reset the alarm and switch the green light from flashing to solid.
What Does a Flashing Green Light Mean on Smoke Alarms?
When you see a flashing green light on your First Alert smoke alarm, it’s signaling a low battery condition that needs your immediate attention. This indicator differs from the steady green light, which confirms AC power reception on hardwired units.
The flashing green warns you to replace the battery promptly to maintain alarm functionality. Simply changing the battery isn’t enough; you must also press the test button to reset the alarm’s memory and stop the flashing.
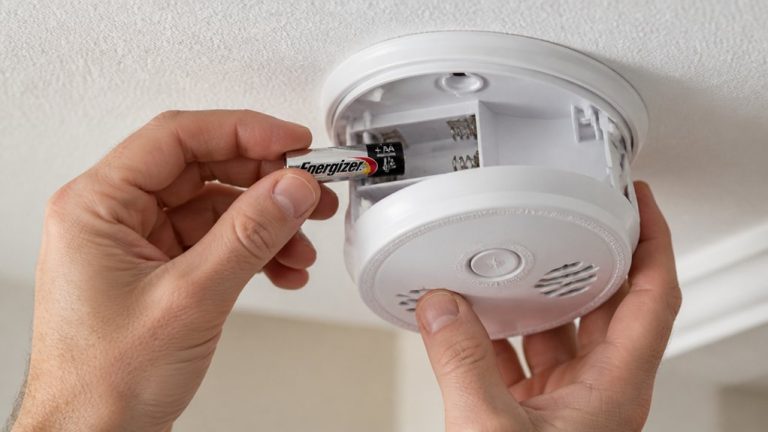
Failure to reset will keep the light flashing, indicating unresolved low battery status. For older models, you may need to remove the alarm from the ceiling to access the battery compartment.
This flashing green light guarantees you recognize battery issues before the alarm’s effectiveness is compromised. Always use the correct 9-volt battery and ensure proper battery placement to maintain reliable alarm operation.
What To Do When Your Smoke Alarm Is Flashing Green?
Recognizing a flashing green light on your First Alert smoke alarm signals an immediate need for action to maintain proper function.
The blinking green indicates a low battery condition requiring replacement. First, obtain a fresh battery compatible with your unit.
Carefully remove the alarm from its mounting. Older models may require ceiling removal to access the battery compartment.
Replace the old battery and securely close the compartment. After replacement, press and hold the test button for at least five seconds to reset the alarm’s internal memory and stop the flashing green light.
Confirm reset success by listening for a beep and observing the light change to solid green. Avoid disconnecting power unnecessarily and schedule biannual checks to prevent future low battery alerts.
It is recommended to replace batteries at least every six months to ensure your smoke alarm remains reliable and ready to alert you in case of emergency.
How To Reset a First Alert Smoke Alarm After Battery Replacement?
Resetting your First Alert smoke alarm after replacing the battery guarantees it returns to normal operation and stops flashing the low battery indicator.
After installing a fresh battery, press and hold the Test/Hush button for at least 5 seconds. This action clears the alarm’s low battery memory and triggers a beep confirming the reset.
Once the beep sounds, release the button; the flashing green light should switch to a steady green LED, indicating normal function.
If your model requires ceiling removal to access the battery, make certain proper reinstallation before resetting. Avoid disconnecting the unit unnecessarily.
Regularly test your alarm following battery replacement to verify battery health, circuitry, and horn operation. This reset process is critical for maintaining accurate power status and ensuring your smoke alarm functions as intended.
For certain models, pressing and holding the test button for 15–30 seconds helps to drain residual power and complete a proper reset procedure.
Why Does a Solid Green Light Appear on Smoke Alarms?
Although the specific meaning can vary by brand, a solid green light on smoke alarms typically indicates that the unit is receiving steady power, either through AC current in hardwired models or after a successful battery replacement and reset in battery-operated First Alert units.
This steady illumination confirms continuous power flow, ensuring the alarm’s circuitry remains active. On hardwired alarms, the green LED signals reliable AC power reception.
For First Alert battery units, the solid green appears only after you press the test or reset button following battery replacement. This reset clears any low-battery warnings and verifies normal function.
Regular testing procedures help confirm that the alarm is functioning correctly and that the solid green light reflects proper operation.
Why Can’t a Solid Green Light Guarantee Full Alarm Function?
Even when you see a solid green light on your smoke alarm, it doesn’t guarantee the device is fully functional. A steady green LED on hardwired units primarily signals AC power reception.
On battery-operated First Alert models, it indicates power presence but not alarm readiness. This light confirms power but doesn’t verify sensor functionality, horn operation, or interconnect integrity.
Without activating the test button, you can’t confirm the circuitry or battery condition beyond mere power reception. Additionally, interconnected alarms may fail silently if wiring issues exist, despite the solid green indicator.
Relying solely on the solid green light risks overlooking critical faults that could impair smoke detection and alarm signaling. Consequently, the green light serves only as a basic power status, not a thorough functionality assurance.
For continuous operation during power outages, hardwired smoke detectors require a reliable battery backup to maintain full alarm functionality.
How To Test Your Smoke Alarm’s Green Light and Sound Properly?
Test your smoke alarm’s green light and sound regularly to ensure it’s functioning correctly.
To verify the unit’s operational status, press and hold the test button for at least 5 seconds. This activates the circuitry, horn, and battery check simultaneously.
Press and hold the test button for 5 seconds to check circuitry, horn, and battery all at once.
If you have interconnected alarms, all should sound in unison, confirming proper wiring and communication between units.
Remember, a steady green light alone doesn’t confirm full functionality; the audible alarm test is essential.
Press the test/hush button firmly for 5 seconds. Confirm all interconnected alarms activate simultaneously.
Observe the green light behavior during and after testing.
Replace batteries if the green light flashes or no sound occurs.
Regular testing guarantees your alarm provides reliable protection.
If false alarms or persistent alerts occur, consider cleaning and maintenance to ensure accurate operation before resetting or replacing the unit.
Common Troubleshooting Steps for Green Light Issues on Smoke Alarms
When you notice a flashing or steady green light on your smoke alarm, it signals specific power or battery conditions that require your attention.
If the green light flashes on a First Alert model, replace the battery immediately. After replacement, press and hold the test button for at least five seconds to reset the alarm’s memory and stop the flashing.
A steady green light on hardwired units confirms AC power reception but doesn’t guarantee full functionality. Perform a test button check to verify.
Avoid disconnecting the alarm unless battery access requires ceiling removal. Regularly inspect your detectors twice yearly for battery status and proper operation.
If you hear chirping along with the green light, it indicates an urgent low battery or end-of-life status that requires prompt action.
How Interconnected Smoke Alarms Affect Green Light Signals and Testing?
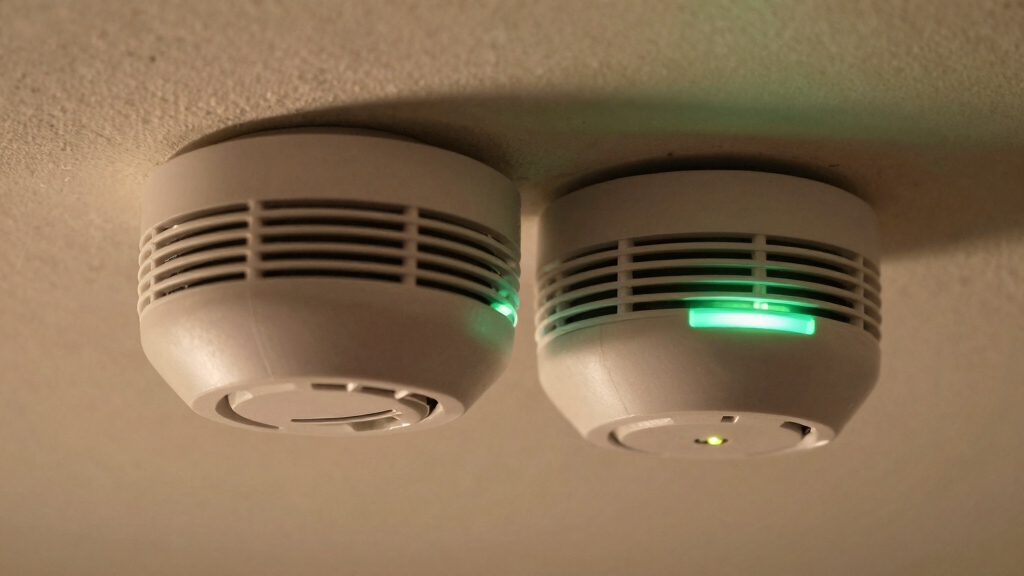
Understanding how interconnected smoke alarms influence green light signals and testing procedures helps you maintain reliable whole-home protection. When alarms are linked, the green LED behavior may differ slightly from standalone units.
This requires you to interpret signals carefully during maintenance. Testing one alarm should activate all connected units, confirming interconnectivity and power status.
Keep these points in mind:
- A steady green light on each unit confirms AC power receipt across the network.
- Pressing the test button on one alarm triggers all alarms’ horns simultaneously.
- If only one alarm sounds, suspect interconnect wiring or module failure.
- Flashing green on a unit indicates a low battery, even if others remain solid green.
Regularly test interconnected alarms to ensure synchronized alerts and consistent power signals. Many interconnected hardwired alarms include backup batteries that automatically activate during power outages to maintain continuous operation.
How To Tell Which Brand Your Smoke Alarm Is by Its Green Light?
How can you identify the brand of your smoke alarm just by observing its green light behavior?
First Alert models use a flashing green light to signal a low battery, requiring you to replace the battery and press the test button to reset.
First Alert alarms flash a green light for low battery, prompting replacement and a test button reset.
In contrast, a solid green light on First Alert alarms indicates normal operation after reset or steady AC power on hardwired units.
Kidde alarms typically show a steady green light to confirm power but don’t flash green for battery warnings.
Battery-operated units across brands may flash green briefly every 30-45 seconds during normal function.
For certain models like Nest Protect, a solid green light along with a voice announcement can indicate the device is ready for testing after a reset.
Why Regular Testing Matters Even When the Green Light Is On?
Just because your smoke alarm has a steady green light doesn’t mean everything’s working perfectly.
It’s a good idea to hit that test button regularly. Doing so helps you check the circuitry, horn, and battery status.
Plus, testing can reveal any interconnect issues that might stop multiple alarms from sounding at the same time.
Regular monthly testing helps catch battery failures or sensor problems early to maintain reliable operation.
Green Light Limitations
While a steady green light confirms that your smoke alarm is receiving power, it doesn’t guarantee that all internal components are functioning correctly.
The green LED primarily indicates power presence, but critical failures can still occur unnoticed without proper testing. You need to be aware of these limitations to maintain peak safety.
The green light doesn’t verify horn or sensor functionality.
Power reception alone can’t detect wiring faults or sensor degradation.
Interconnected units might fail to communicate despite solid green indicators.
Battery health and memory status require more than just visual confirmation.
Relying solely on the green light risks a false sense of security.
Regular testing is essential because it actively checks the alarm’s full operational status, ensuring it will sound correctly in an emergency.
Importance Of Test Button
Pressing the test button on your smoke alarm provides a crucial check that the green light alone cannot offer. While a solid green indicates power, it doesn’t confirm the alarm’s internal circuitry, horn, or battery status.
Regular testing verifies these components function correctly and resets memory after battery changes, stopping flashing green alerts on First Alert units.
| Test Button Action | Purpose |
|---|---|
| Press ≥5 seconds | Verify horn, circuitry, battery |
| Post-battery replacement | Reset memory, stop flashing |
| Single press | Confirm alarm sounds |
| Interconnected units | All alarms should activate |
You should test biannually to ensure full operational readiness, as the green light alone isn’t a complete safety guarantee.
Detecting Interconnect Issues
Knowing the green light status and performing regular tests aren’t enough to guarantee your smoke alarms are fully interconnected. Even with a solid green light, interconnect wiring issues can prevent alarms from sounding simultaneously during an emergency.
To make certain of full functionality, you need to:
- Test each alarm by pressing the test button for at least 5 seconds to verify all units sound.
- Monitor for any single unit failing to respond, signaling potential interconnect failure.
- Inspect wiring connections if interconnected alarms don’t activate together.
- Schedule biannual tests regardless of steady green indicators to detect hidden faults.
Frequently Asked Questions
Can a Flashing Green Light Indicate Issues Other Than Low Battery?
A flashing green light usually signals a low battery on First Alert smoke alarms, but it generally doesn’t indicate other issues.
If you see this, replace the battery and press the test button to reset the alarm’s memory.
If the flashing continues after these steps, you might’ve a malfunction or wiring problem.
Always test your alarm to confirm it’s fully operational rather than relying solely on light indicators.
How Often Should Smoke Alarm Batteries Be Replaced Regardless of Indicator Lights?
You might think waiting for warning lights is enough, but don’t risk it. You should replace smoke alarm batteries at least once a year, regardless of any indicator.
Regular replacement guarantees uninterrupted protection, avoiding false security from unnoticed battery decline. After changing batteries, press the test button to reset the alarm’s memory and confirm functionality.
Stick to this routine to maintain reliable, life-saving operation at all times.
What Should I Do if My Alarm’s Green Light Is off Completely?
If your alarm’s green light is off completely, first check the power source. Ensure the battery is installed correctly or the unit is connected to AC power.
Replace the battery if needed. Press the test button to verify functionality.
If the light remains off and the alarm doesn’t sound, the unit may be faulty or disconnected. In that case, replace the alarm immediately to maintain safety and compliance with regulations.
Are There Differences in Green Light Signals Between Smoke and CO Detectors?
Think of your smoke and CO detectors as vigilant guardians, each with their own language of green lights.
Yes, their signals differ: smoke alarms often flash green to warn of low batteries, while CO detectors use steady green to show power status.
You should recognize these subtle cues—flashing means attention needed, solid means normal.
Always test after battery changes to confirm proper reset and function, ensuring your home’s protection remains uncompromised.
Can Environmental Factors Affect Green Light Behavior on Smoke Alarms?
Yes, environmental factors can affect your smoke alarm’s green light behavior. High humidity, dust, or temperature extremes may cause intermittent flashing or prevent the light from remaining solid.
These conditions can interfere with sensor function or power circuits, triggering false low battery or power signals. To guarantee accurate green light status, keep your detector clean and avoid placing it near vents or bathrooms.
Maintain stable room conditions. Regular testing confirms proper operation despite environmental influences.
Your Smoke Alarm Deserves More Than a Quick Glance
So, you see a green light and think, “All clear!” But ironically, that steady glow or flashing blink doesn’t always mean your smoke alarm is fully functional.
You might still need to test, reset, or troubleshoot it to be truly safe. Don’t let that reassuring green fool you.
Stay proactive, follow the steps, and make sure your alarm’s ready to protect you when it really counts.