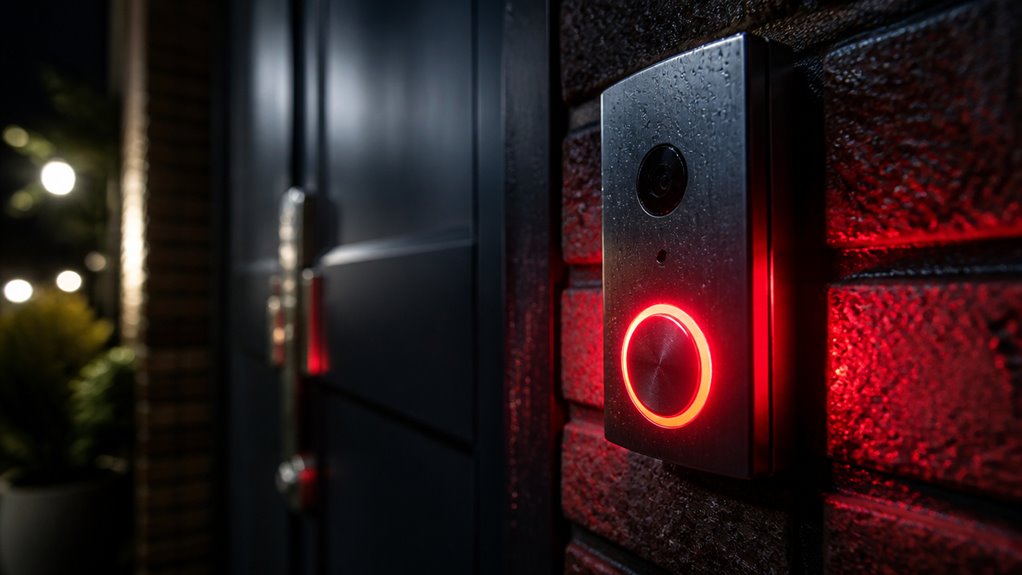

If your Alarm.com doorbell is flashing red, it means the device is either booting up or facing Wi-Fi connection issues.
Check your power and wiring first, then try power cycling the doorbell by holding the button until the LED flashes blue.
Verify your Wi-Fi signal strength and make sure the doorbell uses 2.4 GHz.
Persistent red flashing indicates deeper problems possibly needing a factory reset or professional support.
Explore detailed steps to resolve connection and hardware concerns effectively.
Key Takeaways
- Red flashing means the doorbell is booting up or experiencing Wi‑Fi connection failure if it persists beyond boot time.
- Continuous red flashing may indicate hardware or firmware issues requiring support intervention.
- Verify power, wiring, and chime type settings to prevent power conflicts causing red flashing.
- Power cycle the doorbell by holding the button until LED flashes blue, then reboot router if issue persists.
- Check Wi‑Fi signal strength, use AP mode for reconfiguration, or perform a factory reset to restore connectivity.
What a Red Flashing Light Means on Your Alarm.com Doorbell?
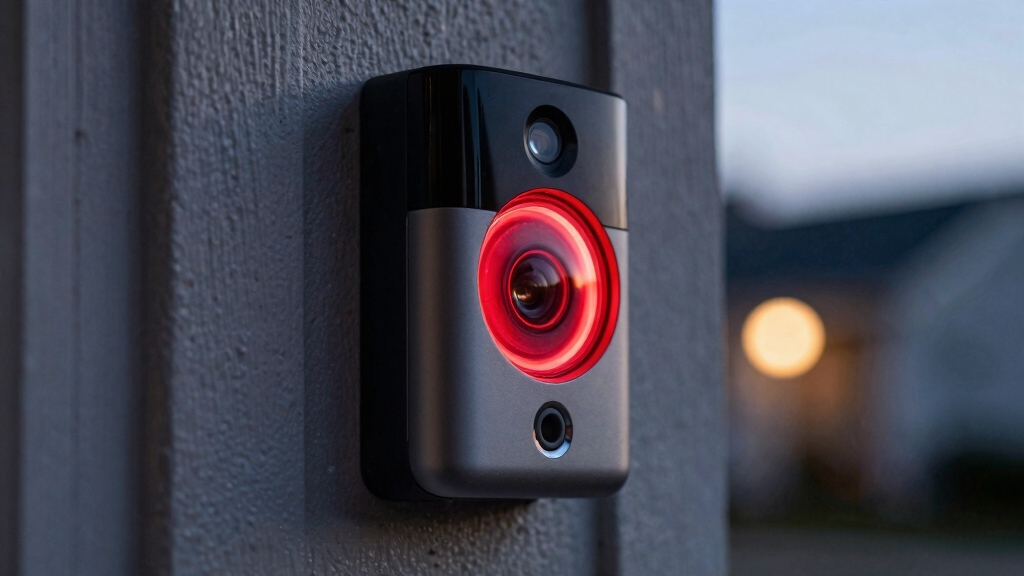
When your Alarm.com doorbell flashes red, it typically indicates the device is powered on but still booting up. This red blinking is a normal startup signal, showing that the camera is initializing its hardware and software components.
However, if the red flashing continues beyond the standard boot time, it may imply the device failed to connect to your Wi-Fi network. Additionally, red flashing can occur during a factory reset process if the button is held for about 75 seconds.
Continuous red flashing isn’t a standard operational state for a fully connected, functioning doorbell, suggesting a power or network issue. You should verify the doorbell’s power status and make certain the physical wiring is secure before proceeding with further diagnostics or resets.
Check for power supply inconsistencies as loose or damaged power cables can cause intermittent video loss or failure to connect properly.
How to Power Cycle Your Alarm.com Doorbell to Fix Red Flashing?
If your Alarm.com doorbell continues flashing red after startup, power cycling the device can often resolve the issue.
This process helps reset the device’s internal state and reestablishes proper boot and network connection sequences. To power cycle your doorbell:
Press and hold the doorbell button until the LED flashes blue, then release.
Press and hold the doorbell button until the LED flashes blue, then release to initiate a reset.
Wait for the device to reboot; LED behavior should change as it restarts.
If connected, the red flashing should cease once the doorbell completes booting and reconnects to Wi-Fi.
If the issue persists, consider rebooting your router or modem to refresh network hardware.
Power cycling resets temporary faults, often clearing boot or connectivity glitches causing persistent red flashing.
For persistent problems, verify Wi‑Fi signal strength at the doorbell location to ensure reliable connectivity.
How to Check Power and Hardware When Your Doorbell Flashes Red?
To troubleshoot a red flashing Alarm.com doorbell, start by confirming the device has consistent power. Check the physical connections to guarantee no wires are loose or damaged, as interrupted power supply often causes issues.
Verify the doorbell is securely mounted and connected to the mechanical wall chime type set in the app to prevent power conflicts.
Next, power cycle the doorbell by pressing and holding the button until the LED flashes blue, then release to reboot the system.
If power is stable but the red flashing persists, inspect the doorbell’s wiring and the transformer supplying it. Guaranteeing proper hardware setup and constant power is essential before addressing other issues like network connectivity or software troubleshooting.
Additionally, ensure that cables are fastened securely and protected using conduit or cable raceways to prevent damage that could cause power interruptions.
How to Fix Wi-Fi Issues Causing Red Flashing on Your Doorbell?
After confirming your doorbell has stable power and hardware connections, focus on Wi-Fi issues that often cause the red flashing indicator. A weak or lost Wi-Fi signal prevents the doorbell from connecting properly, resulting in persistent red flashes.
Start by checking the signal strength on the Alarm.com video page. If it’s weak, relocate your router or install a Wi-Fi extender. Next, toggle recording schedules off and on via the app to refresh connectivity.
Power cycle your doorbell by holding the button until the LED flashes blue, then release.
- Verify Wi-Fi signal strength to guarantee reliable connection
- Toggle recording schedules in the app to reset sync
- Power cycle the doorbell to clear temporary faults
- Reset your router or modem if connection issues persist
For optimal performance, ensure your device operates on the 2.4 GHz Wi‑Fi band since higher frequency bands are not supported.
How to Use Access Point Mode to Connect Your Alarm.com Doorbell?
How can you directly configure your Alarm.com doorbell’s Wi-Fi settings when it struggles to connect?
Use Access Point (AP) mode by holding the doorbell button for 35–40 seconds until the LED flashes white, then release.
The device will reboot and enter AP mode, indicated by alternating red and green blinking.
Connect your smartphone to the temporary Wi-Fi network named “Skybell…” broadcasted by the doorbell.
Open a browser and enter `192.168.1.1` to access the doorbell’s configuration portal.
From there, select your home Wi-Fi network and enter the password to establish a connection.
After completing setup, the doorbell will attempt to connect to your network.
This method bypasses standard app connectivity, allowing direct network configuration when usual Wi-Fi pairing fails.
For enhanced security and privacy, consider devices that support local storage to keep your footage safe within your home network.
Step-by-Step Factory Reset for Your Alarm.com Doorbell
Performing a factory reset on your Alarm.com doorbell restores the device to its original settings, resolving persistent issues like connectivity failures or unresponsive behavior.
This process wipes all custom configurations, so you’ll need to set up the device again after.
To initiate the reset, follow these steps carefully:
Hold down the doorbell button until the LED flashes yellow for about 80 seconds.
Release the button when the yellow flash begins; the device will reboot.
Wait for alternating red and green blinking, indicating it has entered Access Point mode.
Confirm the device resets by checking the LED behavior and prepare to reconfigure in the app.
This method guarantees a clean start, eliminating firmware glitches or corrupted settings causing the red flashing issue.
For best results, ensure your device is connected to a stable Wi‑Fi network during reconfiguration to maintain consistent communication.
How to Remove and Re-Add Your Doorbell in the Alarm.com App?
Once you complete a factory reset, you’ll need to remove the doorbell from your Alarm.com account before setting it up again.
Open the Alarm.com app and navigate to the device list. Locate your doorbell camera, then select the option to delete or remove it from your account.
Confirm the removal to make certain the device is fully disassociated. After removal, return to the main menu and choose “Add Device.”
Select “Doorbell Camera” from the options provided. Follow the on-screen prompts to reconnect the doorbell to your Wi‑Fi network and reconfigure its settings.
If the device doesn’t appear, log out and log back into the app to refresh the interface. Completing these steps re-establishes the doorbell’s connection to your account and resolves most setup-related issues.
For enhanced security, consider integrating your doorbell with Ring cameras to enable visual verification during alerts.
Adjust App Settings to Fix Alarm.com Doorbell Connection Issues
To fix those pesky connection issues, let’s start by enabling push notifications in the Alarm.com app. This way, you’ll be in the loop about any activity at your doorbell. It’s super helpful for staying informed!
Next up, let’s take a look at the audio settings. Make sure they’re configured correctly so you get those sound alerts and chimes just right. You don’t want to miss any notifications because of audio issues!
Lastly, don’t forget to check your recording schedules. Toggling them can help ensure that you have consistent video capture and maintain that all-important connectivity. With these adjustments, you should be back on track!
Also, switching from continuous to motion-activated recording can help conserve storage and extend your video retention time.
Enable Push Notifications
How can enabling push notifications improve your Alarm.com doorbell’s connectivity?
Push notifications keep you instantly informed about doorbell activity, ensuring timely responses and reducing missed alerts that might indicate connection issues. By activating these alerts, you maintain an active link between the device and your smartphone, helping to detect connectivity problems early.
To enable push notifications efficiently:
- Open the Alarm.com app and select your doorbell device.
- Tap the gear icon to access device-specific settings.
- Toggle on push notifications under alert preferences.
- Confirm notification permissions are granted in your phone’s system settings.
Enabling push notifications supports a proactive troubleshooting approach. This helps you monitor your doorbell’s status in real time and address connection interruptions promptly. For optimal reliability, consider integrating your doorbell with a system offering dual-path communication to ensure consistent connectivity.
Configure Device Audio
Adjusting your Alarm.com doorbell’s audio settings in the app can resolve connection issues related to sound and chime configurations. Open the app, select your doorbell device, and tap the gear icon to access audio settings.
Make sure the chime type matches your hardware, usually “mechanical,” to avoid power conflicts. Adjust volume levels and test the doorbell sound to confirm functionality. If audio issues persist, toggling these settings often restores proper communication between the device and the app. For best results, ensure your doorbell is integrated properly with your smart home devices to maintain seamless operation.
| Setting | Description | Recommended Action |
|---|---|---|
| Chime Type | Mechanical or digital chime | Set to mechanical if wired |
| Volume Level | Doorbell sound volume | Adjust to medium or higher |
| Microphone Status | Enable/disable microphone | Enable for two-way audio |
| Speaker Status | Enable/disable speaker | Enable for alerts |
| Test Sound | Plays doorbell chime | Use to verify settings |
Check Recording Schedules
Before troubleshooting further, check your Alarm.com doorbell’s recording schedules in the app to confirm they’re enabled properly. Incorrect or disabled recording schedules can cause the doorbell to flash red if it’s not capturing footage as expected.
Open the app and verify the settings to make certain recordings are active during desired times. Toggle the schedules off and on to refresh the connection.
To effectively check and adjust recording schedules:
- Navigate to the video settings in the Alarm.com app.
- Confirm recording times cover your monitoring needs.
- Toggle recording schedules off, then back on to reset.
- Save changes and monitor the doorbell’s LED behavior.
Adjusting these settings can resolve connection and recording issues without deeper intervention.
When to Contact Support for Persistent Red Flashing Problems?
If your Alarm.com doorbell continues flashing red despite following all troubleshooting steps, it’s time to contact support.
Persistent red flashing signals a deeper hardware or firmware issue beyond user-level fixes. Before reaching out, gather device details: model number, firmware version, and a summary of troubleshooting actions taken.
Be ready to describe your network environment, including router type and signal strength. Support can assist with advanced diagnostics, firmware reinstallation, or hardware replacement if needed.
Avoid prolonged attempts to force connectivity, as this may exacerbate the problem. Timely engagement with support secures a faster resolution, minimizes downtime, and maintains your doorbell’s security functionality.
Keep your account credentials handy to streamline verification during the support process.
Frequently Asked Questions
Can Firmware Updates Cause My Alarm.Com Doorbell to Flash Red?
Firmware updates typically don’t cause your Alarm.com doorbell to flash red.
A red flashing LED usually indicates booting, network connection failure, or a factory reset in progress.
During an update, the device may reboot, briefly showing different LED colors.
However, continuous red flashes signal issues like Wi-Fi connectivity or power problems.
If you see persistent red flashing during an update, check your network and power to ensure proper device operation.
Does Extreme Weather Affect the Red Flashing LED Behavior?
Imagine your doorbell like a phone struggling to get a signal during a storm.
Yes, extreme weather can disrupt your doorbell’s Wi-Fi connection, causing the red LED to flash as it fails to connect properly.
This flashing isn’t about hardware damage but weak signals or interrupted power.
You should check your network strength and power supply after storms to restore normal operation and stop the persistent red flashing.
How Does Doorbell Placement Impact Red Flashing and Connectivity?
Your doorbell’s placement directly affects red flashing and connectivity by influencing Wi-Fi signal strength. If it’s too far from the router or obstructed by walls, metal, or dense materials, the signal weakens. This causes connection failures and persistent red flashing.
Position it within strong Wi-Fi range, away from interference sources. Also, avoid extreme angles or locations exposed to weather extremes. These factors can degrade hardware performance and network stability.
Are There Battery-Powered Alarm.Com Doorbells That Flash Red Differently?
Imagine your bike’s warning light flashing differently when the battery’s low versus when it’s charging.
Similarly, battery-powered Alarm.com doorbells do flash red with subtle differences.
For example, a steady red might indicate low battery, while blinking red signals booting or errors.
Knowing these nuances helps you diagnose issues quickly, ensuring you don’t confuse a power warning with connectivity problems or reset procedures.
Always check your specific model’s LED guide.
Can Other Wireless Devices Interfere With My Doorbell’s Red Flashing?
Yes, other wireless devices can interfere with your doorbell’s Wi-Fi signal, causing the red flashing issue.
Devices operating on the same 2.4 GHz frequency, like cordless phones, baby monitors, or microwaves, might disrupt connectivity.
To fix this, reduce nearby electronic interference, relocate your router closer, or switch your doorbell to a less congested Wi-Fi channel.
Ensuring a strong, stable network helps prevent persistent red flashing caused by connection failures.
The Secret to Solving Alarm.com Doorbell Red Light Issues
When your Alarm.com doorbell flashes red, don’t let frustration ring louder than your doorbell. Power cycle it, check hardware and Wi-Fi, or use access point mode to restore connection.
If needed, perform a factory reset or re-add the device in the app. Adjust settings carefully to avoid hiccups.
When all else fails, contact support. Think of them as your technical lifeline, ready to untangle even the most stubborn red alerts.