
You’ll want to take your fire extinguisher to a certified service provider who follows NFPA standards for refilling.
First, safely depressurize it by releasing trapped air with the handle squeezed.
Then, disassemble only rechargeable units to inspect and clean valves and hoses.
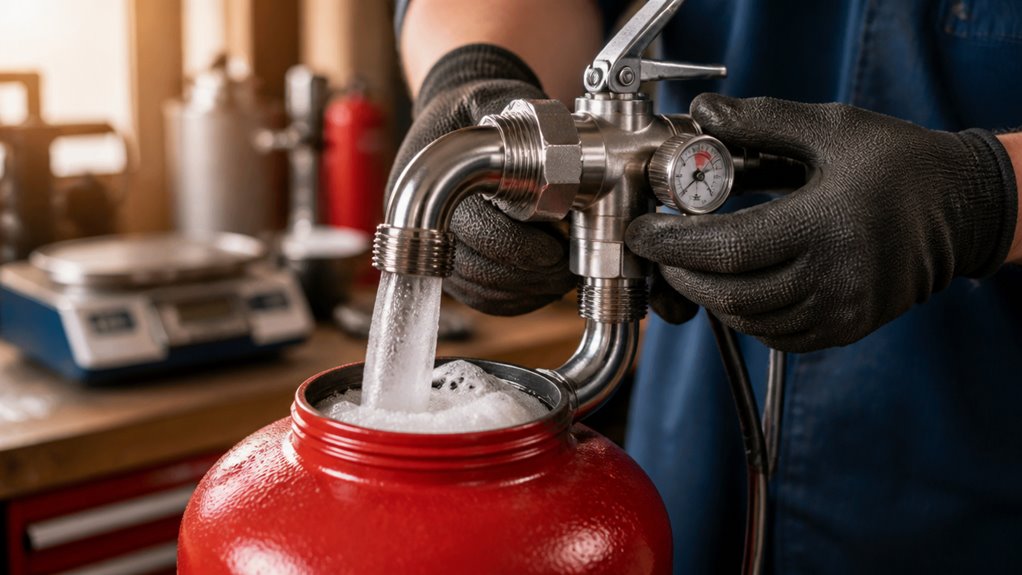
Refill using the approved chemical and maintain specified fill volumes.
Hand-tighten components, pressurize with the correct gas, and check for leaks.
Proper tagging and documentation guarantee compliance.
Keep going to fully master each essential step.
Key Takeaways
- Contact authorized service providers or certified technicians for safe and compliant fire extinguisher refilling.
- Fully depressurize the extinguisher by inverting and squeezing the handle until the pressure gauge reads zero.
- Disassemble only rechargeable extinguishers with metal valves, inspecting hoses and valves for damage or corrosion.
- Refill using manufacturer-specified agents and volumes, hand-tighten valves, and pressurize to recommended levels, holding the discharge handle down.
- Perform leak testing, verify pressure gauge readings, reinsert safety pin, and attach a dated service tag after maintenance.
Where to Get Your Fire Extinguisher Refilled Near You?
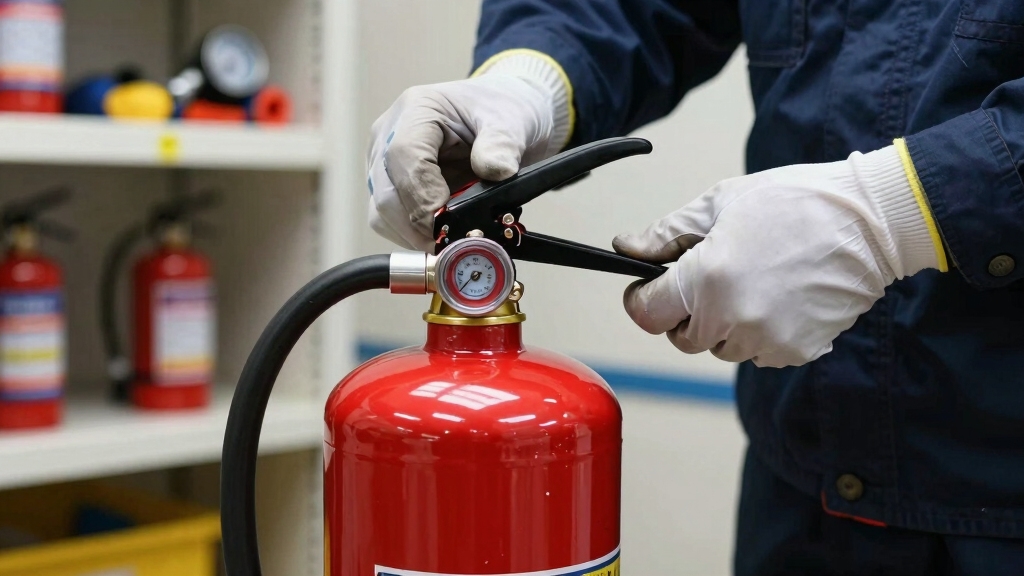
When you need to get your fire extinguisher refilled, start by reaching out to local certified fire equipment dealers or fire protection companies, as they’re authorized to perform proper servicing.
Use the product label to identify approved service providers and confirm they follow the exact service manuals mandated by the manufacturer.
You can also contact local fire departments, which may offer refilling services or direct you to qualified vendors.
Additionally, specialized maintenance companies and some home improvement retailers provide authorized refilling.
Conduct an online search using terms like “fire extinguisher refill near me” to locate nearby certified services.
Always make certain the chosen facility complies with regulatory standards to guarantee safety, proper recharging, and device reliability for future use.
Scheduling refills during regular business hours can help avoid higher fees associated with after-hours or emergency services.
Prepare Your Fire Extinguisher for Safe De-Pressurization
Before you begin de-pressurizing your fire extinguisher, make sure you’re in a well-ventilated area and wearing appropriate safety gear. This minimizes exposure to discharged contents and prevents inhalation hazards.
Secure the extinguisher upright on a stable surface to avoid accidental movement during the process. Slowly invert the extinguisher and squeeze the handle to release internal pressure completely. Confirm the pressure gauge reads zero before proceeding.
It is important to perform this procedure with trained technicians who follow NFPA standards to ensure safety and compliance.
| Step | Action | Safety Tip |
|---|---|---|
| Positioning | Place upright on a stable surface | Prevents tipping |
| Ventilation | Work outdoors or in a ventilated room | Avoids inhalation of fumes |
| Pressure release | Invert and squeeze the handle | Release pressure fully before disassembly |
Following these steps guarantees safe de-pressurization and maintains structural integrity for refilling.
Disassemble Your Fire Extinguisher for Refilling
First things first, you’ll want to fully depressurize your extinguisher. Just turn it upside down and squeeze the handle to let all that air pressure out. Easy enough, right?
Once that’s done, it’s time to unscrew the nut. This will allow you to carefully remove the hose and valve body assembly from the cylinder. Taking this step is really important—it gives you safe access for a thorough cleaning and refilling.
However, be aware that only rechargeable extinguishers with metal valves and gauges can be safely disassembled and refilled by a certified technician.
Depressurization Steps
Although handling a pressurized fire extinguisher requires caution, you can safely depressurize it by turning the unit upside down and squeezing the handle to release all trapped air. This step is vital for safe disassembly and refilling.
Next, unscrew the nut securing the hose and valve body assembly to the cylinder. Remove the plastic fill cone inside and clear any residual chemical before inspection. Follow the CGA Visual Inspection Standard C-6 to verify cylinder integrity before refilling.
For outdoor storage or refilling, it is critical to monitor environmental conditions and conduct regular inspections to prevent pressure-related failures caused by temperature extremes.
| Step Number | Action |
|---|---|
| 1 | Turn extinguisher upside down |
| 2 | Squeeze handle to release air |
| 3 | Unscrew nut and remove hose |
| 4 | Remove plastic fill cone |
| 5 | Inspect cylinder per CGA C-6 |
Hose And Valve Removal
Begin by carefully unscrewing the nut that secures the hose and valve body assembly to the extinguisher cylinder.
Use an appropriate-sized wrench or hand tools, guaranteeing you don’t apply excessive force that could damage threads or deform components.
Once loosened, gently detach the hose and valve assembly, taking care not to kink or damage the hose.
Inspect the valve body for any signs of corrosion, wear, or residue buildup.
Set the assembly aside on a clean surface to prevent contamination.
Removing the hose and valve is critical for accessing the cylinder interior for thorough cleaning and refilling.
Always follow manufacturer specifications and safety protocols during disassembly to maintain extinguisher integrity and guarantee reliable performance upon reassembly and pressurization.
Before disassembly, inspect the extinguisher’s physical condition and components to ensure safe handling and identify any damage that could affect the refilling process.
Fill Your Fire Extinguisher With the Correct Chemicals
When filling your fire extinguisher, use only the chemical agents specified on its product label to guarantee proper functionality and safety. Different extinguisher types require distinct suppressants and precise volumes.
Overfilling or using incorrect chemicals risks malfunction or safety hazards. Always remove residual agents before refilling.
| Extinguisher Type | Chemical Agent |
|---|---|
| Water | 2-1/2 gallons water |
| Dry Chemical | Specified powder weight |
| CO2 | Liquid CO2 (manufacturer specified) |
| Foam | Manufacturer-approved foam concentrate |
Maintain an air gap inside to allow pressurization. Follow label instructions exactly to make sure the extinguisher performs reliably in emergencies. Using the correct agent is critical to ensure non-conductive operation and prevent electrical hazards during use.
Pressurize and Reassemble Your Fire Extinguisher
Alright, let’s dive into the process of reassembling and pressurizing your fire extinguisher.
First up, you’ll want to reinstall the discharge valve. Just hand-tighten it for now—no need to go crazy and over-torque it!
Once that’s done, it’s time to pressurize your extinguisher. You’ll need to get it up to 100 PSI, using an air line for this. A little tip: hold down the handle to keep the valve open while you’re filling it. It makes things smoother!
And hey, don’t forget about safety! Be sure to place the extinguisher in a safety cage while you’re working.
Before you wrap everything up, check those pressure gauge readings to make sure everything’s in good shape. Safety first, right?
Remember, maintaining proper pressure levels is critical to ensure optimal spray duration and fire suppression effectiveness.
Valve Reinstallation Steps
Although the valve reinstallation may seem straightforward, it demands meticulous attention to guarantee airtight sealing and proper function. Start by aligning the valve body with the cylinder opening, ensuring no debris interferes with the seal.
Hand-tighten the valve nut. Avoid using tools that can overtighten and damage threads. After securing the valve, reinstall the discharge hose and handle assembly.
| Step | Action | Caution |
|---|---|---|
| Align Valve | Position valve correctly | Assure no debris in threads |
| Tighten Nut | Hand-tighten only | Avoid wrench use to prevent damage |
| Reattach Hose | Secure hose and handle | Confirm no kinks or leaks |
This precise reinstallation preserves extinguisher integrity and readiness for pressurization.
Proper Pressurization Methods
Since proper pressurization guarantees the extinguisher functions reliably during emergencies, you’ll need to carefully reinstall the discharge valve and apply the correct pressure.
Start by placing the valve body back into the cylinder and tightening it by hand. Don’t use a wrench to avoid over-tightening.
Next, connect an air line to the Schrader valve behind the pressure gauge and charge the extinguisher to the specified pressure, typically 100 PSI.
Holding the discharge handle down during pressurization guarantees the valve opens properly. This allows air or nitrogen to fill the cylinder evenly.
Key steps include:
- Hand-tighten the discharge valve without tools
- Use the Schrader valve for accurate pressurization
- Apply manufacturer-specified pressure, commonly 100 PSI
- Hold the handle to open the valve during filling
- Use nitrogen if specified as a pressurizing gas
Visible and strategically placed equipment can serve as an effective psychological deterrent by signaling proper maintenance and readiness.
Safety Measures During Assembly
Having made certain the discharge valve is properly hand-tightened and the extinguisher is pressurized to the correct level, you must implement strict safety measures to prevent accidents during assembly.
Always hold the discharge handle down while pressurizing to allow valve venting. Use a safety cage to contain any accidental release.
Verify that the pressure gauge reads within the green zone, confirming correct pressurization. Reinsert the safety pin securely to prevent unintended discharge.
After assembly, attach a service tag stamped with the current date to validate servicing. Finally, dunk the extinguisher in water to check for leaks; any bubbles indicate a breach requiring immediate attention.
Adhering to these protocols guarantees your extinguisher functions reliably and safely after reassembly.
Additionally, it is crucial to confirm mounting surface stability to ensure the extinguisher remains securely in place and is accessible during emergencies.
Verify Fire Extinguisher Safety and Test for Leaks
Confirm the extinguisher’s pressure gauge rests firmly within the green zone, typically around 700 kPa, to guarantee proper charging.
Next, assure the safety pin is securely inserted to prevent accidental discharge. Place the extinguisher in a safety cage during pressurization to mitigate risks.
Conduct a leak test by submerging the extinguisher in water and watching for bubbles, which indicate compromised seals.
Finally, inspect the valve and hose assembly for any signs of damage or corrosion that could affect performance.
- Verify green zone pressure on the gauge (approx. 700 kPa)
- Insert safety pin firmly in discharge handle
- Use safety cage during pressurization
- Submerge extinguisher in water to detect leaks
- Inspect valve and hose for damage or corrosion
Ensure that the extinguisher type and maintenance comply with NFPA standards to guarantee reliable emergency use.
Attach Service Tags and Record Fire Extinguisher Maintenance
Wrap up the maintenance process by attaching a service tag to the fire extinguisher, clearly marking the date of the latest inspection and recharge. This tag serves as a critical record, ensuring compliance with safety regulations and facilitating future maintenance tracking.
Attach a service tag noting the latest inspection date to ensure compliance and track future maintenance.
Use a durable, weather-resistant tag and securely fasten it to the extinguisher’s handle or cylinder. Document all maintenance actions, including recharging details, pressure readings, and any repairs performed, in a centralized log or digital system.
Accurate record-keeping supports accountability and aids certified service providers in evaluating the extinguisher’s condition over time. Always verify that the tag information matches the actual service performed to avoid discrepancies.
This systematic approach guarantees the extinguisher’s reliability and readiness in emergencies.
Frequently Asked Questions
How Often Should I Replace My Fire Extinguisher Entirely?
You should replace your fire extinguisher every 5 to 15 years, depending on the manufacturer’s guidelines and extinguisher type.
Inspect it regularly for damage or corrosion.
If the cylinder fails the CGA Visual Inspection Standard C-6 or shows leaks, replace it immediately.
Even with proper maintenance and periodic recharging, aging components degrade.
Timely replacement guarantees peak reliability and safety during emergencies.
Always consult the product label for specific lifespan recommendations.
Can I Refill a Fire Extinguisher Myself Safely at Home?
Refilling a fire extinguisher yourself is like performing delicate surgery. You need certified expertise and proper tools.
You shouldn’t attempt it at home since only certified dealers or fire protection companies have the required manuals, equipment, and safety protocols.
Incorrect refilling risks malfunction or injury. Instead, rely on professionals who follow strict procedures, including depressurization, chemical specs, pressurization, and safety tagging.
This ensures your extinguisher operates flawlessly when needed.
What Are the Signs My Extinguisher Needs Servicing Besides Expiration?
You’ll know your extinguisher needs servicing if you notice dents, corrosion, or leakage on the cylinder.
Pressure gauge readings outside the green zone indicate loss of pressure.
If the safety pin is missing or damaged, or if the discharge handle is stuck, service is required.
Also, after any use, even partial, immediate recharging is mandatory.
Regular inspection for cracks or chemical residue buildup signals the need for professional servicing.
Are There Different Refill Procedures for Various Extinguisher Types?
Yes, you must follow different refill procedures depending on extinguisher type.
Water extinguishers require 2-1/2 gallons filled to the bottom of the fill cone. Powder extinguishers use vacuum filling to reach the correct weight.
Pressurization gases also vary; some use nitrogen instead of air. Always reference the product label for exact chemical amounts and manufacturer specifications to guarantee safe, authorized servicing and maintain extinguishing effectiveness.
How Do I Dispose of Old or Damaged Fire Extinguishers Properly?
You should never dispose of old or damaged fire extinguishers in regular trash. Instead, contact your local fire department or a certified fire equipment dealer for proper disposal methods.
They’ll make certain hazardous materials are handled safely, often recycling parts or neutralizing chemicals.
Many areas require you to depressurize the extinguisher first, so don’t attempt this yourself unless trained.
Always follow local regulations to avoid environmental harm and legal issues.
Final Thoughts on How to Fill a Fire Extinguisher
By following these steps, you make certain your fire extinguisher functions like a well-oiled machine, ready to protect when seconds count.
Proper refilling and maintenance aren’t just routine; they’re critical for your safety and compliance.
Don’t skip the pressure checks or service tags; each detail guarantees reliability under stress.
Treat your extinguisher with the same precision as a lifeline because in an emergency, it’s exactly that—a crucial shield against disaster.