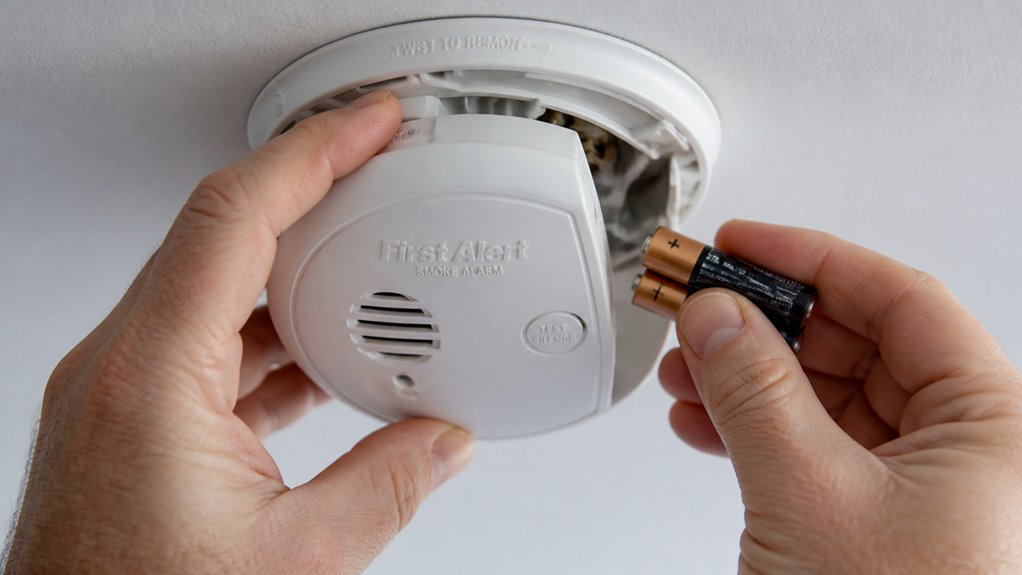

To replace batteries in your First Alert smoke detector, first twist or pull the unit from its mounting base carefully. Open the battery compartment, usually on the back or side, by sliding or unlatching it.
Remove the old battery, noting its orientation, then insert the correct new battery, often 9V or AA, matching polarity exactly. Close the compartment firmly and press the Test button to guarantee proper function.
Following proper reset and testing will prevent false chirps and keep your alarm reliable. More detailed tips can help fine-tune this process.
Key Takeaways
- Twist the First Alert smoke detector counterclockwise to remove it from the mounting bracket before accessing the battery compartment.
- Locate and open the battery compartment, usually on the back or side, checking for a latch or sliding door.
- Remove the old battery carefully, noting the positive and negative terminal orientation for correct replacement.
- Insert the recommended battery type firmly, ensuring proper polarity and secure seating under the clip or holder.
- Close the compartment, press the Test button to confirm operation, and reset the alarm if needed by discharging stored power.
How to Safely Remove Your First Alert Smoke Detector?
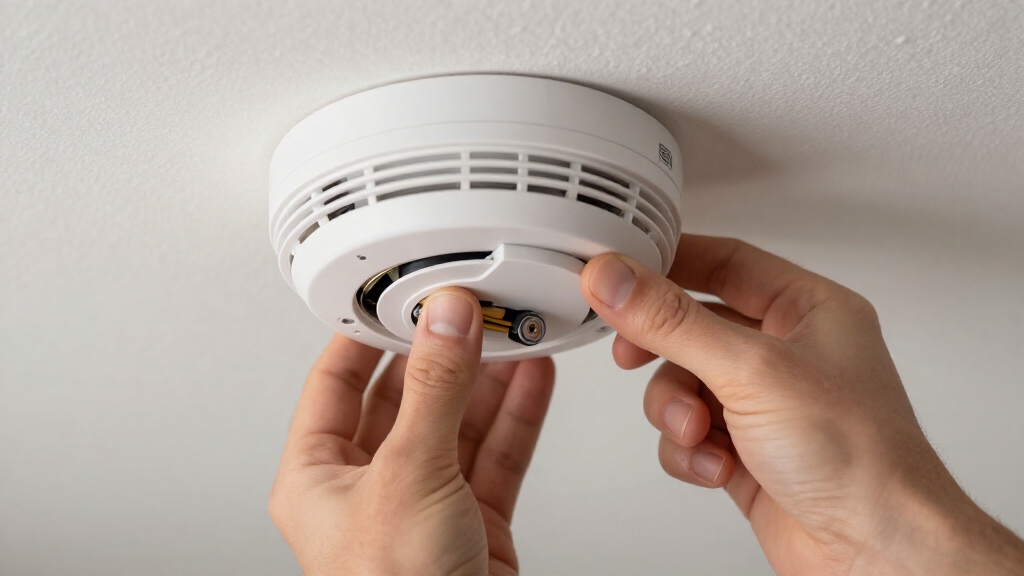
To safely remove your First Alert smoke detector, start by turning it counterclockwise to release it from its mounting bracket if it uses a twist-lock base.
Begin by turning your First Alert smoke detector counterclockwise to unlock it from the mounting bracket.
Grasp the alarm firmly but gently to avoid damaging the unit or bracket.
Once it disengages, pull the alarm straight away from the base.
If you have a hardwired model, carefully disconnect the power harness by pressing the release tab before fully removing the unit.
Avoid yanking on wires to prevent damage.
Handle the alarm with care to preserve the mounting bracket and wiring integrity.
Check that the unit is fully detached before proceeding.
This process guarantees you remove the smoke detector safely, preparing it for battery replacement or maintenance without risking damage or electrical issues.
Many models include backup batteries to ensure continuous operation during power outages, which should be considered when handling the unit.
How to Open the Battery Compartment on Your First Alert Alarm?
To get started, you’ll want to find the battery compartment on your First Alert alarm. It’s typically located on the back or side.
Once you’ve spotted it, go ahead and fully open the battery drawer or unlatch the compartment.
Just a quick tip: make sure you open it all the way before you take out the old battery. This helps prevent any damage to the alarm.
For this model, be sure to use the specified CR17335 lithium battery to ensure proper operation and avoid false alarms.
Locating The Battery Compartment
You’ll usually find the battery compartment on the back or side of your First Alert alarm, often hidden behind a small door or drawer.
Begin by examining the unit’s edges for a seam or latch indicating the battery housing. Some models feature a sliding drawer, while others have a hinged cover secured by a clip or tab.
If your alarm is mounted, you might need to remove it from its bracket first. Twist it counterclockwise or gently pull it away, depending on the design.
Note that combination smoke and CO alarms may have different compartment locations or sizes to accommodate varied battery types.
Look for markings or labels on the unit that specify the battery type and compartment position. Identifying the compartment correctly guarantees a smooth battery replacement process without damaging the alarm.
For certain models, especially hardwired alarms, removing the backup battery is crucial for complete power isolation during maintenance.
Opening The Battery Drawer
Locate the battery drawer on your First Alert alarm by inspecting the back or side of the unit. Carefully release any latch or tab securing the cover.
Some models have a sliding drawer that you push or pull gently, while others use a hinged cover that flips open. If your alarm is mounted on a bracket, you might need to remove it by twisting counterclockwise before accessing the battery compartment.
Once open, slide the battery out smoothly, noting the orientation of the positive and negative terminals for correct reinstallation. If you spot dust or corrosion, clean it carefully to guarantee good contact.
Avoid forcing the drawer open, as this can damage the unit. With the compartment open, you’re now ready to remove and replace the battery securely.
Replace the battery promptly after hearing the low-battery chirp to ensure continuous alarm functionality.
How to Choose the Right Battery for Your First Alert Smoke Detector?
Choosing the right battery for your First Alert smoke detector hinges on identifying the specific model and its power requirements.
Selecting the correct battery depends on knowing your First Alert smoke detector’s model and power needs.
Check the back of the alarm or the user manual for the recommended battery type. Common options include 9V alkaline, AA batteries, or sealed lithium batteries in newer models.
If your alarm combines smoke and carbon monoxide detection, it might require a different battery format. Avoid using rechargeable or expired batteries, as they can cause malfunctions or chirping.
Always match the battery terminals to the alarm’s polarity markings when installing. Stick to fresh, high-quality alkaline batteries unless the manual specifies otherwise.
Following these guidelines guarantees your smoke detector functions reliably and alerts you promptly in an emergency.
It is also important to replace batteries at least every six months or immediately when low-battery warnings occur to keep your detector reliable.
How to Install a New Battery in Your First Alert Alarm?
After selecting the correct battery for your First Alert smoke detector, the next step is to install it properly to guarantee reliable operation. Follow these steps carefully:
- Open the battery compartment fully, noting the positive (+) and negative (–) terminal markings inside.
- Insert the new battery, aligning terminals with the compartment’s markings. Make sure it seats securely under the clip or in the holder.
- Avoid mixing old and new batteries; always use fresh replacements with valid expiration dates.
- Close the compartment firmly to make certain the battery stays in place and the alarm functions correctly.
Proper installation prevents false alerts and ensures your alarm will perform as expected when needed. Always press the test button after installation to confirm normal operation and check for any low battery chirps.
How to Reset and Test Your First Alert Smoke Detector After Battery Replacement?
Typically, you’ll need to reset your First Alert smoke detector to clear any residual charge and make certain it functions properly after replacing the battery.
Start by pressing and holding the Test button for about 15 to 30 seconds with the battery removed. This step discharges any leftover energy inside the unit.
After the reset, insert the new battery carefully, ensuring the terminals align correctly.
Next, press the Test button again briefly to confirm the alarm sounds loudly and clearly.
If you don’t hear a strong beep, check the battery seating and polarity, then retest.
This reset and test process guarantees your smoke detector operates reliably, giving you confidence that it’s ready to alert you in an emergency.
Be sure to perform a monthly test to ensure your smoke detector remains fully operational over time.
How to Fix Common Chirping and Battery Issues on First Alert Alarms?
If your First Alert alarm is chirping, the first thing you should do is check the battery. Sometimes, it could be low, loose, or even installed incorrectly. So, give it a quick look!
Make sure you’re using the recommended battery type and that it’s inserted with the correct polarity. It’s important to seat it firmly in the compartment—this can make a big difference!
Once you’ve replaced the battery, don’t forget to reset the alarm. Just hold down the Test button for a moment to clear any stored charge. After that, you can test its function to ensure everything’s working as it should.
If the chirping continues after battery replacement, it may indicate a device malfunction requiring cleaning or professional inspection.
Identifying Chirp Causes
Frequently, a recurring chirp from your First Alert alarm signals a low battery or improper battery installation. To identify the cause, you need to check a few key factors:
- Battery Life – A chirp every 30 to 60 seconds usually means the battery is low and needs replacement.
- Battery Seating – Make sure the battery is fully seated. A loose connection can cause intermittent chirping.
- Battery Orientation – Verify the battery terminals align correctly with the positive and negative markings.
- Stored Charge – If chirping persists, remove the battery and hold the Test button for 15-30 seconds to reset residual charge before reinstalling.
Following these steps helps you pinpoint the source of the chirp and prevent false alarms. If chirping continues after battery replacement and reset, it may indicate the detector has reached its 10-year lifespan and requires replacement.
Proper Battery Installation
Make certain your First Alert alarm functions reliably by installing batteries correctly to prevent common chirping and power issues.
First, identify the proper battery type for your model, usually a 9V or AA alkaline battery. Avoid mixing old and new batteries.
Open the battery compartment fully, noting the positive and negative terminal orientation marked inside. Insert the new battery firmly, ensuring it seats securely under the clip or in the holder.
Check for dust or corrosion on contacts and clean if necessary to maintain a good connection.
After installation, confirm the battery drawer or latch closes completely to prevent loose contacts that might trigger chirping.
Proper installation guarantees your alarm receives steady power, reducing false alerts and extending battery life for dependable operation.
If your alarm continues to chirp after battery replacement, try pressing the Test/Silence button to temporarily quiet the alarm while you verify proper installation and battery condition.
Resetting The Alarm
When your First Alert alarm starts chirping despite having a fresh battery, resetting the unit often resolves the issue by clearing any residual charge.
To reset your alarm effectively, follow these steps:
- Remove the battery from the unit carefully.
- Press and hold the Test button for 15 to 30 seconds to discharge any stored power.
- Reinsert the battery, ensuring proper alignment of terminals.
- Press the Test button again to confirm the alarm sounds correctly.
This reset clears minor glitches causing false chirps or battery warnings. If chirping continues, double-check the battery seating and type.
Regularly resetting after battery changes helps maintain reliable operation and extends your smoke detector’s lifespan.
When to Replace Your First Alert Alarm Battery (And Why It Matters)?
You should replace your First Alert alarm battery at least once a year or as soon as it begins to chirp, signaling a low battery. Ignoring this warning can compromise your safety by reducing the alarm’s effectiveness.
Low batteries can cause intermittent chirping or a complete failure to sound during an emergency. Regular replacement guarantees the alarm operates reliably. First Alert recommends testing your alarm monthly and changing batteries every six months for peak performance.
When you hear the chirp, replace the battery promptly; don’t wait until it dies completely. Using the correct battery type and installing it properly also matters to maintain consistent power and prevent false alerts.
Replace the battery promptly when it chirps, using the correct type and proper installation to avoid false alerts.
Staying proactive with battery replacement keeps your smoke detector ready to protect you and your home at all times.
How to Identify Your First Alert Smoke Detector Model for Battery Replacement?
Keeping your First Alert smoke detector powered with fresh batteries is essential. Knowing which battery to use depends on accurately identifying your alarm’s model. Here’s how to do it:
- Locate the model number on the back or side of the alarm. It’s usually printed near the battery compartment or on the label.
- Check the battery compartment design. This will help you determine whether it holds a 9V, AA, or sealed battery.
- Identify if your unit is a combination smoke and CO detector, as these may require different batteries.
- Refer to the user manual or the label on the alarm for specific battery recommendations based on the model number.
This precise identification guarantees you use the correct battery, maintaining reliable alarm performance.
Frequently Asked Questions
Can I Use Rechargeable Batteries in My First Alert Smoke Detector?
You generally shouldn’t use rechargeable batteries in your First Alert smoke detector.
These alarms are designed for specific battery types, usually alkaline 9V or AA batteries, which provide steady voltage.
Rechargeable batteries tend to have lower voltage and can cause false chirps or failure to sound during emergencies.
Always check your model’s manual for recommended batteries and stick to fresh alkaline batteries to guarantee reliable operation and safety.
How Do I Dispose of Old Smoke Detector Batteries Safely?
You should never toss old smoke detector batteries in regular trash. Instead, take them to a local battery recycling center or hazardous waste facility.
Many hardware stores also accept used batteries for safe disposal. Before dropping them off, place each battery in a separate plastic bag or cover terminals with tape to prevent short circuits.
Following these steps protects the environment and prevents fire hazards. Always check local regulations for specific disposal rules.
What Should I Do if My Alarm Won’T Stop Beeping After Battery Replacement?
If your alarm won’t stop beeping after battery replacement, first make certain the battery is installed correctly with proper terminal alignment and fully seated.
Then, remove the battery and hold the Test button for 15-30 seconds to clear any residual charge. Reinsert the battery and press Test again.
If it still beeps, check for dust or corrosion on contacts, and verify you’re using the recommended battery type. Repeat if needed.
Are There Any Warranty Implications When Replacing Batteries Myself?
You won’t void your warranty by replacing batteries yourself if you follow the manufacturer’s instructions, use the recommended battery type, and handle the alarm carefully.
You should avoid damaging the unit, installing incorrect batteries, or tampering with sealed components. Always keep your purchase receipt and record of maintenance.
Can Environmental Factors Affect the Battery Life of My Smoke Detector?
Yes, environmental factors can impact your smoke detector’s battery life. High humidity, extreme temperatures, and dust buildup can cause batteries to drain faster or corrode contacts.
Keep your alarm in a dry, moderate-temperature area and clean it regularly to maintain peak battery performance. Avoid placing detectors near vents or windows where temperature fluctuations are frequent.
Monitoring these conditions helps guarantee reliable operation and reduces the chance of premature battery failure.
Test Your First Alert Smoke Detector After Replacement
Replacing the battery in your First Alert smoke detector is straightforward when you follow each step carefully. Always use the correct battery type and make certain the compartment is securely closed to avoid false alarms.
After installation, reset and test the alarm to confirm proper function. Remember, timely battery replacement prevents dangerous chirping and guarantees your safety.
Identifying your model helps keep your detector reliable. Don’t ignore those alerts, as they’re essential for your home’s protection.