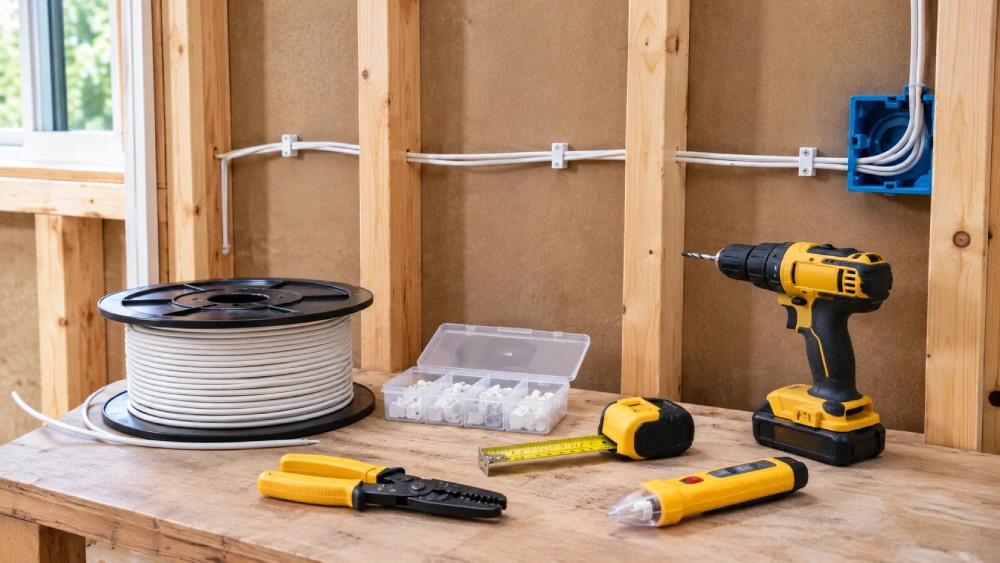

You’ll want to start by carefully mapping your wire route, avoiding sharp bends and interference from line-voltage cables.
Check local codes for permits and use cables rated for the environment.
Select the proper wire gauge based on load and length to minimize voltage drop.
Secure cables without pinching insulation.
Make tight, polarity-consistent connections, then test continuity and voltage under load to verify reliability.
With this foundation, you’ll be set for a detailed, reliable installation process.
Key Takeaways
- Plan and map cable routes, avoiding sharp bends, interference, and high-traffic areas to protect low-voltage wires from damage and noise.
- Separate low-voltage cables from line-voltage wiring and maintain required clearance to minimize electromagnetic interference.
- Use appropriate cable types and connectors rated for the installation environment, including weatherproof or direct-burial options if outdoors.
- Secure cables with soft staples or clips, leaving slack for thermal expansion and avoiding insulation pinching or over-compression.
- Test continuity and polarity with a multimeter after installation to ensure proper connections and device functionality.
Plan Your Low Voltage Wire Route
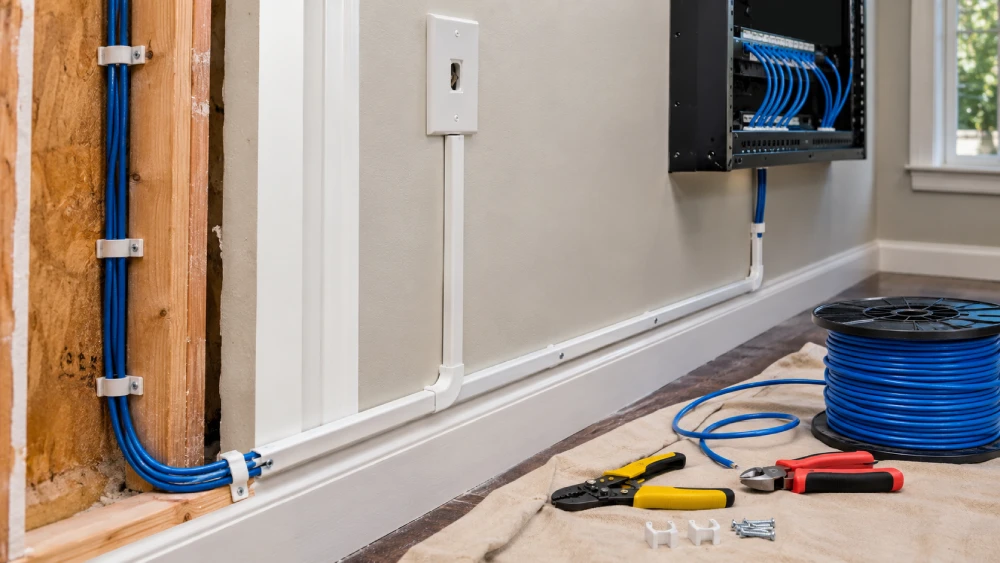
Before you start pulling any wire, lay out a clear plan for your low voltage wire route.
Begin by mapping all device locations, power sources, and termination points precisely.
Measure the total run length and add extra slack to accommodate bends, connections, and future servicing.
Avoid sharp bends and crisscrossing cables, which can stress the wire and degrade signal quality.
Select the shortest practical path that also protects cables from mechanical damage.
Plan to separate cables from potentially damaging edges or framing.
Document your entire layout, including wire paths and connection points, to maintain accuracy during installation.
This methodical planning reduces errors and guarantees efficient, safe wiring runs tailored to your specific low voltage system requirements.
Ensure cable routes minimize distance to the DVR/NVR and avoid high-traffic or exposed areas to prevent damage and signal degradation, following best practices for cable routing.
Follow Low Voltage Wiring Codes and Permits
Before you kick off your project, it’s a good idea to check out the local code requirements. You’ll want to find out if you need any permits or if a licensed installer is necessary for your low voltage work.
It’s also worth confirming whether your system has any special low-voltage regulations or exemptions in your area. Following these guidelines not only helps you stay on the right side of the law but also ensures that your installation is safe and up to code.
Additionally, understanding the NEC Class 2 circuits limits can help ensure your wiring meets safety and current restrictions.
Local Code Requirements
Although low voltage wiring often seems straightforward, you must verify local code requirements and permit regulations before starting your installation. Codes vary by jurisdiction and may affect cable placement, separation from high-voltage wiring, and allowable cable types.
To guarantee compliance, follow these steps:
- Confirm whether your local code exempts or regulates your specific low voltage system.
- Identify required separation distances between low-voltage and line-voltage cables per NEC or local amendments.
- Avoid running low voltage cables in the same conduit or raceway as higher voltage conductors unless expressly allowed.
- Verify that your installation method meets access, clearance, and protection criteria to prevent future violations.
Adhering to these rules helps you maintain safety, guarantee system performance, and avoid costly rework. Proper installation also involves securing cables at regular intervals with staples or clamps, as required by local electrical codes, to ensure safety and durability.
Permit and Licensing Rules
When you plan your low voltage wiring project, you need to check if local permits or licensed installation are required, as regulations vary widely by area.
Start by consulting your local building department or electrical inspector to determine permit needs. Some jurisdictions exempt low-voltage systems under certain voltage or application thresholds.
However, many require permits for security, fire alarm, or communication wiring. You must also verify if a licensed electrician is mandated for installation.
Follow applicable codes, including NEC guidelines on separation and conduit use for Class 2 and Class 3 systems.
Never install low-voltage wiring in the same raceway as high-voltage conductors unless explicitly allowed.
Maintaining compliance prevents costly rework and fines, and guarantees safety and system reliability throughout your project.
Additionally, using fire-rated cable where required helps ensure compliance with safety standards and protects wiring integrity in critical installations.
Choose the Right Cable and Gauge
When you’re choosing a cable for your low-voltage project, it’s important to pick the right type. For example, if you’re working on lighting circuits, an 18/2 cable is a solid choice.
But that’s just the beginning! You also need to consider the wire gauge. It’s crucial to match it to the load and the total run length. This is especially important if your runs are over 100 feet, as you’ll want to minimize any voltage drop. For projects involving surveillance cameras, planning cable runs within the 100 meters maximum length for PoE ensures reliable power and data delivery.
Matching Wire Gauge
Select the appropriate wire gauge by considering the load, total run length, and allowable voltage drop to guarantee efficient and reliable performance. Using the right gauge prevents overheating and voltage loss that can impair device function.
Follow these steps:
- Calculate the total current draw of your devices to determine minimum wire capacity.
- Measure the full run length from power source to device to assess voltage drop risk.
- Choose a larger gauge (lower AWG number) for runs over 100 feet to maintain voltage within specification.
- Confirm the voltage drop doesn’t exceed 3% to ensure consistent device operation.
Proper identification and handling of load wires are also crucial for maintaining electrical safety and circuit reliability.
Cable Type Selection
Choosing the proper cable type is critical to ensuring system reliability and safety in low-voltage wiring projects. Begin by selecting a cable that matches your application’s voltage and current requirements.
Use wire gauges rated for the load and run length to minimize voltage drop, especially on runs exceeding 100 feet. For typical low-voltage lighting, 18/2 cable is common, but longer distances or higher loads may require thicker wire.
Make certain the cable insulation and jacket meet environmental conditions: indoor, outdoor, or direct burial. Use stranded wire if your connectors require flexibility.
Maintain correct polarity throughout the circuit to prevent device malfunction. Finally, verify the cable type complies with local codes and manufacturer specifications to guarantee safe, efficient operation.
For environments with significant electromagnetic interference, consider cables with advanced shielding techniques to maintain signal integrity.
Run Low Voltage Wire to Protect Insulation and Signal
When running low voltage wire, protecting the insulation and maintaining signal integrity are critical to ensuring reliable system performance. You need to avoid physical damage that can cause shorts or signal loss.
Follow these key steps:
- Use smooth, gradual bends to prevent kinks and stress on the insulation. Avoid sharp turns that can crack or compress the cable.
- Separate low voltage wiring from line voltage and other interference sources to minimize electromagnetic noise affecting the signal.
- Secure cables with soft staples or clips. Leave enough slack to avoid pinching the insulation during thermal expansion or movement.
- Protect cables from mechanical damage by routing them away from edges, framing, or areas prone to impact or abrasion.
Plan cable routes to conceal wiring and protect external runs with conduit or raceways for added durability.
Implementing these methods will help you preserve cable integrity and guarantee consistent signal quality throughout the installation.
Make Secure Low Voltage Connections
After securing the wire and protecting its insulation, the next step is to focus on making connections that maintain electrical integrity and guarantee reliable operation.
Strip only the necessary insulation length for a clean splice. Twist stranded conductors firmly before inserting them into rated connectors to ensure a solid mechanical and electrical bond.
Use connectors rated for the environment, such as weatherproof or direct-burial types for outdoor or underground junctions. Always match conductor colors or polarity consistently throughout the run to prevent wiring errors.
Tighten terminals precisely to manufacturer torque specifications, avoiding under- or overtightening that could damage the connection.
These methodical steps reduce resistance, prevent shorts, and maintain system performance, guaranteeing your low-voltage wiring functions safely and reliably over time.
Ensure that all connections comply with applicable electrical codes to maintain safety and functionality.
Test Wiring for Continuity, Polarity, and Voltage Drop
Before energizing your low-voltage system, you must rigorously test the wiring for continuity, polarity, and voltage drop to guarantee reliable operation and safety.
This step ensures all connections are intact and correctly oriented, preventing device malfunction or damage.
Follow these steps:
- Use a multimeter to verify continuity between wire ends, confirming no breaks exist in the circuit.
- Check polarity with the meter; ensure positive and negative leads match the device specifications.
- Measure voltage at the device end under load to detect any voltage drop exceeding acceptable limits.
- Inspect all connectors and insulation visually for damage or loose fittings that could impair performance.
Perform these tests systematically before powering the system to avoid costly troubleshooting and guarantee consistent operation. Additionally, it is important to verify there are no voltage drops that could affect device functionality throughout the wiring run.
Frequently Asked Questions
Can I Run Low Voltage Wire Outdoors Without Conduit?
Yes, you can run low voltage wire outdoors without conduit if you use cable rated for direct burial or outdoor use.
Make sure to select weatherproof, UV-resistant cable designed to withstand moisture and sunlight exposure.
Avoid sharp bends and protect the cable from mechanical damage by routing it away from heavy foot traffic or landscaping tools.
Always follow local codes and manufacturer guidelines to guarantee safety and longevity of the installation.
What Tools Are Best for Stripping Low Voltage Wire Insulation?
You’ll want a quality wire stripper designed for low voltage cables, ideally adjustable to handle various gauges like 18/2 or 16/2.
Precision wire strippers with calibrated notches prevent nicking the conductor, ensuring clean insulation removal.
Needle-nose pliers can help twist conductors before connecting.
For outdoor or direct burial cables, use weatherproof-rated tools and connectors.
Avoid using knives or scissors, as they risk damaging the wire and compromising the connection.
How Do I Troubleshoot Intermittent Signal Loss in Low Voltage Wiring?
To troubleshoot intermittent signal loss, first inspect all connections for corrosion, loose terminals, or damaged insulation.
Use a multimeter to check continuity and voltage stability along the entire run. Look for sharp bends or cable stress points that might cause breaks.
Verify polarity consistency and make sure no electromagnetic interference from nearby power cables.
Finally, test under operational conditions to isolate the fault. Then repair or replace damaged sections for reliable signal integrity.
Is It Safe to Run Low Voltage Wire Through Metal Studs?
Running low voltage wire through metal studs can be safe if you treat the studs like a riverbank. Carefully protect the cable from sharp edges that can slice insulation.
Use grommets or bushings on every hole to prevent chafing. Avoid direct contact with metal, secure the cable loosely, and follow local codes precisely.
This methodical approach guarantees signal integrity and prevents damage, keeping your wiring as reliable as a well-charted course.
What Are the Best Practices for Labeling Low Voltage Wires?
You should label low voltage wires clearly at both ends using durable, weatherproof tags or printed labels.
Include wire function, source, and destination information for easy identification.
Use consistent color coding or numbering systems to avoid confusion.
Label junction boxes and panels too.
Make sure labels are legible and securely attached to prevent detachment or fading over time.
This methodical approach simplifies troubleshooting, maintenance, and future upgrades, saving time and reducing errors.
How to Run Low Voltage Wire: Final Tips?
So, if you want your low voltage wiring to perform like a well-rehearsed symphony instead of a chaotic garage band, plan your route like a cartographer.
Obey codes like a law-abiding citizen, and choose cables as if selecting fine thread for a tailored suit.
Run wires with the precision of a surgeon, make connections tighter than a bank vault, and test everything until you’re sure it won’t short-circuit your weekend.
Easy, right?