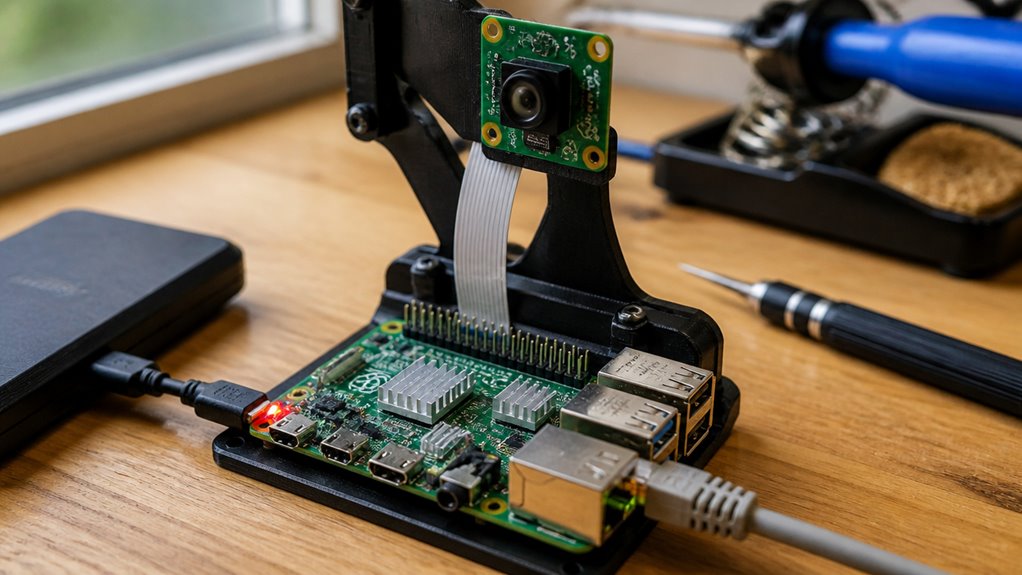

To make a Raspberry Pi security camera, first select a Pi model and compatible camera module based on your resolution and performance needs.
Flash the OS onto a high-endurance microSD card, then enable the camera interface and verify functionality.
Install motion detection software to record only when movement occurs and configure network settings for secure remote access.
Guarantee stable power and proper housing to protect hardware.
Setting up these components correctly lays the foundation for a reliable monitoring system with further customization options ahead.
Key Takeaways
- Select a Raspberry Pi model and compatible camera module based on desired video resolution and performance needs.
- Flash Raspberry Pi OS or MotionEyeOS on a high-endurance microSD card and enable the camera interface for setup.
- Install and configure motion detection software like MotionEye or Shinobi with sensitivity, recording, and storage settings.
- Assign a static IP for reliable network access and secure remote viewing with VPN, SSH tunneling, and strong firewall rules.
- Use weatherproof housing and proper mounting for outdoor protection, ensuring stable power supply and adequate lighting.
How to Choose the Right Raspberry Pi and Camera Module?
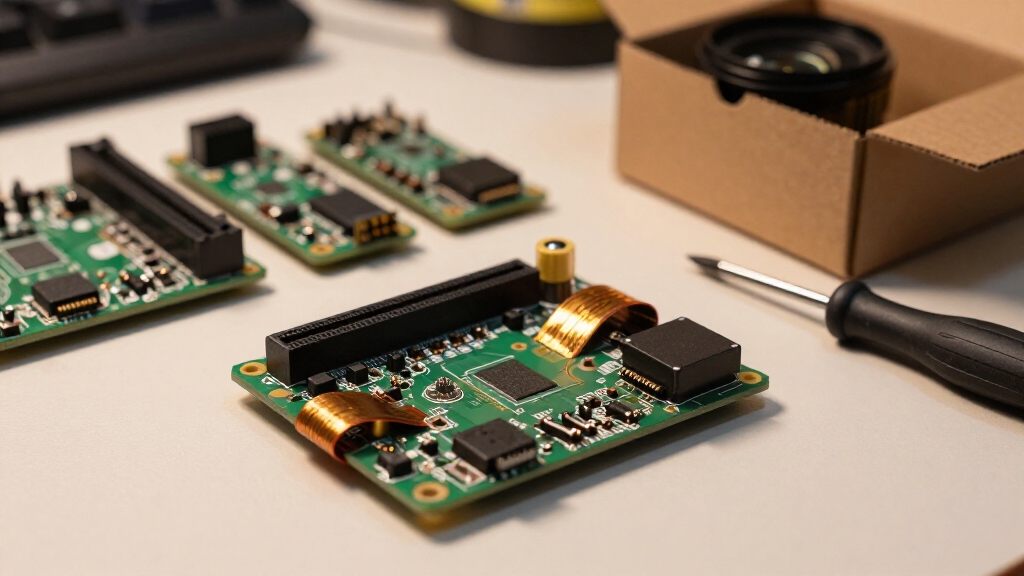
When selecting the right Raspberry Pi for your security camera, consider your performance needs and software requirements carefully.
Choosing the ideal Raspberry Pi hinges on balancing performance demands with your software needs.
If your project demands basic monitoring with low-resolution video, the Raspberry Pi Zero W offers an efficient, cost-effective solution.
For higher-resolution streams and resource-intensive applications, opt for the Raspberry Pi 4, which delivers superior processing power and memory capacity.
Choose a compatible camera module designed for the Pi’s CSI port to guarantee direct video capture with minimal latency.
You’ll also need a microSD card with adequate storage for the operating system, camera software, and recordings.
Secure a stable power supply to maintain continuous operation.
Optionally, integrate motion sensors to trigger recordings or alerts automatically, optimizing storage and responsiveness without manual intervention.
Consider optimizing energy-efficient settings such as resolution and compression to extend battery life and reduce power consumption in remote setups.
Flash the OS to Your MicroSD Card and Prepare Your Pi
Alright, let’s get started! First things first, you’ll want to pick an operating system that fits your project. If you’re going for something general, Raspberry Pi OS is a solid choice. But if you’re diving into camera projects, you might want to check out MotionEyeOS.
Once you’ve made your selection, grab the Raspberry Pi Imager. It’s super user-friendly! Just flash the OS onto your microSD card. Oh, and if you’re planning on using your Pi without a monitor (headless), don’t forget to enter your Wi-Fi credentials—this will make things a lot easier later on.
After the imaging process wraps up, pop that microSD card into your Raspberry Pi. Now, go ahead and power it up! You’ll be all set to start the configuration process. Exciting times ahead! Be sure to connect your device to a stable 2.4GHz Wi‑Fi network for reliable streaming and remote access.
Selecting The Operating System
Before you can configure your Raspberry Pi as a security camera, you’ll need to flash the appropriate operating system onto your microSD card.
Choose an OS that matches your project requirements: Raspberry Pi OS offers flexibility for custom camera setups, while specialized images like MotionEyeOS provide streamlined, ready-to-use security camera functionality.
Consider hardware compatibility, software support for camera modules, and network configuration ease.
Make certain the OS supports your preferred camera software or motion detection tools.
After selecting the OS, verify it includes Wi-Fi setup options for headless operation if you plan to run your Pi without a monitor.
Preparing the microSD card with the correct image is essential for stable operation and smooth integration of camera features when you proceed with the next steps.
For continuous recording without a cloud subscription, ensure your setup supports local storage options such as microSD or network-attached storage.
Imaging The MicroSD Card
To flash the operating system onto your microSD card, you’ll need to use a dedicated imaging tool like Raspberry Pi Imager. This tool streamlines the process of writing the OS image and configuring initial settings.
Start by downloading and installing Raspberry Pi Imager on your computer. Insert the microSD card, then launch the imager and select the desired OS image, commonly Raspberry Pi OS or a camera-specific build like MotionEyeOS.
Choose your microSD card as the target and configure optional settings such as Wi-Fi credentials and hostname for headless setup. Confirm and start the flashing process.
Once complete, safely eject the microSD card. Insert it into your Raspberry Pi, then power it up. This prepares your Pi for initial boot and subsequent camera configuration steps.
Before finalizing, it is important to test all components individually to ensure proper functionality and avoid troubleshooting later.
Enable the Raspberry Pi Camera Interface and Verify It Works
Although the camera module connects physically to the Raspberry Pi, you must enable the camera interface through the Pi’s configuration settings to activate it.
Start by powering on your Pi and opening a terminal. Enter `sudo raspi-config` to launch the configuration tool. Navigate to “Interface Options,” then select “Camera” and enable it.
Confirm your selection and exit the tool. Reboot the Raspberry Pi to apply changes.
After reboot, verify the camera’s functionality by running `libcamera-hello` or `raspistill -o test.jpg` depending on your OS version.
A preview window or saved image confirms the camera is active and communicating correctly. If errors occur, check physical connections and review the config settings.
This step guarantees your camera is ready for subsequent software setup and recording tasks. For enhanced visibility during nighttime recordings, consider using accessories with glare reduction features to improve image clarity.
Set Up Raspberry Pi Motion Detection and Recording Software
With your camera interface enabled and verified, you can now focus on installing and configuring motion detection and recording software to capture relevant activity.
Start by choosing software like MotionEye or Shinobi. Then install it using your Raspberry Pi’s terminal.
Update your system with `sudo apt update` and `sudo apt install motion` or follow specific install instructions for your chosen platform.
Next, configure motion detection parameters: set sensitivity to balance false positives and missed events. Define the region of interest for detection, and specify clip length and post-motion recording delay.
Enable motion-triggered recording to conserve storage. Test the setup by triggering movement and verifying that video clips save correctly.
Adjust settings iteratively to optimize detection accuracy and recording reliability before proceeding to network configurations.
For improved security, be sure to replace default passwords with complex, unique ones to protect your system from unauthorized access.
Configure Raspberry Pi Network Access for Remote Viewing
To get your Raspberry Pi set up for remote viewing, the first step is to ensure it has a static IP address. You can do this either by assigning a static IP directly on the Pi or by reserving an address through DHCP. This way, you won’t have to worry about the IP changing and interrupting your access.
Next up, you’ll want to configure port forwarding on your router. This will allow you to access your Raspberry Pi remotely through your favorite software interface. It might sound a bit technical, but it’s really just a matter of telling your router to direct traffic to the right device on your network.
Now, let’s talk about security. It’s super important to secure your setup with strong passwords. You don’t want just anyone being able to peek at your camera feed! If you can, consider implementing a VPN or SSH tunneling. These methods add an extra layer of protection, keeping your connection safe from unwanted eyes. Additionally, you should implement WPA3 encryption to enhance the security of your network connection.
Network Setup Essentials
Before enabling remote viewing, make sure your Raspberry Pi is properly connected to your local network via Wi-Fi or Ethernet.
Confirm the connection by checking your Pi’s IP address with the command `hostname -I`.
Assign a static IP through your router’s DHCP settings or configure it manually in the Pi’s network interfaces file to prevent IP changes disrupting access.
Verify network connectivity by pinging your router or external sites.
Open required ports on your router to forward traffic to the Pi’s IP if remote access beyond the local network is needed later.
Use a wired connection when possible to guarantee stability.
Test access from another device on the same network by entering the Pi’s IP followed by the camera software port number in a browser.
For consistent remote access, consider configuring port forwarding on your router to map external requests to your Raspberry Pi’s IP address and camera service port.
Secure Remote Access
Although setting up remote access to your Raspberry Pi camera system expands its usability, securing that access is critical to prevent unauthorized entry. Start by changing default passwords and enabling SSH key authentication.
Use a VPN or set up port forwarding with strong firewall rules to limit exposure. Regularly update your Pi’s software to patch vulnerabilities.
| Step | Action | Purpose |
|---|---|---|
| Change Password | Replace default Pi credentials | Prevent brute force attacks |
| Enable VPN | Secure encrypted access | Protect data in transit |
| Update Software | Run regular system updates | Fix security loopholes |
Implementing these security measures helps mitigate risks associated with remote monitoring over the internet while maintaining safe, reliable remote viewing without compromising your network’s integrity.
Manage Raspberry Pi Storage and Power for 24/7 Operation
Since continuous operation demands reliable hardware, managing storage and power effectively is critical for a Raspberry Pi security camera running 24/7.
Start by selecting a high-endurance microSD card designed for constant write cycles to prevent premature failure.
Configure motion-triggered recording to reduce unnecessary storage use. Implement scheduled file deletion or automatic archiving to external storage.
For power, use a stable 5V power supply with sufficient amperage (at least 3A for Pi 4) to avoid undervoltage issues that can cause system instability.
Consider using a UPS or power bank for backup during outages.
Regularly monitor system logs to detect storage or power anomalies early.
Properly managing these guarantees continuous, reliable operation without interruptions or data loss.
Additionally, ensure your microSD card meets the U3 speed class and endurance requirements recommended for continuous video recording to prevent frame drops and data corruption.
Choose the Best Location and Housing for Your Raspberry Pi Camera
When selecting a location for your Raspberry Pi security camera, focus on optimizing the field of view to capture critical areas with minimal obstructions.
Position the camera to cover entrances, pathways, or valuables, ensuring adequate lighting and cable reach. Use weatherproof housing for outdoor setups to protect against moisture and dust.
Choose a compact case that secures the Pi and camera module, providing ventilation to avoid overheating.
Consider mounting height to prevent tampering and maximize coverage.
| Location | Lighting Condition | Housing Type |
|---|---|---|
| Entryway | Daylight/Night | Weatherproof Box |
| Hallway | Artificial Light | Ventilated Case |
| Backyard Fence | Variable Lighting | Sealed Enclosure |
Frequently Asked Questions
Can I Use Multiple Cameras With a Single Raspberry Pi?
Yes, you can use multiple cameras with a single Raspberry Pi, but it requires additional hardware and careful configuration.
The Pi’s CSI port supports only one camera, so you’ll need USB cameras or a camera multiplexer HAT.
You must configure software to manage multiple video streams, often using advanced camera software like ZoneMinder or MotionEye with multi-camera support.
Be mindful of processing power and bandwidth limits to maintain performance and reliability.
How Do I Secure My Raspberry Pi Camera Against Hacking?
Think of your Raspberry Pi camera as a castle gate. Locking it down is critical. Change default passwords immediately, use strong, unique credentials, and disable unused services to minimize attack surfaces.
Regularly update your Pi’s firmware and software to patch vulnerabilities. Enable firewall rules restricting access to trusted IPs, and consider using VPNs for remote viewing.
Finally, encrypt your network traffic with HTTPS or SSH to prevent eavesdropping and unauthorized entry.
What Are the Best Lenses for Improving Camera Image Quality?
The best lenses for improving your camera’s image quality are high-quality glass lenses with adjustable focal lengths, such as wide-angle or telephoto options, depending on your needs.
Consider C- or CS-mount lenses for compatibility with Raspberry Pi camera modules. Opt for lenses with low distortion, good sharpness, and multi-element construction.
Additionally, lenses with an adjustable aperture help control exposure and depth of field, enhancing image clarity in various lighting conditions.
Can I Integrate Raspberry Pi Camera Footage With Home Automation Systems?
Yes, you can integrate Raspberry Pi camera footage with home automation systems. Use software like Home Assistant or OpenHAB that supports camera streams via RTSP or HTTP.
Configure your Pi’s camera software to serve video over the network. Then add the stream URL to your home automation platform.
Automate actions by linking motion detection events from the Pi to triggers in your system. This enables alerts or other connected device responses seamlessly.
How Do I Troubleshoot Common Raspberry Pi Camera Hardware Issues?
If your Raspberry Pi camera won’t show video, first check if the camera interface is enabled in the Pi’s configuration and reboot.
Coincidentally, loose connections often cause issues. Double-check the ribbon cable seating.
Run `vcgencmd get_camera` to verify detection. If it still fails, test with a fresh OS image and confirm power supply stability.
Inspect the camera module for physical damage and guarantee software dependencies like Picamera are correctly installed.
Final Answer: How to Make a Security Camera With Raspberry Pi
By following these steps, you’ll transform your Raspberry Pi into a vigilant digital sentinel, much like the watchful eyes of Argus from mythology.
Choosing the right hardware, setting up motion detection, and ensuring remote access means your DIY security camera won’t miss a thing.
With careful configuration and placement, you’ll have a reliable, 24/7 monitoring system that is technically sound and ready to guard your space with precision and efficiency.